1. Install the Tomcat server
1. Download address (Tomcat official website) http://tomcat.apache.org/
2. Unzip the downloaded zip file to the specified directory (for example: D disk, the directory should not contain Chinese)
D:\apache-tomcat-9.0.43
2. Configure Tomcat environment variables
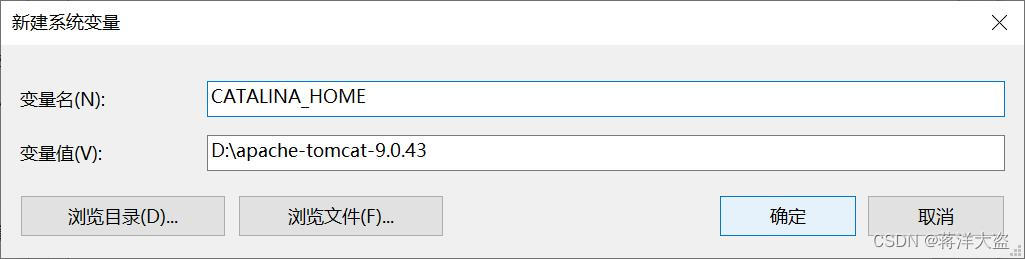
(1) Copy the installation path of Tomcat (D:\apache-tomcat-9.0.43)
(2) This Computer→Properties→Advanced System Settings→Environment Variables
(3) System variables→New→Variable name: CATALINA_HOME Variable value: Tomcat installation path→OK
(4) System Variables→Path→Edit→New→Enter %CATALINA_HOME%\bin
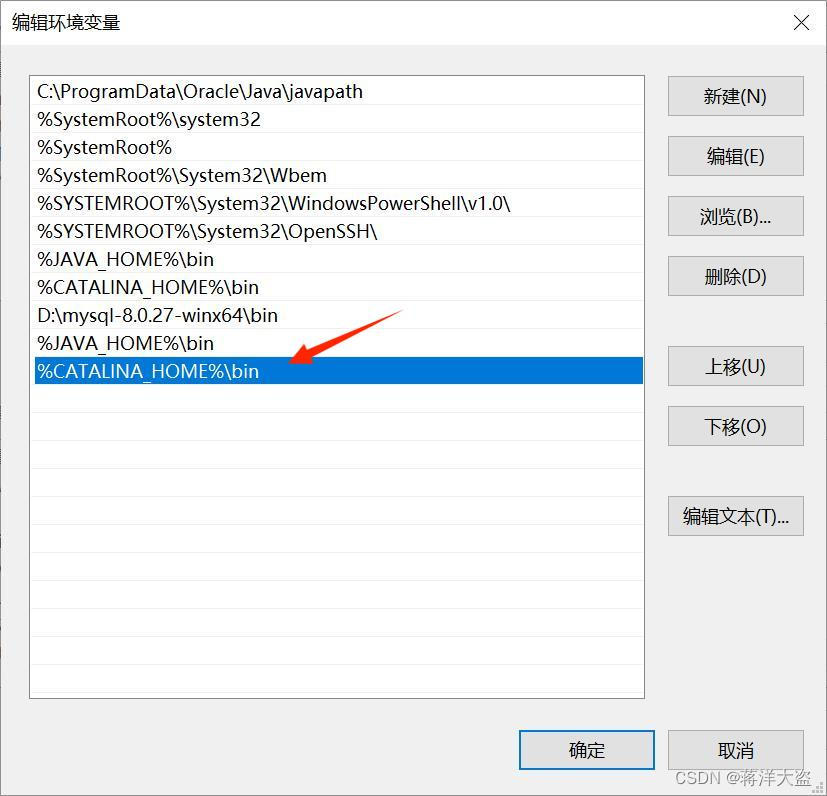
(5) OK→OK→OK
3. Start and test Tomcat
1. Start Tomcat
Find startup.bat in the bin directory under the Tomcat installation path, double-click to run it, and keep the window open
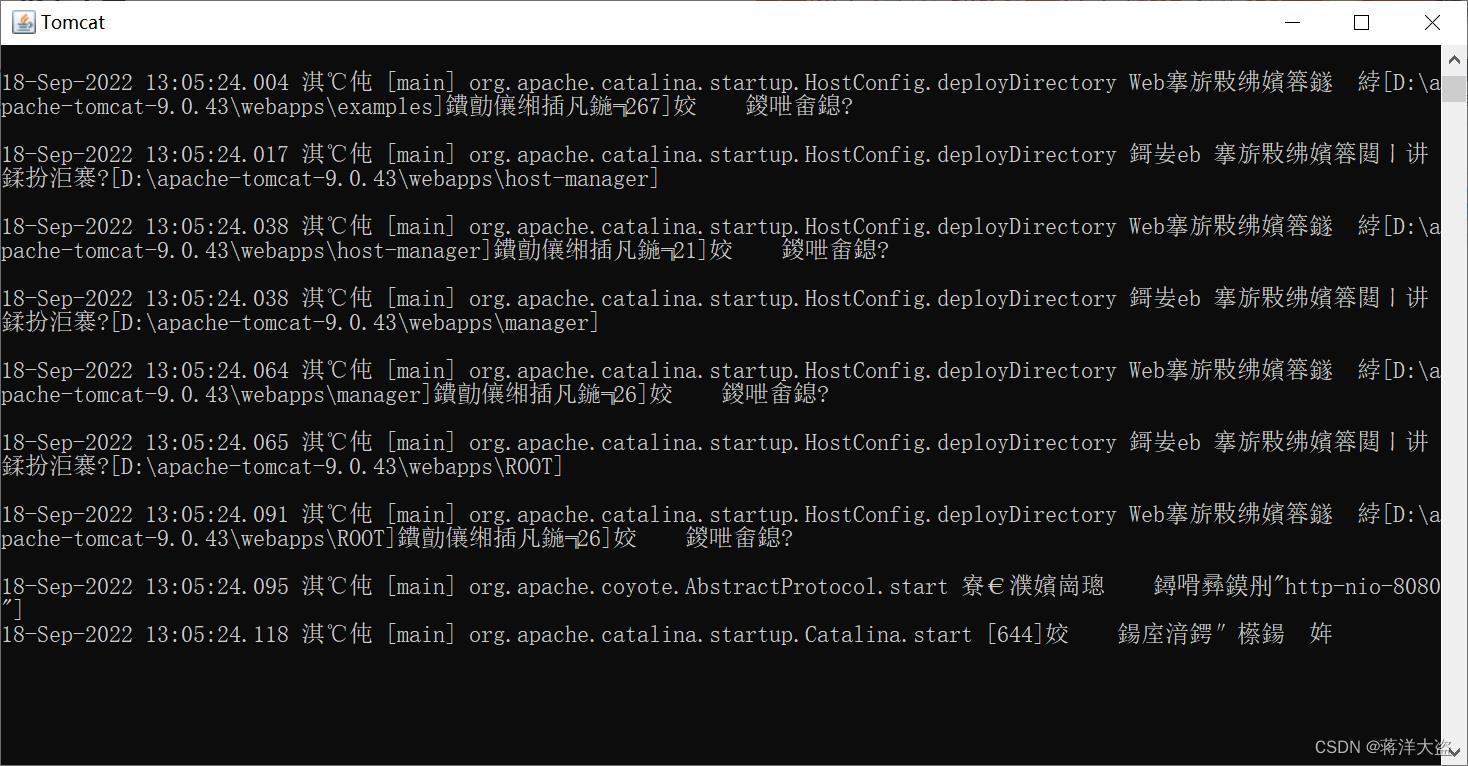
2. Test Tomcat
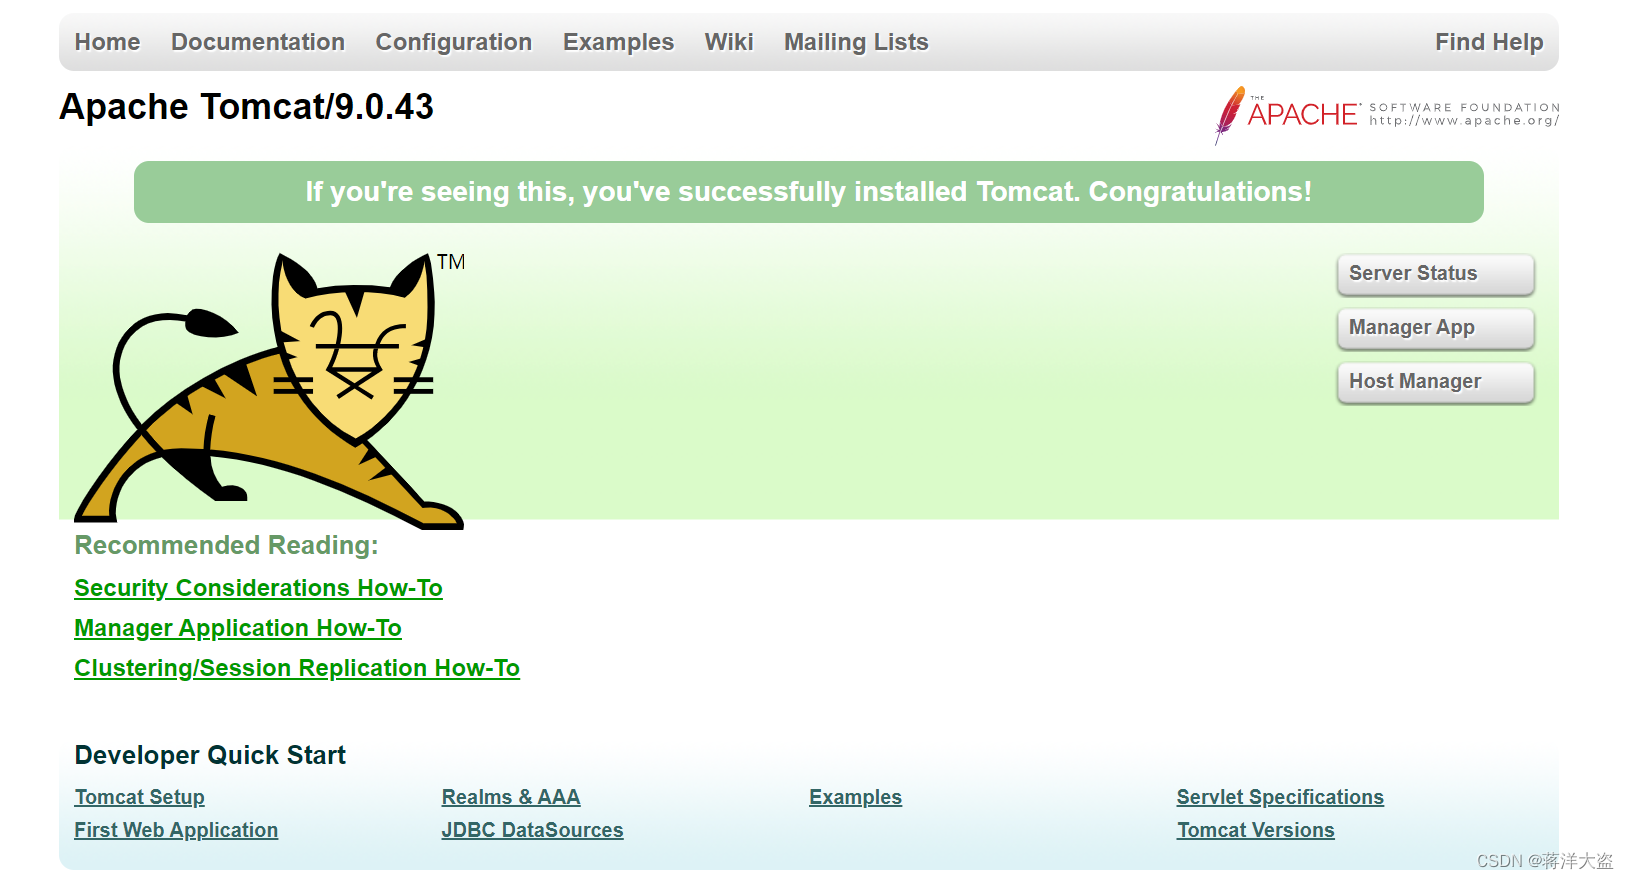
Open the browser, enter http://localhost:8080/ or http://127.0.0.1:8080/ in the address bar, you can see the Tomcat home page and start successfully (if there is a flashback phenomenon, please check whether the environment variable configuration is correct)
3. Close the Tomcat window, the Tomcat server is closed
4. Install Eclipse
1. Download address https://www.eclipse.org/downloads/packages/
Choose Eclipse IDE for Enterprise Java and Web Developers, and choose the version that matches your own operating system according to your needs
2. Unzip the installation package to the installation directory (for example: D drive)
3. Open the eclipse directory, double-click eclipse.exe
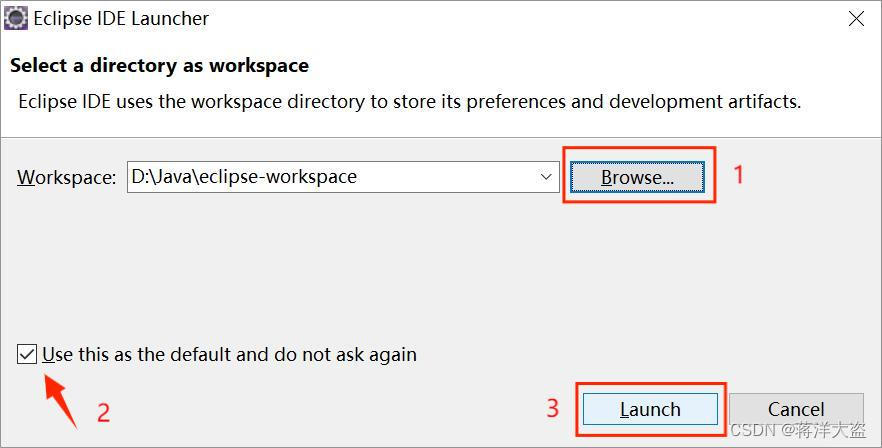
4. Workspace selects the working path, which can be left unchanged by default (you can also create a new folder in the D drive), check Use this as the default and do not ask again, and click Launch
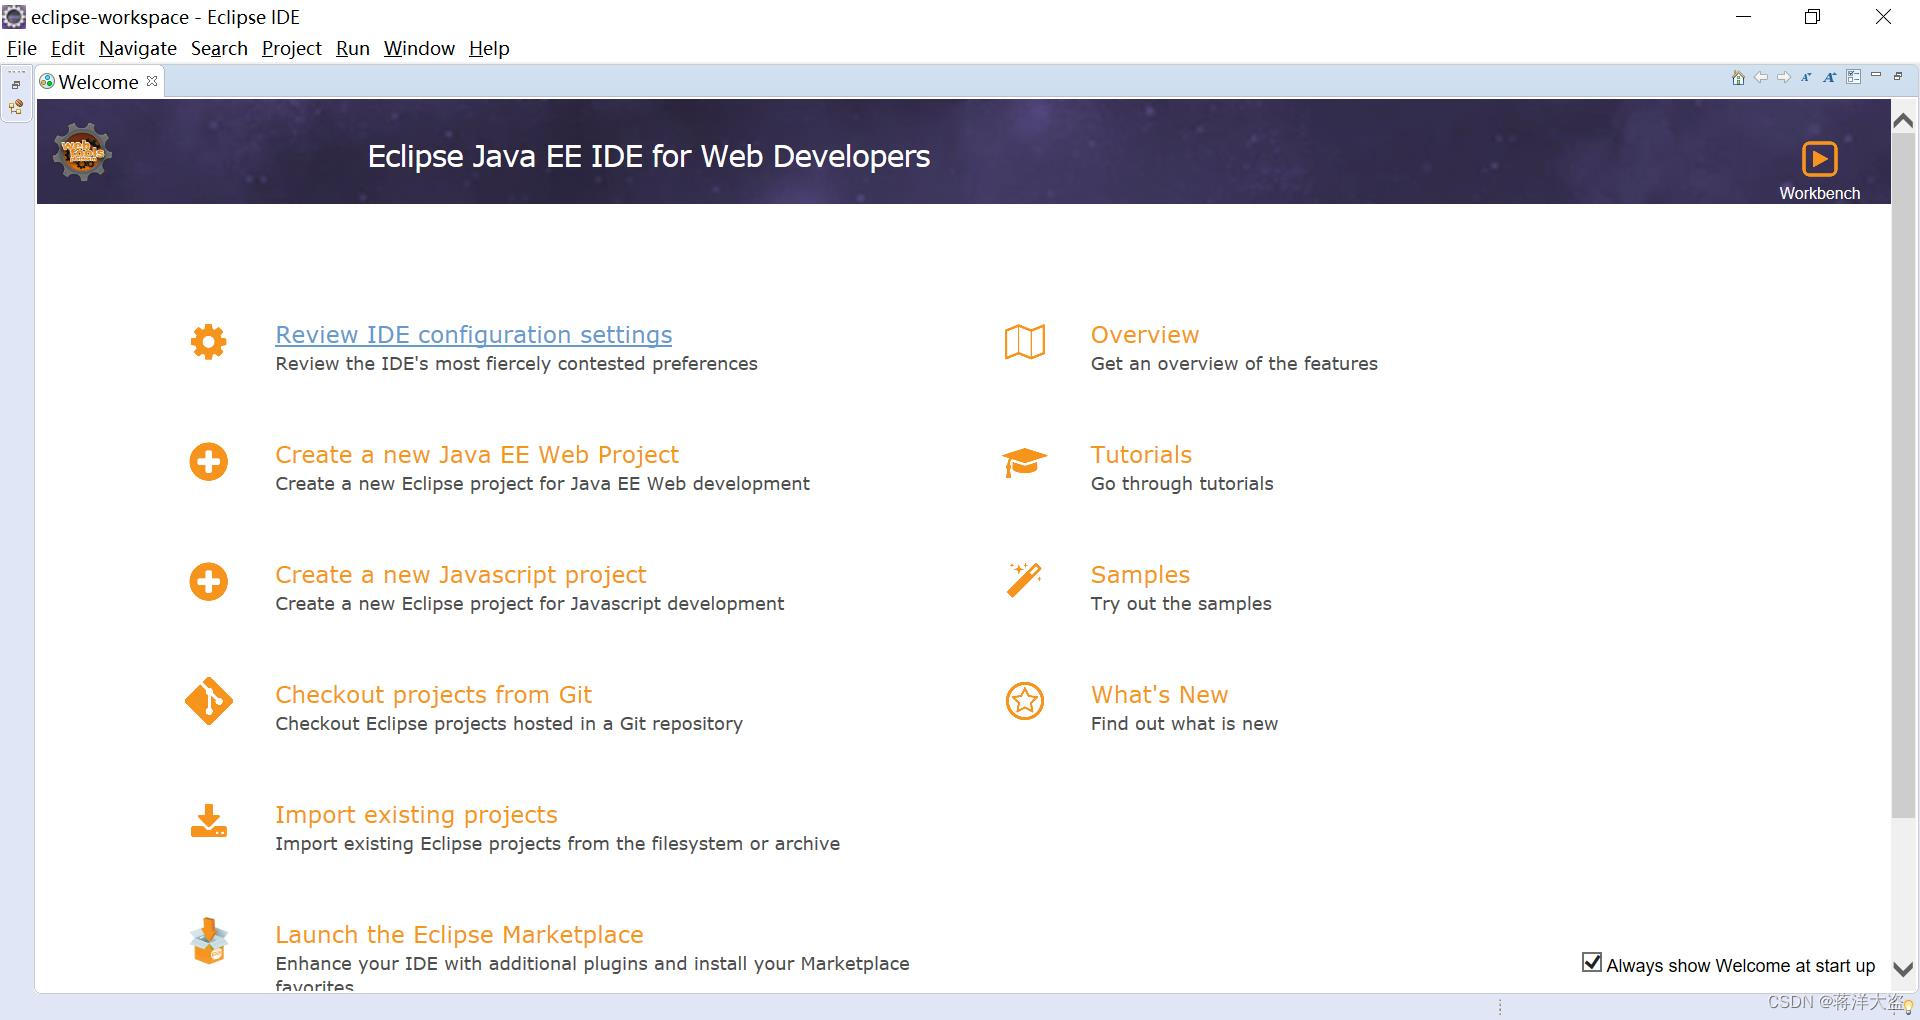
5. The Welcome interface appears, and the installation is successful
Five, Eclipse integrated Tomcat
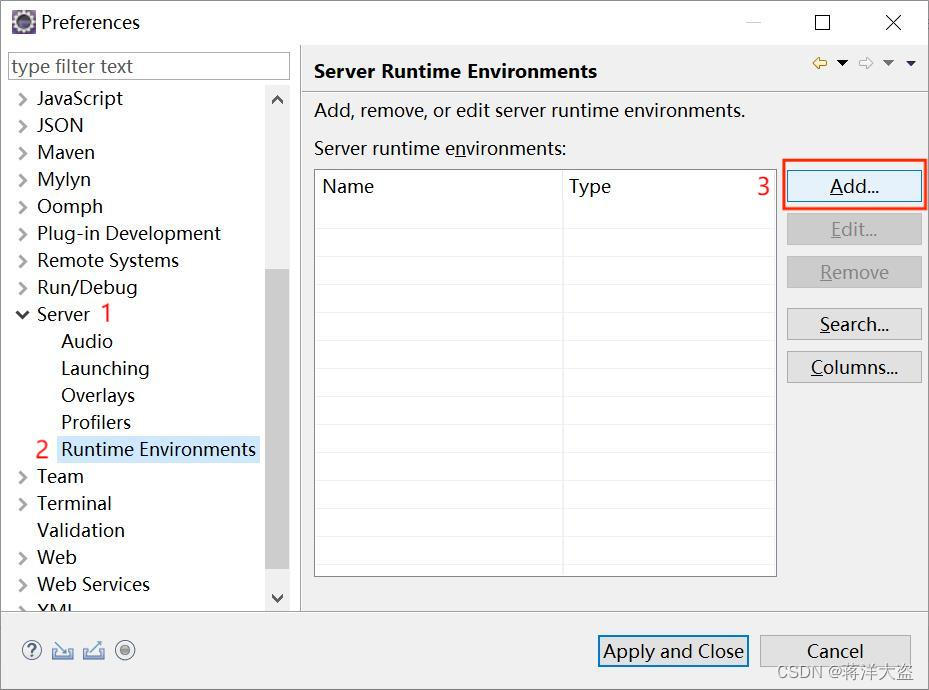
1. Open Eclipse, click "Window", select "Preferences"
2. Find "Server", select "Runtime Environments", and click "Add"
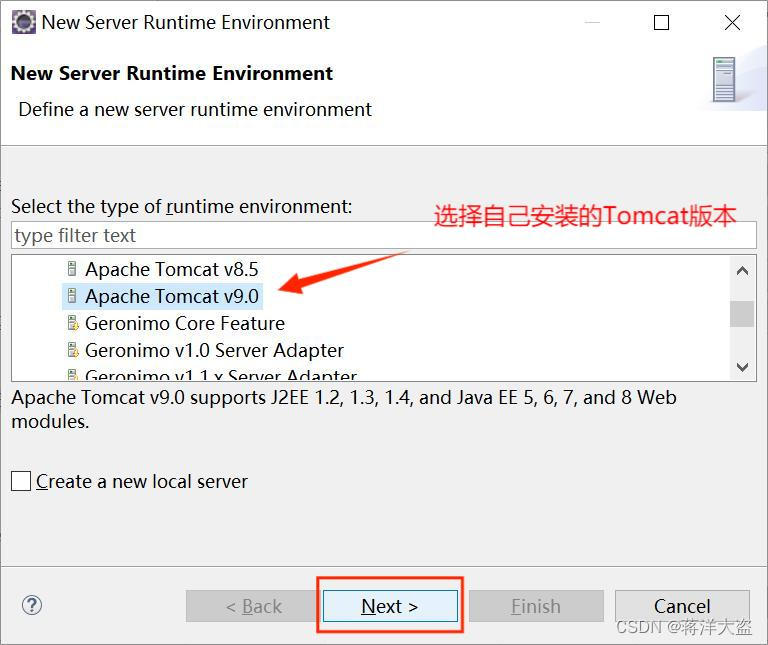
3. Select the Tomcat version and click "Next"
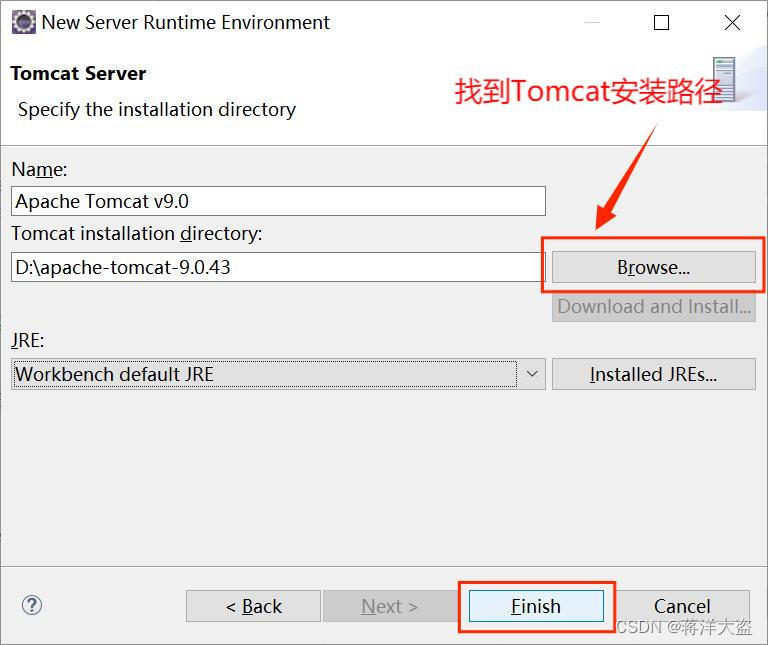
4. Find the Tomcat installation path and click "Finish" to complete
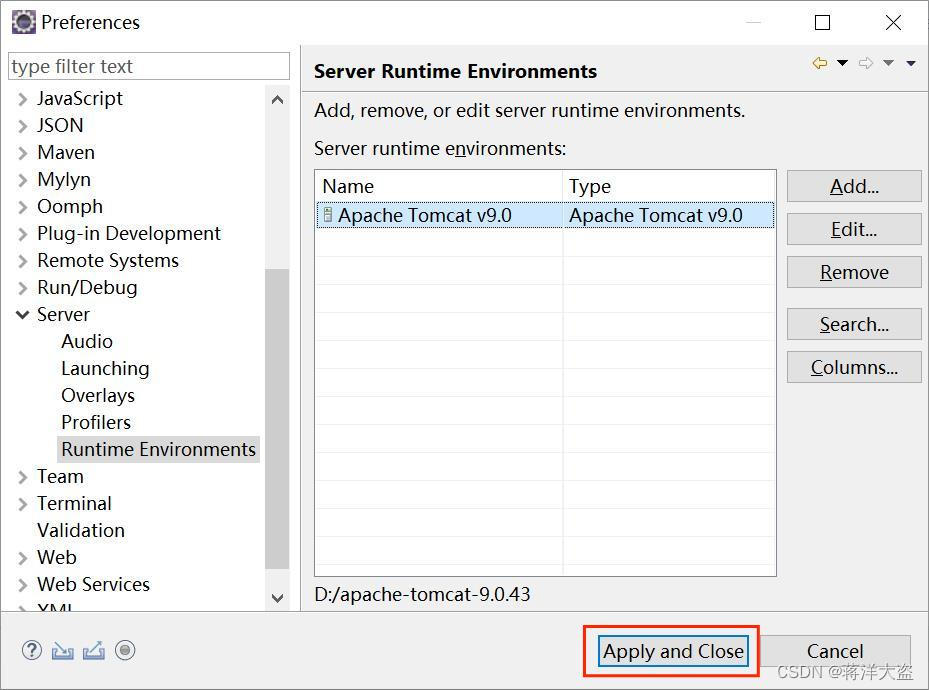
5. Click "Apply and Close"
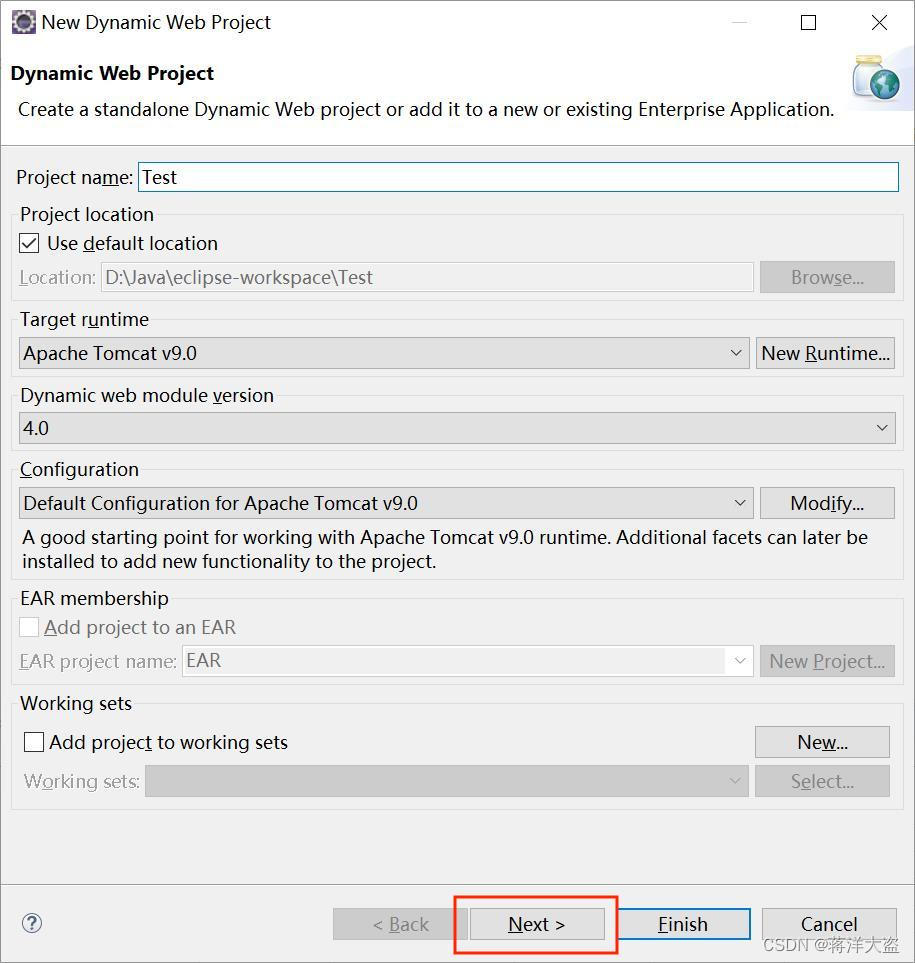
6.File→New→Dynamic Web Project
7.Project name (project name): Test, click "Next"
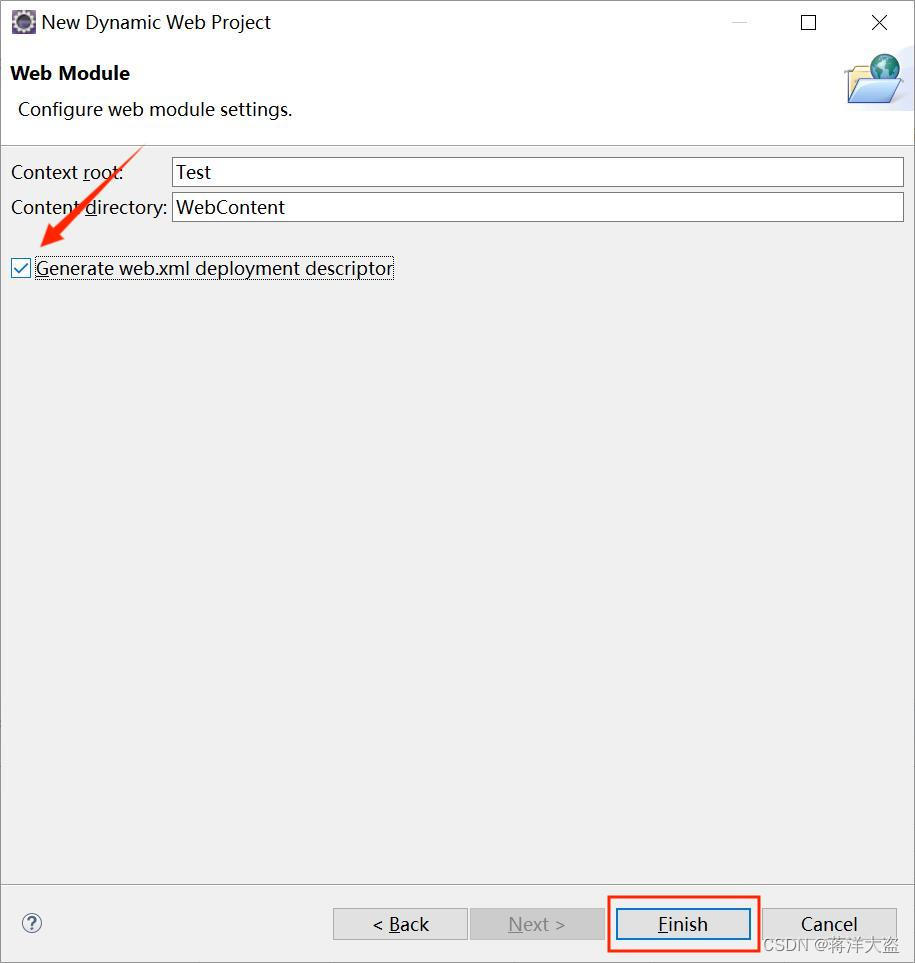
8.Next→Check Generate web.xml deployment descriptor→Finish
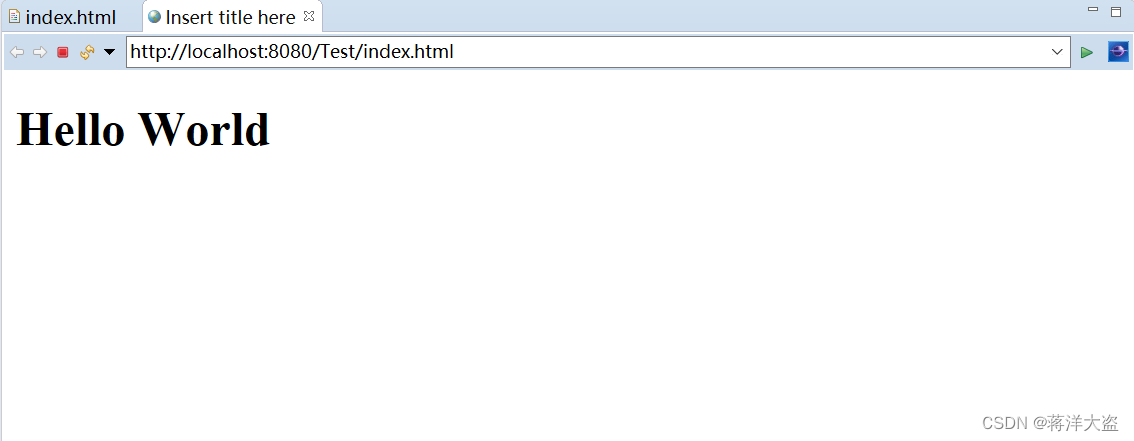
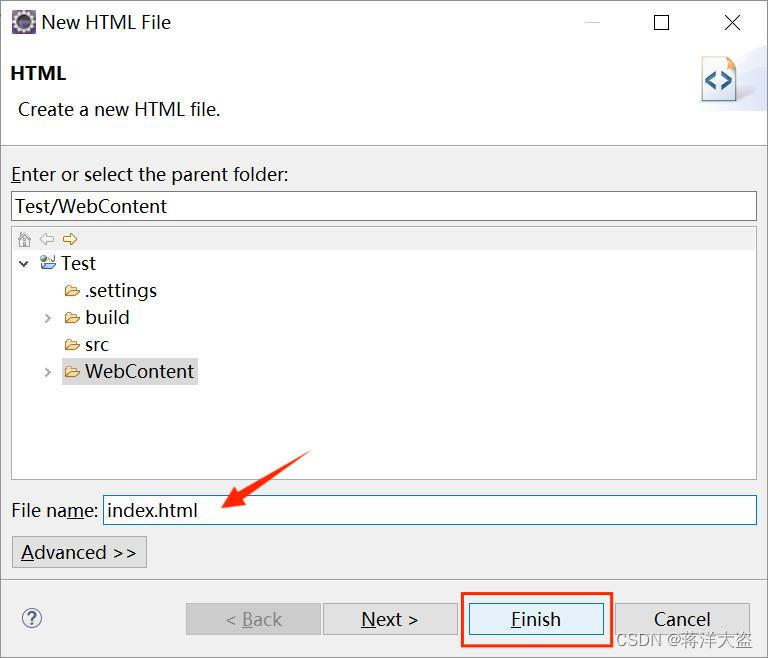
9. Create a new HTML File under the WebContent folder in the Test project, name it index.html, and click "Finish"
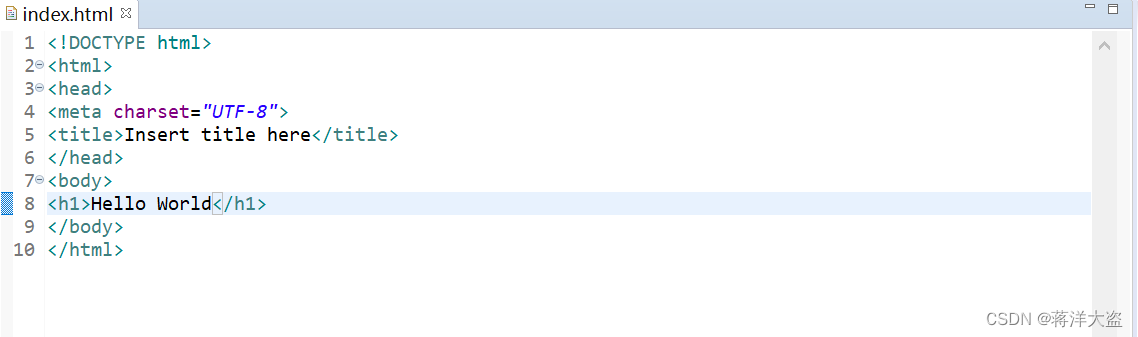
10. Write any statement (for example: Hello World) on the index.html page and do a test
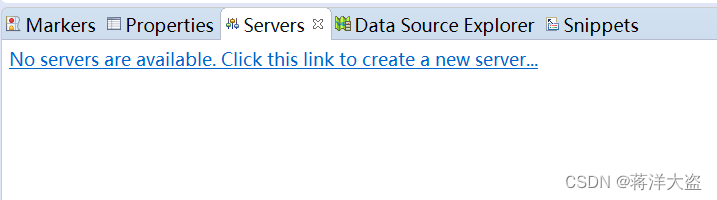
11. Find Servers at the bottom of the window, click No servers are available.Click this link to create a new server... link
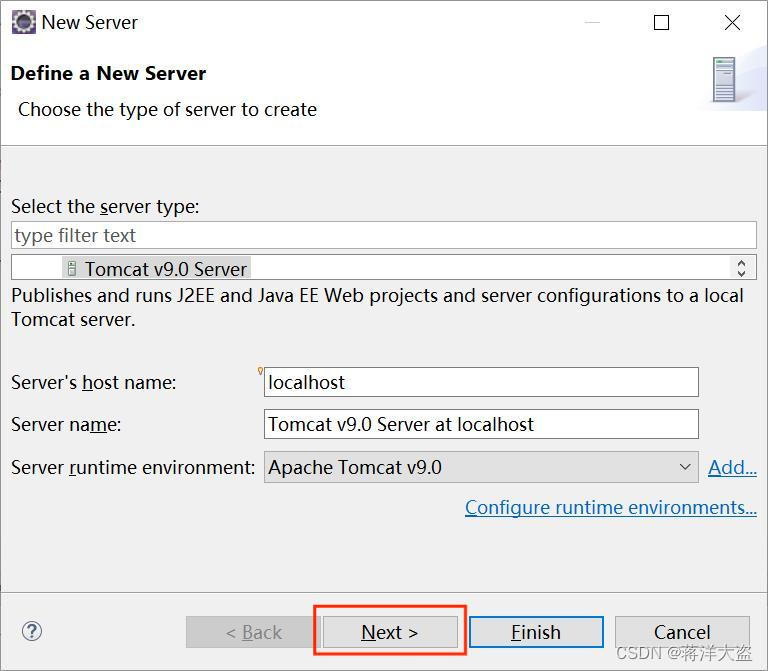
12. No modification, click "Next"
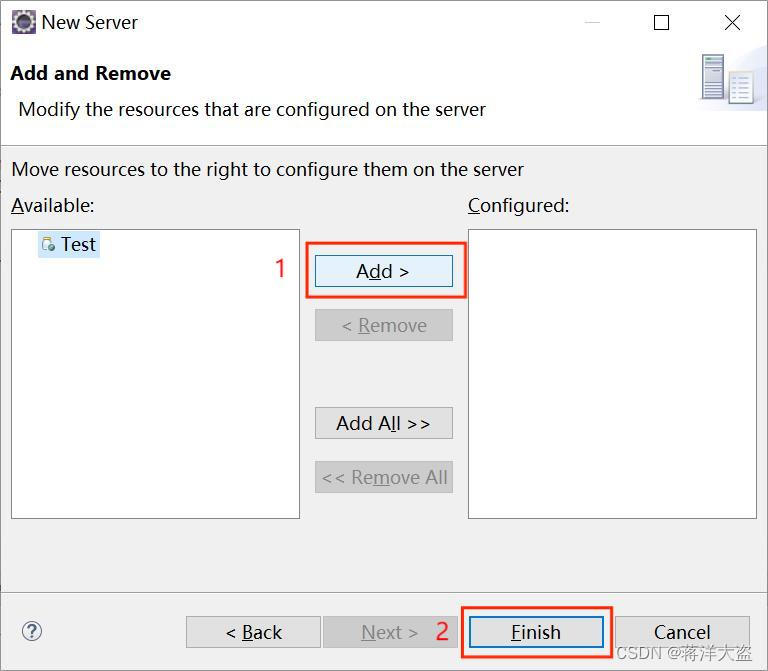
13. Click "Add" and then click "Finish"
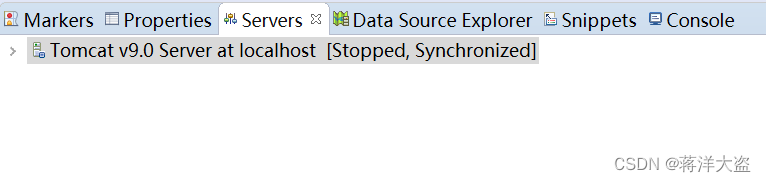
14. Right-click Tomcat v9.0 Server at localhost[Stopped,Synchronized], click "Start"
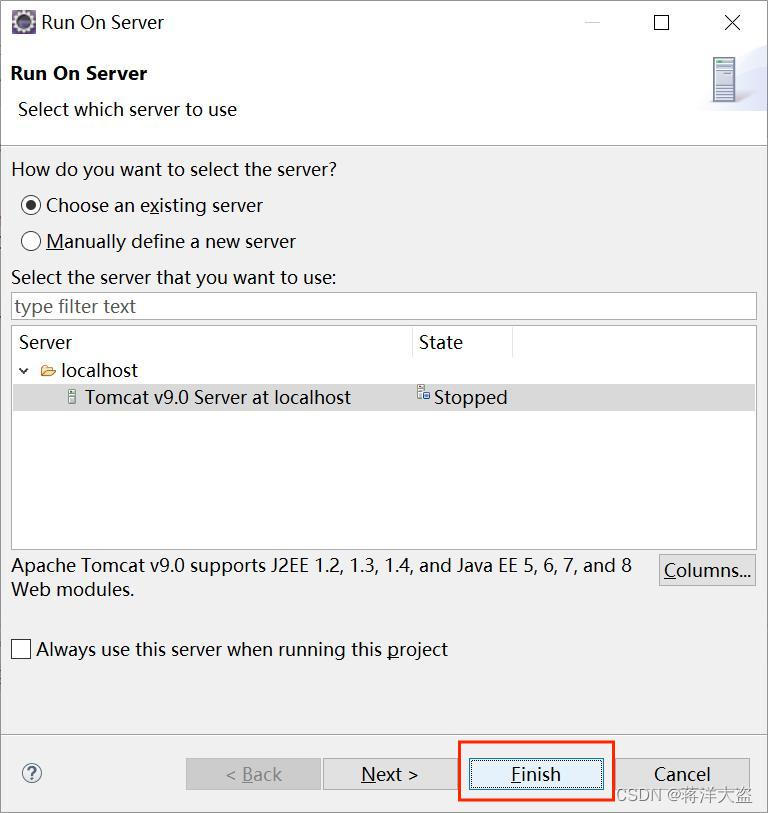
15. Right click on the index.html page, select "Run on Server" under "Run As", and then click "Finish"
15. The following effect appears, Tomcat integration is successful