I. Introduction
In the previous article on k8s components, we talked about the pod component, and learned that pod is the smallest unit of resource management in k8s. It can be said that pod is the most basic individual for the entire k8s to provide external services. It is necessary to do in-depth study of pod and explore.
Second, look at the k8s architecture diagram
In order to deepen the understanding of pod in k8s, let’s review the complete architecture of k8s

3. Pod Features
Combined with the picture above, the pod can be summarized as follows:
- Pod is a group of containers, which is the smallest unit in K8S. A Pod can contain multiple containers, but usually only one container runs in each Pod. Pods can be understood as pea pods, and each container in a Pod is like a pea;
- The core of Pod is to run containers, and a container engine must be specified, such as Docker is one of the technologies;
Four, pod classification
According to whether the pod is created independently, it can be divided into two types
- Self-creation: Pods created directly will disappear after deletion and will not be automatically rebuilt;
- Controller creation: Pods created by the controller will be automatically rebuilt after being deleted;
5. Containers in the pod
From the figure above, we can see that the container runs in the pod, which can also be simply understood as the pod is the external container that the container runs, so a pod can theoretically run many docker containers. Regarding this point, two explanations are made:
- One container in each Pod is the most common usage. Pod is a simple package of containers. K8S manages Pods instead of directly managing containers;
- A Pod runs multiple containers that need to cooperate with each other at the same time, and they share resources. The containers in the same Pod can be used as service units;
6. Network in Pod
For a node in the k8s cluster, multiple pods may be deployed. What if these different pods also need to communicate with each other? This requires talking about the network in the pod;
- A pod contains a set of containers, and a pod does not span multiple worker nodes;
- Each Pod will be assigned a unique IP address, and all containers in the Pod share network space, including IP addresses and ports;
- The containers inside the Pod can communicate with each other using localhost;
Supplement: Network communication model in k8s
There are 4 types of networks in the K8S cluster:
The details are as follows: communication between containers in the same pod, communication between pods, communication between pod and service, and communication between traffic outside the cluster and service
7. Storage in Pod
- Volume can also be used to persist storage resources in the Pod to prevent file loss after the container is restarted;
- All containers in the Pod can access the shared Volume;
Eight, Pod common operation commands
1. View the pods running in the system in the k8s cluster
kubectl get pod -n kube-system
2. View the pod created by yourself
kubectl get pod
或
kubectl get pod,svc,deploy
3. Delete the pod
Delete the pod directly:
kubectl delete pod pod name -n namespace
Delete pods created via the controller:
kubectl delete pod controller name -n namespace
Supplementary note:
- If the pod is created through the deploy controller, deleting it directly will automatically create a new one;
- -n is not required, indicating a specific namespace;
4. Start a pod [command mode start]
kubectl run pod name --image=mirror --port=80 --namespace namespace name
For example, in the previous article, we created an nginx pod, which can be written as:
kubectl run test-nignx-pod --image=nginx:1.23.0 --port=80 --namespace test
5. Start a pod [start in yaml mode]
Create a yaml file in the current directory

The configuration content is as follows:
apiVersion: apps/v1
kind: Deployment
metadata:
  name: nginx-deploy
  labels:
    chapter: first-app
spec:
  selector:
     matchLabels:
       app: nginx
  replicas: 1
  template:
    metadata:
      labels:
        app: nginx
    spec:
      containers:
      - name : nginx
        image: nginx:1.23.0
        ports:
        - containerPort: 80
Then use the apply method to start
kubectl apply -f ./test-nginx.yaml

be careful:
When deleting the pod created by applying -f, it also needs to be deleted by applying -f
6. Export the yaml file through the deployment controller
Under the current cluster, we have the following pod

Use the following command to export the yaml corresponding to this pod
kubectl create deployment test-nginx3 --image=nginx:1.23.0 --namespace test -o yaml --dry-run=client > ./nginx.yamlAfter execution, you can find that a yaml file is created in the current directory

Is the content of the file similar to the yaml we created earlier? It seems to be more complete. It should be noted that some parameters in this file can be modified manually, for example: replicas indicates the number of pods generated by nginx;

Then you can use the apply command to create a pod
kubectl apply -f nginx.yaml
7. View the details of pods in a namespace
kubectl get pod -n ns name -o wide
For example, if you view the pod information under the default namespace, you can see the pod created above through the yaml file;
kubectl get pod -n default -o wide

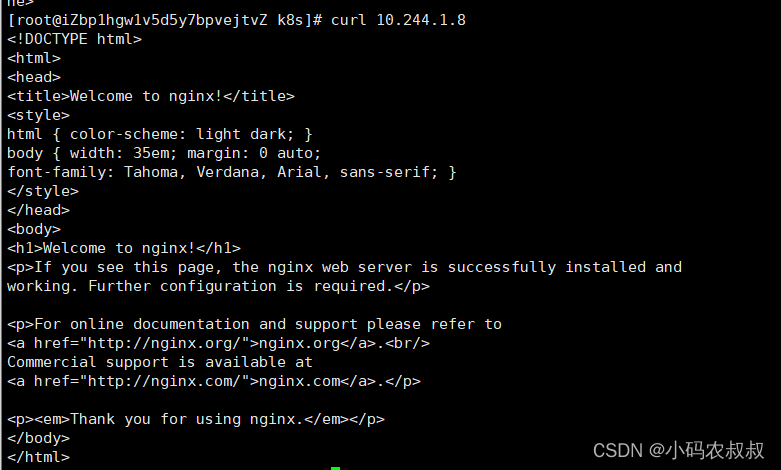
The pod created through k8s will be assigned an IP address to the current pod, which can be accessed directly through curl [other nodes in the same cluster can be accessed]
Nine, Pod extension supplementary instructions
1. Pod image pull strategy
The pod image pull policy can be configured through the imagePullPolicy field, as follows:
spec:
  containers:
    - name: nginx
      image: nginx:1.23.0
      imagePullPolicy: Always	#可取 Always(默认值)、IfNotPresent、Never
imagePullPolicy can use the following three policy values:
Always: the default value, the image will be re-pulled every time a pod is created;
IfNotPresent: the image will be pulled only when it does not exist on the host;
Never: the image will never be actively pulled, using the local image, you need to manually pull the image down;
2. Pod uses resource limit configuration
We know that the nodes in the cluster have certain configurations, such as CPU, memory and other information, and the resources of the node cannot be filled up because of a pod created, so it can be configured in the configuration file to use Apply -f to create a pod, the key configuration in the configuration file is as follows:
resources:
	requests:
		memory:"内存大小"
		cpu:"cpu占用大小"
	limits:
		memory:"内存占用大小"
		cpu:"cpu占用大小"
The following is a complete tag configuration and description
spec:
  containers:
  - name: string   #必选,容器名称
    image: string  #必选,容器的镜像名称

    resources: #资源限制和请求的设置
      limits:  #资源限制的设置
        cpu: string     #Cpu的限制,单位为core数,将用于docker run --cpu-shares参数
        memory: string  #内存限制,单位可以为Mib/Gib,将用于docker run --memory参数
      requests: #资源请求的设置
        cpu: string    #Cpu请求,容器启动的初始可用数量
        memory: string #内存请求,容器启动的初始可用数量
The following is a configuration in actual use

For more configurations, please refer to the documentation: k8s documentation
3. About the pod creation process
The pod created by kubectl apply -f xxx.yaml is used for illustration, combined with the k8s architecture diagram at the beginning of this article:
- kubectl sends a request to apiserver to create a pod;
- The apiserver stores the pod creation information in etcd for saving;
- The scheduler listens to the pod resource that is not bound to the node, selects a suitable node for the pod resource through the scheduling algorithm to bind, and then responds to the apiserver, updates the pod status and stores it in etcd;
- In the bound node, the Controller-Manager notifies the kubelet to receive the pod assigned to its own node, calls the container engine api to create the container, and responds to the apiserver with the container status;
4. Pod scheduling strategy
By default, which Node node a Pod runs on is calculated by the Scheduler component using the corresponding algorithm, and this process is not subject to manual control. But in actual use, this does not meet the needs, because in many cases, we want to control certain Pods to reach certain nodes, so how should we do it? This requires understanding k8s scheduling rules for pods.
Here are a few factors that affect pod scheduling:
pod resource limit
The scheduler finds a node of sufficient size for scheduling according to the requests
Using node selector tags (nodeSelector)
The node selector can separate the nodes. For example, there are multiple nodes in the k8s cluster. In order to distinguish the production, development and test environments, the node selector label can be used to divide them;
For example, if the pod needs to be scheduled to the development environment, the pod can be scheduled to the node whose label selector is env_role:dev through the scheduler. The corresponding yaml core configuration is as follows:
nodeSelector:
  env_role:dev/prod
Regarding the node selector, its use will be explained in detail in an article later.