For graduates of computer-related majors, graduation thesis is really a headache, of course, except for academic masters...
graduation, programming... Every time I think of this! Do you really want to explode in place? !
Don't be in a hurry to look down--I have confirmed the eyes, you are the person I want to help!
The following will introduce a method to quickly complete the graduation project (absolutely hands-on practice!)
As a senior computer science scumbag, every time I work on a project in a group, I "hold my thighs". When graduation is approaching, the "thighs" all go their separate ways, and the graduation thesis can only be carried by one person! As a result, I found that all the things I learned in the four years of college were returned to the teacher, and I could not type a few lines of code, let alone finish the design!
Helpless, I could only ask for help from a treasure, and I was lucky to find a ghostwriter. It turns out that the price is higher than the other one, which is really not something that poor students like me can afford. This is really hate, ah, did not study hard. When I was at a loss, I could only search and search on a certain treasure, but I really received a savior (tear run), and by chance I found a development board that supports drag-and-drop programming. Drag-and-drop programming is really code-blind. Savior!
Tools (really a super good thing, students who are too lazy to code code here)
1. TPYBoard development board
The development board I use is TPYBoardv102, a development board that can write Python language, which coincides with the professional courses. For me, this board is relatively easy to use. First of all, it doesn't need any compilation tools. Plug the board into the computer and a drive letter will be displayed, and you can directly compile and run the program. It also encapsulates a lot of class libraries, such as serial port, UART, SPI, etc., which are all ready-made, and it is more convenient to use, just call it directly! Take a look at the previous picture:

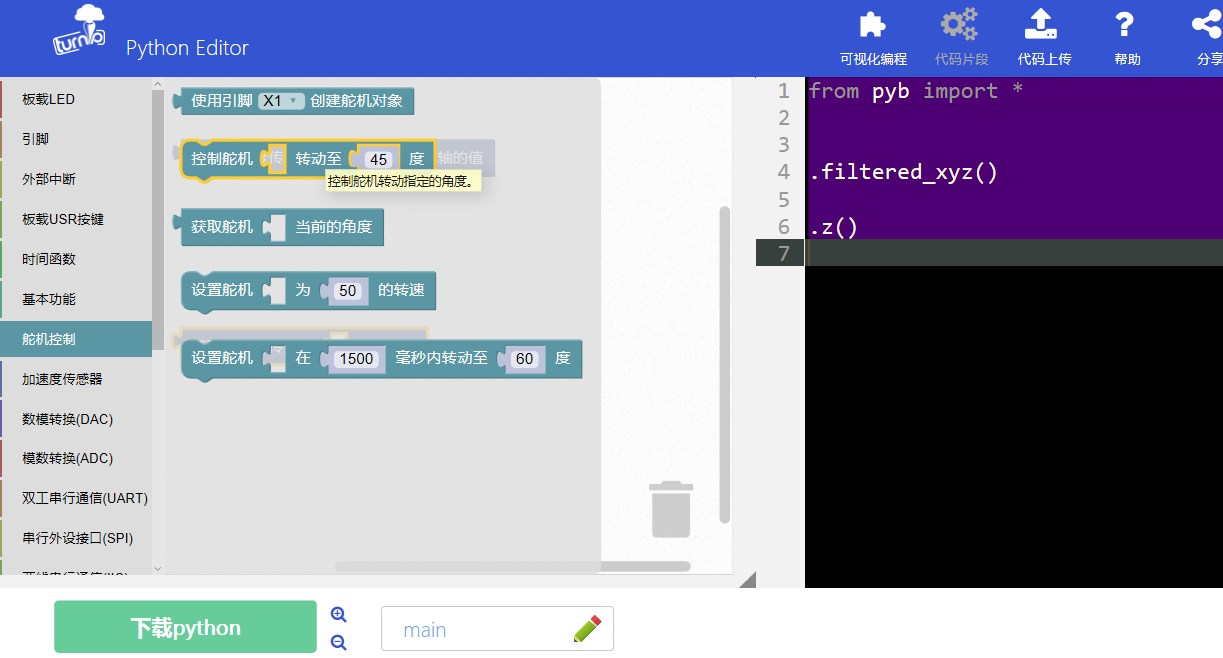
2. Python Editor online code editor
The most important thing is that the TPYBoardv102 development board can be used with his online programming tool PythonEditor for drag-and-drop programming! For me who can't write code and don't want to write code, this is really like a clear spring in the desert! Drag-and-drop programming and code programming are carried out simultaneously, which is really a blessing!
Online programming website: www.tpyboard.com/pythoneditor
Steps to use: (A brief introduction, interested students can go to the official website to see, it is free)
(1) Obtain the plug-in program through the Python Editor plug-in programming tool, as shown in the figure below, click to download the "main.py" program file.
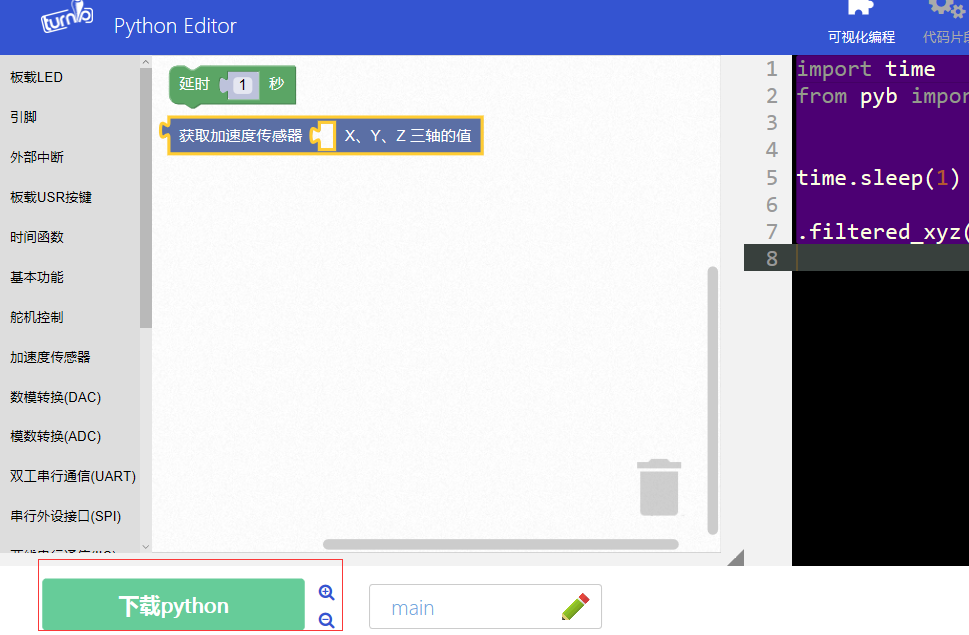
(2) Copy the downloaded "main.py" program to the computer drive letter "TPFlash" corresponding to TPYBoardv102

(3) After the storage is completed, that is, after the red light on the board goes out, you can run the program through the putty software or use the onboard RST reset button (not recommended) to run the program.
Tutorial (very important one)
For me and other scumbags, tutorials are really very important. Coincidentally, TPYBoard really provides quite rich and more important tutorial materials that are especially suitable for beginners, and all of them are free! It took me about a month from watching the first tutorial to finally completing the graduation project. For the graduation project, the time is enough. The important point is that I really completed it independently. I have a sense of accomplishment and self-confidence. It is also bursting with wood!
Online learning website: www.tpyboard.com
Tutorial website: docs.tpyboard.com Thank you for
taking it away!
Actual combat (DIY voice-activated night light)
The graduation thesis is too long to go into details! Let me show you the first small example I made with plug-in programming, don't be too low!
1. Experimental equipment (all of these tutorials are available, you can also buy them in a treasure mall of TPYBoard, and the relevant software can be downloaded on the website)
Mall address: turnipsmart.taobao.com
Software download address: old.tpyboard.com
TPYBoardv102 development board
Python Editor online editor
USB data cable
Putty software
NotePad++ software
1 sound sensor module 1
Dupont cable
1 breadboard 1
light emitting diode 1
sound sensor:
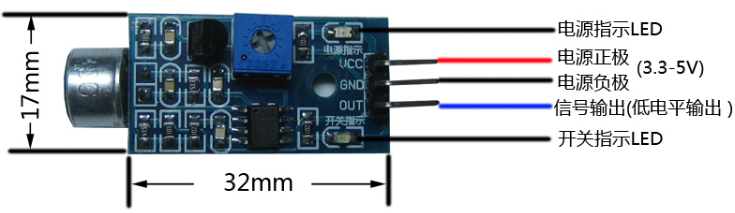
The sound sensor acts as a microphone (microphone). This kind of sensor components, hardware majors are definitely not unfamiliar, there is also a lot of online information about the working principle, so don't nagging!
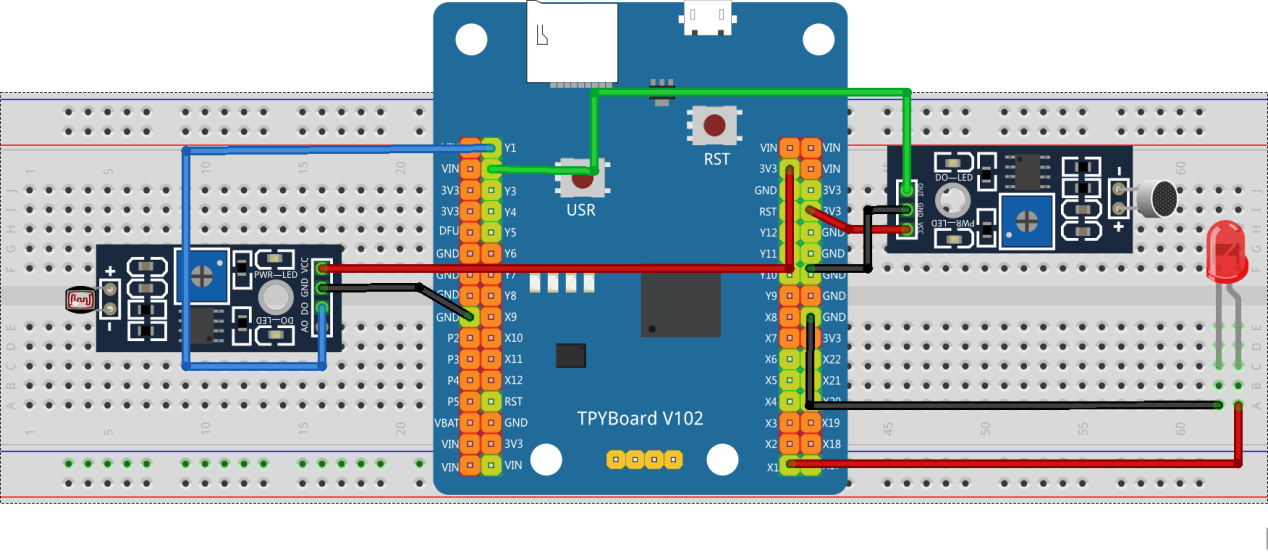
Wiring diagram:
The next step is wiring, which is to connect the sound sensor to the TPYBoardv102 development board. For those who don't know it, you can refer to the tutorial on the TPYBoard official website for more details.
Basic program logic: (I didn’t understand it at all before, but I can understand it soon after reading the tutorial)
In an infinite loop, the level value of the X1 pin connected to the sound sensor is continuously read. When it is judged to be a low level, it means that the intensity of the sound has reached the threshold value, and then the light-emitting diode is turned on, and then goes out after a delay of 3 seconds.
Spelling demo (the most important thing):
Although Python Editor does not need to type code, it still needs a certain logical foundation to quickly get started. Although I am very scumbag, I still understand a little bit of basic logic, so I can get started quickly when I put it together!
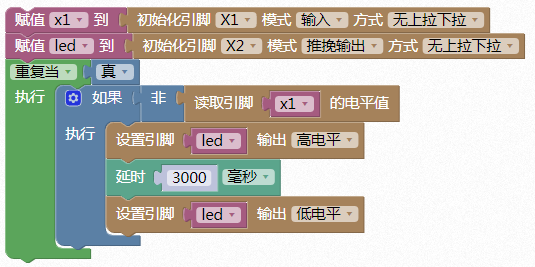
In order to make it clear, I just took a screenshot of the code part of the spelling, which is really just some logic drag and drop, and the code part will be displayed in the code editing area on the right side synchronously, which is very, very, very convenient and fast.
The following is the automatically generated code part, you can use NotePad++ to manually enter the code, try:
from pyb import *


x1 = Pin('X1',Pin.IN,Pin.PULL_NONE)
led = Pin('X2',Pin.OUT_PP,Pin.PULL_NONE)
while True:
  if not x1.value():
    led.high()
    delay(3000)
    led.low()
Download the program to the development board, and after running it, make a sound or tap on the table to see if the light turns on.
Okay, my hands are tired after coding so many words, ahem... I wrote so much just to recommend a programming tool to everyone. Drag-and-drop programming and code programming are carried out at the same time. You can learn many small programs, small cases, and you can also do It is possible to produce a very beautiful graduation project, even for industrial applications!