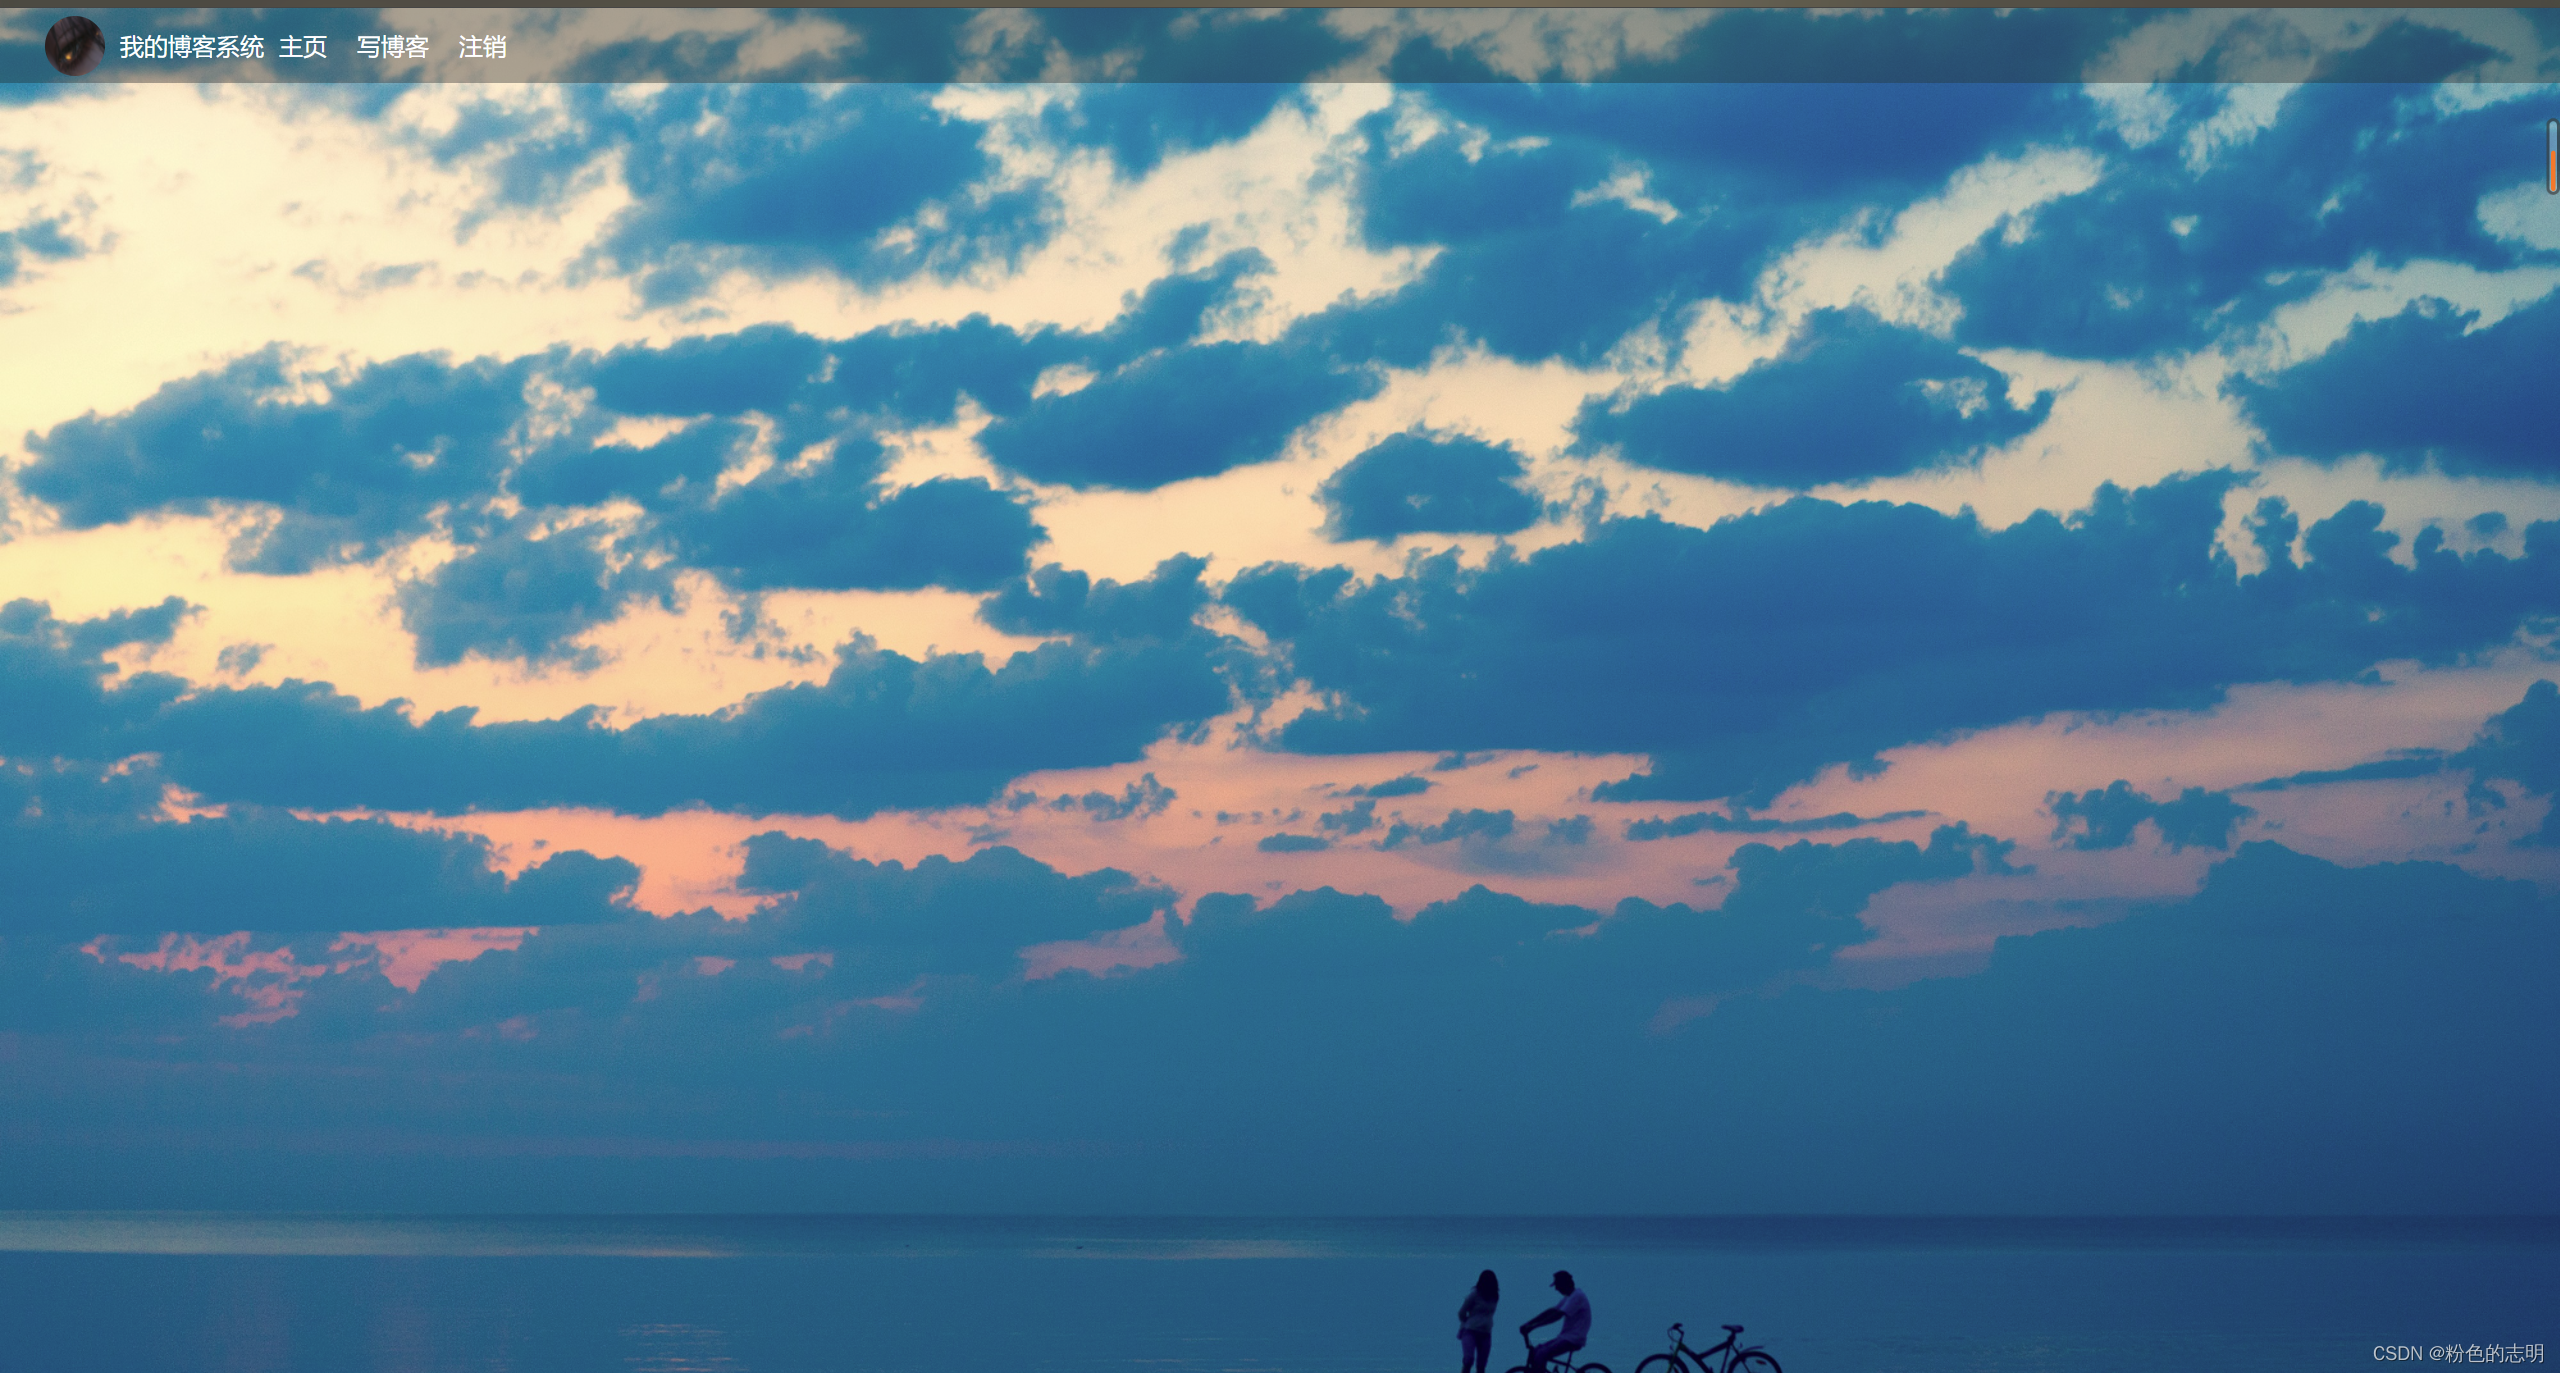
Preview effect
These contents are basically some summaries of the contents learned earlier, which are mainly divided into four pages.
1: Blog list page
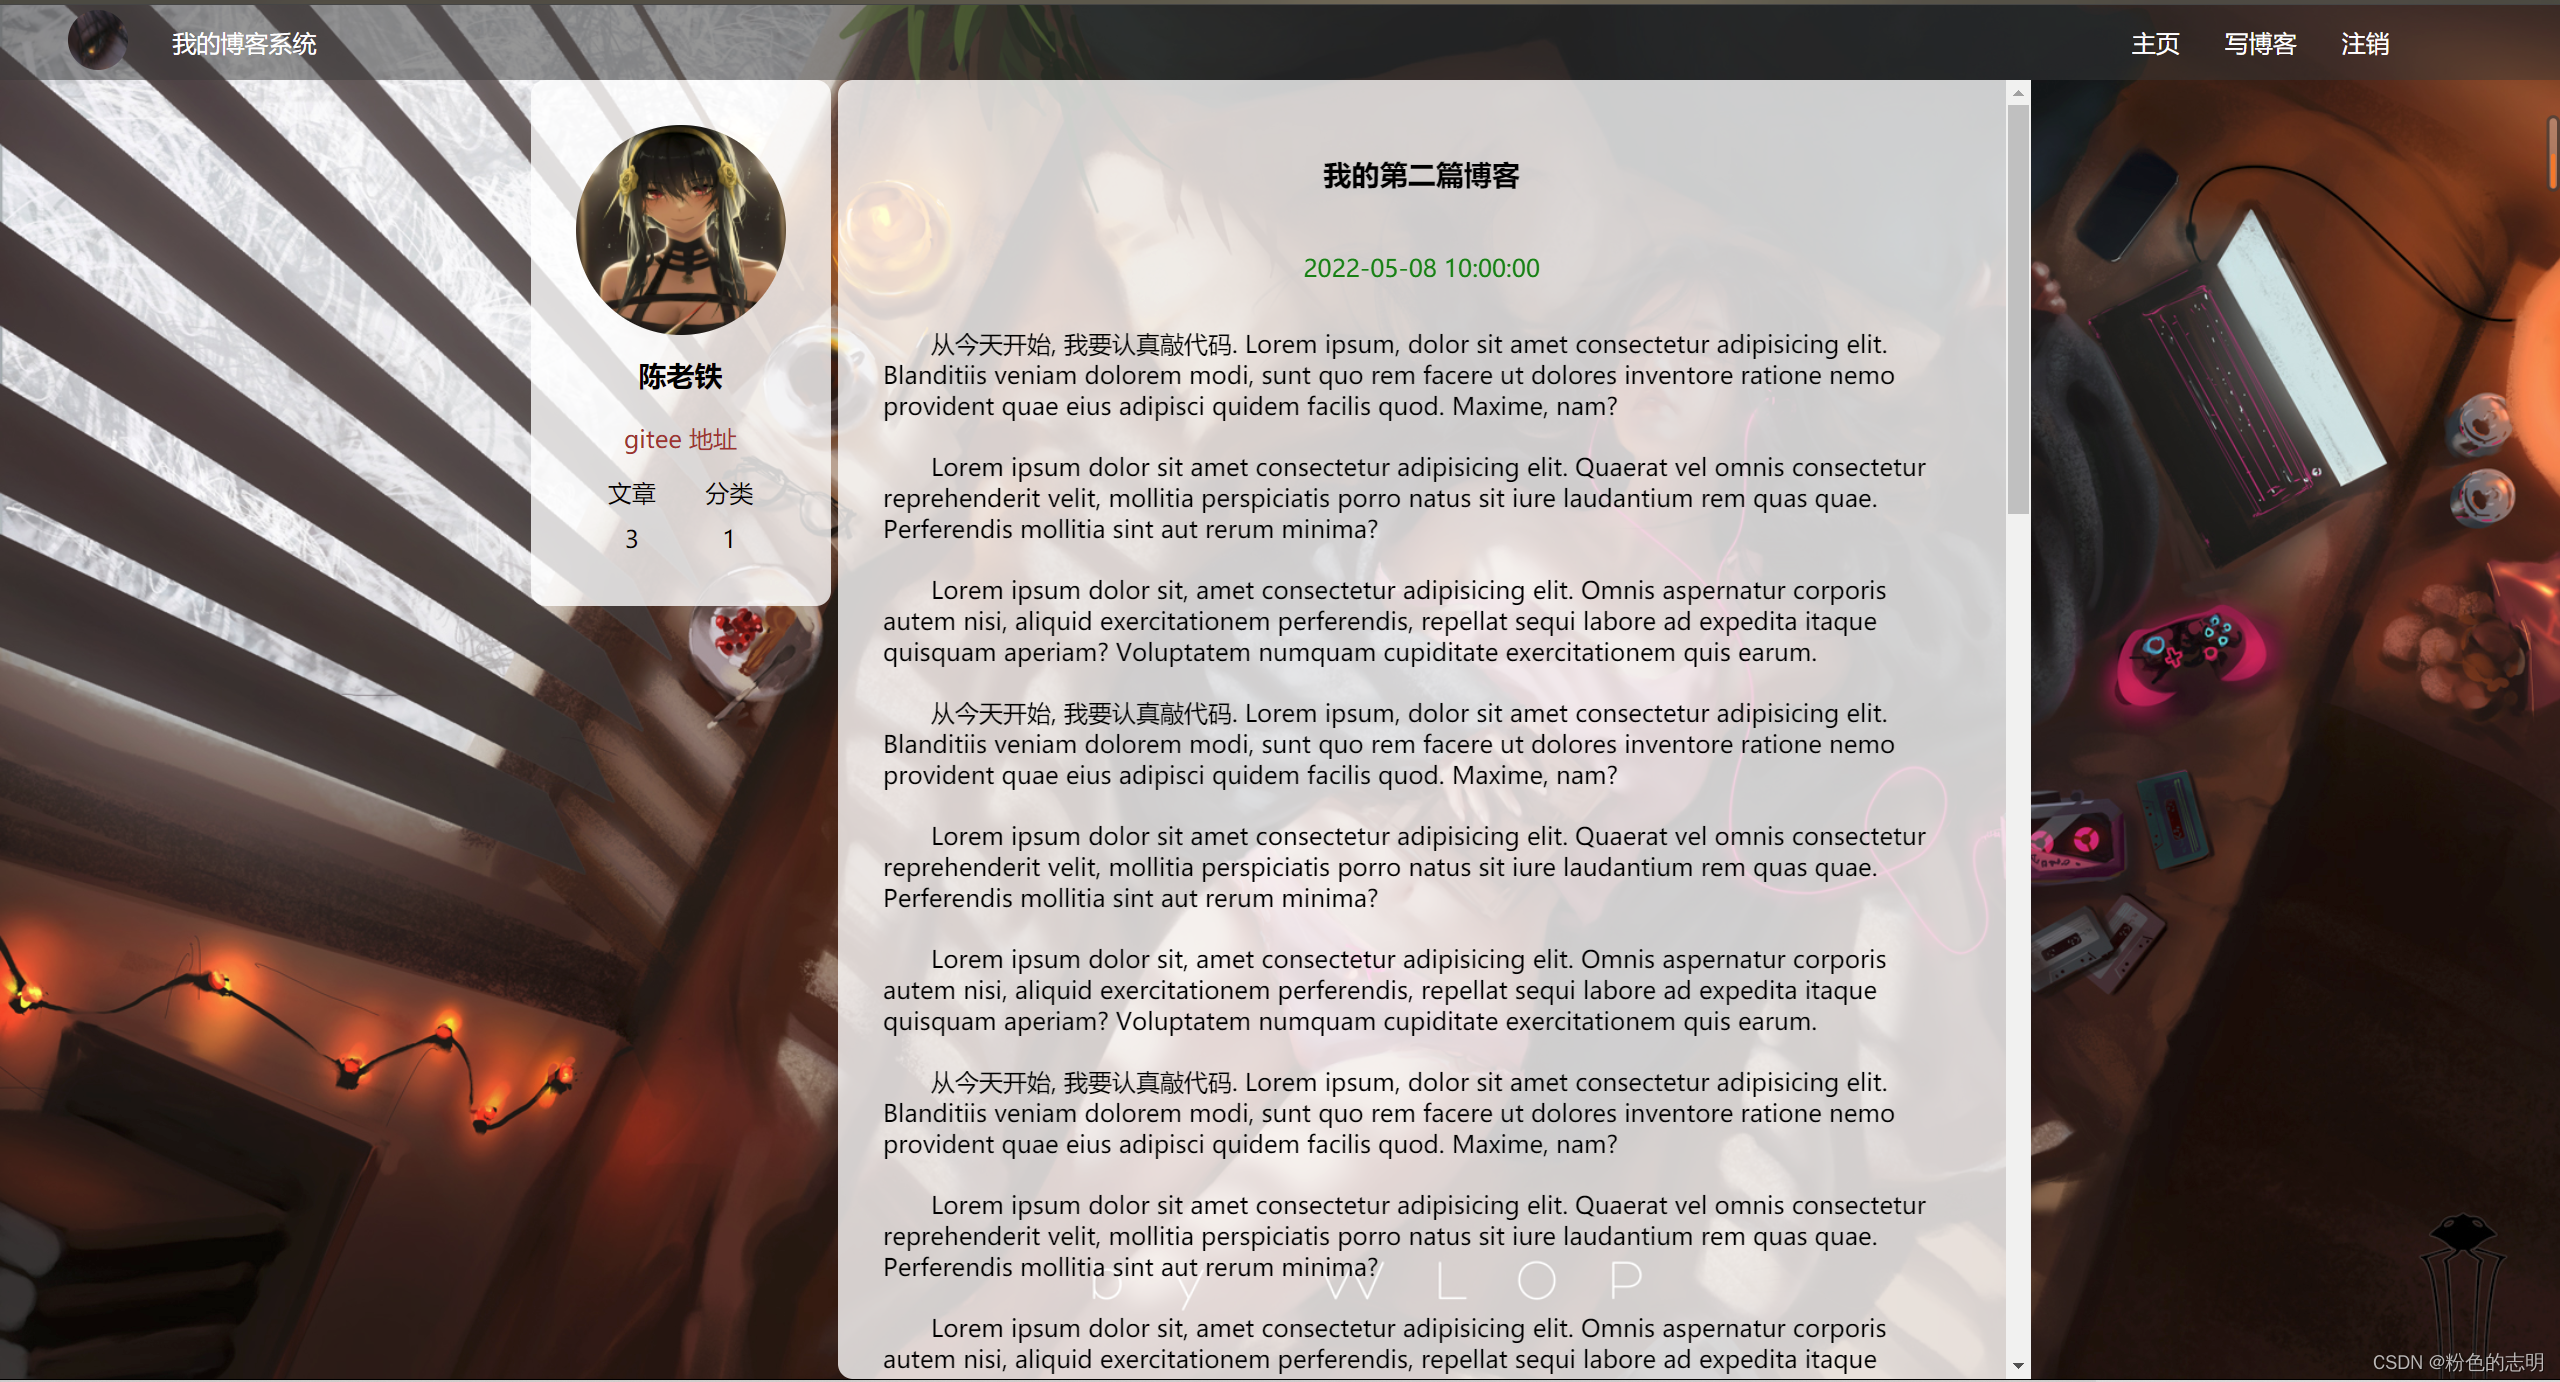
2: Blog body page
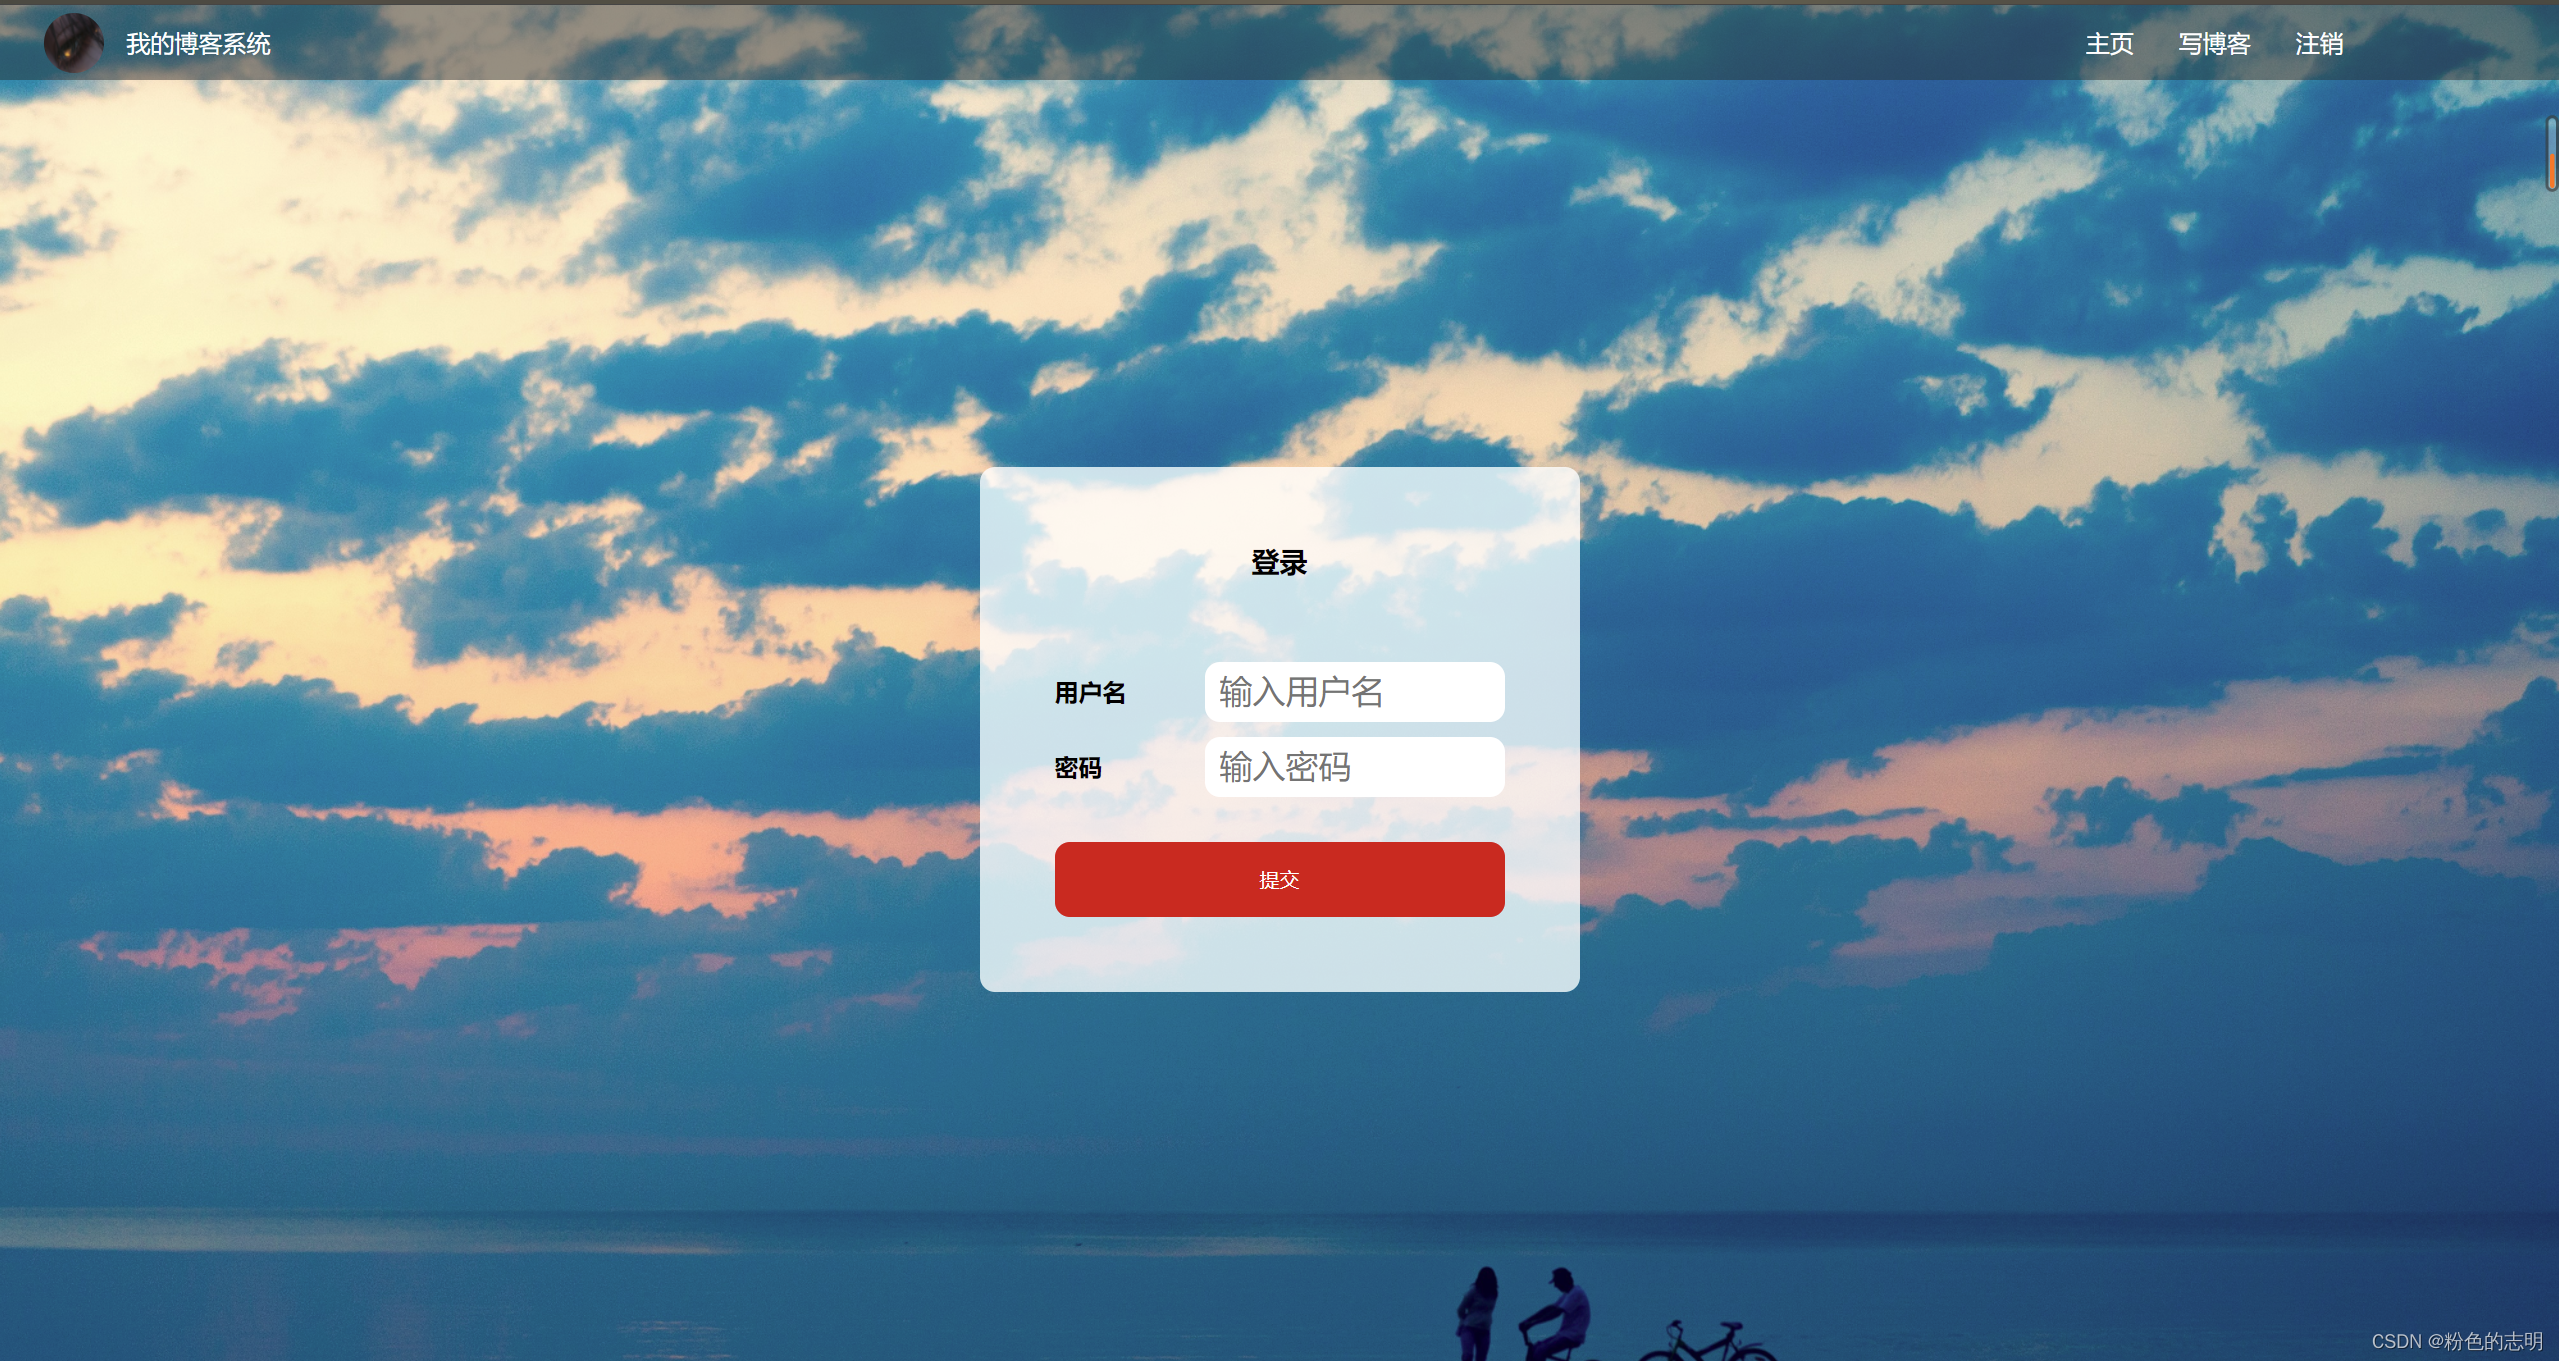
3: Blog login (logout) page
4: Blog edit page
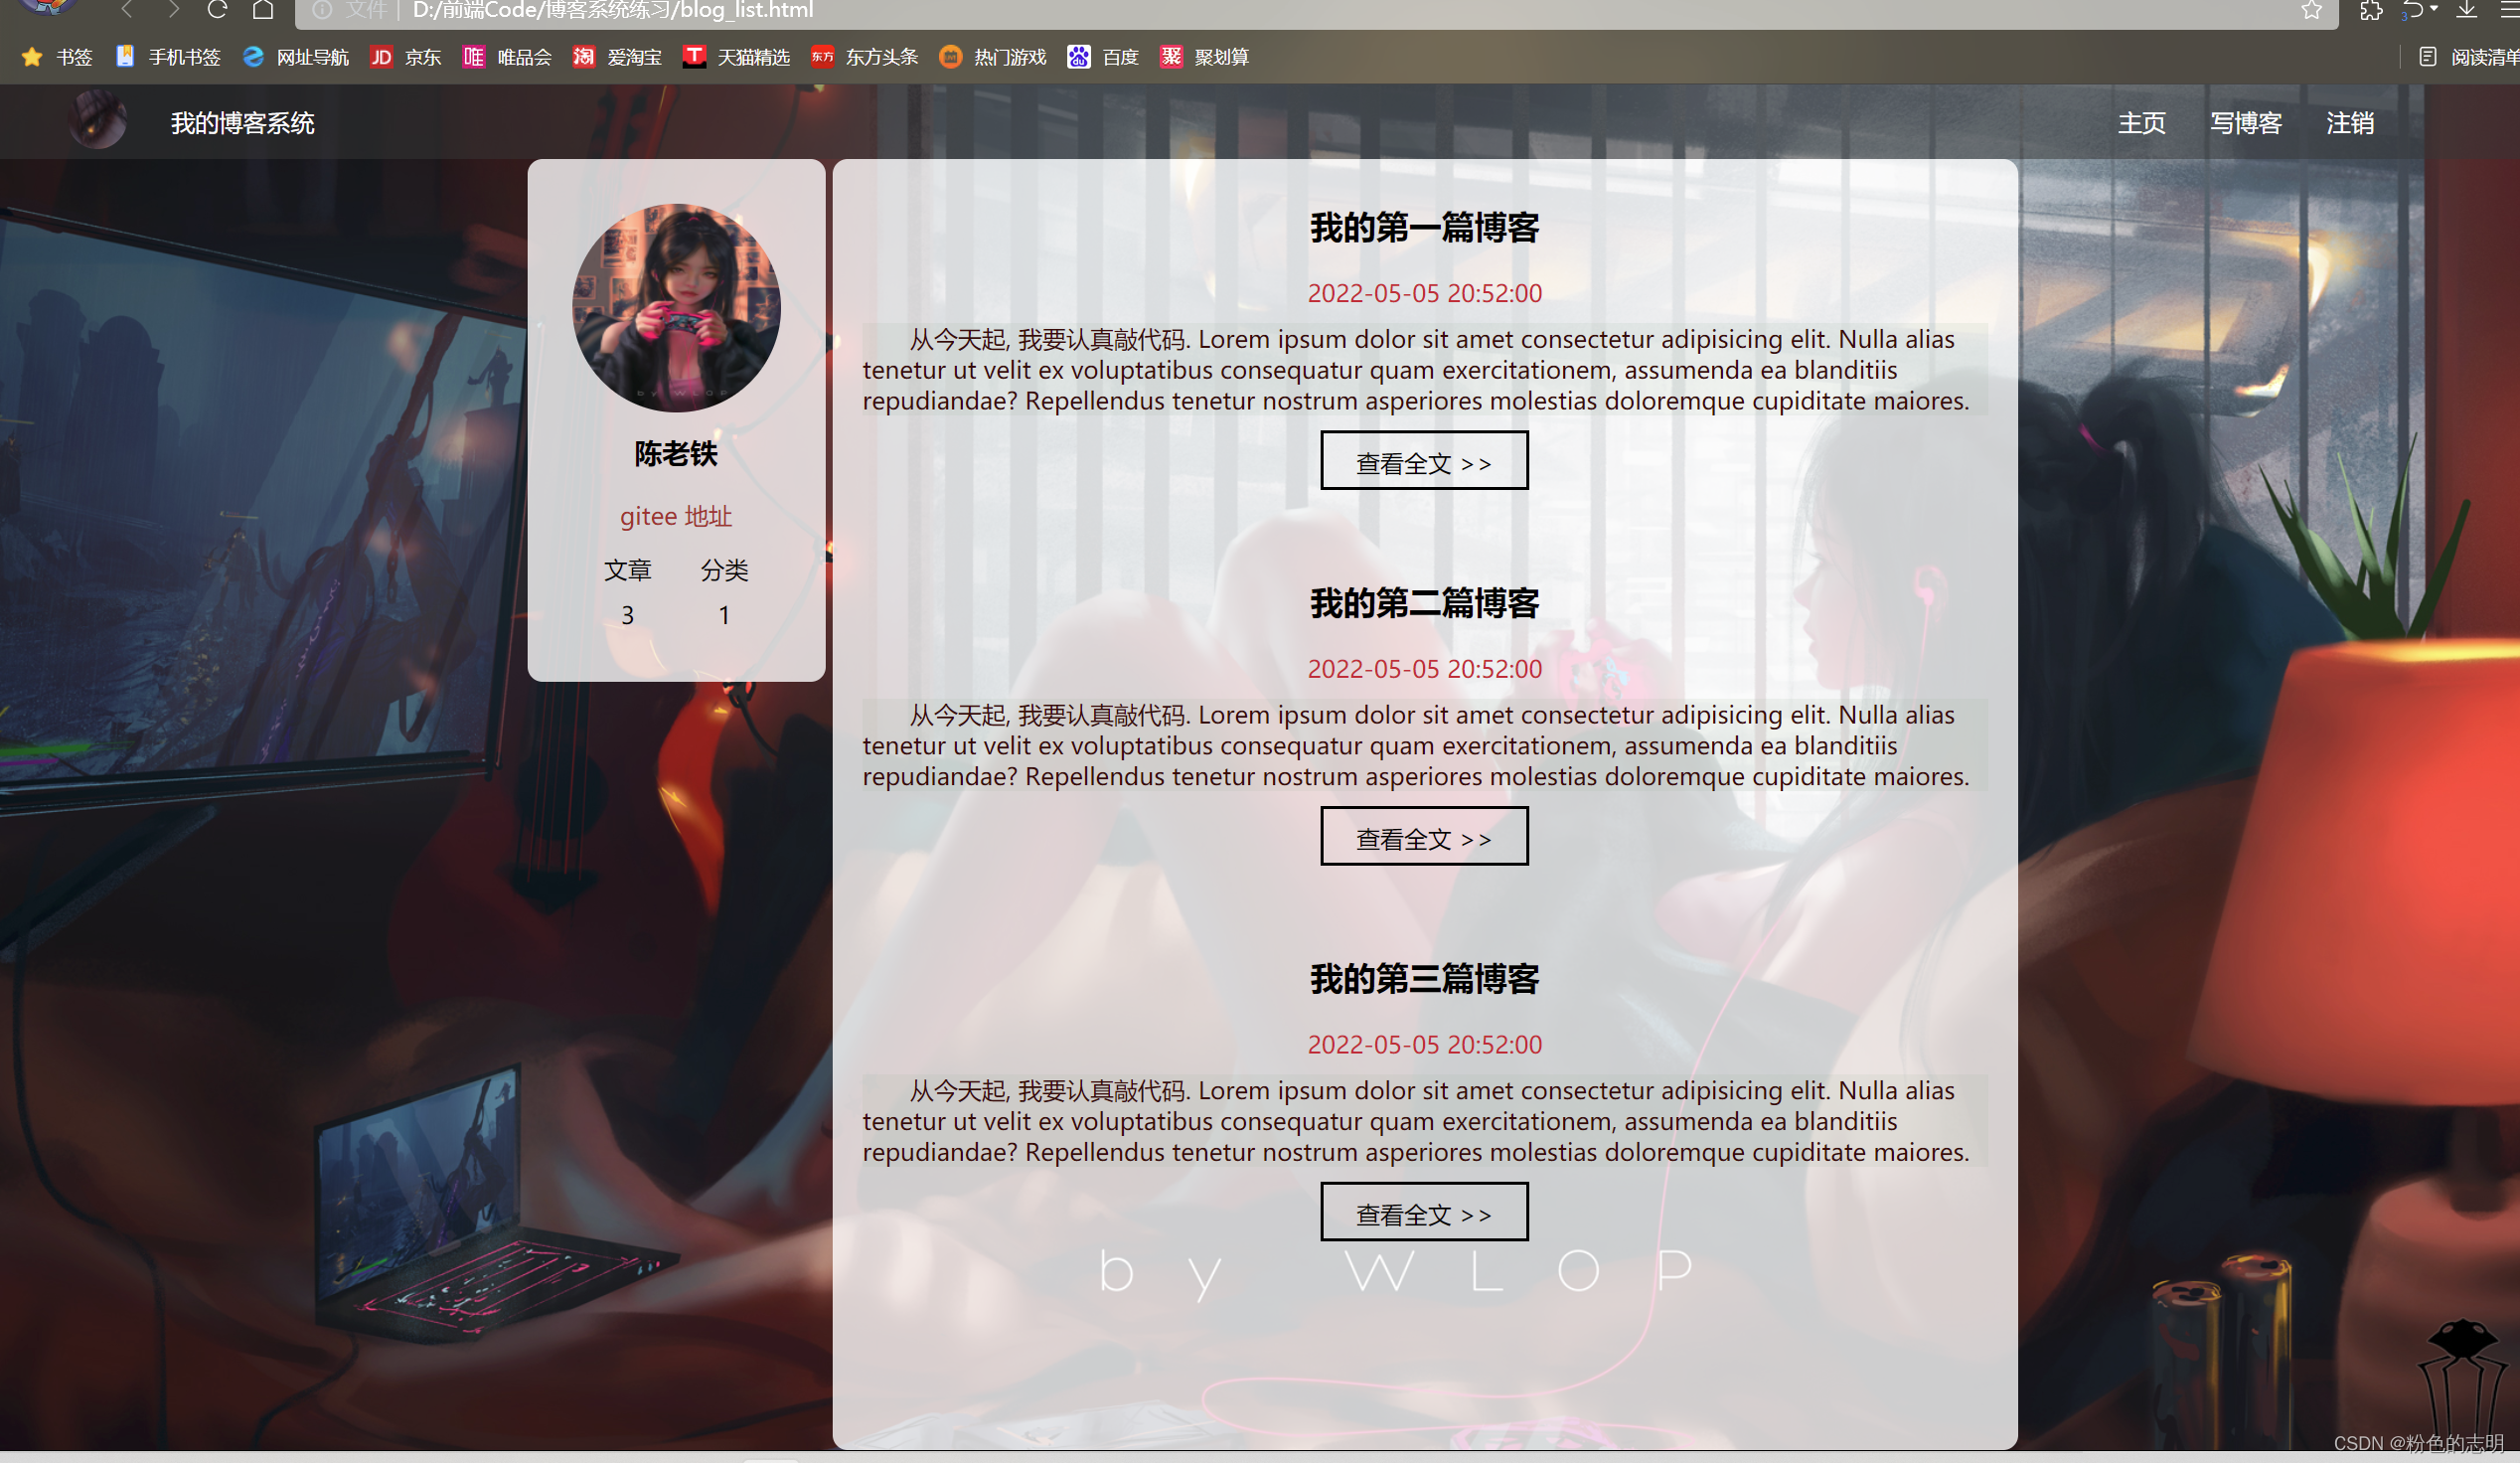
1. Implement the blog list page
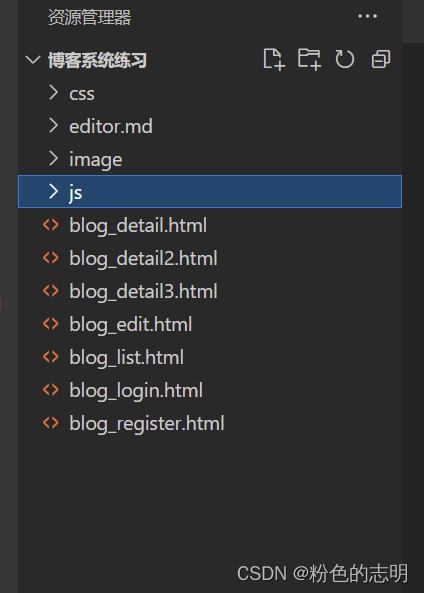
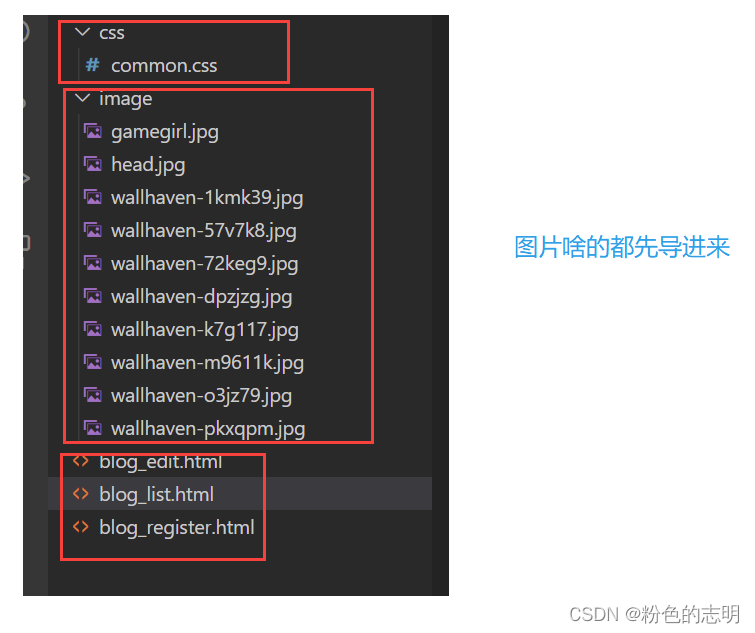
Because this project requires a lot of files, it is recommended to learn to divide folders to store the corresponding content:
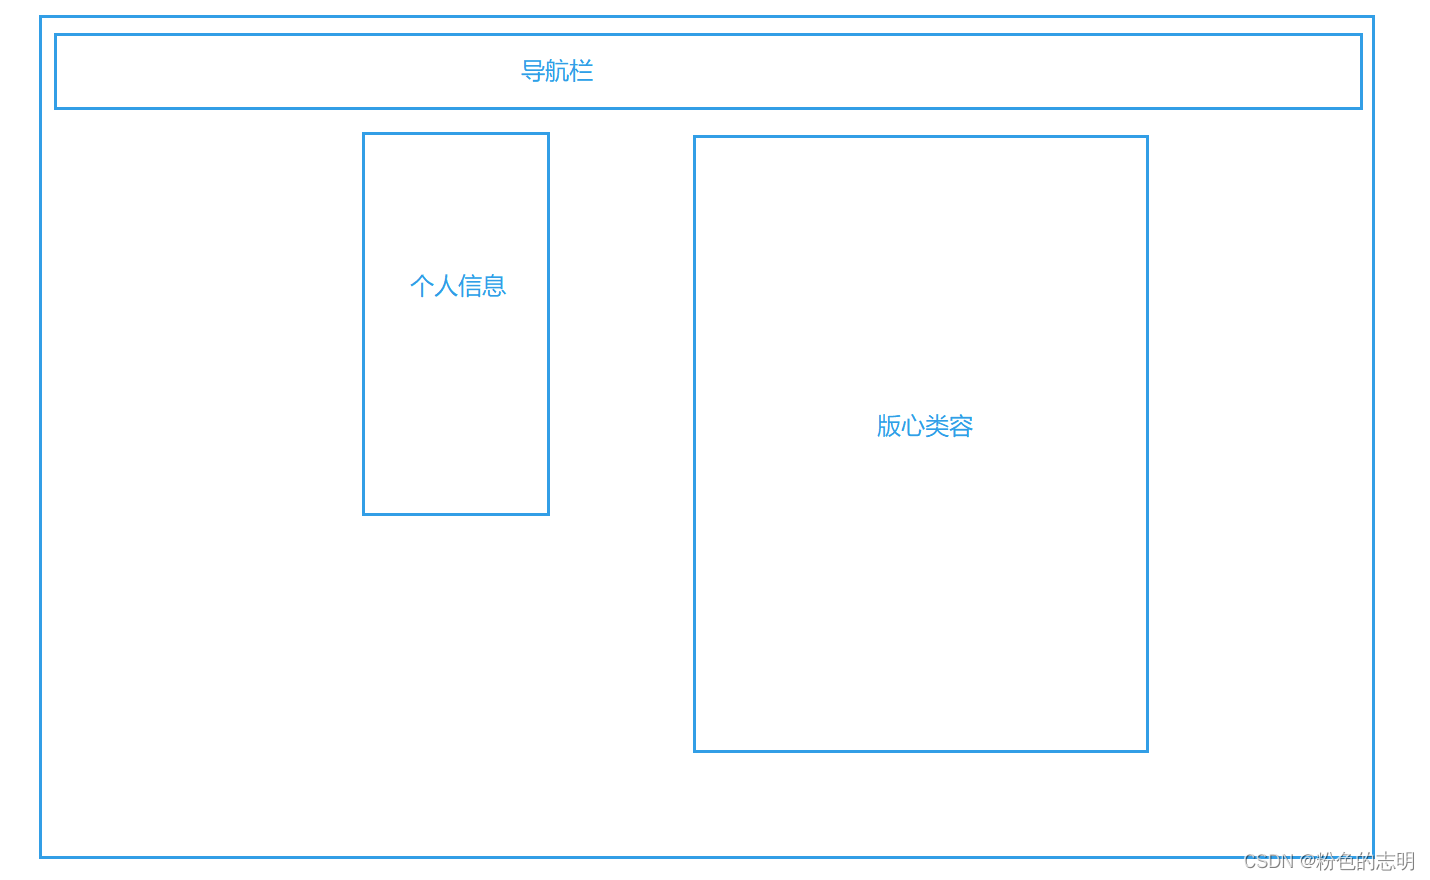
To implement this blog list page first, we have to set up the frame (overall layout) first. At first glance, the style is roughly like this:
一步来实现它,边写边看
Navigation Bar
Write down the html part first:
 <!-- 这个是导航栏 -->
    <div class="nav">
        <img src="image/wallhaven-72keg9.jpg" alt="">
        <span>
            我的博客系统
        </span>
        <!-- 空白元素,用来占位置 -->
        <div class="spacer"></div>
        <a href="blog_list.html">主页</a>
        <a href="blog_edit.html">写博客</a>
        <a href="blog_register.html">注销</a>
    </div>

Next, it is the style css to change it. Since we found that the navigation bar has several pages, we can choose to build a public style file,
common.css
public style
/* 放置一些公共样式 */
* {
    margin: 0;
    padding: 0;
    box-sizing: border-box;
}

/* 给整个页面加上背景图片 */
html,body {
    height: 100%;
}

body {
    background-image: url(../image/wallhaven-57v7k8.jpg);
    background-repeat: no-repeat;
    background-position: center center;
    background-size: cover;
}

.nav {
    width: 100%;
     /* 这些尺寸啥的就是自己设 */
     height: 50px;
     background-color: rgba(51, 51, 51, 0.4);
     color: white;

     /* 导航栏内部的内容,都是一行排列的,就需要使用 flex 布局来进行操作 */
     display: flex;
     /* 实现了元素垂直居中效果 */
     align-items: center;
}

.nav img {
    width: 40px;
    height: 40px;
    border-radius: 50%;

    margin-left: 30px;
    margin-right: 10px;
}

.nav a{
    color: white;
    text-decoration: none;
    padding: 0 10px;
}
Also in html, don't forget to import the contents of the css folder
<link rel="stylesheet" href="css/common.css">
Check out the effect:
The addition is to write down one by one according to the steps like this...
blog_list.html
<!DOCTYPE html>
<html lang="en">
<head>
<meta charset="UTF-8">
<meta http-equiv="X-UA-Compatible" content="IE=edge">
<meta name="viewport" content="width=device-width, initial-scale=1.0">
<title>博客列表</title>
<link rel="stylesheet" href="css/common.css">
<link rel="stylesheet" href="css/blog_lsit.css">
</head>
<body>
<div class="nav">
<label for="主页"></label>
<a href="blog_list.html">
<img src="image/wallhaven-72keg9.jpg" alt="" id="主页">
</a>
<span>我的博客系统</span>
<div class="spacer"></div>
<a href="blog_list.html">主页</a>
<a href="blog_edit.html">写博客</a>
<a href="blog_login.html">注销</a>
</div>
<!-- 页面版心 -->
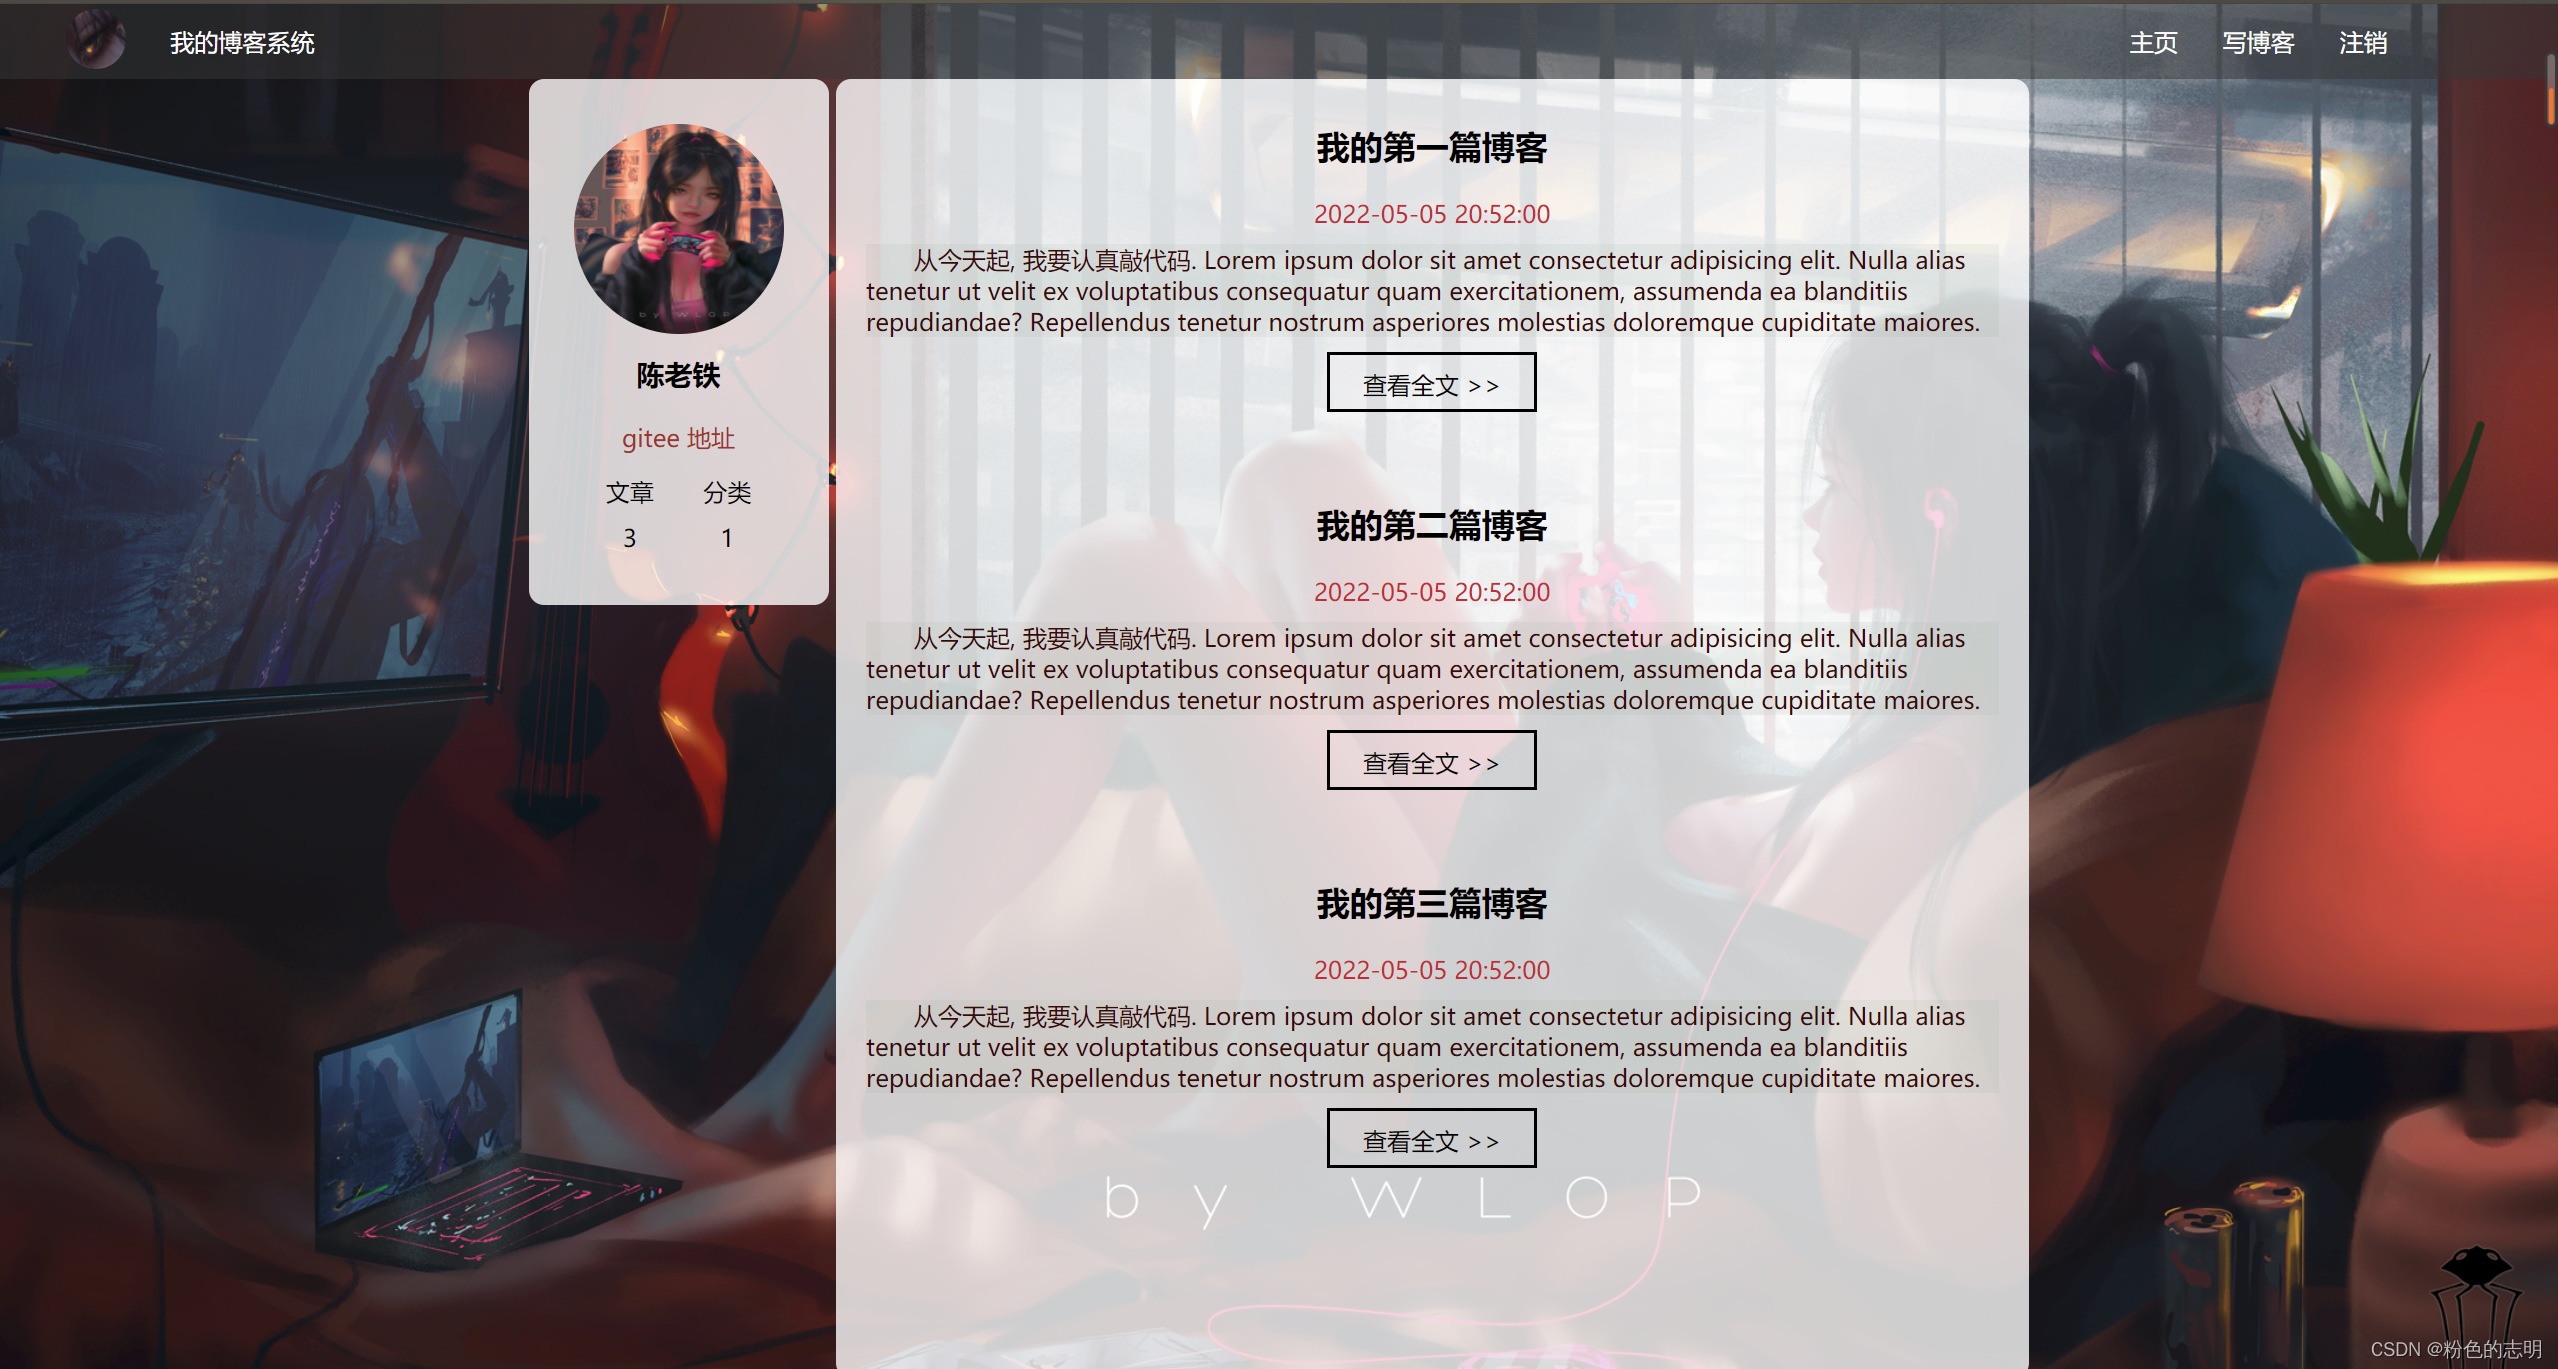
<div class="container">
<!-- 左侧个人信息 -->
<div class="left">
<div class="card">
<!-- <div class="xitiao">
<img src="image/gamegirl.jpg" alt="">
</div> -->
<img src="image/gamegirl.jpg" alt="">
<h3>陈老铁</h3>
<a href="https://gitee.com/big-white-rice">gitee 地址</a>
<div class="counter">
<span>文章</span>
<span>分类</span>
</div>
<div class="counter">
<span>3</span>
<span>1</span>
</div>
</div>
</div>
<!-- 右侧内容详情 -->
<div class="right">
<!-- .blog 就对应一个博客 -->
<div class="blog">
<!-- 博客标题 -->
<div class="title">
我的第一篇博客
</div>
<!-- 博客发布时间 -->
<div class="date">
2022-05-05 20:52:00
</div>
<!-- 博客的摘要 -->
<div class="desc">
从今天起, 我要认真敲代码. Lorem ipsum dolor sit amet consectetur adipisicing elit. Nulla alias tenetur ut velit ex voluptatibus consequatur quam exercitationem, assumenda ea blanditiis repudiandae? Repellendus tenetur nostrum asperiores molestias doloremque cupiditate maiores.
</div>
<a href="blog_detail.html">查看全文 >> </a>
</div>
<div class="blog">
<!-- 博客标题 -->
<div class="title">
我的第二篇博客
</div>
<!-- 博客发布时间 -->
<div class="date">
2022-05-05 20:52:00
</div>
<!-- 博客的摘要 -->
<div class="desc">
从今天起, 我要认真敲代码. Lorem ipsum dolor sit amet consectetur adipisicing elit. Nulla alias tenetur ut velit ex voluptatibus consequatur quam exercitationem, assumenda ea blanditiis repudiandae? Repellendus tenetur nostrum asperiores molestias doloremque cupiditate maiores.
</div>
<a href="blog_detail2.html">查看全文 >> </a>
</div>
<div class="blog">
<!-- 博客标题 -->
<div class="title">
我的第三篇博客
</div>
<!-- 博客发布时间 -->
<div class="date">
2022-05-05 20:52:00
</div>
<!-- 博客的摘要 -->
<div class="desc">
从今天起, 我要认真敲代码. Lorem ipsum dolor sit amet consectetur adipisicing elit. Nulla alias tenetur ut velit ex voluptatibus consequatur quam exercitationem, assumenda ea blanditiis repudiandae? Repellendus tenetur nostrum asperiores molestias doloremque cupiditate maiores.
</div>
<a href="blog_detail3.html">查看全文 >> </a>
</div>
</div>
</div>
</div>
</body>
</html>
blog_list.css
html, body {
    height: 100%;
}

body {
    background-image: url(../image/wallhaven-k7g117.jpg);
    background-repeat: no-repeat;
    background-position: center center;
    background-size: cover;
}
/* 博客列表相关样式 */
.blog {
    width: 100%;
    padding: 20px;
}

.blog .title {
    text-align: center;
    font-size: 22px;
    font-weight: bold;
    padding: 10px 0;
}

.blog .date {
    text-align: center;
    color: rgb(201, 29, 52);
    padding: 10px 0;
}

.blog .desc {
    text-indent: 2em;
    background-color: rgba(134, 169, 139, 0.1);
    color: rgb(55, 4, 4);
}

.blog a {
    display: block;
    width: 140px;
    height: 40px;
    margin: 10px auto;
    border: 2px black solid;

    color: black;
    line-height: 40px;
    text-align: center;
    text-decoration: none;

    transition: all 0.5s;
}

.blog a:hover {
    background: #333;
    color: #fff;
}
2. Implement the blog body page
blog_detail.html
<!DOCTYPE html>
<html lang="en">
<head>
<meta charset="UTF-8">
<meta http-equiv="X-UA-Compatible" content="IE=edge">
<meta name="viewport" content="width=device-width, initial-scale=1.0">
<title>博客详情页</title>
<link rel="stylesheet" href="css/common.css">
<link rel="stylesheet" href="css/blog_detail.css">
</head>
<body>
<!-- 这是导航栏 -->
<div class="nav">
<label for="主页"></label>
<a href="blog_list.html">
<img src="image/wallhaven-72keg9.jpg" alt="" id="主页">
</a>
<span>我的博客系统</span>
<!-- 空白元素, 用来占位置 -->
<div class="spacer"></div>
<a href="blog_list.html">主页</a>
<a href="blog_edit.html">写博客</a>
<a href="#">注销</a>
</div>
<!-- 页面版心 -->
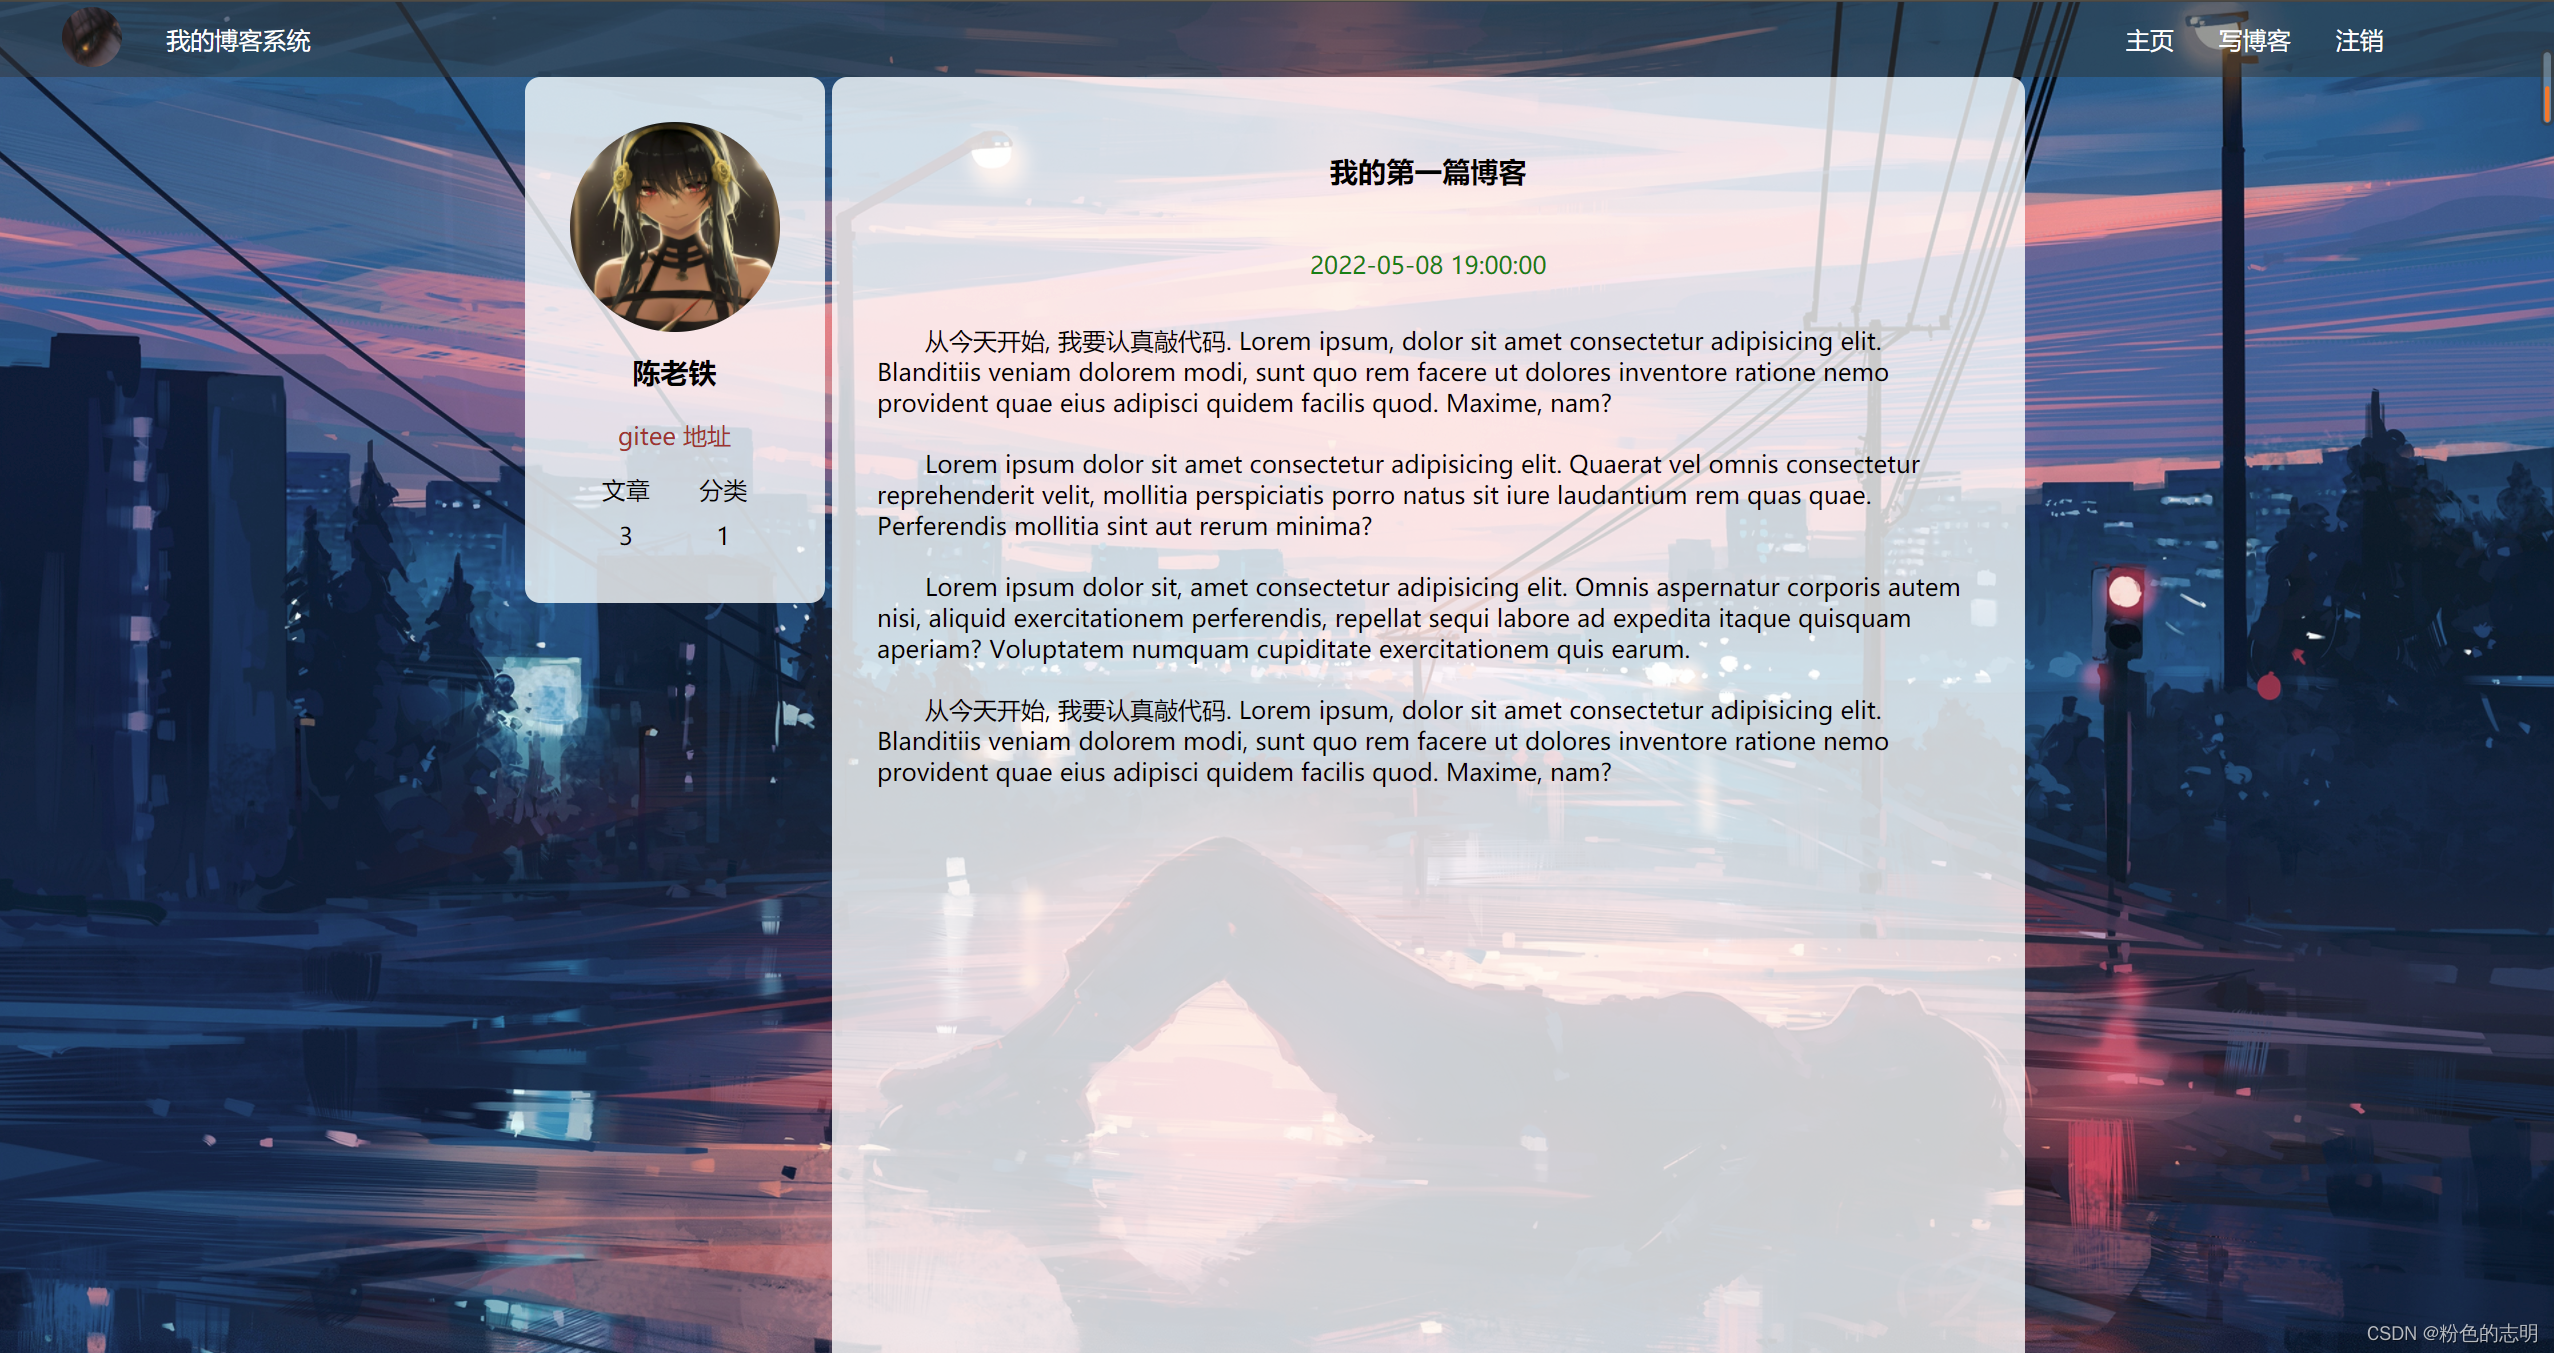
<div class="container">
<!-- 左侧个人信息 -->
<div class="left">
<div class="card">
<!-- <div class="xitiao">
<img src="image/gamegirl.jpg" alt="">
</div> -->
<img src="image/head.jpg" alt="">
<h3>陈老铁</h3>
<a href="https://gitee.com/big-white-rice">gitee 地址</a>
<div class="counter">
<span>文章</span>
<span>分类</span>
</div>
<div class="counter">
<span>3</span>
<span>1</span>
</div>
</div>
</div>
<!-- 右侧内容详情 -->
<div class="right">
<!-- 使用这个 div 来包裹整个博客的内容详情 -->
<div class="blog-content">
<!-- 博客标题 -->
<h3>我的第一篇博客</h3>
<!-- 博客的时间 -->
<div class="date">2022-05-08 19:00:00</div>
<!-- 正文 -->
<p>
从今天开始, 我要认真敲代码. Lorem ipsum, dolor sit amet consectetur adipisicing elit. Blanditiis veniam dolorem modi, sunt quo rem facere ut dolores inventore ratione nemo provident quae eius adipisci quidem facilis quod. Maxime, nam?
</p>
<p>
Lorem ipsum dolor sit amet consectetur adipisicing elit. Quaerat vel omnis consectetur reprehenderit velit, mollitia perspiciatis porro natus sit iure laudantium rem quas quae. Perferendis mollitia sint aut rerum minima?
</p>
<p>
Lorem ipsum dolor sit, amet consectetur adipisicing elit. Omnis aspernatur corporis autem nisi, aliquid exercitationem perferendis, repellat sequi labore ad expedita itaque quisquam aperiam? Voluptatem numquam cupiditate exercitationem quis earum.
</p>
<p>
从今天开始, 我要认真敲代码. Lorem ipsum, dolor sit amet consectetur adipisicing elit. Blanditiis veniam dolorem modi, sunt quo rem facere ut dolores inventore ratione nemo provident quae eius adipisci quidem facilis quod. Maxime, nam?
</p>
</div>
</div>
</div>
</body>
</html>
blog_detail.css
/* 给博客详情页使用的样式文件 */

html, body {
    height: 100%;
}

body {
    background-image: url(../image/wallhaven-pkxqpm.jpg);
    background-repeat: no-repeat;
    background-position: center center;
    background-size: cover;
}
.blog-content {
    padding: 30px;
}

.blog-content h3 {
    text-align: center;
    padding: 20px 0;
}

.blog-content .date {
    text-align: center;
    color: rgb(0, 128, 0);
    padding: 20px 0;
}

.blog-content p {
    text-indent: 2em;
    padding: 10px 0;
}
3. Implement blog login (logout) page
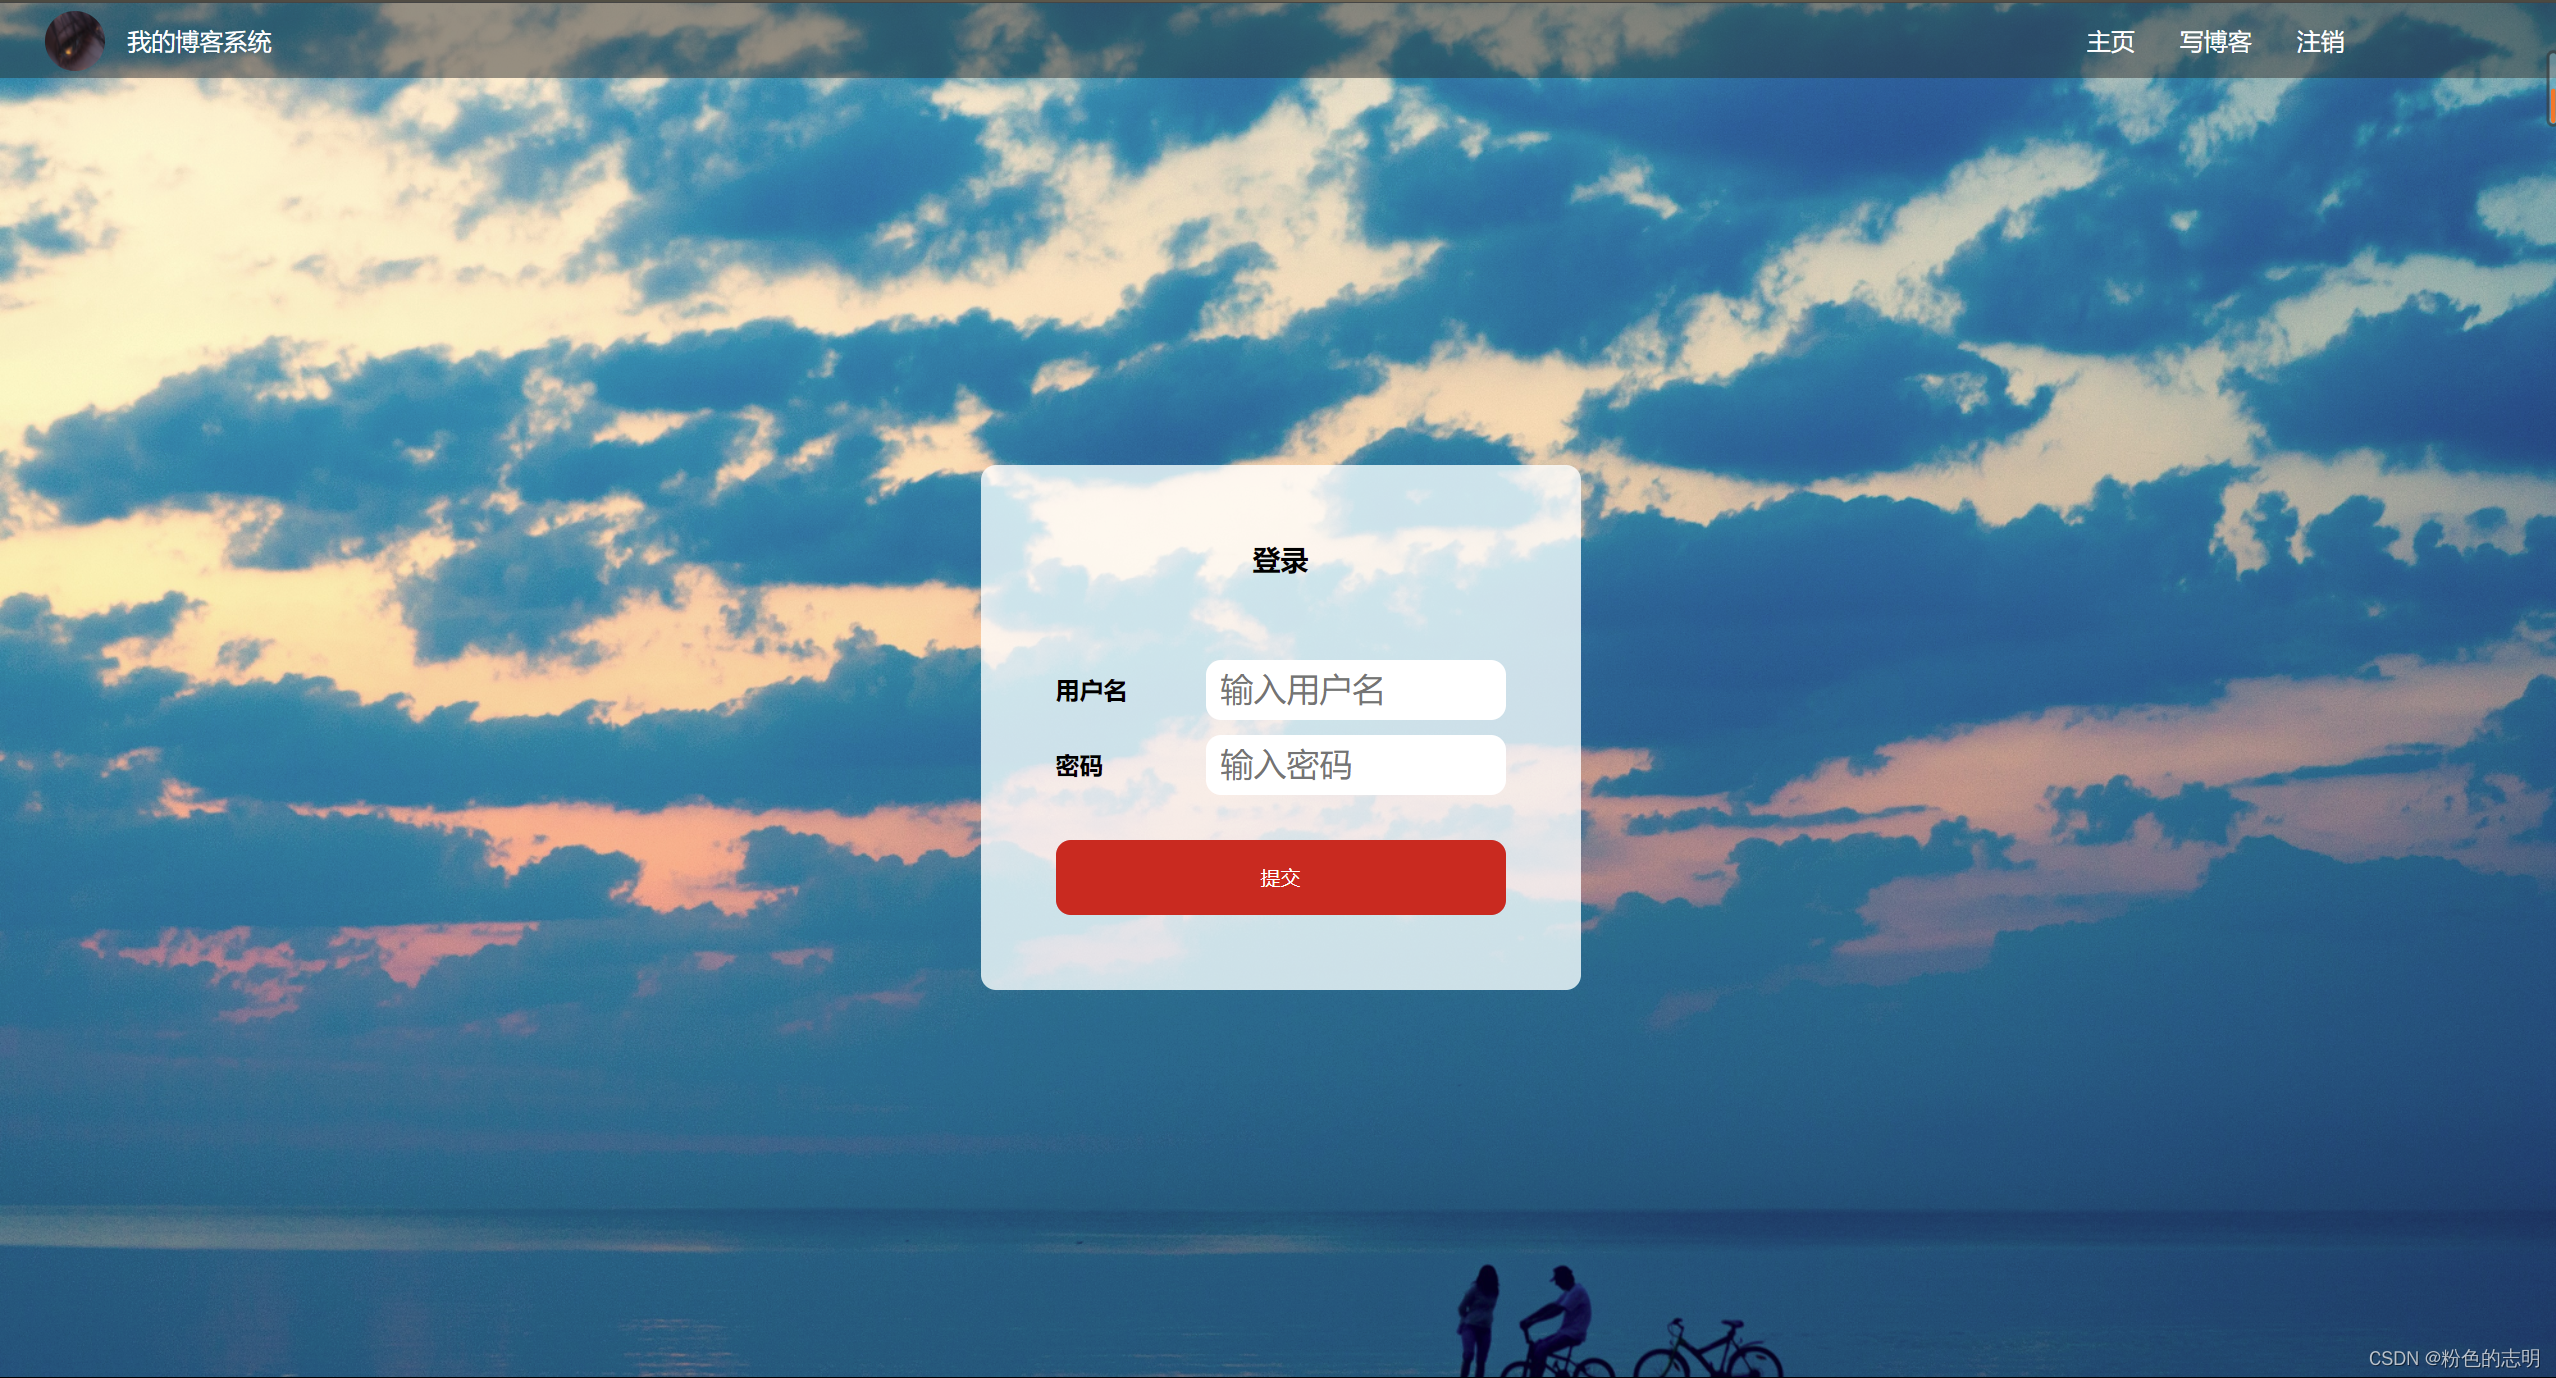
blog_login.html
<!DOCTYPE html>
<html lang="en">
<head>
    <meta charset="UTF-8">
    <meta http-equiv="X-UA-Compatible" content="IE=edge">
    <meta name="viewport" content="width=device-width, initial-scale=1.0">
    <title>登录页面</title>
    <link rel="stylesheet" href="css/common.css">
    <link rel="stylesheet" href="css/blog_login.css">
</head>
<body>
    <div class="nav">
        <img src="image/wallhaven-72keg9.jpg" alt="">
        <span>我的博客系统</span>
        <div class="spacer"></div>
        <a href="blog_list.html">主页</a>
        <a href="blog_edit.html">写博客</a>
        <a href="blog_register.html">注销</a>
    </div>
<div class="login-container">
    <div class="login-dialog">
        <h3>登录</h3>
        <div class="row">
            <span>用户名</span>
            <input type="text" id="username" placeholder="输入用户名">
        </div>
        <div class="row">
              <span>密码</span>
              <input type="password" id="password" placeholder="输入密码">
        </div>
        <div class="row">
            <button>提交</button>
        </div>
    </div>
</div>

</body>
</html>
blog_login.css
/* 登录界面样式 */

html, body {
    height: 100%;
}

body {
    background-image: url(../image/wallhaven-57v7k8.jpg);
    background-repeat: no-repeat;
    background-position: center center;
    background-size: cover;
}
.login-container {
    width: 100%;
    height: calc(100% - 50px);

    display: flex;
    align-items: center;
    justify-content: center;
}

.login-dialog {
    width: 400px;
    height: 350px;
    background-color: rgba(255, 255, 255, 0.8);
    border-radius: 10px;
}

.login-dialog h3 {
    text-align: center;
    padding: 50px 0;
}

.login-dialog .row {
    height: 50px;
    width: 100%;

    display: flex;
    align-items: center;
    justify-content: center;
}

.login-dialog .row span {
    display: block;
    width: 100px;
    font-weight: 700;
}

#username, #password {
    width: 200px;
    height: 40px;
    font-size: 22px;
    line-height: 40px;
    padding-left: 10px;
    border-radius: 10px;

    border: none;

    outline: none;
}

.row button {
    width: 300px;
    height: 50px;
    border-radius: 10px;
    color: white;
    background-color: rgb(210, 19, 19);
    border: none;
    outline: none;

    margin-top: 50px;
}

.row button:active {
    background-color: #666;
}
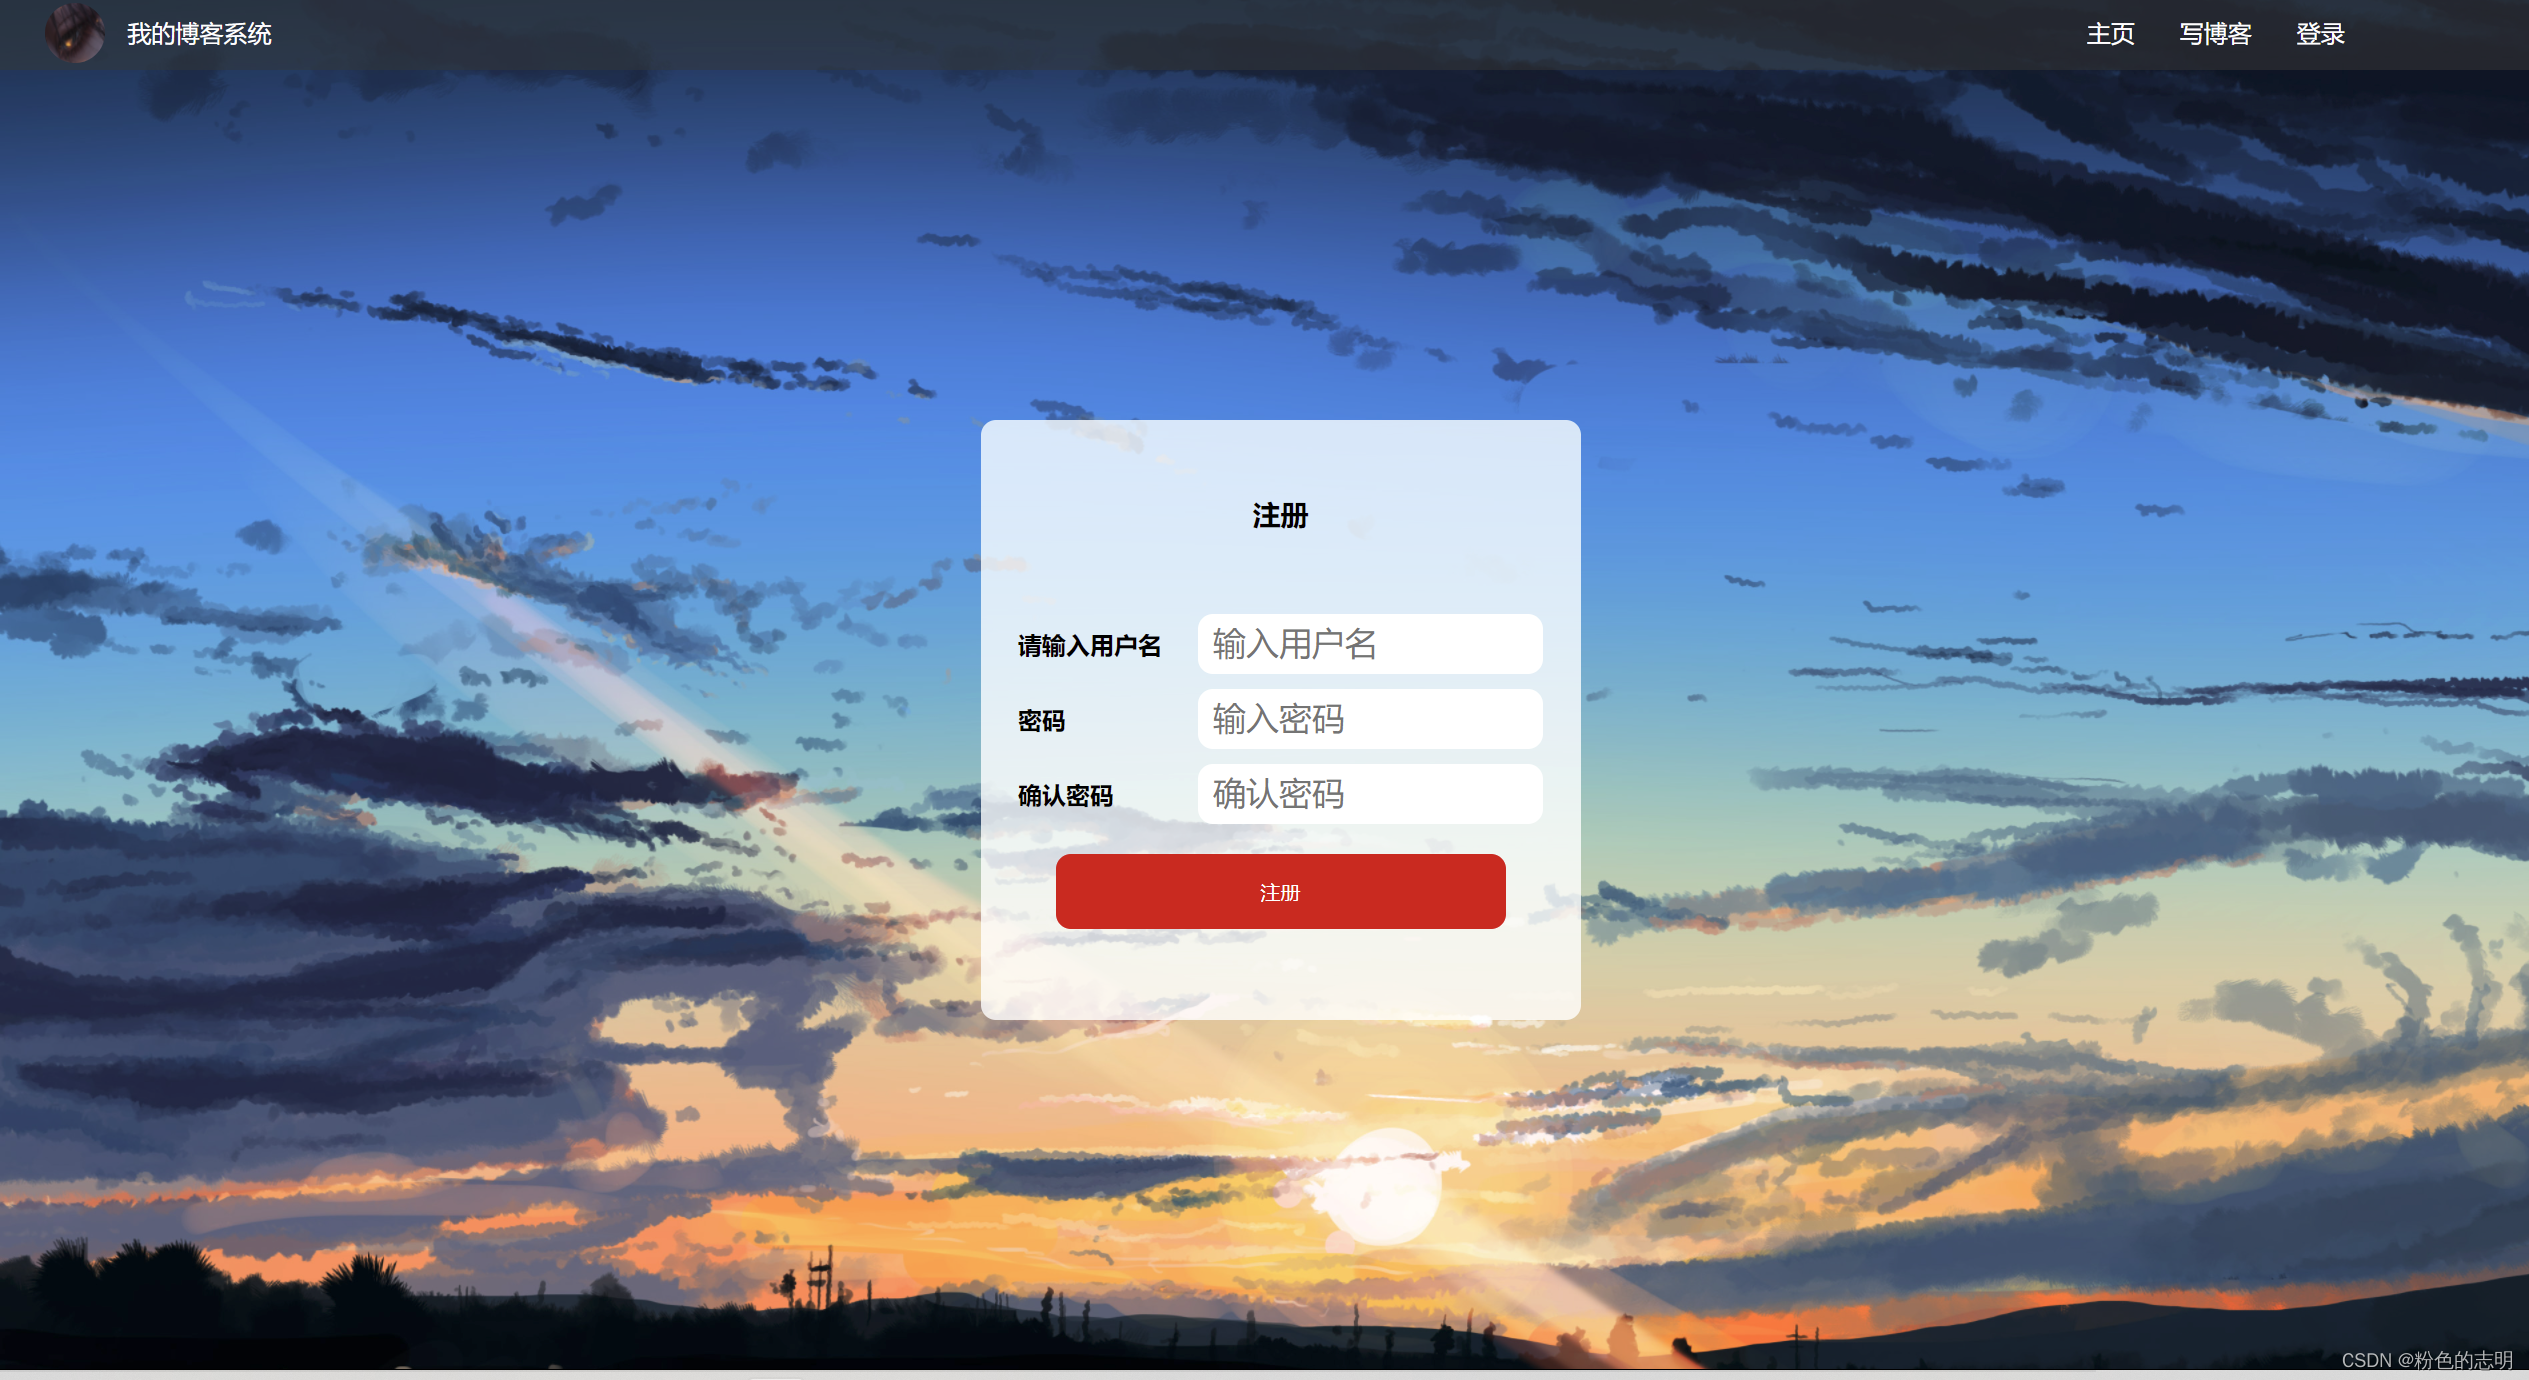
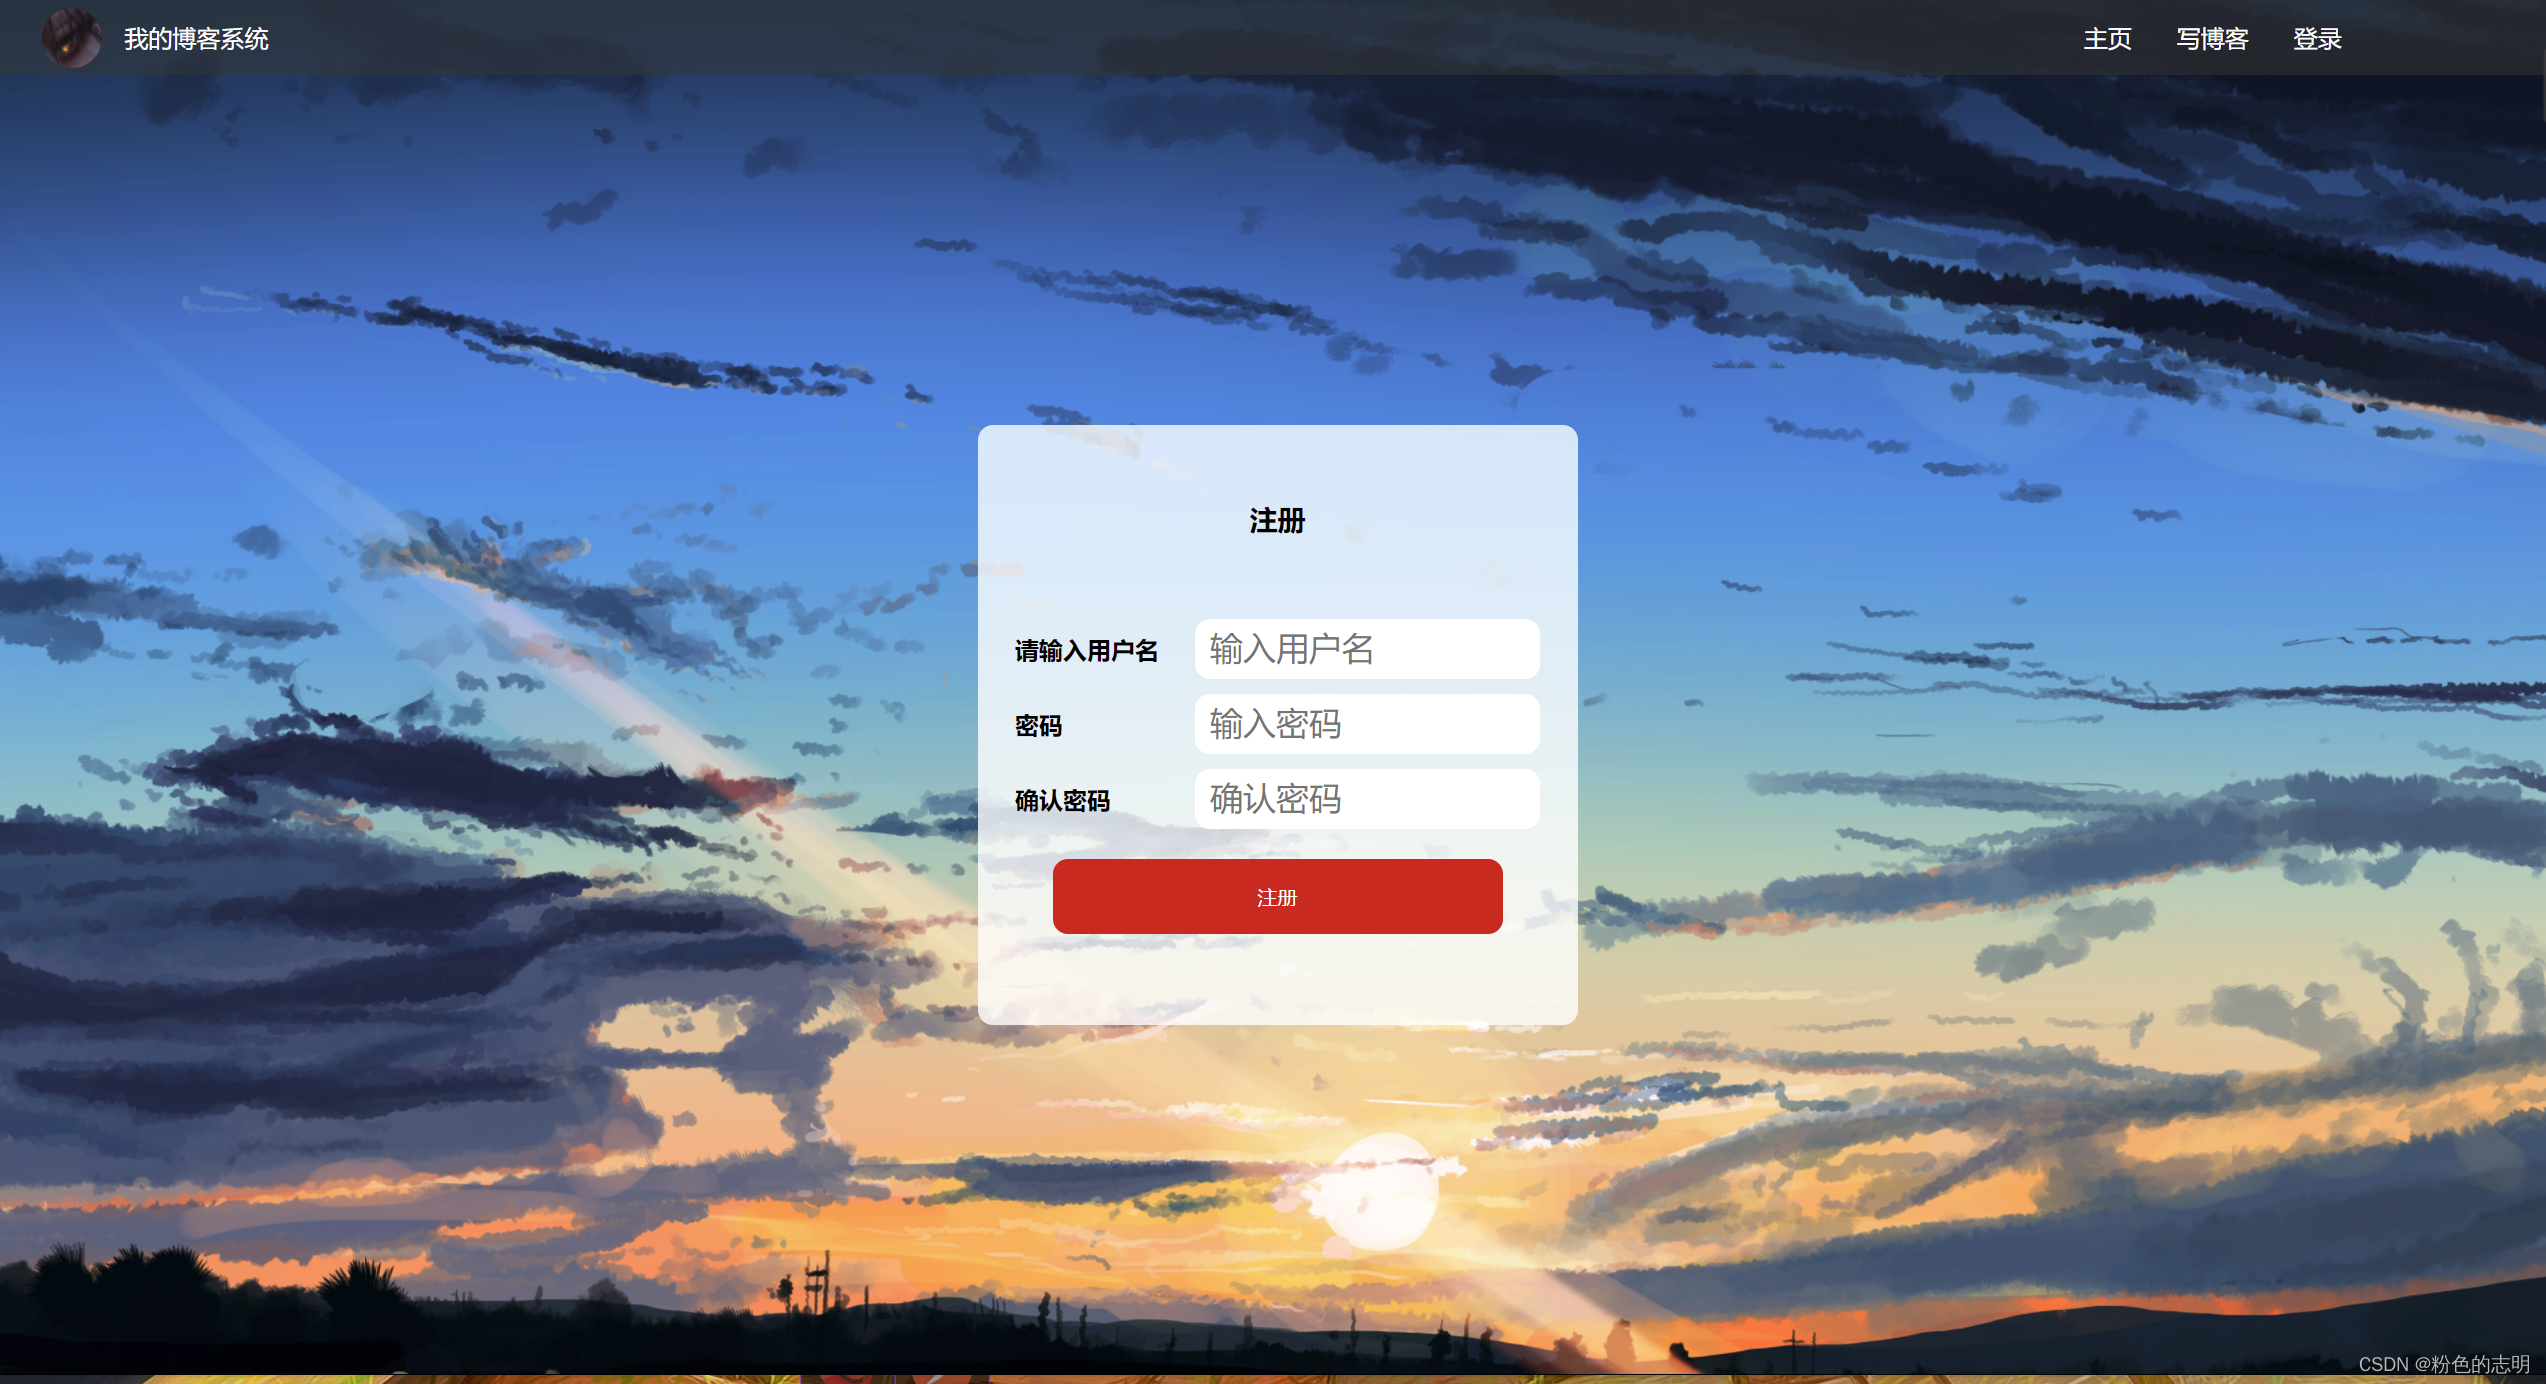
blog_register.html
<!DOCTYPE html>
<html lang="en">
<head>
    <meta charset="UTF-8">
    <meta http-equiv="X-UA-Compatible" content="IE=edge">
    <meta name="viewport" content="width=device-width, initial-scale=1.0">
    <title>注册页面</title>
    <link rel="stylesheet" href="css/common.css">
    <link rel="stylesheet" href="css/blog_register.css">
</head>
<body>
    <div class="nav">
        <img src="image/wallhaven-72keg9.jpg" alt="">
        <span>我的博客系统</span>
        <div class="spacer"></div>
        <a href="blog_list.html">主页</a>
        <a href="blog_edit.html">写博客</a>
        <a href="blog_login.html">登录</a>
    </div>
<div class="login-container">
    <div class="login-dialog">
        <h3>注册</h3>
        <div class="row">
            <span>请输入用户名</span>
            <input type="text" id="username" placeholder="输入用户名">
        </div>
        <div class="row">
              <span>密码</span>
              <input type="password" id="password" placeholder="输入密码">
        </div>
        <div class="row">
            <span>确认密码</span>
            <input type="password" id="password" placeholder="确认密码">
      </div>
        <div class="row">
            <button>注册</button>
        </div>
    </div>
</div>
</body>
</html>
blog_register.css
html, body {
    height: 100%;
}

body {
    background-image: url(../image/wallhaven-dpzjzg.jpg);
    background-repeat: no-repeat;
    background-position: center center;
    background-size: cover;
}
.login-container {
    width: 100%;
    height: calc(100% - 50px);

    display: flex;
    align-items: center;
    justify-content: center;
}

.login-dialog {
    width: 400px;
    height: 400px;
    background-color: rgba(255, 255, 255, 0.8);
    border-radius: 10px;
}

.login-dialog h3 {
    text-align: center;
    padding: 50px 0;
}

.login-dialog .row {
    height: 50px;
    width: 100%;

    display: flex;
    align-items: center;
    justify-content: center;
}

.login-dialog .row span {
    display: block;
    width: 120px;
    font-weight: 700;
}

#username, #password {
    width: 230px;
    height: 40px;
    font-size: 22px;
    line-height: 40px;
    padding-left: 10px;
    border-radius: 10px;

    border: none;

    outline: none;
}

.row button {
    width: 300px;
    height: 50px;
    border-radius: 10px;
    color: white;
    background-color: rgb(210, 19, 19);
    border: none;
    outline: none;

    margin-top: 30px;
}

.row button:active {
    background-color: #666;
}
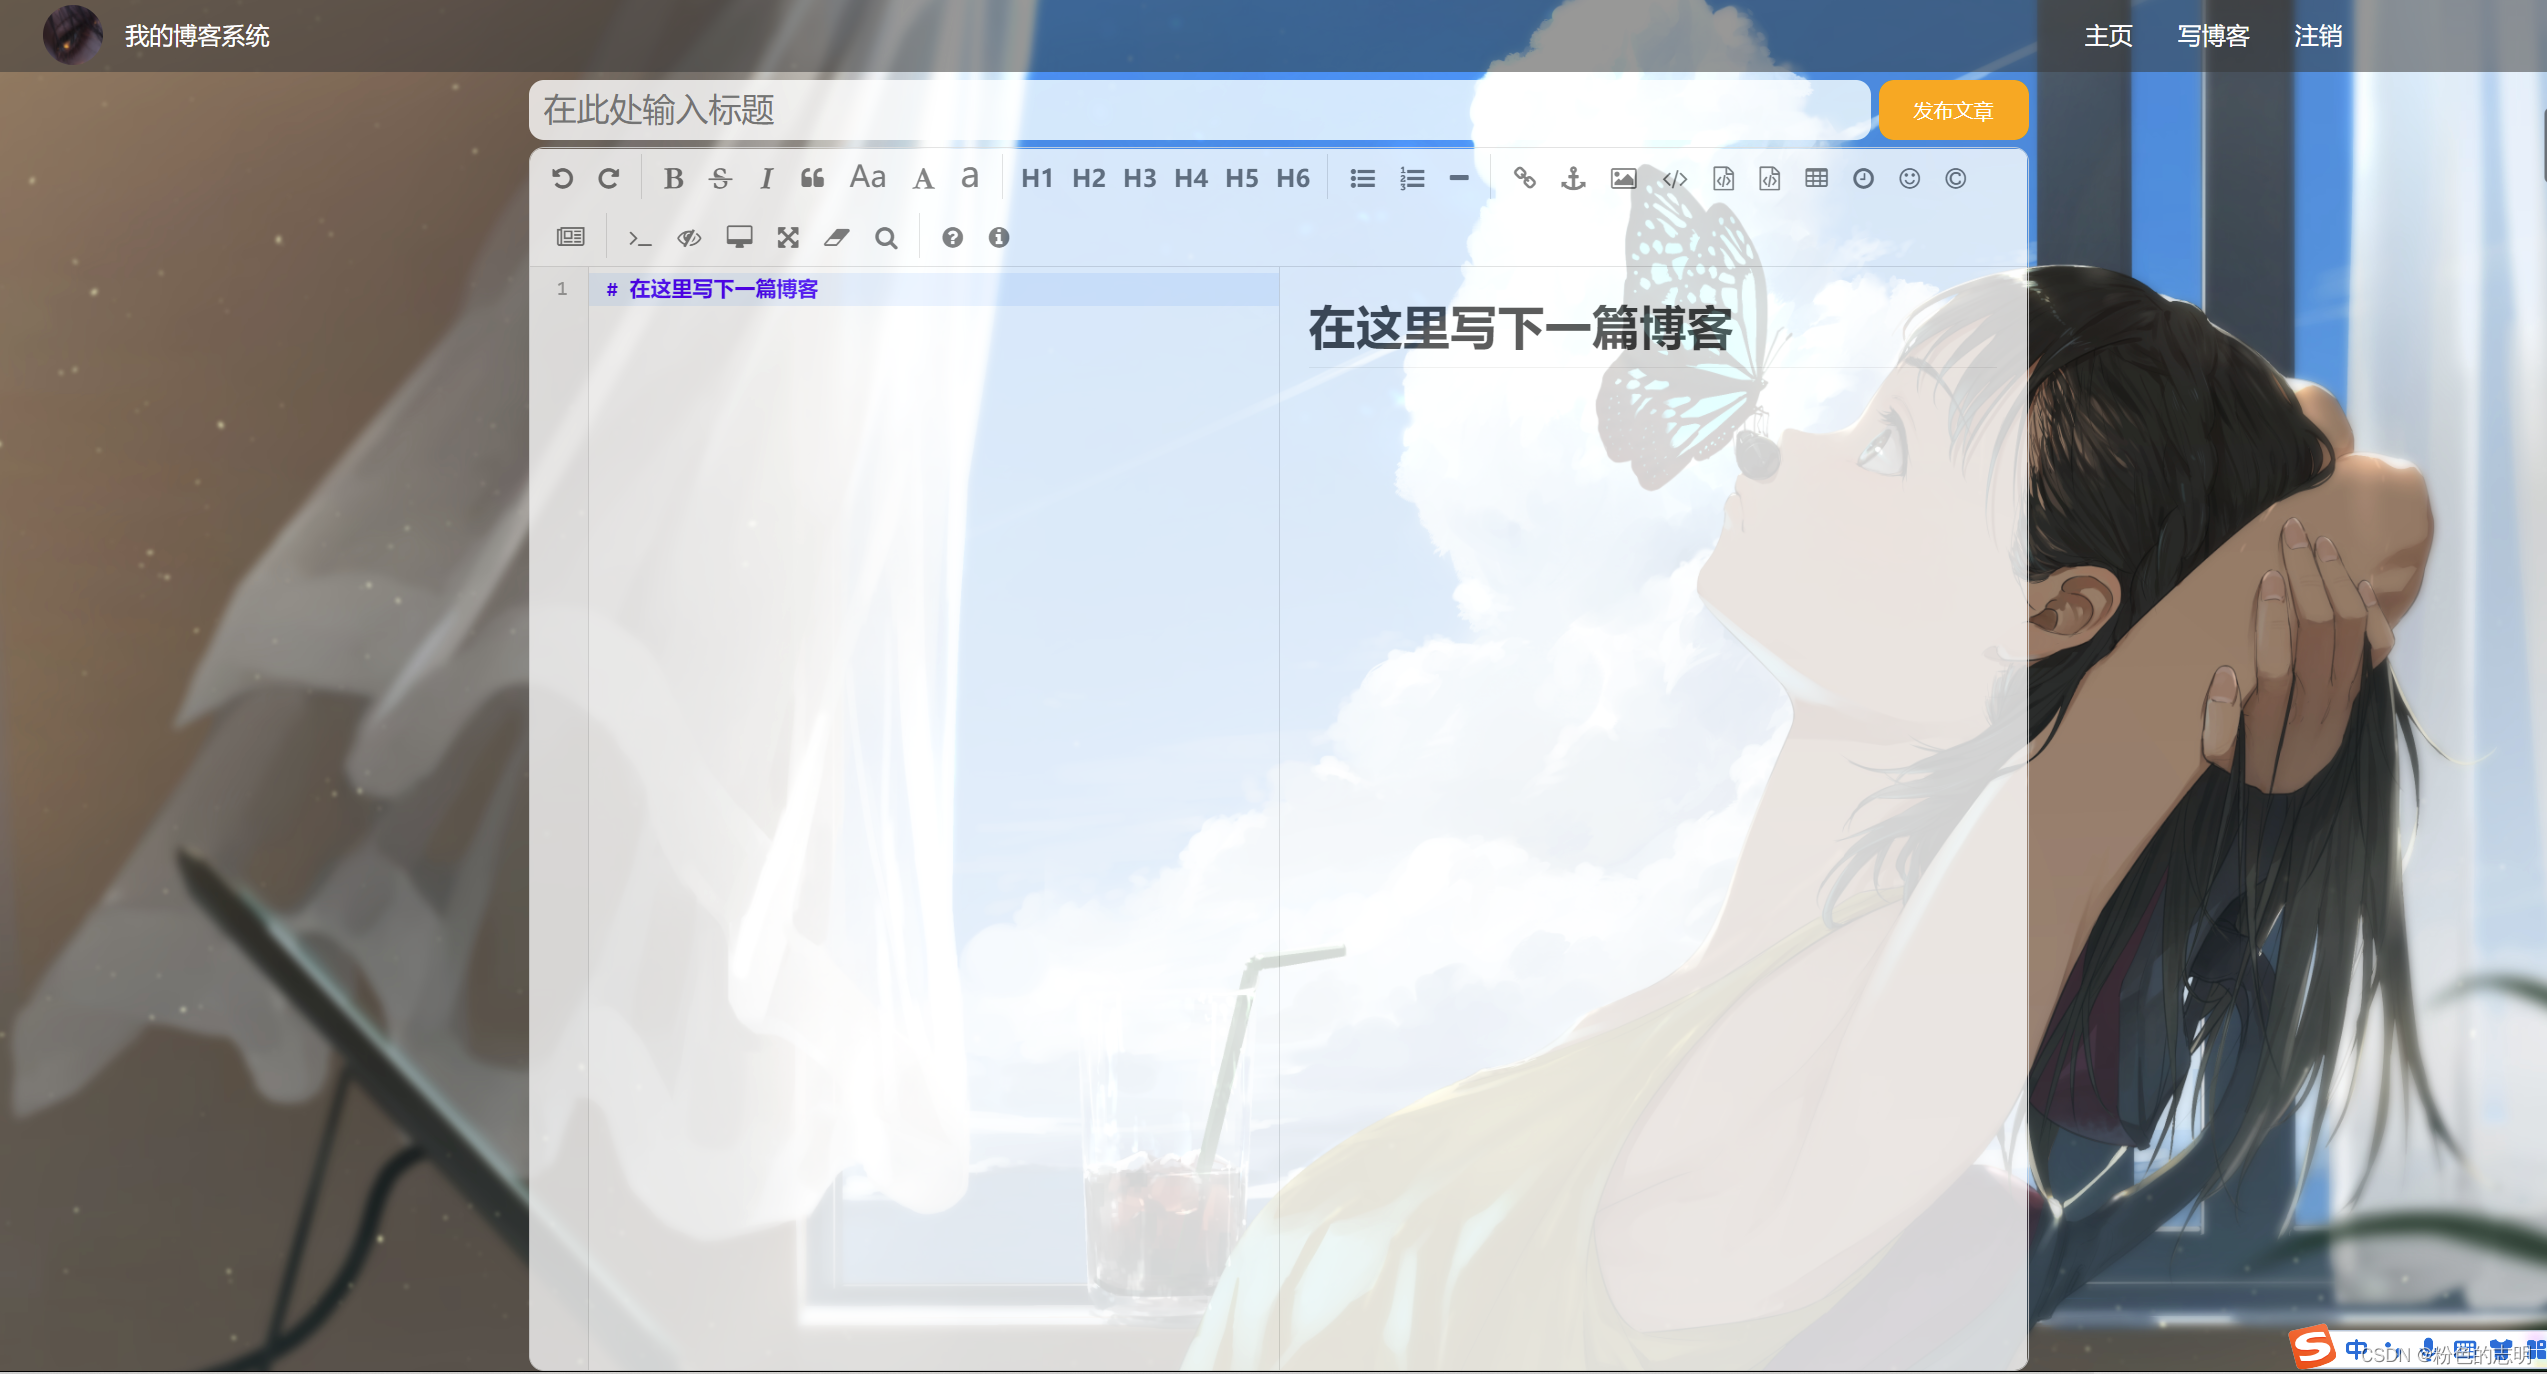
4. Implement the blog edit page
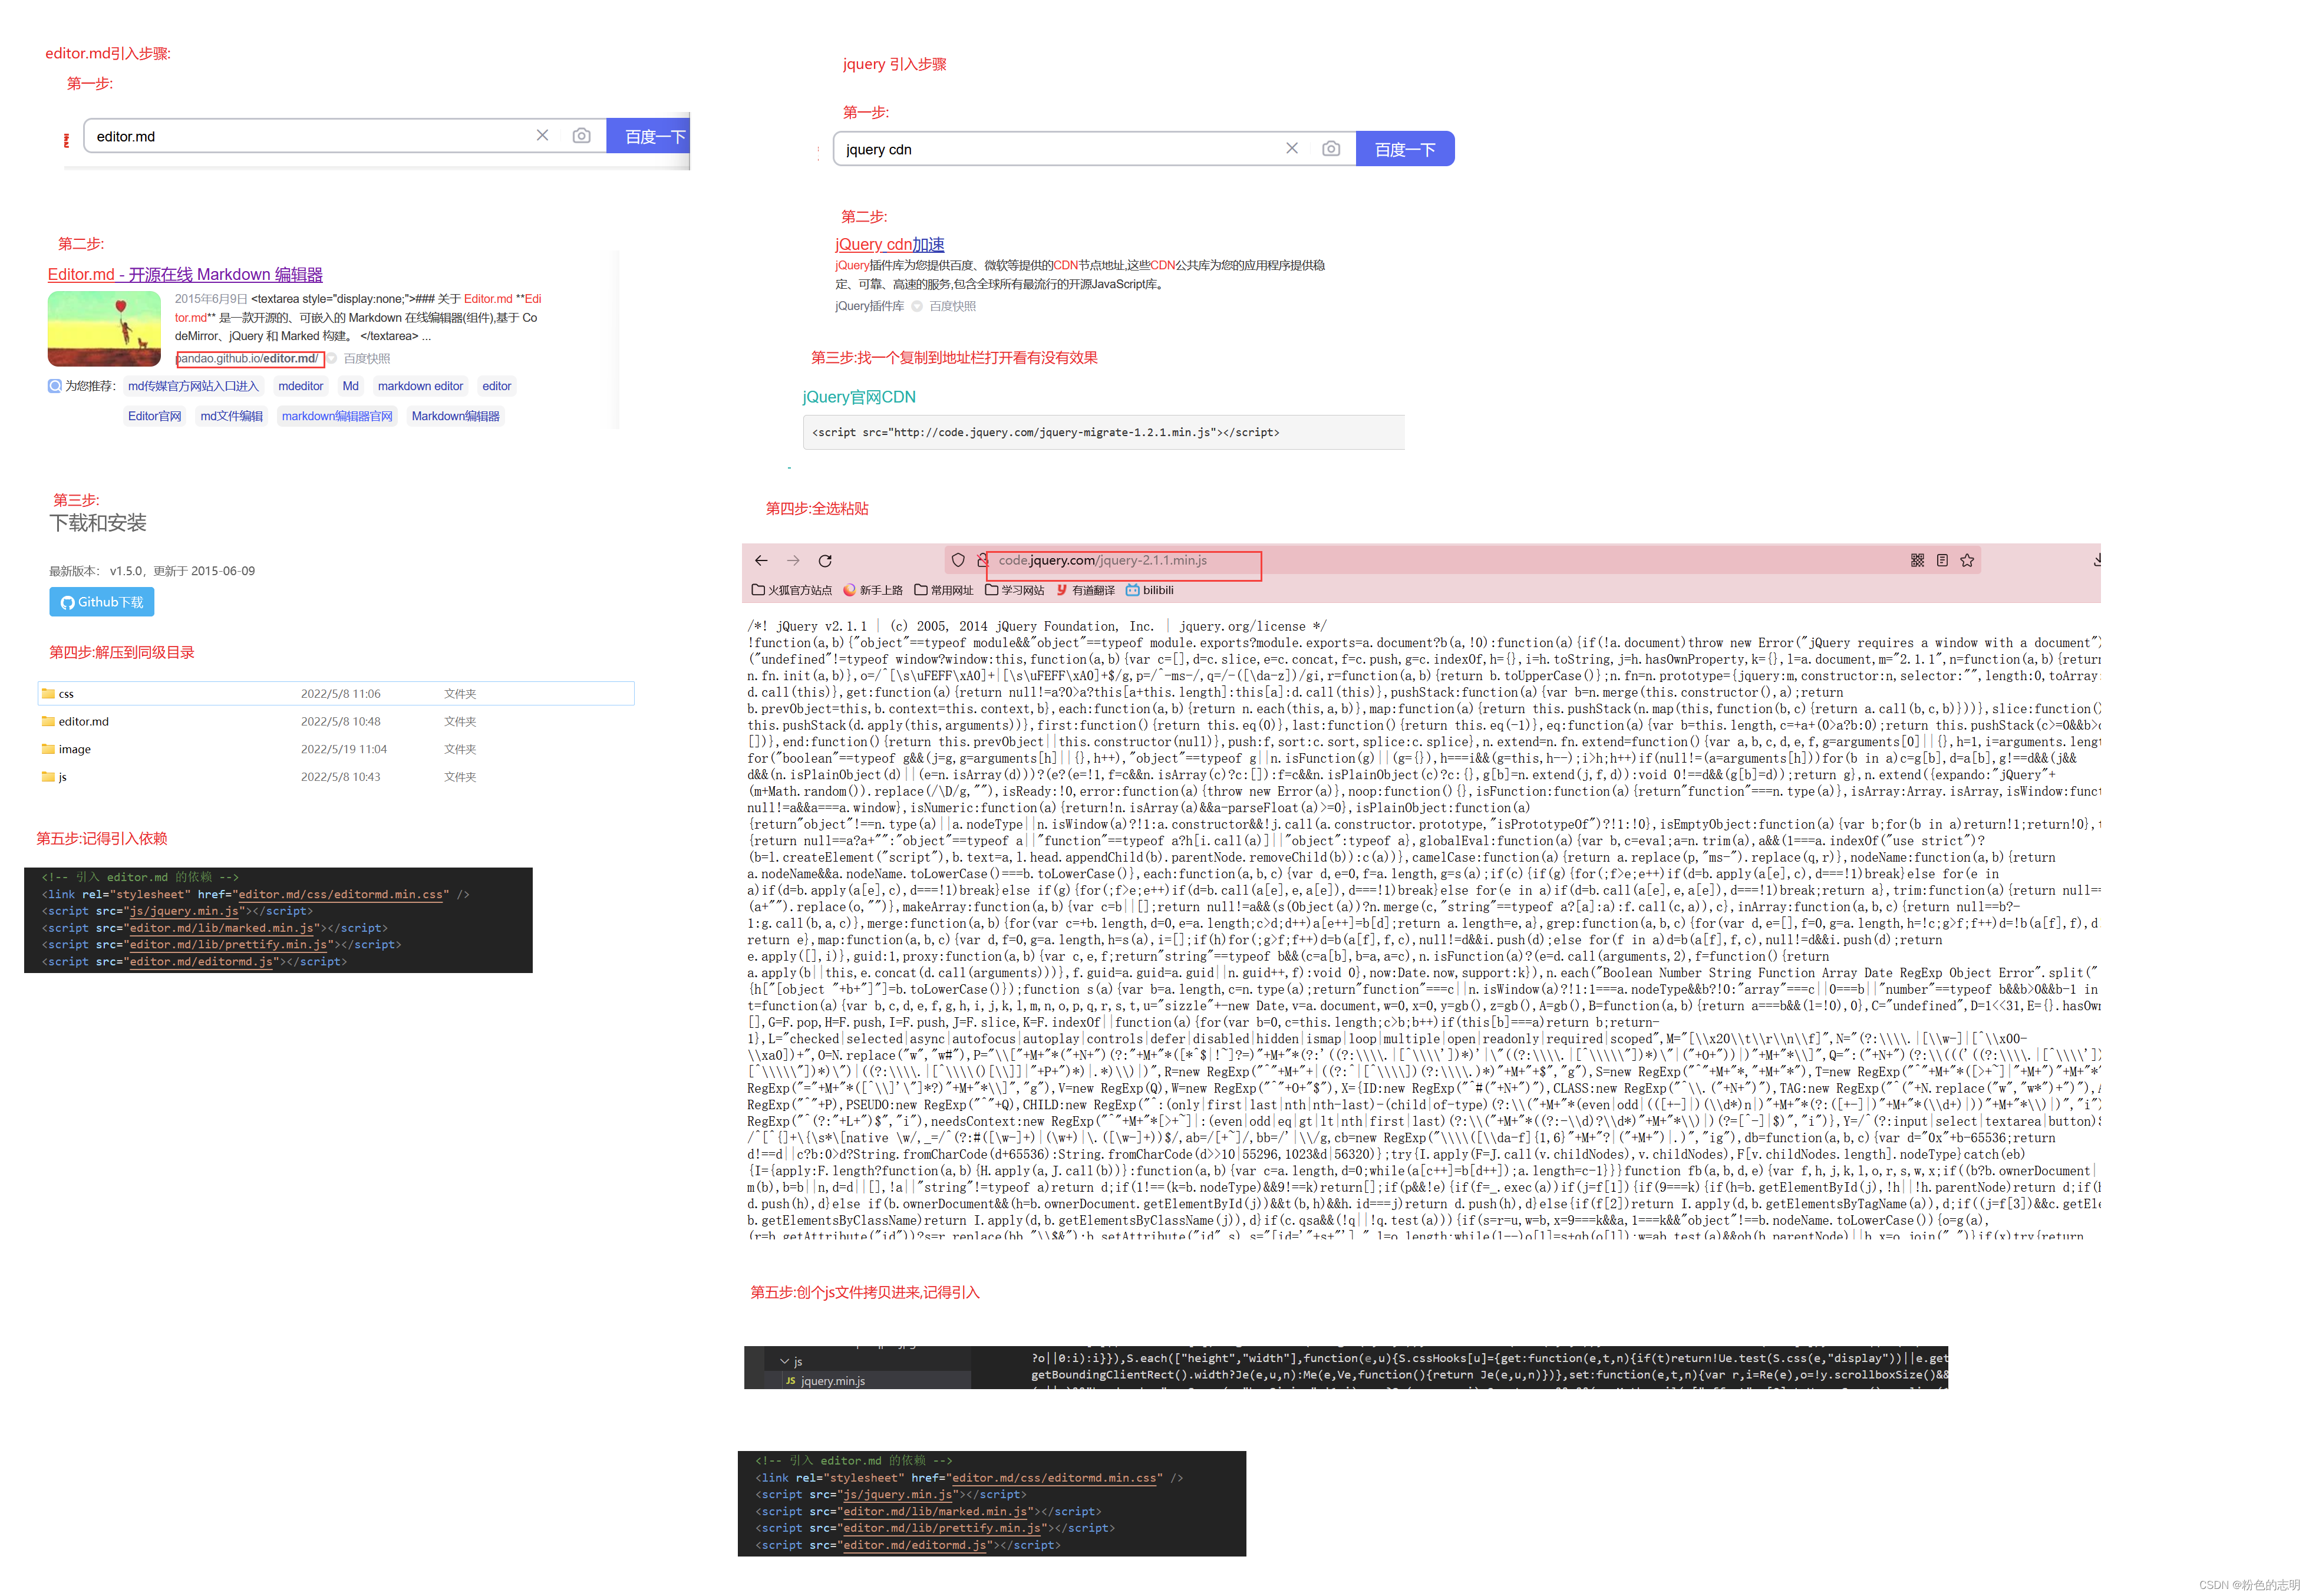
The Markdown editor we use here is implemented by a big guy, I just quoted him, and also introduced jquery
blog_edit.html
<!DOCTYPE html>
<html lang="en">
<head>
<meta charset="UTF-8">
<meta http-equiv="X-UA-Compatible" content="IE=edge">
<meta name="viewport" content="width=device-width, initial-scale=1.0">
<title>博客编辑页</title>
<link rel="stylesheet" href="css/common.css">
<link rel="stylesheet" href="css/blog_edit.css">
<!-- 引入 editor.md 的依赖 -->
<link rel="stylesheet" href="editor.md/css/editormd.min.css" />
<script src="js/jquery.min.js"></script>
<script src="editor.md/lib/marked.min.js"></script>
<script src="editor.md/lib/prettify.min.js"></script>
<script src="editor.md/editormd.js"></script>
</head>
<body>
<!-- 这是导航栏 -->
<div class="nav">
<img src="image/wallhaven-72keg9.jpg" alt="">
<span>我的博客系统</span>
<!-- 空白元素, 用来占位置 -->
<div class="spacer"></div>
<a href="blog_list.html">主页</a>
<a href="blog_edit.html">写博客</a>
<a href="blog_register.html">注销</a>
</div>
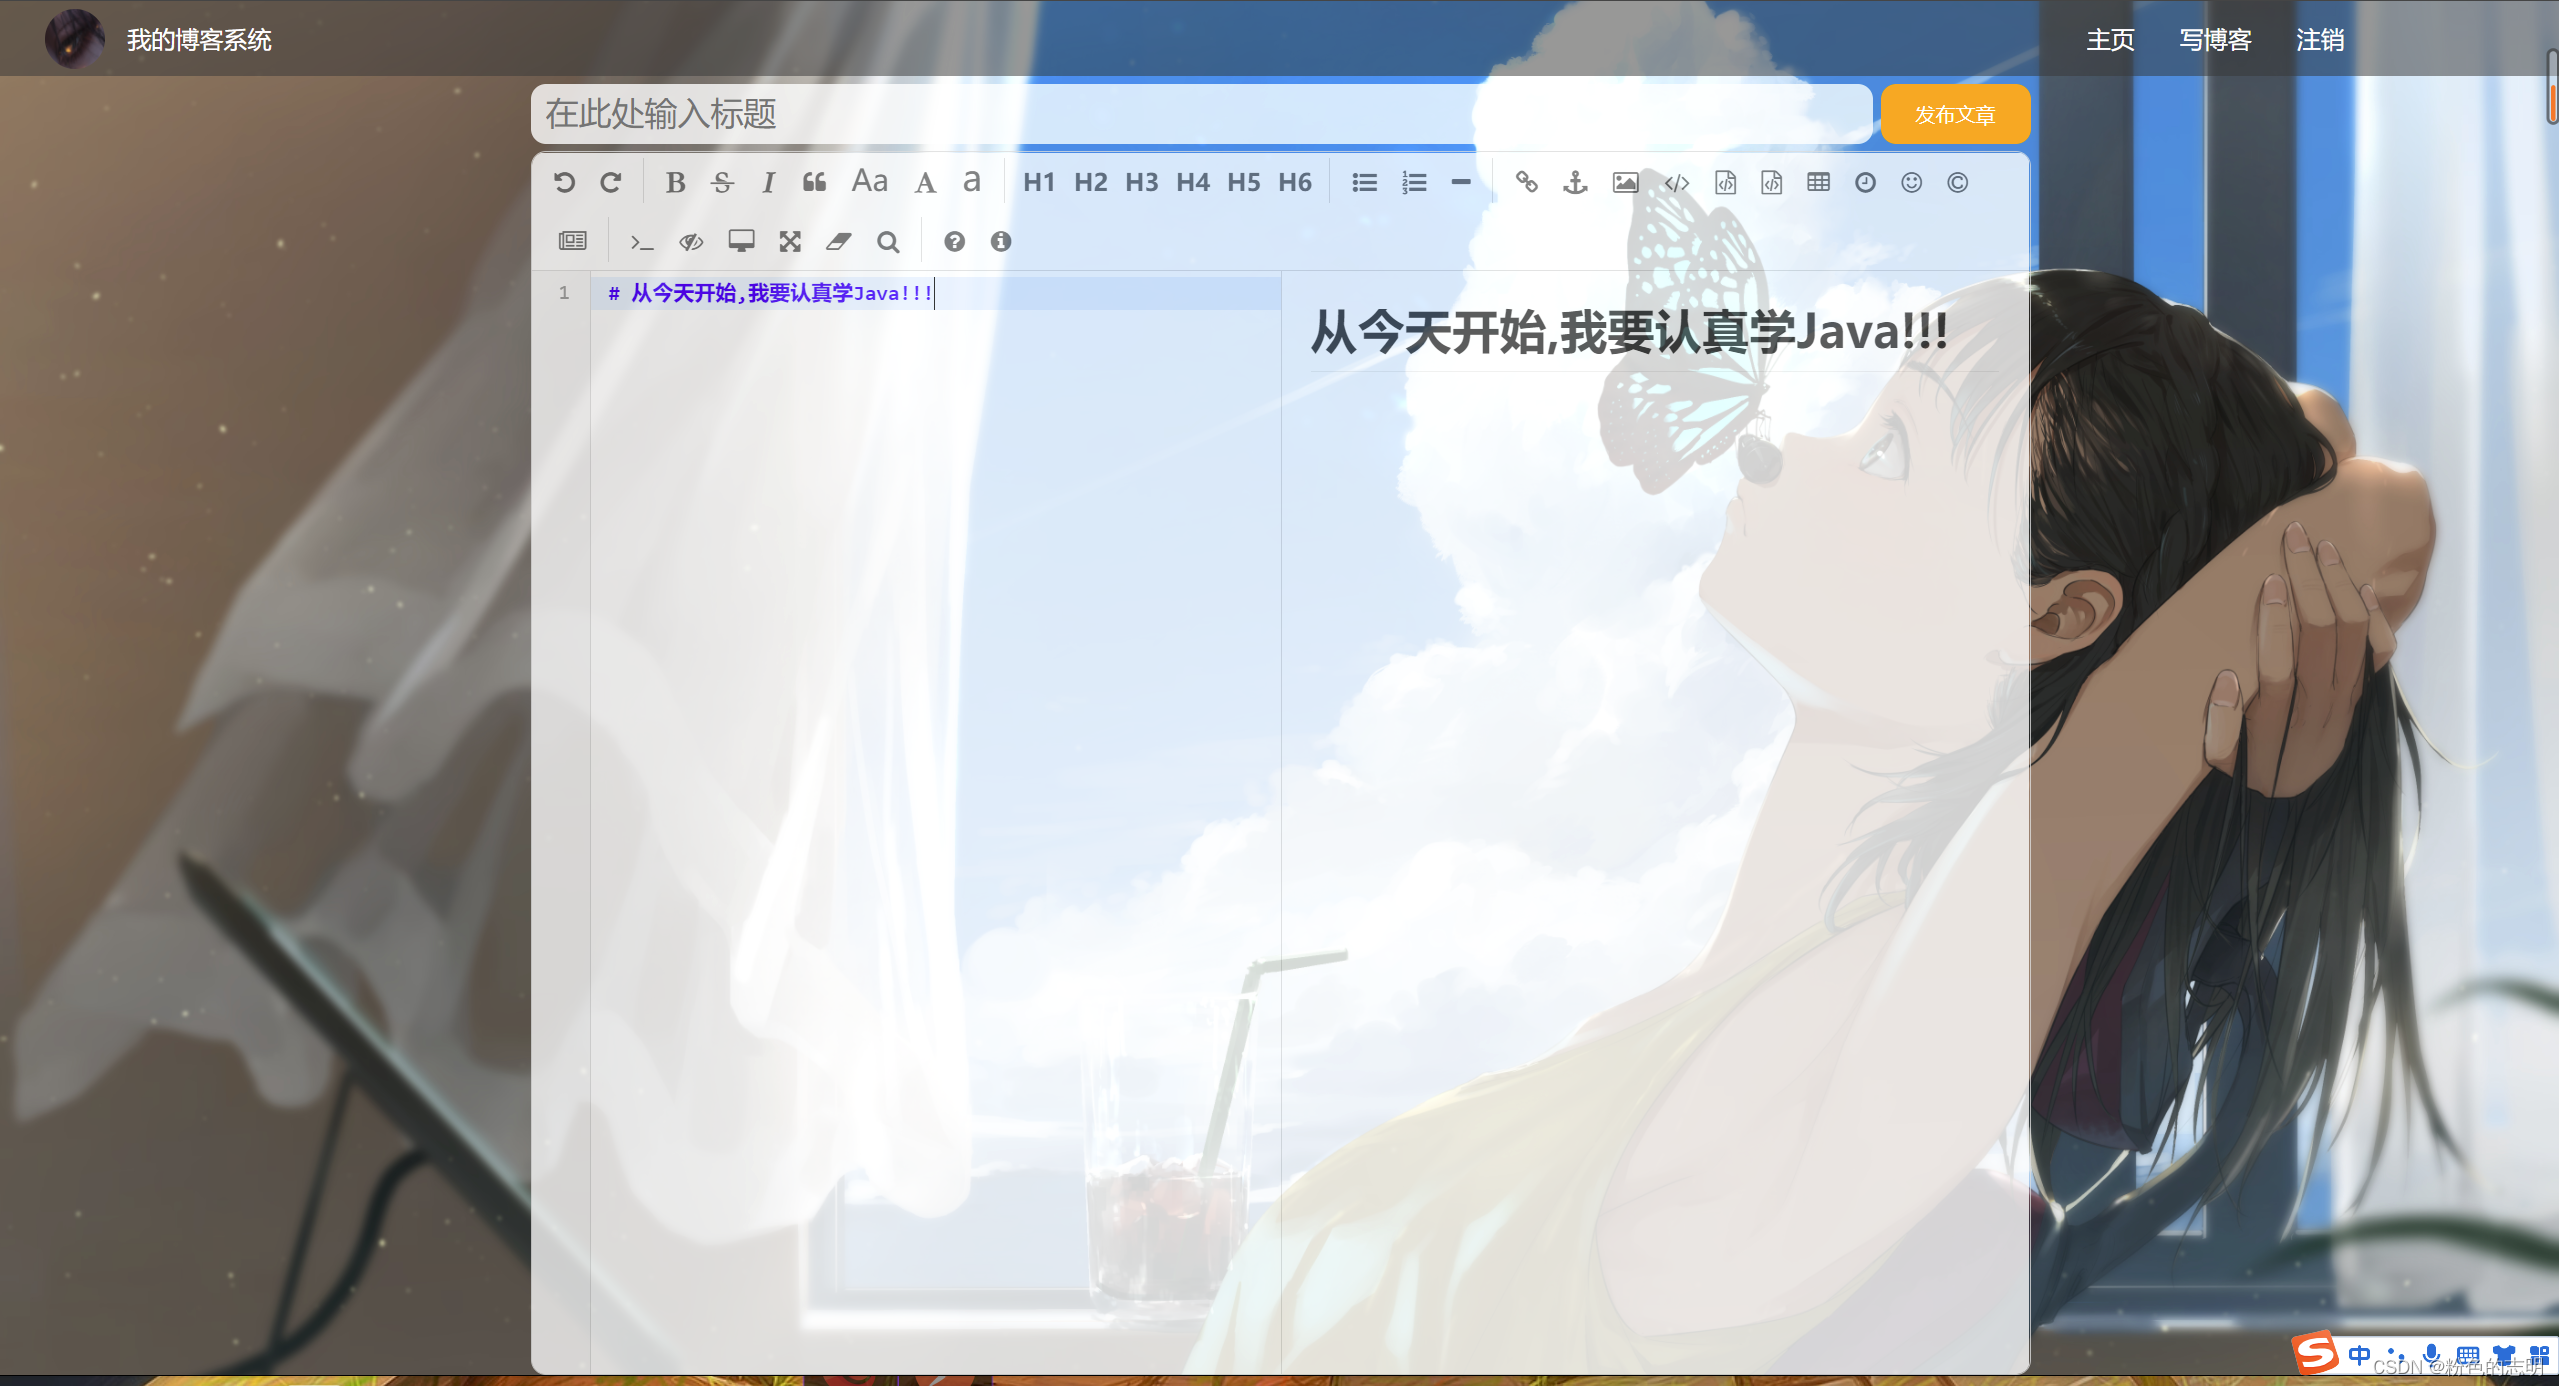
<!-- 包裹整个博客编辑页内容的顶级容器 -->
<div class="blog-edit-container">
<div class="title">
<input type="text" placeholder="在此处输入标题">
<button>发布文章</button>
</div>
<!-- 放置 md 编辑器 -->
<div id="editor">
</div>
</div>
<script>
// 初始化编辑器
let editor = editormd("editor", {
// 这里的尺寸必须在这里设置. 设置样式会被 editormd 自动覆盖掉.
width: "100%",
// 设定编辑器高度
height: "calc(100% - 50px)",
// 编辑器中的初始内容
markdown: "# 在这里写下一篇博客",
// 指定 editor.md 依赖的插件路径
path: "editor.md/lib/"
});
</script>
</body>
</html>
blog_edit.css
/* 这是博客编辑页专用的样式文件 */

html, body {
    height: 100%;
}

body {
    background-image: url(../image/wallhaven-1kmk39.jpg);
    background-repeat: no-repeat;
    background-position: center center;
    background-size: cover;
}
.blog-edit-container {
    width: 1000px;
    height: calc(100% - 50px);
    margin: 0 auto;
}

.blog-edit-container .title {
    width: 100%;
    height: 50px;

    display: flex;
    align-items: center;
    justify-content: space-between;
}

.blog-edit-container .title input {
    width: 895px;
    height: 40px;
    border-radius: 10px;
    border: none;
    outline: none;
    font-size: 22px;
    line-height: 40px;
    padding-left: 10px;

    background-color: rgba(255, 255, 255, 0.8);
}

.blog-edit-container .title button {
    width: 100px;
    height: 40px;
    border-radius: 10px;
    color: white;
    background-color: orange;
    border: none;
    outline: none;
}

.blog-edit-container .title button:active {
    background-color: #666;
}

#editor {
    border-radius: 10px;

    /* background-color: rgba(255, 255, 255, 0.8); */
    opacity: 80%;
}
At this point, I have basically finished writing, and the aesthetics are limited!! It’s good to introduce the pictures by yourself. This is my gitee address, which needs to be picked up by yourself: front-end blog system