Python crawler learning ==> Chapter 2: MongoDB environment configuration
Learning purpose:
MongoDB installation
formal steps
(This MongoDB self-starting service cannot be installed on the VMWare virtual machine. If you can do it, please enlighten me)
Step1: Introduction to MongoDB
MongoDB is a database based on distributed file storage. Written in C++ language. It aims to provide scalable high-performance data storage solutions for WEB applications.
mongoDB is a product between relational databases and non-relational databases. It is the most feature-rich and most like relational databases among non-relational databases. The data structure it supports is very loose and is a JSON-like bson format, so it can store more complex data types. The biggest feature of Mongo is that the query language it supports is very powerful. Its syntax is somewhat similar to the object-oriented query language. It can almost realize most functions similar to single-table query in relational databases, and it also supports indexing of data.
(Refer to Baidu Encyclopedia: https://baike.baidu.com/item/mongodb/60411?fr=aladdin)
Step2: MongoDB installation
- Log on to http://www.mongodb.org/ to download the software
- Double-click the MongoDB installation software, click Next to the following installation interface

- Choose a custom installation path
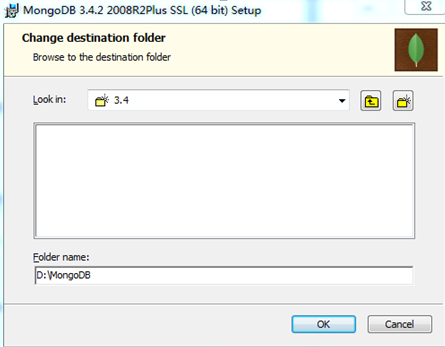
- The following installation steps select the default until the installation is complete
Step3: Enable MongoDB
- View the MongoDB executable file can open the directory: D:\MongoDB
- Create a folder to store data, create the /data/db directory under the D:\MongoDB directory
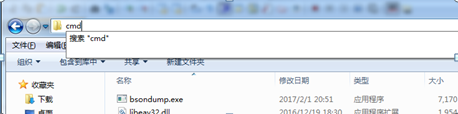
- Enter the D:\MongoDB\bin directory and enter: cmd under the file path
- Execute in the command line window that opens: mongod --dbpath D:\MongoDB\data\db

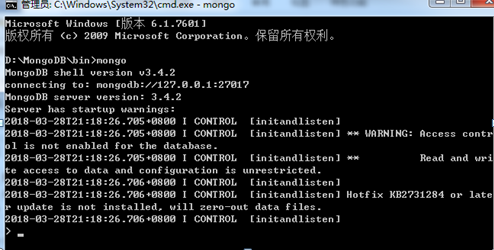
- Verify that MongoDB started successfully. Enter localhost:27017 in the browser and the
 above echo indicates that the database was started successfully.
 - Open the database command line, enter the installation D:\MongoDB\bin directory, enter cmd in the path bar, open the corresponding directory in the windows command line, and start the database command line: mongo
Step4: Configure MongoDB system service
- Create a new log directory under the path of D:\MongoDB\data, open it and create a new log file mongo.log
- Open cmd with administrator privileges and enter the path D:\MongoDB\bin
- 执行命令:mongod --bind_ip 0.0.0.0 --logpath D:\MongoDB\data\log\mongo.log --logappend --dbpath D:\MongoDB\data\db --port 27017 --serviceName "MongoDB" --serviceDisplayName "MongoDB" –install
- Start the MongoDB service

Step5: Visually view MongoDB data
- Download tool robomongo-windows-x86_64 (Mongo visualization tool)
- The tool is opened by default after installation, the hostname and port number are from the data in the configuration in the previous step
summarize:
Crawler learning, the basic stage does not need virtual machines to learn, because computer network knowledge cannot support the construction of its own learning environment
Learning purpose:
MongoDB installation
formal steps
(This MongoDB self-starting service cannot be installed on the VMWare virtual machine. If you can do it, please enlighten me)
Step1: Introduction to MongoDB
MongoDB is a database based on distributed file storage. Written in C++ language. It aims to provide scalable high-performance data storage solutions for WEB applications.
mongoDB is a product between relational databases and non-relational databases. It is the most feature-rich and most like relational databases among non-relational databases. The data structure it supports is very loose and is a JSON-like bson format, so it can store more complex data types. The biggest feature of Mongo is that the query language it supports is very powerful. Its syntax is somewhat similar to the object-oriented query language. It can almost realize most functions similar to single-table query in relational databases, and it also supports indexing of data.
(Refer to Baidu Encyclopedia: https://baike.baidu.com/item/mongodb/60411?fr=aladdin)
Step2: MongoDB installation
- Log on to http://www.mongodb.org/ to download the software
- Double-click the MongoDB installation software, click Next to the following installation interface
- Choose a custom installation path
- The following installation steps select the default until the installation is complete
Step3: Enable MongoDB
- View the MongoDB executable file can open the directory: D:\MongoDB
- Create a folder to store data, create the /data/db directory under the D:\MongoDB directory
- Enter the D:\MongoDB\bin directory and enter: cmd under the file path
- Execute in the command line window that opens: mongod --dbpath D:\MongoDB\data\db
- Verify that MongoDB started successfully. Enter localhost:27017 in the browser and the above echo indicates that the database was started successfully.
- Open the database command line, enter the installation D:\MongoDB\bin directory, enter cmd in the path bar, open the corresponding directory in the windows command line, and start the database command line: mongo
Step4: Configure MongoDB system service
- Create a new log directory under the path of D:\MongoDB\data, open it and create a new log file mongo.log
- Open cmd with administrator privileges and enter the path D:\MongoDB\bin
- 执行命令:mongod --bind_ip 0.0.0.0 --logpath D:\MongoDB\data\log\mongo.log --logappend --dbpath D:\MongoDB\data\db --port 27017 --serviceName "MongoDB" --serviceDisplayName "MongoDB" –install
- Start the MongoDB service
Step5: Visually view MongoDB data
- Download tool robomongo-windows-x86_64 (Mongo visualization tool)
- The tool is opened by default after installation, the hostname and port number are from the data in the configuration in the previous step
summarize:
Crawler learning, the basic stage does not need virtual machines to learn, because computer network knowledge cannot support the construction of its own learning environment