Implement several common topics in C language course design in the simplest way, suitable for freshmen or students who are just learning C language. Pure C projects created with the Code::Blocks compiler can also be run directly by pasting the source code into other compilers or C++ projects. Because some students have not studied data structures, they try to use traditional arrays for storage to avoid knowledge points that they have not learned, but encourage everyone to improve by themselves. In order to make the program simpler and easier to read, there is basically no fault tolerance for user input, and you can add it yourself.
Code::Blocks installation and usehttps://blog.csdn.net/qq_42283621/article/details/124055391?spm=1001.2014.3001.5501
The source code of the project will be given at the end of the article, because there are two bitmaps in it that may be used by everyone, so the project is placed on github synchronously https://github.com/Last-Malloc/blend
Article directory
demand analysis
The function is very simple. Mix the pixels of two bitmap images into a bitmap image, which is implemented by instructions. The instruction format is
blend src1.bmp 80% src2.bmp dst.bmp
blend: the name of the executable program;
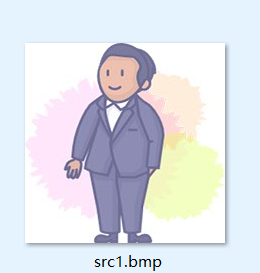
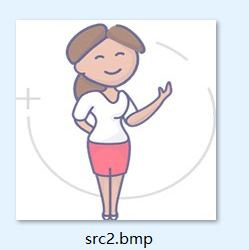
src1.bmp src2.bmp: the original image file name;
80%: the blend percentage, that is, 80% of the pixels of src1.mbp and 20% of the pixels of
src2.bmp dst.bmp: the new generated The file name of the file
can be modified except for blend.
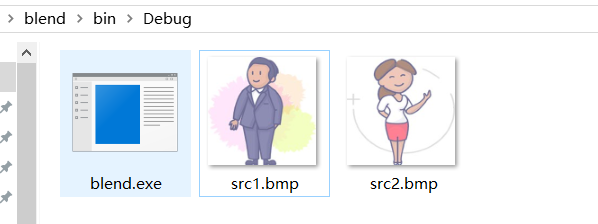
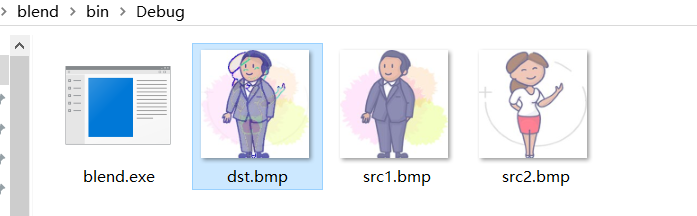
First look at the effect

Basic explanation
executable file exe
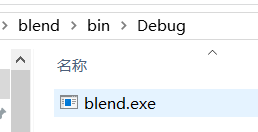
We use code::blocks to create a C project named blend. After clicking Build and Run, you can see that there is a blend.exe in the blend/bin/Debug directory, which is an executable program with the same name as the project.
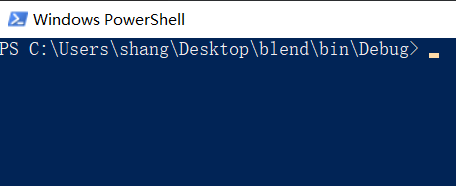
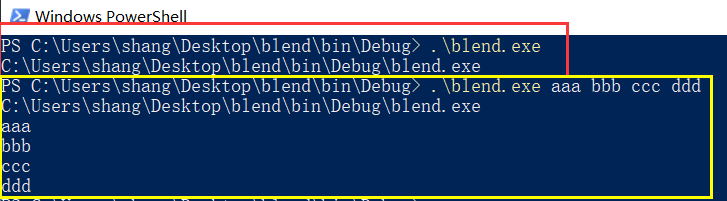
On this screen, hold down the shift key and right-click, and select "Run PowerShell window here"
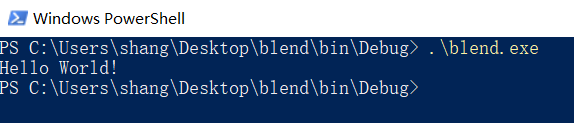
Enter ./blend.exe to run this program, that is, in addition to clicking the run button in the compiler to run the program, you can also use the command line to run the program.
It is very important to note that if you use the run button (green triangle) in Code::Blocks, the root directory is where main.cpp is located; but if you use the above command line to run, then the root directory is blend.exe where, that is, you should put the two original images next to blend.exe, then the new images generated will also appear next to blend.exe
main function with parameters
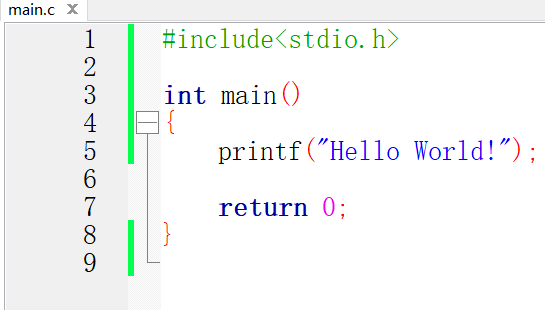
The main function of main.c we saw above is int main(), which is our most common type. In fact, the main function can take parameters, that is, int main(int argc, char* argv[]), argc is the number of parameters, and argv is argc parameters. We can output these argc parameters.
As you can see, it outputs a parameter, which is the full path of the blend.exe. You click build to run the code from a compiler such as Code::blocks. By default, there is a parameter that is the path to the executable file.

In the same way as before, open a Powershell window, then
Enter .\blend.exe, output the full path of blend.exe, that is, there is only one default parameter. The full path of blend.exe
Enter .\blend.exe aaa bbb ccc ddd, output 5 parameters, in addition to the default parameters, also There are 4 parameters we input namely aaa bbb ccc ddd
Bitmap file
https://blog.csdn.net/swordjun/article/details/108667926
https://blog.csdn.net/weixin_41336592/article/details/109710440
BMP file composition
There are 4 parts:
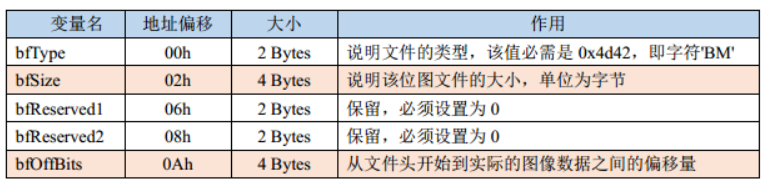
bitmap file header (bitmap-file header) 14 bytes
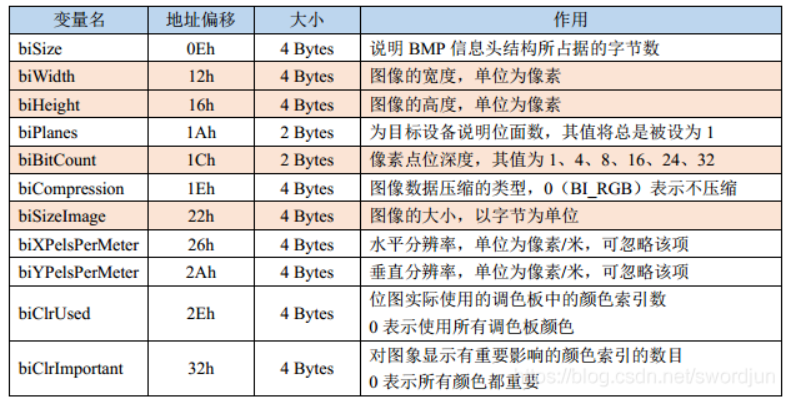
bitmap information header (bitmap-informationheader) 40 bytes
color table (color table) 24-bit true color image does not have this
color bitmap data (bits data)
This article only explains the use of 24-bit true color images
Bitmap file header:
Bitmap information header:
Two structures can be defined to read the file header and the information header. For a 24-bit true color image, the first 54 bits (0-53) are the file information (as shown in the two figures above), starting from the 54th byte (the subscript starts from 0), which is the color lattice data. The format of the color lattice data is BGR, the rows are from left to right, and the columns are from bottom to top. This may be vague. Let's take a look at the following example. For example, for a 4*4 pixel true color image, the number of pixels should be 4*4*3=48 bits. Figure 1 is the image format we intuitively think, and Figure 2 is the format it actually stores in the file.

//位图文件头
struct bfHead
{


    char bfType[2]; //检查读入的文件是否是"BM"类型
	long bfSize;
	long bfReserved;
	long bfOffBits;
};

//位图信息头
struct biHead
{


	long biSize;
	long biWidth;   //图的宽度
	long biHeight;  //图的高度
	short biPlanes;
	short biBitCount;   //像素点位深度,24则为24位真彩图
	long biCompression;
	long biSizeImage;
	long biXPelsPerMeter;
	long biYpelsPerMeter;
	long biClrUsed;
	long biClrImportant;
};
The useful fields in the bitmap file header and bitmap information header used later are the fields that are annotated in the above code
Function realization
#include <stdio.h>
#include <stdlib.h>
#include <string.h>

//存放图片的颜色点阵数据RGB
char src1[1000][1000][3];
char src2[1000][1000][3];
char dst[1000][1000][3];

//位图文件头
struct bfHead
{


    char bfType[2]; //检查读入的文件是否是"BM"类型
	long bfSize;
	long bfReserved;
	long bfOffBits;
};

//位图信息头
struct biHead
{


	long biSize;
	long biWidth;   //图的宽度
	long biHeight;  //图的高度
	short biPlanes;
	short biBitCount;   //像素点位深度,24则为24位真彩图
	long biCompression;
	long biSizeImage;
	long biXPelsPerMeter;
	long biYpelsPerMeter;
	long biClrUsed;
	long biClrImportant;
};

int main(int argc, char* argv[])
{


    struct bfHead bfSrc1, bfSrc2;
    struct biHead biSrc1, biSrc2;

    //打开2个原始文件 供读取数据
    FILE *fp1 = fopen(argv[1], "r+b");
    FILE *fp2 = fopen(argv[3], "r+b");

    //混合的百分比,例如输入 80% 则percent为0.8
    double percent = 0;
    for (int i = 0; i < strlen(argv[2]) - 1; ++i)
        percent = percent * 10 + (argv[2][i] - '0');
    percent /= 100;

    //打开目标文件 供写入数据
    //这个文件可能是没有的,fopen会创建一个新的文件;如果该文件已经存在,fopen会将其覆盖掉
    FILE *fp3 = fopen(argv[4], "w+b");

    //读取位图文件头 位图信息头
    fread(&bfSrc1, 14, 1, fp1);
    fread(&bfSrc2, 14, 1, fp2);
    fread(&biSrc1, 40, 1, fp1);
    fread(&biSrc2, 40, 1, fp2);

    //检查是否为BM类型 是否为24位真彩图 照片尺寸是否相等
    if (bfSrc1.bfType[0]=='B'&& bfSrc1.bfType[1]=='M' && bfSrc2.bfType[0]=='B' && bfSrc2.bfType[1]=='M'
        && biSrc1.biBitCount == 24 && biSrc2.biBitCount == 24
        && biSrc1.biWidth == biSrc2.biWidth && biSrc1.biHeight == biSrc2.biHeight)
    {


        //读取颜色点阵数据
        //遍历列 从下向上
        for (int y = biSrc1.biHeight - 1; y >= 0; --y)
        {


            //遍历行 从前向后
            for (int x = 0; x < biSrc1.biWidth; ++x)
            {


                //文件数据流中按照BGR的顺序存储,我们以RGB的顺序存储
                for (int k = 2; k >= 0; --k)
                {


                    fread(&src1[x][y][k], 1, 1, fp1);
                    fread(&src2[x][y][k], 1, 1, fp2);
                }
            }
        }

        //混合像素到目标文件数据
        for (int y = biSrc1.biHeight - 1; y >= 0; --y)
        {


            for (int x = 0; x<biSrc1.biWidth; ++x)
            {


                for (int k = 2; k >= 0; --k)
                    dst[x][y][k] = src1[x][y][k] * percent + src2[x][y][k] * (1 - percent);
            }
        }

        //写目标文件
        fwrite(&bfSrc1,14,1,fp3);
        fwrite(&biSrc1,40,1,fp3);
        for (int y = biSrc1.biHeight - 1; y >= 0; --y)
        {


            for (int x = 0; x<biSrc1.biWidth; ++x)
            {


                for (int k = 2; k >= 0; --k)
                    fwrite(&dst[x][y][k], 1, 1, fp3);
            }
        }

        printf("执行成功\n");
    }

    //关闭文件
    fclose(fp1);
    fclose(fp2);
    fclose(fp3);

    return 0;
}
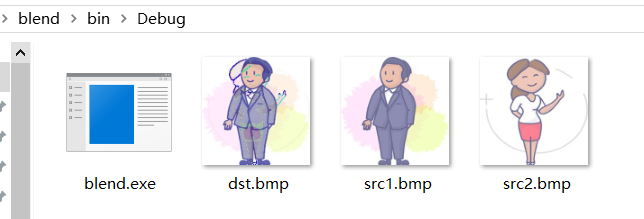
Overall effect
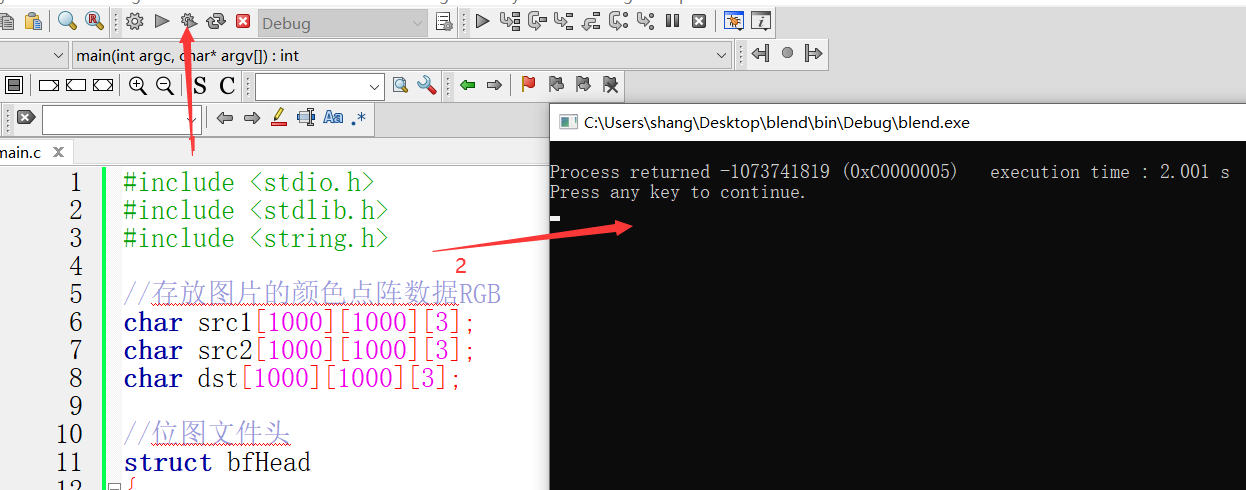
After saving, click build and run, and find that the return value is wrong, this is normal, don't care
In the blend/bin/Debug directory, hold down the shift key and right-click, select "Run PowerShell window here", and enter the following:

Before pointing to and after execution, the files under the folder are as follows: