EMWI
Article directory
foreword
Sometimes we want to display some pictures on the button to distinguish between on and off, such as turning on the LED in the previous section. When using the BUTTON control that comes with emwin, the state of the BUTTON is the same when turning on and off the LED. To judge the status of the LED light at this time, we need to check the on and off of the LED to judge. emwin provides an API function to display bitmaps on BUTTON, then we can distinguish and close these two states by displaying different bitmaps when opening and closing
1. Make a bitmap C file
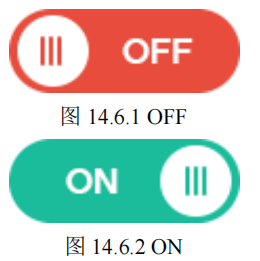
First of all, we definitely need to make two bitmap files. When it is closed, we display the picture shown in Figure 14.6.1 on the BUTTON, and when it is opened, the picture shown in Figure 14.6.2 is displayed. The formats of these two pictures are BMP.
How to generate a .c file can be seen in the previous blog.
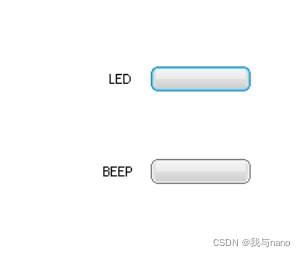
2. GUIBulider design interface
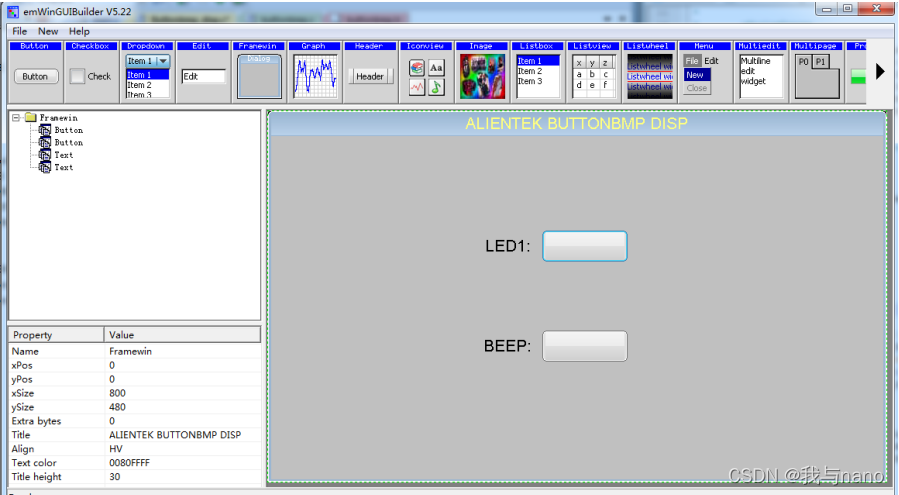
The interface designed with GUIBulider uses a control that we have not used yet: TEXT, we use the TEXT control to display the two prompt information "LED1:" and "BEEP:". The button in the picture is still the default button type of emwin. If you want to modify it to a bitmap, you need to modify the generated C file. Note: There are no characters displayed on the BUTTON control, and GUIBulider only generates a general program frame
in the buttonbmp.c file . It is to copy the two bitmap C files generated earlier into a C file. The buttonbmp.h file mainly declares two GUI_BITMAP structure variables: bmBUTTONOFF and bmBUTTONON, so that we can call these two structures in other files. The body variable can be simply understood as these two structure variables are the pictures OFF and ON.
#define ID_FRAMEWIN_0 (GUI_ID_USER + 0x00)
#define ID_BUTTON_0 (GUI_ID_USER + 0x01)
#define ID_BUTTON_1 (GUI_ID_USER + 0x02)
#define ID_TEXT_0 (GUI_ID_USER + 0x03)
#define ID_TEXT_1 (GUI_ID_USER + 0x04)
GUI_BITMAP buttonbmp_tab[2];
//对话框资源表
static const GUI_WIDGET_CREATE_INFO _aDialogCreate[] =
{


{

     FRAMEWIN_CreateIndirect, "Framewin", ID_FRAMEWIN_0, 0, 0, 800, 480, 0, 0x64, 0 },
{

     BUTTON_CreateIndirect, "Button", ID_BUTTON_0, 350, 122, 110, 40, 0, 0x0, 0 },
{

     BUTTON_CreateIndirect, "Button", ID_BUTTON_1, 350, 251, 110, 40, 0, 0x0, 0 },
{

     TEXT_CreateIndirect, "Text", ID_TEXT_0, 266, 132, 80, 20, 0, 0x64, 0 },
{

     TEXT_CreateIndirect, "Text", ID_TEXT_1, 266, 261, 80, 20, 0, 0x64, 0 },
};
//对话框回调函数
static void _cbDialog(WM_MESSAGE * pMsg)
{


WM_HWIN hItem;
int NCode;
int Id;
static u8 ledflag=0;
static u8 beepflag=0;
switch (pMsg->MsgId)
{


case WM_PAINT: (1)
GUI_SetBkColor(GUI_WHITE);
GUI_Clear();
break;
case WM_INIT_DIALOG:
//初始化对话框
hItem = pMsg->hWin;
FRAMEWIN_SetTitleHeight(hItem, 30);
FRAMEWIN_SetText(hItem, "ALIENTEK BUTTONBMP DISP");
FRAMEWIN_SetFont(hItem, GUI_FONT_24_ASCII);
FRAMEWIN_SetTextAlign(hItem, GUI_TA_HCENTER | GUI_TA_VCENTER);
FRAMEWIN_SetTextColor(hItem, 0x0000FFFF);
//初始化 BUTTON0
hItem = WM_GetDialogItem(pMsg->hWin, ID_BUTTON_0);
BUTTON_SetBitmapEx(hItem,0,&buttonbmp_tab[0],0,0); (2)
BUTTON_SetText(hItem, "");
//初始化 BUTTON1
hItem = WM_GetDialogItem(pMsg->hWin, ID_BUTTON_1);
BUTTON_SetBitmapEx(hItem,0,&buttonbmp_tab[0],0,0); (3)
BUTTON_SetText(hItem, "");
//初始化 TEXT0
hItem = WM_GetDialogItem(pMsg->hWin, ID_TEXT_0);
TEXT_SetTextAlign(hItem, GUI_TA_HCENTER | GUI_TA_VCENTER);
TEXT_SetFont(hItem, GUI_FONT_32_ASCII);
TEXT_SetText(hItem, "LED1:");
//初始化 TEXT1
hItem = WM_GetDialogItem(pMsg->hWin, ID_TEXT_1);
TEXT_SetTextAlign(hItem, GUI_TA_HCENTER | GUI_TA_VCENTER);
TEXT_SetFont(hItem, GUI_FONT_32_ASCII);
TEXT_SetText(hItem, "BEEP:");
break;
case WM_NOTIFY_PARENT:
Id = WM_GetId(pMsg->hWinSrc);
NCode = pMsg->Data.v;
switch(Id)
{


case ID_BUTTON_0: //BUTTON_0 的通知代码,控制 LED1
hItem = WM_GetDialogItem(pMsg->hWin, ID_BUTTON_0);
switch(NCode)
{


case WM_NOTIFICATION_CLICKED:
break;
case WM_NOTIFICATION_RELEASED: //按钮被按下并释放
LED1=~LED1; //LED1 反转
ledflag=~ledflag;
BUTTON_SetBitmapEx(hItem,0,ledflag?\ (4)
&buttonbmp_tab[1]:&buttonbmp_tab[0],0,0);
break;
}
break;
case ID_BUTTON_1: //BUTTON_1 的通知代码,控制 BEEP
hItem = WM_GetDialogItem(pMsg->hWin, ID_BUTTON_1);
switch(NCode)
{


case WM_NOTIFICATION_CLICKED:
break;
case WM_NOTIFICATION_RELEASED:
BEEP=~BEEP; //蜂鸣器反转
beepflag=~beepflag;
BUTTON_SetBitmapEx(hItem,0,beepflag?\ (5)
&buttonbmp_tab[1]:&buttonbmp_tab[0],0,0);
break;
}
break;
}
break;
default:
WM_DefaultProc(pMsg);
break;
} }
//创建一个对话框
WM_HWIN CreateFramewin(void)
{


WM_HWIN hWin;
buttonbmp_tab[0]=bmBUTTONOFF;
buttonbmp_tab[1]=bmBUTTONON;
hWin = GUI_CreateDialogBox(_aDialogCreate, GUI_COUNTOF(_aDialogCreate)\
, _cbDialog, WM_HBKWIN, 0, 0);
return hWin;
}
//BUTTON 按钮上显示位图
void Buttonbmp_Demo(void)
{


WM_HWIN hWin;
hWin=CreateFramewin();
while(1)
{


GUI_Delay(100);
} }
(1) WM_PAINT message, there is no such message in the C file generated by GUIBulider, here we need to add it manually, when the WM_PAINT message is received, the background color of the dialog box is refreshed to white.
(2) When initializing BUTTON0, call the function BUTTON_SetBitmapEx() to display the bitmap OFF on BUTTON.
(3) When initializing BUTTON1, call the function BUTTON_SetBitmapEx() to display the bitmap OFF on BUTTON.
(4), according to the different ledflag call function BUTTON_SetBitmapEx() to display OFF or ON on BUTTON.
(5), according to the different beepflag call function BUTTON_SetBitmapEx() to display OFF or ON on BUTTON.

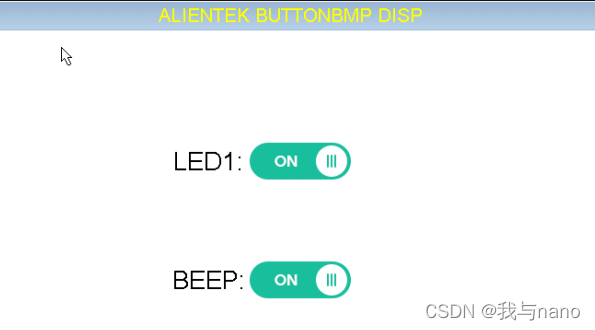
Click the switch of LED1 and BEEP, the display is as shown in Figure 14.6.9, and LED1 lights up and the buzzer sounds.