Use Arduino to collect DHT11 temperature and humidity serial display
one. Introduction
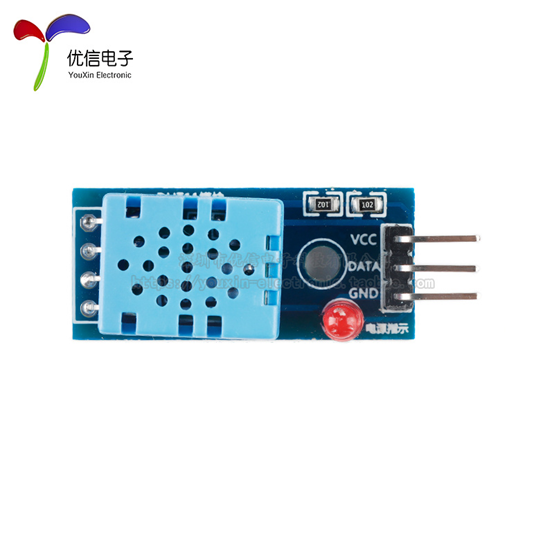
DHT11 is a digital temperature and humidity sensor, DHT11 is a temperature and humidity composite sensor with calibrated digital signal output. It applies special digital module acquisition technology and temperature and humidity sensing technology to ensure the product has reliable stability, fast response and strong anti-interference ability. The sensor includes a polymer resistance moisture sensing element and an NTC temperature measuring element, and is connected with a high-performance 8-bit single-chip microcomputer, and communicates with the microprocessor through a single bus, only one line is required.
two. DHT11 related parameters
DHT11 digital humidity and temperature sensor adopts single bus data format. That is, a single data pin port completes input and output bidirectional transmission. Its data packet consists of 5Byte (40Bit). The data is divided into a fractional part and an integer part, and the specific format is described below.
A complete data transfer is 40bit, high bit first out.
Data format: 8bit humidity integer data + 8bit humidity decimal data + 8bit temperature integer data + 8bit temperature decimal data + 8bit checksum
The checksum data is the addition of the first four bytes.
Sensor data output is unencoded binary data. Data (humidity, temperature, integer, decimal)
should be handled separately. If, at a certain time, the following 5Byte data is read from the sensor:
The calculation method of temperature and humidity can be obtained from the above data format
humi (humidity)= byte4 . byte3=45.0 (%RH)
temp (temperature)= byte2 . byte1=28.0 ( ℃)
jiaoyan (check)= byte4+ byte3+ byte2+ byte1=73( =humi+temp) (check is correct)
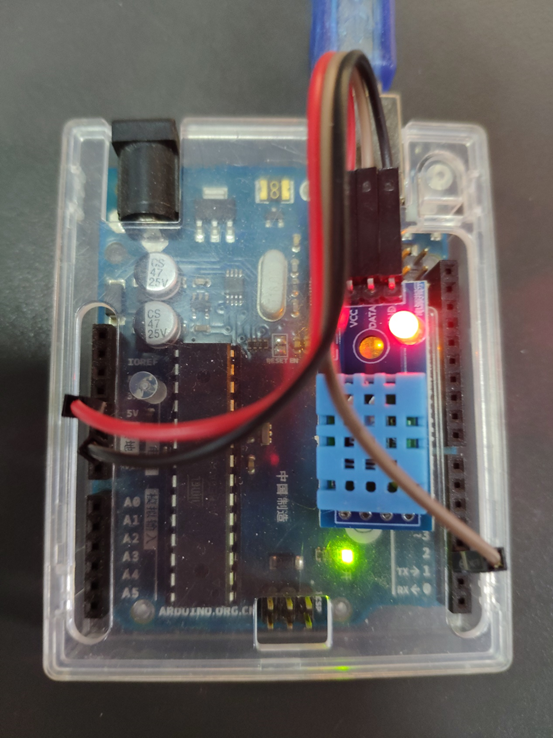
three. wiring
Direct 5V power supply DATA connected to digital 2 port
Four. Configure Arduino and download program verification
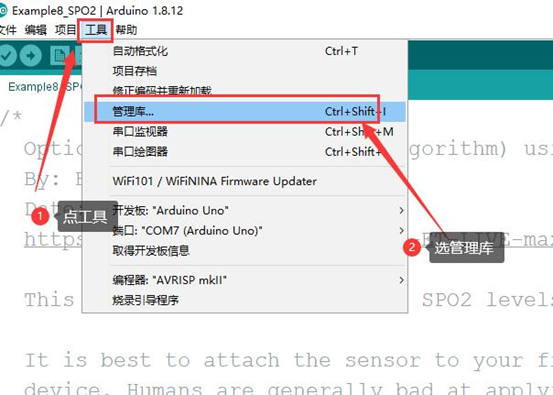
1. Open Arduino_IDE, click Tools - Manage Libraries
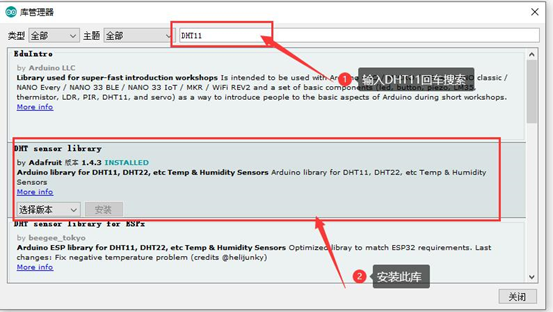
2. Enter DHT11 and press Enter to search, and then install the DHT sensor library library
3. Click on file - example - DHT sensor library - DHTtester

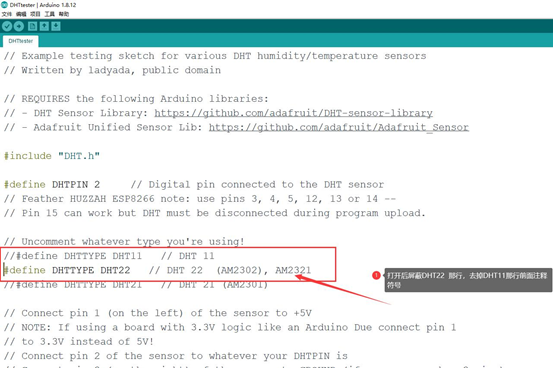
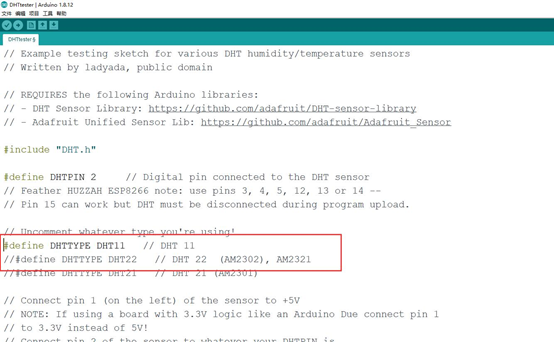
4. After opening the sample program, because the default is DHT22, it needs to be changed to DHT11, so here the macro definition shields DHT22, and removes the comment in front of DHT11.
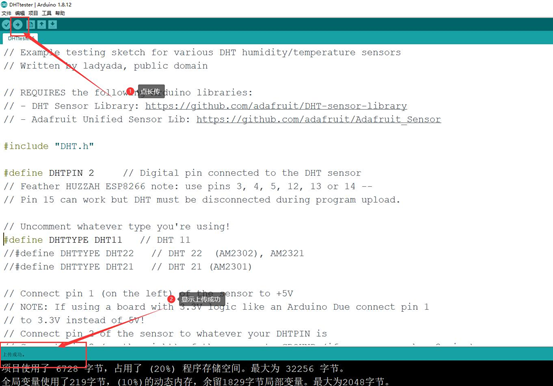
5. Click upload and wait for the upload to succeed
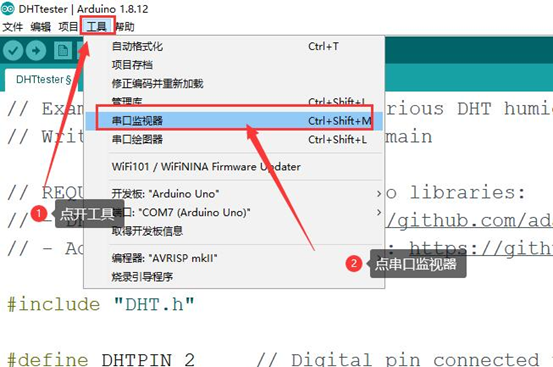
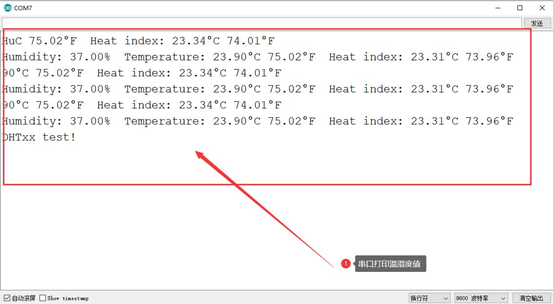
6. Click on Tools-Serial Monitor, a pop-up window, the default settings are fine, you can see the sensor test results after the pop-up
five. Precautions
1. There is no phenomenon or instability after plugging in and uploading. This may be caused by poor wiring connection. It is recommended to change the cable and reconnect.
2. If this routine cannot be found, it may be that the library is not installed, or the library is not installed successfully.