Scaffolding to run Angular projects
Step 1: Install Angular Scaffolding
npm install @angular/cli
Step 2: Create a Project Using Angular Scaffolding
ng new xxx
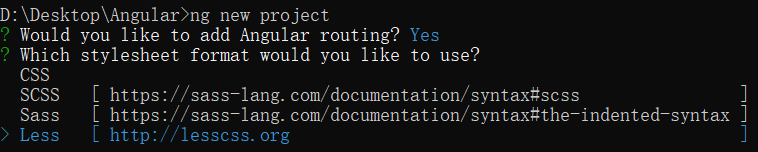

创建成功!!!
Step 3: Run the project
Execute under the project pathng serve --open
--open表示会自动打开浏览器


项目运行完成!!!
Step 4: Understand the project structure

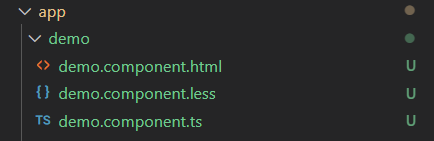
Step 5: Try to create a demo component
1、在app文件夹下创建demo组件文件夹,包括html、less以及ts三个文件。
2、在demo.component.ts文件中编写组件代码
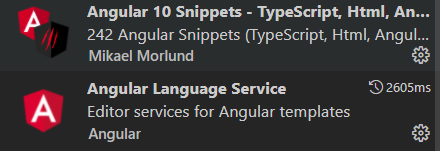
Here you can use extensions to complete the function of quickly writing template code. As shown below:
注意修改组件名称!!!
/*demo.component.ts*/
import {

     Component, OnInit } from '@angular/core';

@Component({


    //组件名
    selector: 'app-demo',
    //当前组件关联的html地址
    templateUrl: './demo.component.html',
    //当前组件关联的css地址
    styleUrls: ['./demo.component.less']
})
export class DemoComponent implements OnInit {


    constructor() {

     }

    ngOnInit(): void {

     }
}
<!--demo.component.html-->
<h1>Hello World</h1>
/*demo.component.less*/
h1{


    color: red;
}
这样组件设计就完成了!!!
接下来就是在app.module.ts文件中对组件进行注册:
import {

     NgModule } from '@angular/core';
import {

     BrowserModule } from '@angular/platform-browser';

import {

     AppRoutingModule } from './app-routing.module';
import {

     AppComponent } from './app.component';
import {

     DemoComponent } from './demo/demo.component';

@NgModule({


  declarations: [
    AppComponent,DemoComponent
  ],
  imports: [
    BrowserModule,
    AppRoutingModule
  ],
  providers: [],
  bootstrap: [AppComponent]
})
export class AppModule {

     }
最后在app.component.html中对demo组件进行展示:
<!--app.component.html-->
<app-demo></app-demo>
<app-demo></app-demo>
<app-demo></app-demo>

组件创建和展示成功!!!
The above is the first day: build the environment, use the scaffolding to create and run the content of the Angular project, and pay attention to the " Angular Learning " column.
I will share the common problems in my usual projects and the knowledge of the written test and interview with you on CSDN, and make progress together. Come on.