Android studio case-start an activity interface
table of Contents
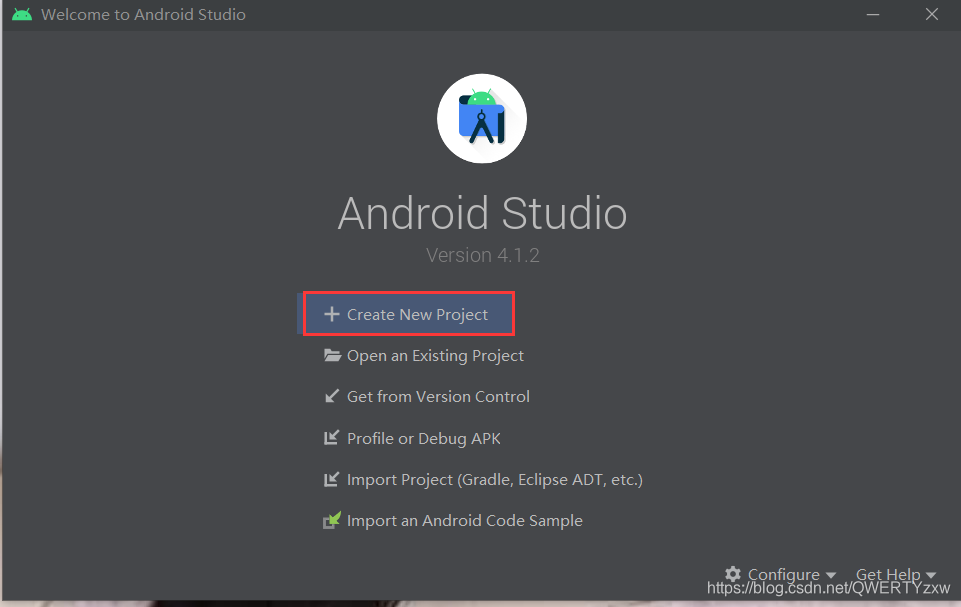
1. Create a project
Open Android studio, create a project named demo,
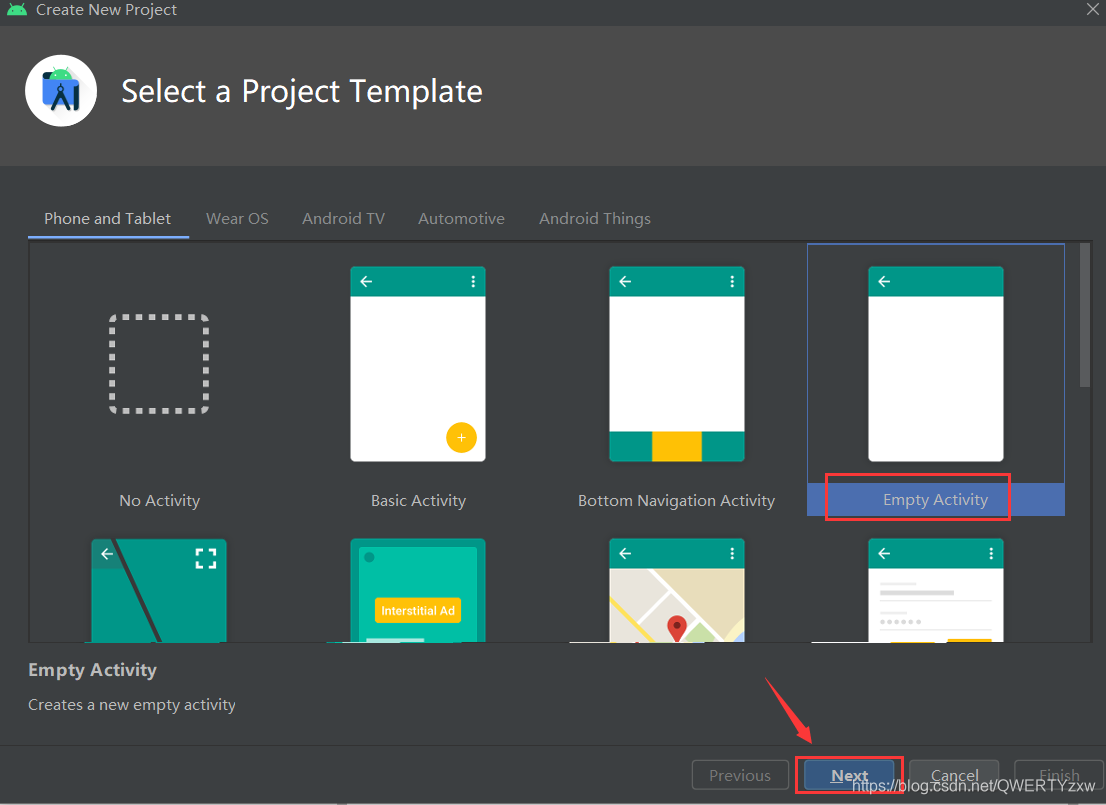
select a blank project, click next to
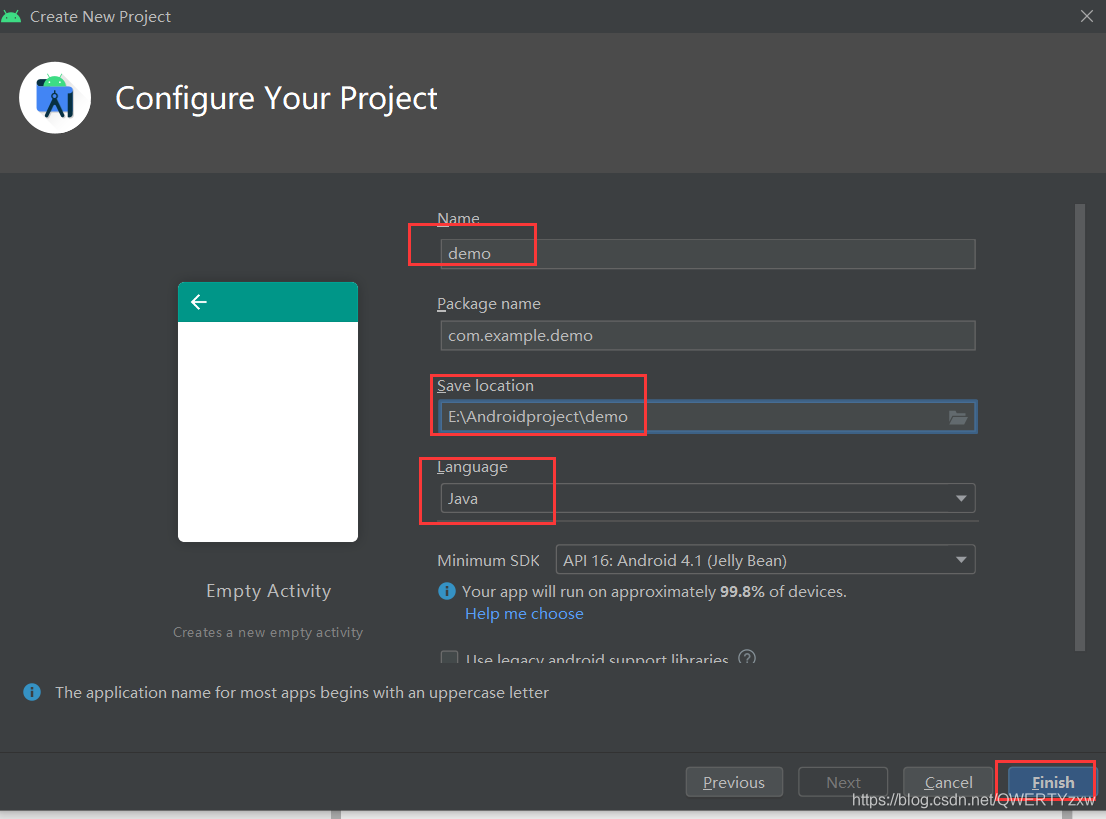
complete the project information, customize the path, select Java as the language, and click finish to
wait for the creation of the workspace (the first time will be a bit slow, the later will be faster) , The interface creation is as shown in the figure.
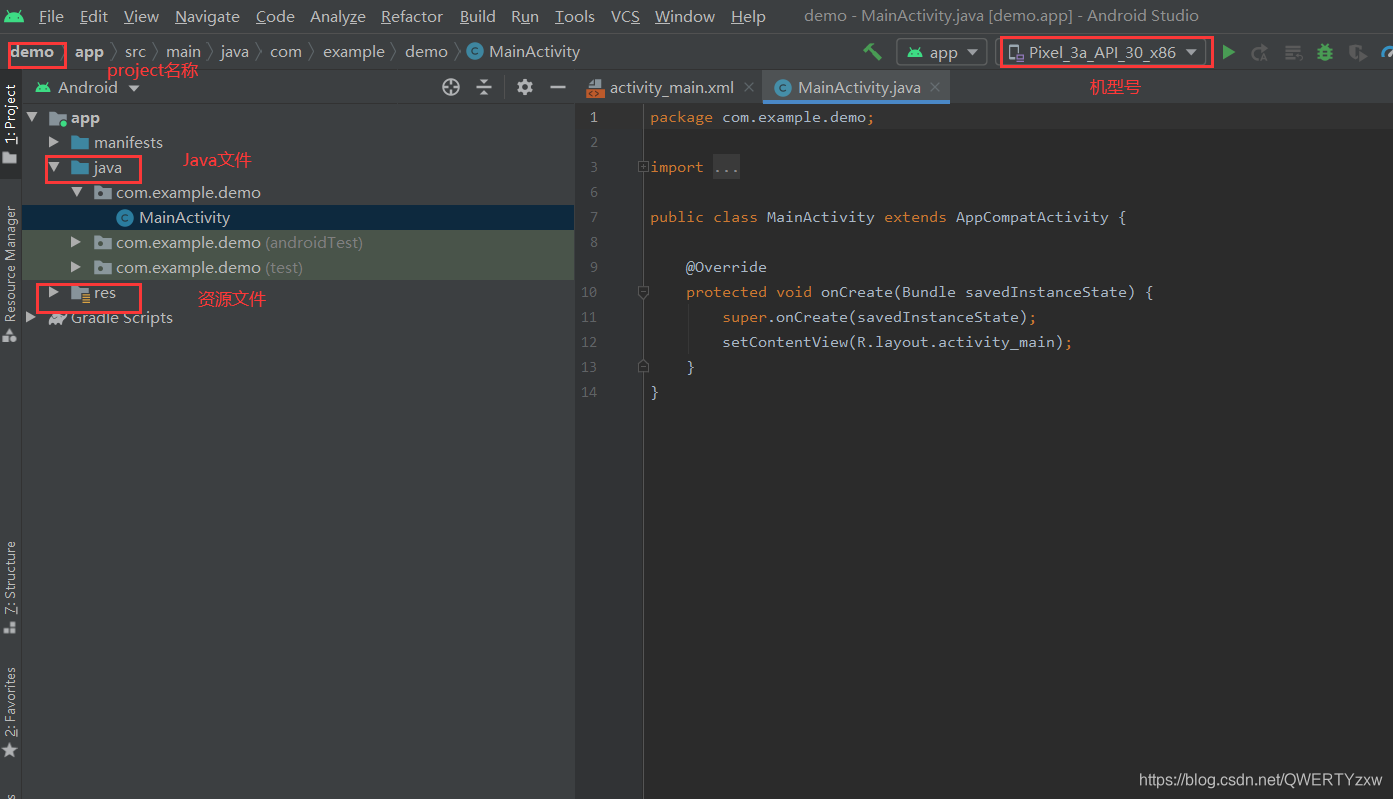
At this point, the project creation is complete. Next, let's see how to open the activity interface.
Second, start the activity interface
1. Create a new activity
In the Java file, create a new activity
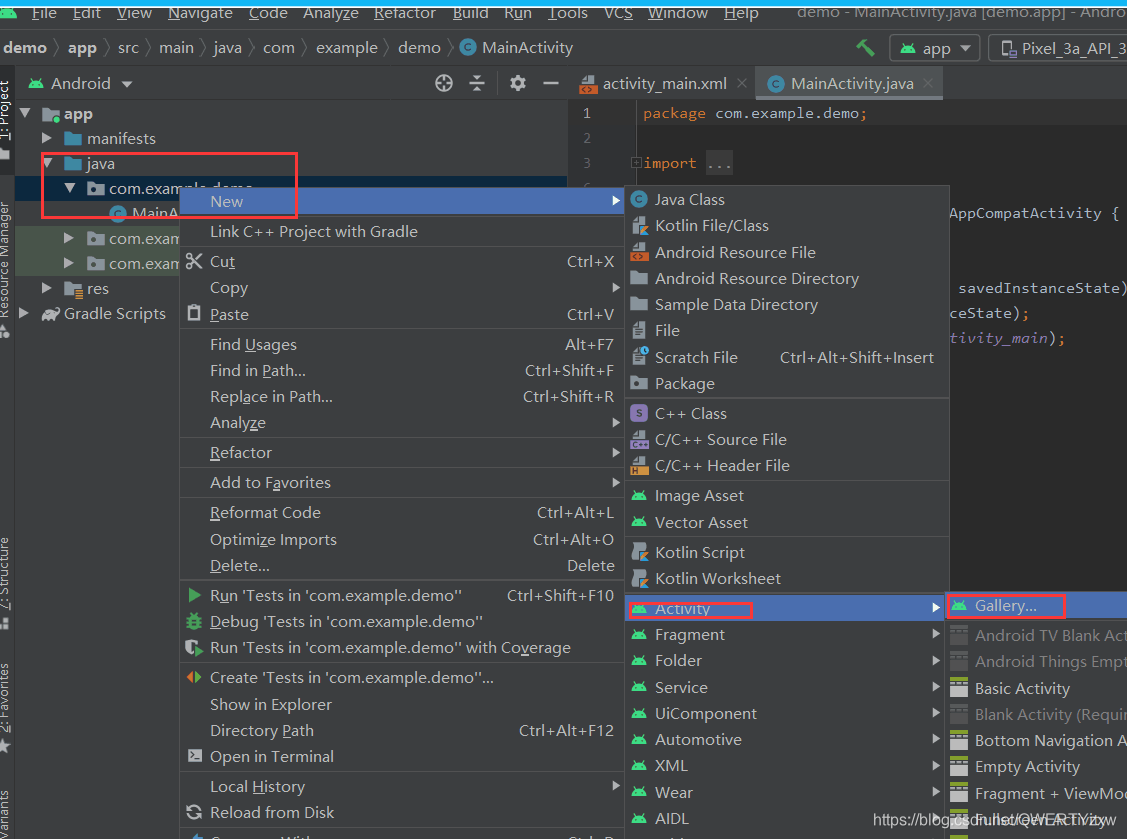
Note: The newly created activity is under the com.example.demo file, do not select new in the mainactivity file.
Select the blank interface to
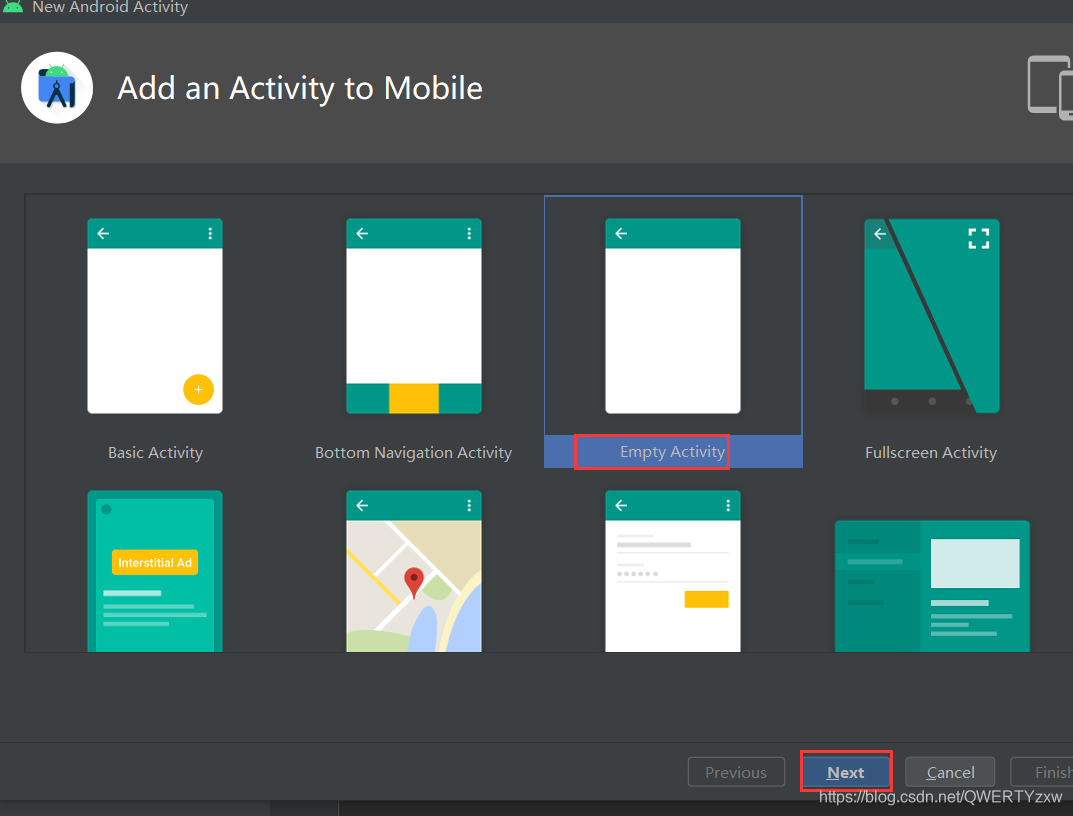
complete the relevant information, click the finish
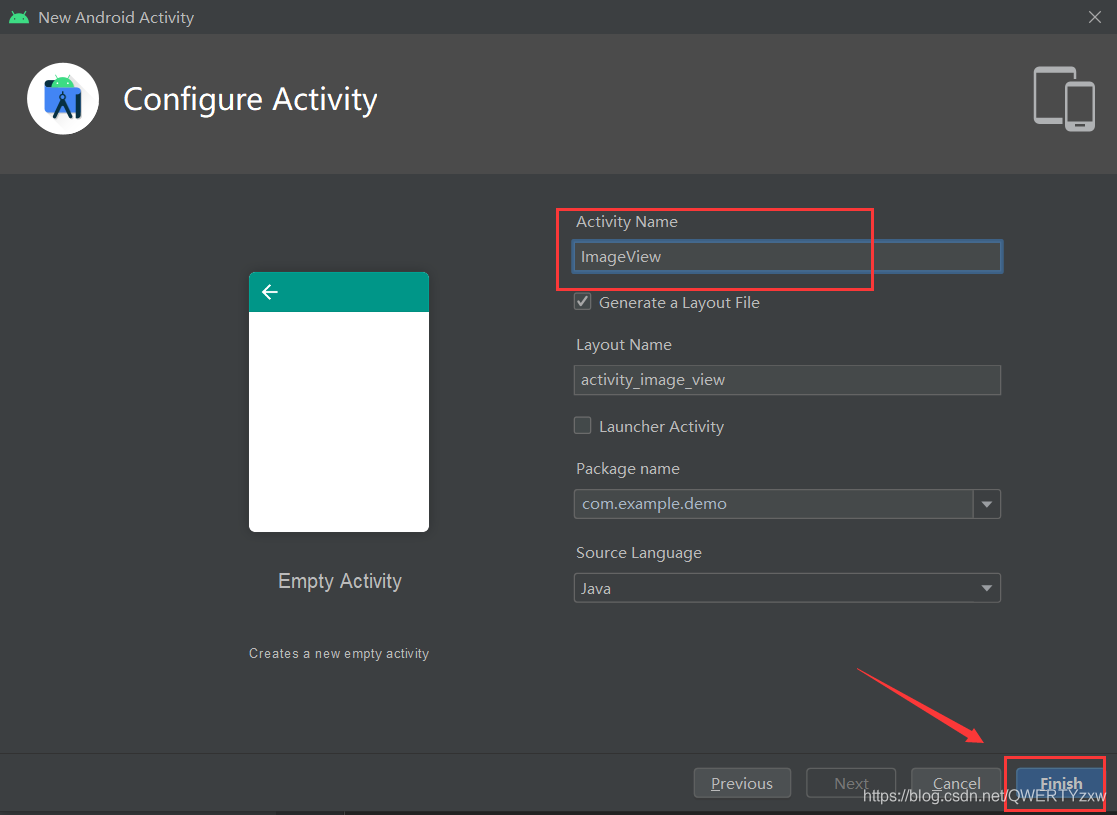
file to view (xml file is the display file of the interface)

2. Add pictures
Find a picture in the computer file, which is used to start the activity.
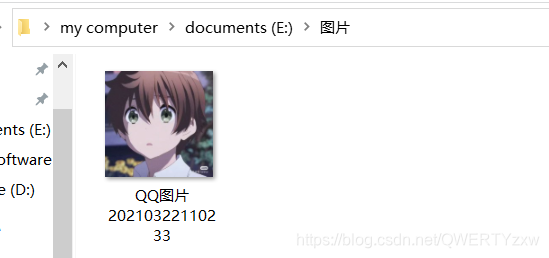
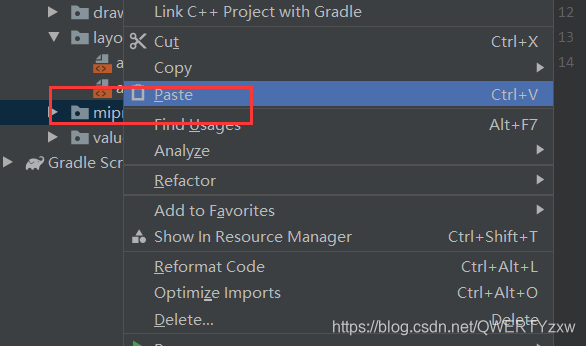
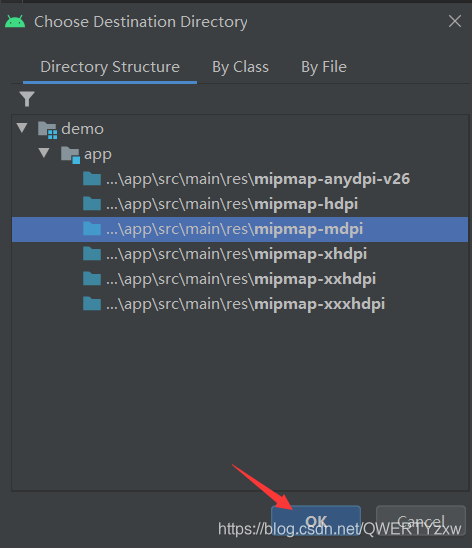
Copy this picture and paste it under the mipmap file.
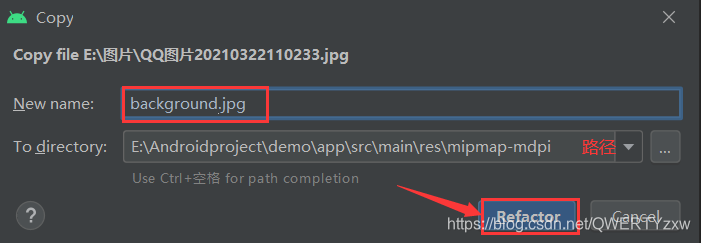
Click OK (the path is automatically configured) and
modify the picture signature
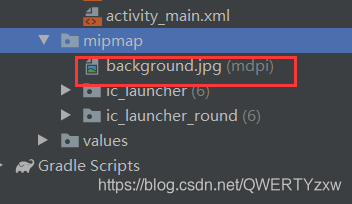
. View the result
3. Addition of code
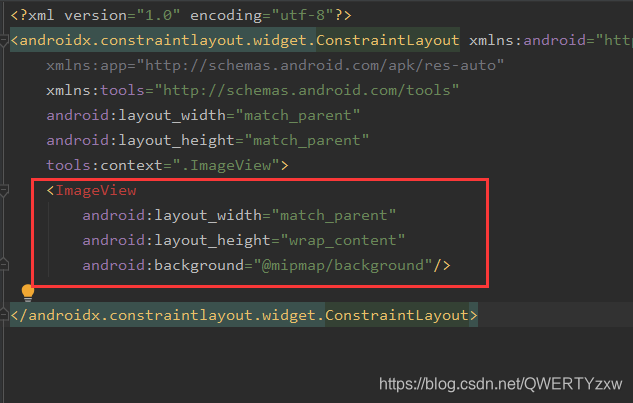
Add controls in the activity_image_view.xml file
<ImageView
        android:layout_width="match_parent"
        android:layout_height="wrap_content"
        android:background="@mipmap/background"/>
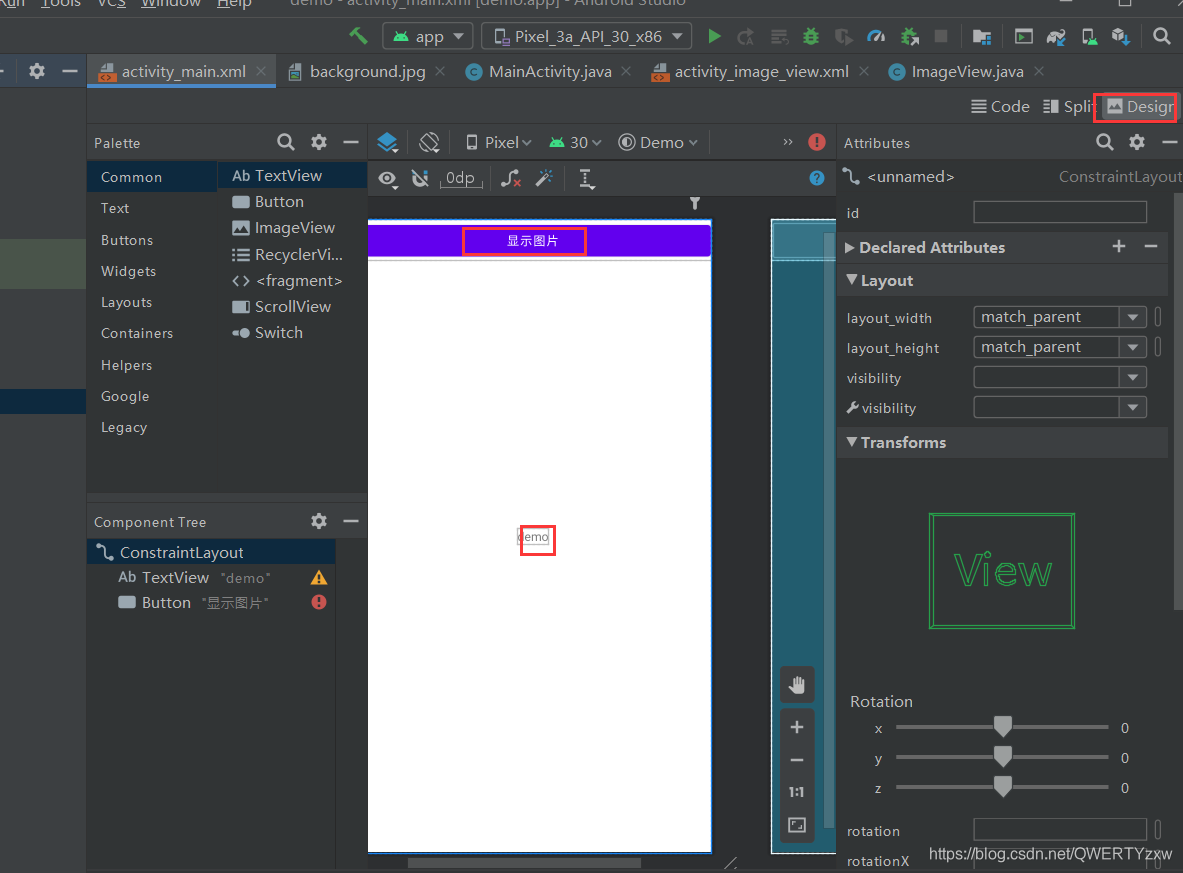
View the design and

place the button in the activity_main_xml file
 <Button
        android:layout_width="match_parent"
        android:layout_height="wrap_content"
        android:text="显示图片"/>

View effect
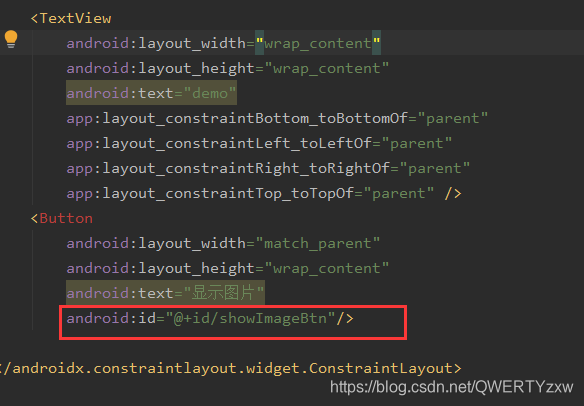
Add button ID
android:id="@+id/showImageBtn"
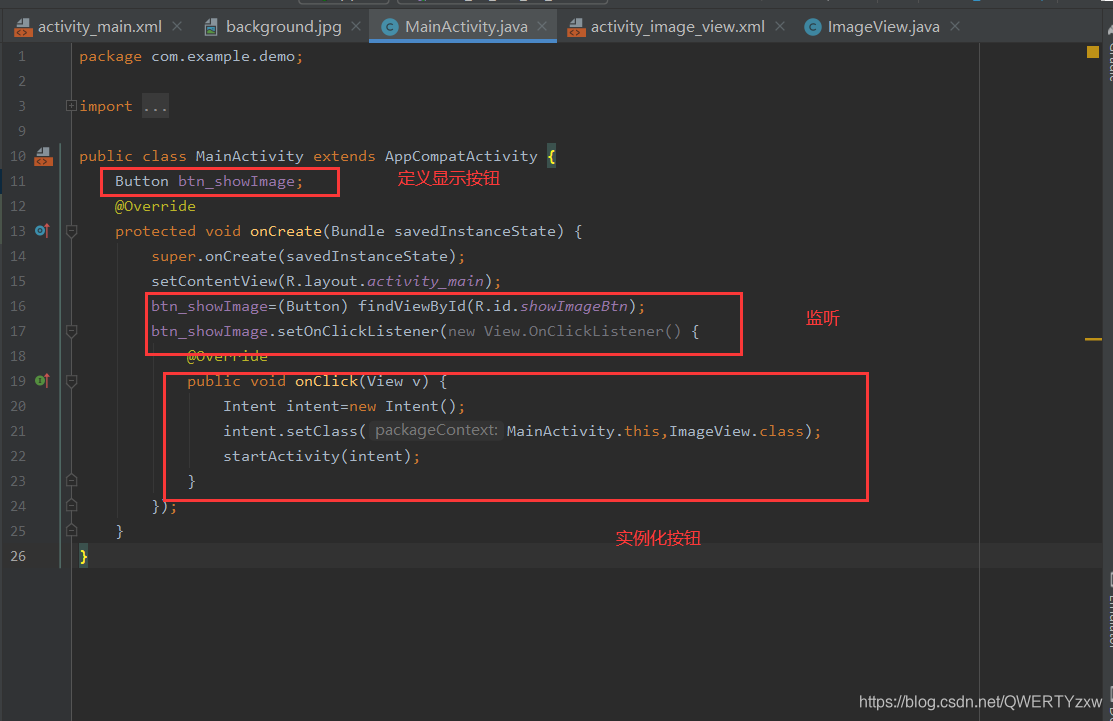
Define related buttons and instantiate them
public class MainActivity extends AppCompatActivity {


    Button btn_showImage;
    @Override
    protected void onCreate(Bundle savedInstanceState) {


        super.onCreate(savedInstanceState);
        setContentView(R.layout.activity_main);
        btn_showImage=(Button) findViewById(R.id.showImageBtn);
        btn_showImage.setOnClickListener(new View.OnClickListener() {


            @Override
            public void onClick(View v) {


                Intent intent=new Intent();
                intent.setClass(MainActivity.this,ImageView.class);
                startActivity(intent);
            }
        });
    }
}
4. Compile and run
Run after the code is added. The
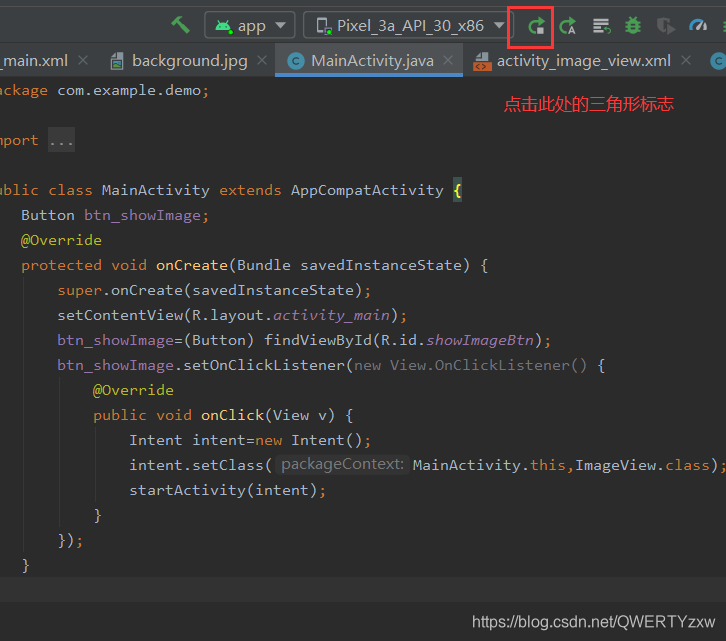
effect is displayed.
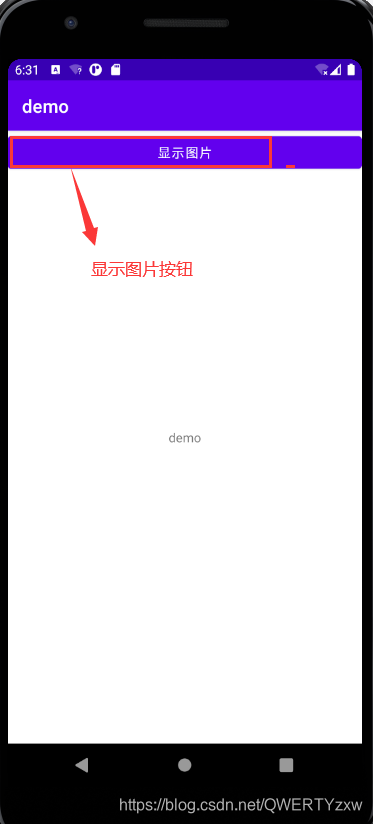
Click the button to display the picture on the simulator.

Three, summary
It's relatively simple to start the activity interface, but I just started to do this aspect of the content, not very skilled, so it is a bit slow to do it. Practice makes perfect, just wait for more practice.