Deploy the java project and implement the Nginx reverse proxy Tomcat server
Install tomcat
For detailed installation steps, please refer to my other article:
Deployment and Optimization of TOMCAT .
[root@maomao zhuzhu]# ls
apache-tomcat-8.5.16.tar.gz  bootstrap01 ???.zip  jdk-8u221-linux-x64.tar.gz
[root@maomao zhuzhu]# tar xf apache-tomcat-8.5.16.tar.gz -C /usr/local/
[root@maomao zhuzhu]# tar xf jdk-8u221-linux-x64.tar.gz  -C /usr/local/


[root@maomao local]# mv apache-tomcat-8.5.16 tomcat
[root@maomao local]# mv jdk1.8.0_221 jdk

# 修改环境变量
[root@lnmp local]# vim /etc/profile
# 在最后一行添加
export JAVA_HOME=/usr/local/jdk
export CLASSPATH=$JAVA_HOME/lib/tools.jar:$JAVA_HOME/lib/dt.jar
export PATH=$JAVA_HOME/bin:$PATH

[root@maomao local]# source /etc/profile
[root@maomao local]# java -version
java version "1.8.0_221"
Java(TM) SE Runtime Environment (build 1.8.0_221-b11)
Java HotSpot(TM) 64-Bit Server VM (build 25.221-b11, mixed mode)
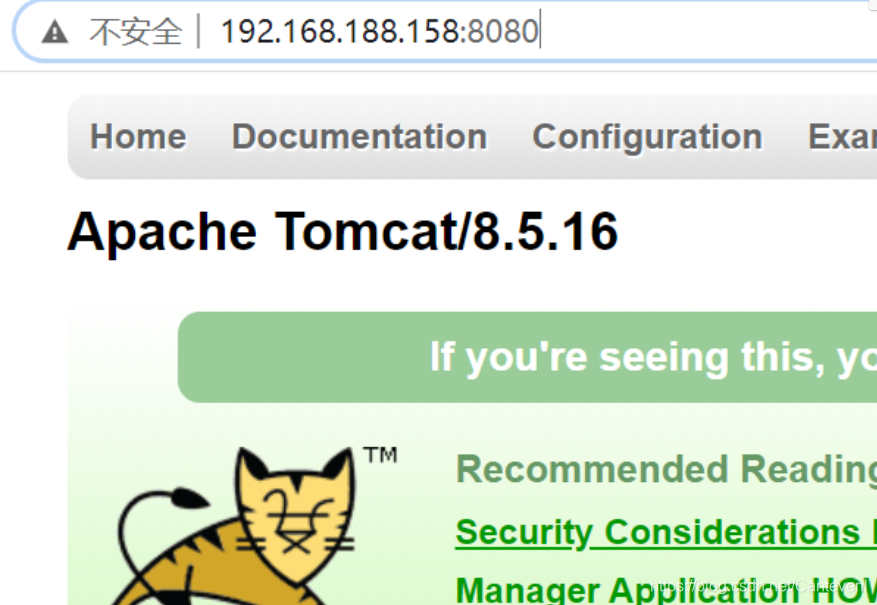
Open tomcat browser test
Deploy the java project
Upload the java project to the server
修改java项目的yml文件 修改数据库信息
[root@lnmp resources]# vim application.yml
datasource:
    url: jdbc:mysql://192.168.188.188:3306/manage?characterEncoding=utf-8
    username: root
    password: 123
    driver-class-name: com.mysql.jdbc.Driver


执行java项目的sql语句
[root@lnmp db]# pwd
/home/java-demo/db

sql语句
/*
MySQL - 5.6.30-log : Database - test
*/
CREATE DATABASE IF NOT EXISTS `manage`  DEFAULT CHARACTER SET utf8 ;
USE `manage`;

CREATE TABLE `user` (
  `id` INT(11) NOT NULL AUTO_INCREMENT,
  `name` VARCHAR(100) NOT NULL COMMENT '名字',
  `age` INT(3) NOT NULL COMMENT '年龄',
  `sex` CHAR(1) DEFAULT NULL COMMENT '性别',
  PRIMARY KEY (`id`)
) ENGINE=INNODB DEFAULT CHARSET=utf8;

COMMIT;

# 在sql的目录登录mysql
[root@lnmp db]# mysql -uroot -p
mysql> source tables_ly_tomcat.sql;
Query OK, 1 row affected, 1 warning (0.01 sec)

Database changed
Query OK, 0 rows affected (0.00 sec)

Query OK, 0 rows affected (0.00 sec)

line 1

mysql> use manage;
Database changed
mysql> show tables;
+------------------+
| Tables_in_manage |
+------------------+
| user             |
+------------------+
1 row in set (0.00 sec)
Package the java project
# 需要使用maven
# 首先安装maven
[root@maomao bin]# yum install -y maven

# 进入java项目目录
[root@maomao ~]# cd /home/zhuzhu/java-demo/

# 输入打包命令
[root@maomao java-demo]# mvn clean package -Dmaven.skip.test=True

mvn clean package  -Dmaven.skip.test=True	# 跳过单元测试

# 打包完成之后 目录里面会多出一个target目录
# 里面就会有打包的war包
Pass the war package to the webapps under tomcat
# 在tomcat的webapps目录下面新建一个java目录
[root@lnmp webapps]# mkdir java
# 修改tomcat主配置文件
[root@lnmp tomcat]# vim conf/server.xml
<Host name="localhost"  appBase="webapps"
            unpackWARs="true" autoDeploy="true">
        <Context docBase="/usr/local/tomcat/webapps/java"  path="" reloadable="true" />
</Host>


# 将war包移动到tomcat的webapps下面的java目录
[root@lnmp target]# mv ly-simple-tomcat-0.0.1-SNAPSHOT.war /usr/local/tomcat/webapps/java/

# 最后将war包解压
[root@lnmp java]# unzip ly-simple-tomcat-0.0.1-SNAPSHOT.war

# 目录下会多出两个新文件
[root@lnmp java]# ls
ly-simple-tomcat-0.0.1-SNAPSHOT.war  META-INF  WEB-INF
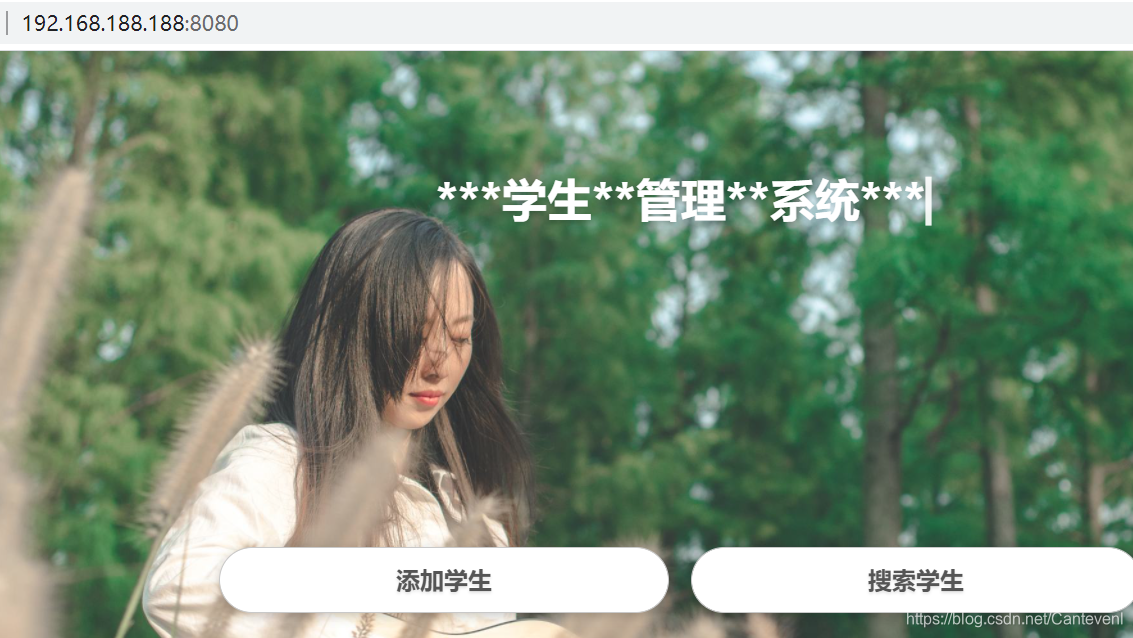
Restart tomcat and
open the browser to test the
project is successfully deployed
Add students to test whether mysql is normal

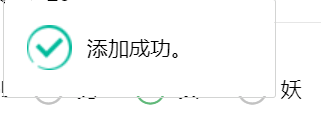

Check the database
mysql> select name from manage.user;
+--------+
| name   |
+--------+
| 猫猫   |
+--------+
1 row in set (0.00 sec)
Implement Nginx reverse proxy
The specific realization of the topology diagram is
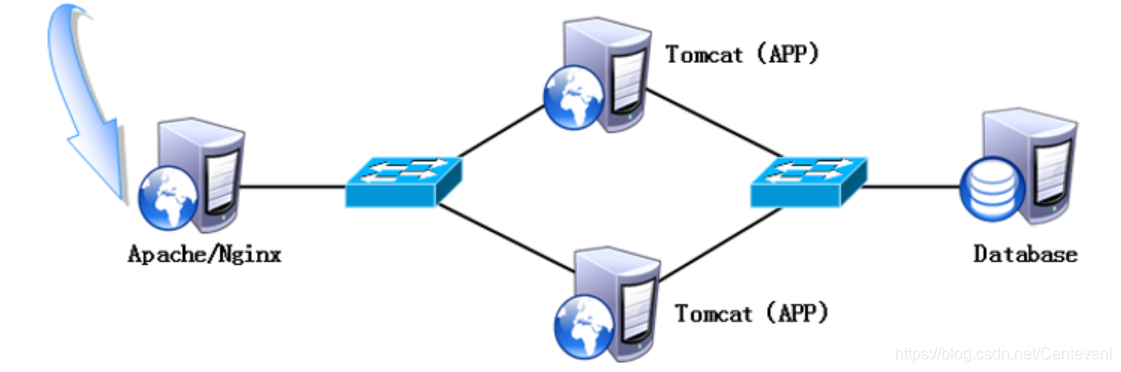
to configure the nginx main configuration file on the nginx server
[root@lnmp bin]# vim /usr/local/nginx/conf/nginx.conf
在http下面添加服务池
upstream java {


        server 192.168.188.188:8080 weight=1;
        server 192.168.188.158:8080 weight=1;

}

然后在相应server下面的location添加proxy_pass反向代理
location / {


            root   html;
            index  index.html index.htm;
            proxy_pass http://java;
        }
- Polling is the default allocation method of upstream, that is, each request is allocated to different back-end servers in turn in chronological order
- proxy_pass is proxy forwarding. The name of the service pool added before the url behind proxy_pass is written is java
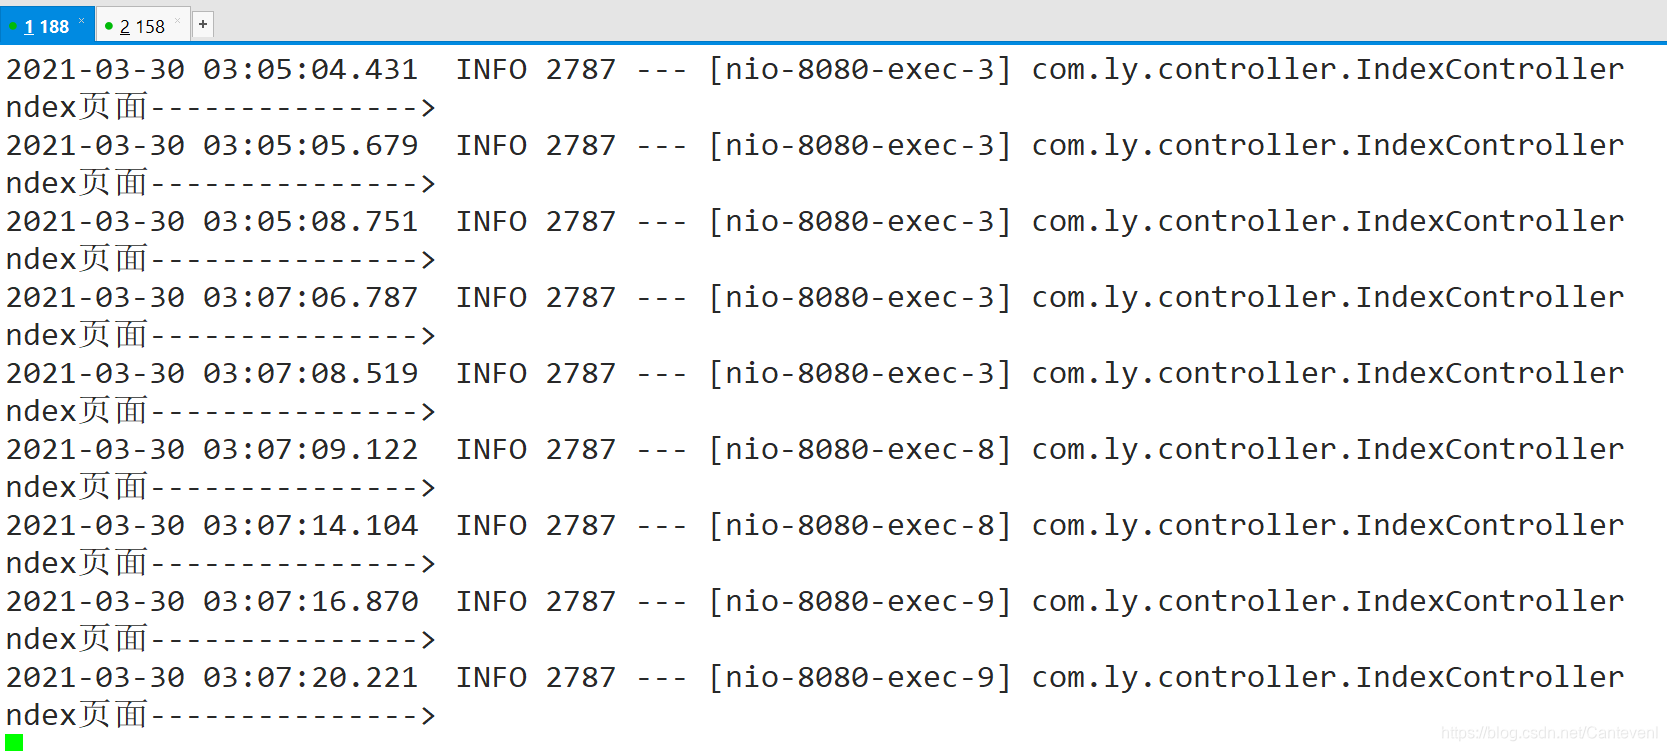
Open the browser to test and check the logs of two tomcats to prove that the reverse proxy is successful.
Use the domain name to access the browser

Dynamic view tomcat access log
[root@lnmp logs]# tailf /usr/local/tomcat/logs/catalina.out
188 server
158 Server
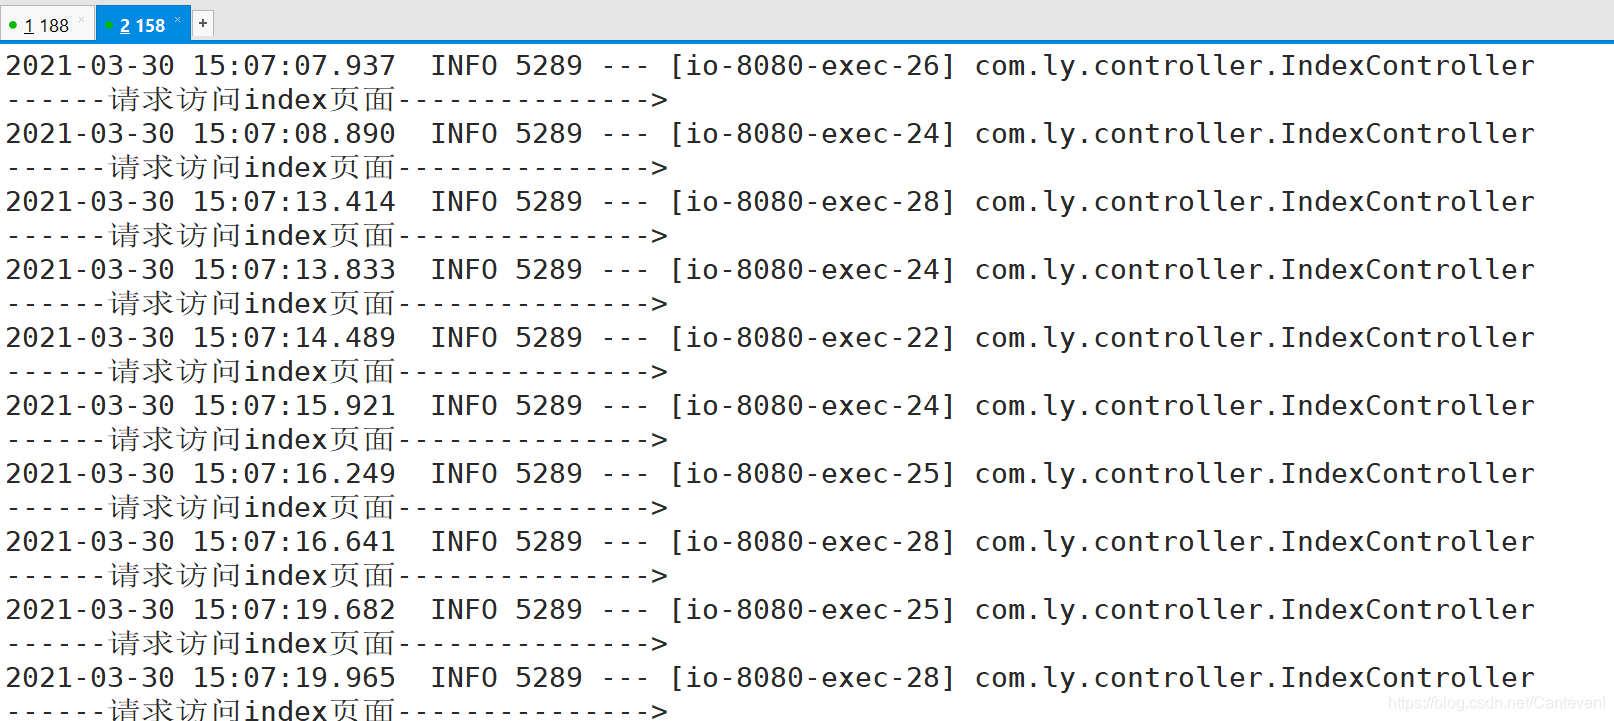
Refresh the page. The logs of both servers are updated, indicating that the reverse proxy is successful.
The data is also normal
