1. Environmental preparation
1. MySQL environment installation
When performing MySQL database backup and restore operations, the MySQL environment must be installed in advance, and the MySQL service has been successfully started
(1) If the MySQL environment is not installed, you can refer to the blog: https://blog.csdn.net/weixin_43184774/article/details/106020174
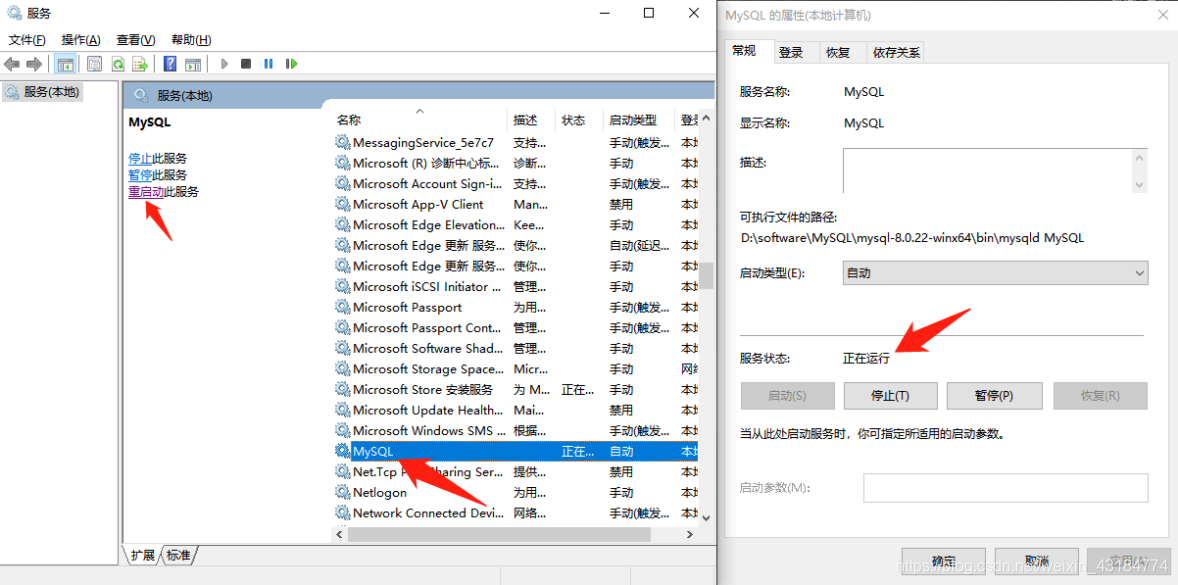
(2) If the MySQL environment has been successfully installed, open the running window and enter: services.msc to open Windows service window, check whether MySQL is on. If it is not enabled, refer to the document in step (1) to enable the MySQL service
2. Add log-bin log configuration
(1) Find the my.ini configuration file in your MySQL installation directory 
(2) Open the my.ini configuration file and add a line under [mysqld] in the my.ini file
log-bin = mysql-bin 
(3) Restarting the MySQL service will generate a mysql-bin.000001 log file in the data directory of the MySQL installation directory
Remarks: The mysql-bin.00000X log file is used for subsequent incremental database restore operations. This file can be automatically generated according to scheduled tasks


(4) Open the MySQL operating environment, execute the following command to check whether log-bin is turned on, if the status is ON, it means it is turned on normally
show variables like 'log_bin';
Two, create a test database and table
1. Create a test database
(1) Log in to the MySQL environment and create a class database. The command is as follows:
create database class character set gbk;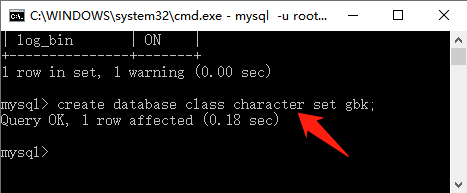
(2) Enter the data directory of the MySQL installation directory, you will see the successfully created database file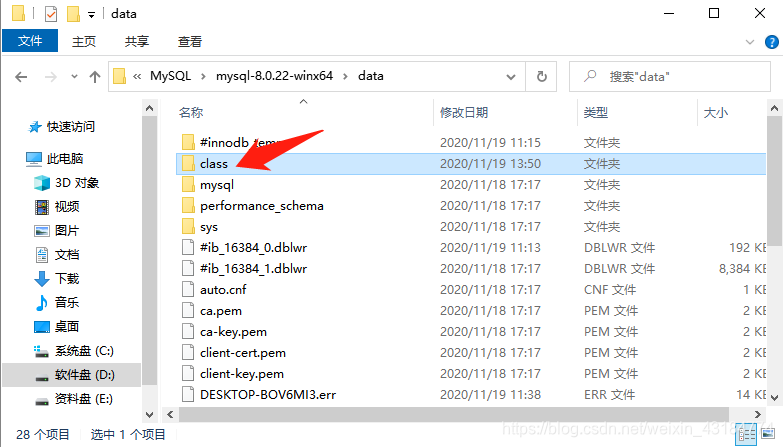
(3) After creating the class database, to use this database, execute the command
use class
2. Create a test data table
(1) Enter the following command to create a student table
CREATE TABLE student

(

  id INT unsigned not null auto_increment primary key,

  username VARCHAR(8) not null

);
(2) Execute the following command to view the newly created student table. At this time, the student is an empty table without any data
SELECT *FROM student;
(3) Execute the following command to insert data into the student table
insert into student values(1,'张学友');
insert into student values(2,'刘德华');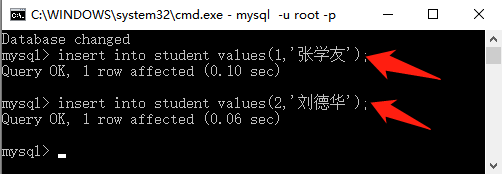
(4) The student table after executing the command to insert the data. At this time, the student table has two pieces of data
SELECT *FROM student;
Three, full backup and restore the database
1. Full backup database
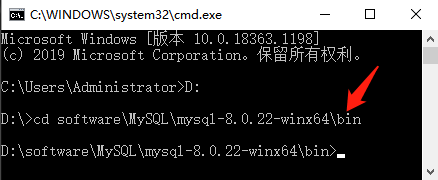
(1) Open the cmd window and cd into the bin directory of the MySQL installation directory
(2) Execute the following command in the bin directory to perform a full backup of the class database just created
mysqldump --opt --host=127.0.0.1 --protocol=tcp --port=3306 --default-character-set=utf8 --single-transaction=TRUE -u root --password=123456 class student > "D:\beifen20201119.sql"Explanation:
① --host=127.0.0.1 is the IP address of the database you want to back up
② --port=3306 database port number
③ " D :\ beifen20201119.sql " Back up the full class database to the root directory of Disk D, and name it Called beifen20201119.sql
④ class student is the name of the database and table you want to back up. You can back up the full database of the class, or you can back up the student table separately. Note: The backup drive letter must be on the same disk as the MySQL installation directory. In the character, otherwise it will prompt: Access denied

(3) Table operations that are not required for backup:
Syntax:
mysqldump --opt --host=127.0.0.1 --protocol=tcp --port=3306 --default-character-set=utf8 --single-transaction=TRUE -u root --password=123456 dbname --ignore-table=dbname.table1 --ignore-table=dbname.table2 > ./db_files/test.sql
Examples:
mysqldump --opt --host=127.0.0.1 --protocol=tcp --port=3306 --default-character-set=utf8 --single-transaction=TRUE -u root --password=123456 class --ignore-table=class.student > "D:\beifen20201124.sql(4) After the backup is completed, an sql file will be automatically generated in the corresponding directory, enter the directory, and view the full backup database

(5) We can encapsulate the above steps into a .bat batch script file, and then double-click to run the batch file to execute the full backup database, the
full backup database script is as follows, note: you must configure this according to your actual settings Script file

rem Auther By Anker
rem date:20201119
rem ******Backup MySQL Start******
@echo off
::设置时间变量
set "Ymd=%date:~0,4%%date:~5,2%%date:~8,2%"

::创建存储的文件夹
if not exist "D:\mysql_backup" md "D:\mysql_backup"

::执行备份操作
"D:\software\MySQL\mysql-8.0.22-winx64\bin\mysqldump" --opt --user=root --password=123456 --host=127.0.0.1 --protocol=tcp --port=3306 --default-character-set=utf8 --single-transaction=TRUE --routines --events "class" >D:\software\beifen_%Ymd%.sql

::删除90天前的备份数据
forfiles /p "C:\mysql_backup" /m backup_*.sql -d -90 /c "cmd /c del /f @path"

@echo on
rem ******Backup MySQL End******
2. Restore the database in full
(1) Execute the following command to delete the class database created in advance
drop database class;
(2) Execute the following command to query the student table, you will find that the class database cannot be found
SELECT *FROM student;
(3) Because the drop command was executed in the previous step, it is equivalent to deleting all the database data and structure. At this time, the database structure needs to be re-created before the restore operation can be performed. So, execute the create database command again, and then use this class database, that is, use class
create database class character set gbk;
use class
(4) Execute the following command to restore the deleted class database
source D:\beifen20201119.sql
(5) Execute the following command again to query the student table, you will find that the previous student table data is back again
SELECT *FROM student;
Four, incremental backup and restore the database
1. Incremental backup database
(1) Execute the following command, insert 2 more data into the student table
insert into student values(3,'郭富城');
insert into student values(4,'黎明'); 
(2) Execute the query command to query the student table, at this time you will find two more data
SELECT *FROM student; 
(3) Execute the truncate student; command to delete the data in the student table.
Special attention: if the drop student; command is executed, the entire student table structure and data are deleted, and only the full amount can be restored at this time
truncate student; 
(4) Execute the query command again to query the student table, you will find that there is no data in the student table
SELECT *FROM student;
(5) We can encapsulate the above steps into a .bat batch script file, and then double-click to run the batch file to perform incremental backup of the database. The
incremental backup database script is as follows. Note: You must set it according to your own actual settings. Configure this script file
rem Auther By Anker
rem date:20201119
rem ******Backup MySQL Start******
@echo off
::设置时间变量
set "Ymd=%date:~0,4%%date:~5,2%%date:~8,2%"

::执行增量备份操作
mysqladmin -u root -p123456 flush-logs

@echo on
rem ******Backup MySQL End******
2. Incremental recovery of the database
(1) Before performing incremental recovery, you need to perform a full recovery first to restore the database data to the latest data in a certain period of time, that is, execute the command: source D:\beifen20201119.sql

(2) Execute the query command again to query the student table, and you will find that the previous student table data is back again, but the data in the table is only Jacky Cheung and Andy Lau, and there is no added Guo Fucheng and Liming later.
SELECT *FROM student; 
(3) If you want to restore the newly added Guo Fucheng and Liming data, you need to use the bin-log file. That is, run the following command in the mysql environment
show binlog events in 'mysql-bin.000001'; 
(4) View the start and end positions of the dawn data recorded in the binlog content

(5) Execute the following command in the data directory of the MySQL installation directory to convert the bin-log file that needs to be backed up in the data directory into a sql file
mysqlbinlog --no-defaults mysql-bin.000001 --start-position=3898 --stop-position=4034 > d:\\zengliang.sql
(6) At this time, you will find that the D drive automatically generates a zengliang.sql file

(7) Execute the following command to restore the deleted dawn data
source d://zengliang.sql
(8) Execute the query command again to query the student table, and you will find that the data from the previous student table dawn is back again
SELECT *FROM student;
Five, regularly perform backup tasks
(1) Search "Task Scheduler" in the start program search list and open

(2) After opening the task scheduler, click "Create Basic Task" on the right, and write the name and description of the scheduled task

(3) Choose a name arbitrarily and click "Next"

(4) According to your needs, click to select the period of timing execution, and click "Next"

(5) Set the required execution time and click "Next"

(6) Select "Start the program" and click "Next"

(7) Browse and select the completed backup script file, and click "Next"

(8) After confirming that the information is correct, click "Finish"

(9) After the timed task is created, you can see the task we created in the task list, and you can right-click the task to delete it
