1, the configuration server installation ( JDK, tomcat, redis, rabbitMQ, MySQL)
1.1, installationJDK
By xftpuploading the jdkcompressed package, the jdkversion is 1.8, if the computer has installed the rzcommand, you can upload it directly through the command
Installed lrzscyum command
yum -y install lrzsz
Personal habit: two folders, package and local, will be created in the root directory

If not, create one (the directory is based on personal habits)
mkdir package;

mkdir local;

cd package;

rz  ;# (上传文件)
Unzip the tar package to the jdkpath
mkdir /local/java
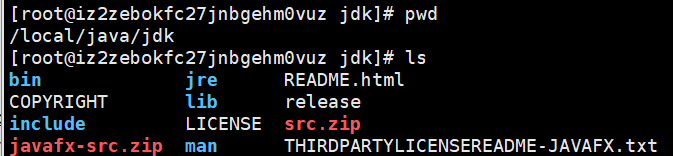
tar -zxvf jdk-8u231-linux-x64.tar.gz -C /local/java/
To jdkadd an environment variable, if you do not know the exact path to enter their extraction path input pwdcommand to obtain jdkthe path
vi /etc/profile
Add at the end of the file
export JAVA_HOME=/local/java/jdk #自己的jdk所处的路径
export CLASSPATH=.:$JAVA_HOME/lib/dt.jar:$JAVA_HOME/lib/tools.jar
export PATH=$JAVA_HOME/bin:$PATH
ESCSave, then enter the :wqsave, then restart the configuration file
source /etc/profile;

java -version;
If the corresponding jdk version information is displayed, the configuration is successful
1.2, install tomcat
You can choose your own directory, my habit is that it exists under "/package/", tomcat is decompressed by default, you can directly enter the decompression directory to run
rz  ;# (上传文件tomcat压缩包)

tar -zxvf apache-tomcat-9.0.29.tar.gz -C /local/ ;(/local/目录ke自己指定)
# 进入tomcat下的bin目录,tomcat有执行脚本和停止脚本
sh startup.sh
[External link image transfer failed. The source site may have an anti-hotlinking mechanism. It is recommended to save the image and upload it directly (img-s3lYdxzw-1576568044337) (C:\Users\25452\AppData\Roaming\Typora\typora-user-images\ image-20191217145219831.png)]
1.3, installation redis
rz  ;# (上传文件redis压缩包)
tar -zxvf redis-4.0.11.tar.gz -C /local/ ;(/local/目录ke自己指定)
Compiled and installed into the directory, my redisdirectory /local/redis
If makewhen the error might be missinggcc
yum -y install gcc automake autoconf libtool make
cd /local/redis
make
make install
Configuration redis.conf
vim redis.conf
Modify several items in the configuration file, open the remote port and set a password (mine rediscan't connect remotely without setting a password)
开启后台模式:daemonize no 设置为yes,这样就不用开启服务后还要保持着窗口
设置密码:requirepass mypassword
注释掉绑定ip bind 127.0.0.1
protected-mode no 改为 protected-mode yes
Start redis
./redis-server ../redis.conf
1.4, installationrabbitMQ
Reprint https://www.cnblogs.com/wintercloud/p/10877234.html
To prevent the link from failing, linuxthe command below is
Preparation: install dependent files anderlang
yum -y install gcc glibc-devel make ncurses-devel openssl-devel xmlto perl wget

wget http://www.erlang.org/download/otp_src_20.3.tar.gz #下载erlang包

tar -xvf otp_src_20.3.tar.gz  #解压

cd otp_src_20.3/ #切换到安装路径

./configure --prefix=/usr/local/erlang  #生产安装配置

make && make install  #编译安装

vi /etc/profile  #在底部添加以下内容
Add the following environment variables at the end of the configuration file
ERL_HOME=/usr/local/erlang
PATH=$ERL_HOME/bin:$PATH
export ERL_HOME PATH
Reload configuration file
source /etc/profile
测试一下是否安装成功,在控制台输入命令erl
erl #如果进入erlang的shell则证明安装成功,退出即可。
rabbitmq Still use the decompressed version to install
The default download is rabbitmqnot a gzpackage, but a xzpackage
xz -d rabbitmq-server-generic-unix-3.7.4.tar.xz #将xz解压为gz

tar -xvf rabbitmq-server-generic-unix-3.7.4.tar

vi /etc/profile #配置环境变量
export PATH=$PATH:/usr/local/rabbitmq/sbin
Reload configuration file
source /etc/profile
1.5, yuminstall MySqL
wget http://dev.mysql.com/get/mysql-community-release-el7-5.noarch.rpm
rpm -ivh mysql-community-release-el7-5.noarch.rpm
yum install mysql-community-server
# 启动数据库
systemctl start mysql
# 设置密码,初始密码为空直接回车然后输出两次新密码
mysqladmin -uroot -p password
1.6, configurationKafka
Reprint https://blog.csdn.net/qq_33257527/article/details/85227478