This document uses virtualenv+gunicorn+flask
One. Install nginx
把安装包解压到指定文件夹即可,不做细讲
two. Install python
1. Unzip: Python-3.7.0.tar.xz
.tar -vxf Python-3.7.0.tar.xz
2. Enter the unzipped directory
cd Python-3.7.0
3. Execute the following commands successively to compile and install.
	./configure --prefix=/usr/local/python3
	make
	make install
5. Establish a soft link for python3
ln -s /usr/local/python3/bin/python3 /usr/bin/python3
6. Add /usr/local/python3/bin to PATH
(1)
vim ~/.bash_profile
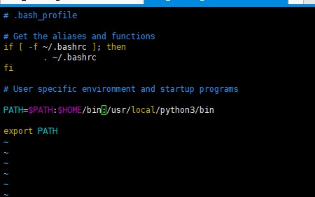
(2) Press ESC, enter: wq and press Enter to exit.
(3) After modifying, remember to execute the following command to make the modification of the previous step take effect:
(4)
source ~/.bash_profile
4. Execute the command to check whether the installation is successful
python3

Ctrl+d exit python
three. Install setuptools
Unzip the installation package to the specified folder
. 1. Unzip
unzip setuptools-40.6.2.zip
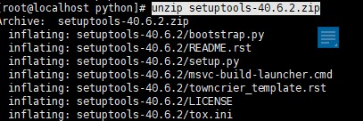
2. Enter the setuptools-40.6.2 directory
cd setuptools-40.6.2.zip
3. Compile and install
	python3 setup.py build
	python3 setup.py install
four. Install pip
pip is an installation tool for python, which can be used to download python third-party libraries used in the installation project and
unzip the installation package to the specified folder.
 Wget --no-check-certificate  https://pypi.python.org/packages/source/p/pip
 /pip-8.0.2.tar.gz#md5=3a73c4188f8dbad6a1e6f6d44d117eeb
1. Unzip
tar -zxvf pip-8.0.2.tar.gz
2. Enter the pip directory to install
	(1)cd pip-8.0.2
	(2)python3 setup.py build
	(3)python3 setup.py install
Fives. Install virtualenv
Virtaulenvwrapper is an extension package of virtualenv, which is used to manage virtual environments more conveniently. It can do:
1. Consolidate all virtual environments in one directory
2. Manage (add, delete, copy) virtual environments
3. Switch virtual environments
virtualenv is Python operating environment,
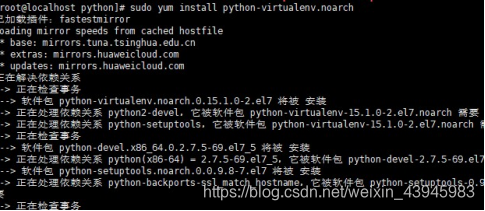
1. Install virtualenv
sudo yum install python-virtualenv.noarch
 2. Create a virtual environment with the virtualenv command

six. Activate Venv, start the virtual environment
Python 3.3 and above use venv to replace the original virtualenv used by Python2 to create a virtual environment. It is the name of the virtual environment, and all our operations and downloaded library files in the virtual environment will be in this folder.
Enter the /venv/bin/ directory and execute the activation command
	1.进入bin文件夹:cd /venv/bin
	2.执行命令:source activate

	3.退出venu模式

	deactivate
Seven. Install flask
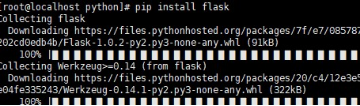
Flask is suitable for app background or ajax application based on json communication. It is a lightweight framework.
Installation command: pip install flask
Eight. Install gunicorn
Gunicorn is used to enable services. It is generally used to manage multiple processes. Gunicorn can be pulled up when a process hangs to prevent the server from stopping the service for a long time. It can also dynamically adjust
the number of workers and increase the number of workers when there are many requests. Reduce when there are few requests. This is the so-called pre-fork model, which seems to be its main advantage.
There is no way to run gunicorn alone with multiple processes and multiple ports to load balance. The role of nginx is to make up for the above problems. First, as a front-end server, it can handle all static file requests. At this time, gunicorn is used as a back-end server. Nginx will forward dynamic requests to the back-end server, so we can start multiple gunicorn processes. Let nginx load balance and forward requests to multiple gunicorn processes to improve server processing efficiency and processing capabilities. Finally, nginx can also configure a lot of security-related, authentication-related and many other processes, which can make your website more focused on business writing, and leave some forwarding rules and other business-unrelated things to nginx.
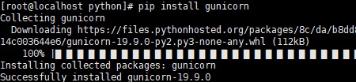
Installation command:
pip install gunicorn
nine. Install Jenkins (optional)
ten. Deploy python project
1. Upload your project file to the specified location
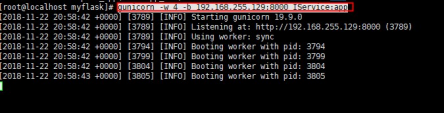
2. Enter the location of the project file and start the service with gunicorn, as shown below
gunicorn -w 4 -b 192.168.255.129:8000 IService:app
-w 4是指预定义的工作进程数为4,
-b 192.168.255.129:8000指绑定地址和端口
IService是flask的启动python文件,app则是flask应用程序实例
At this point, you can access it in the browser,

*Attachment: All installation packages used for installation can be searched and downloaded on the official website https://pypi.org/
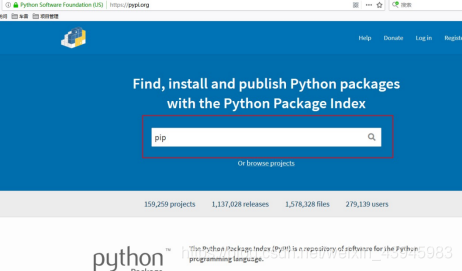
.
.
.
Afterword: After I found out that my white shoes were dirty, my partner would brush me clean, so I decided to buy only white shoes from now on.