Day 03 Linux file management advanced
1. Text Processing Three Musketeers Command
The Three Musketeers commands will be explained in depth in shell programming, here we learn the most basic usage
1.sed
Streaming editor, mainly good at editing files, we can customize the instructions for editing files in advance, and then let sed automatically complete the overall editing of the files
1.1 Usage
sed 选项 '定位+命令' 文件路径
1.2 Options
-
-n cancel the default output
sed -n '1p;2p;4p' 1.txt # 带 n 只打印需要的部分 --------------------------------- user12312 23123user 111asda2323 sed '1p;2p;4p' 1.txt # 在默认输出基础上附加输出 --------------------------------- user12312 user12312 23123user 23123user 1123user12323 111asda2323 111asda2323 2131asdasd23423asdas35454dxcz 00000user9999user8888user -
-r supports extended regular metacharacters (because you haven't learned regular, so I will understand it here temporarily)
-
-i edit file immediately
1.3 Positioning
Row positioning :
- Position to the first line
- 1,3 represents from the first row to the third row
- Do not write positioning means positioning all rows
Regular expression targeting :
/user/Includeduserlines/^user/To theuserbeginning of the line/user$/Atuserthe end of the line
Number + regular expression positioning :
-
1, 8pRepresents printing 1 to 8 linessed -n '1,7p' 1.txt # 文本就6行 ---------------------------------- user12312 23123user 1123user12323 111asda2323 2131asdasd23423asdas35454dxcz 00000user9999user8888user -
1, /user/pIt means to take from the first row to the first matched/user/rowsed -n '1, /231/p' 1.txt # 打印1到以231 开头的行 ---------------------------------- user12312 23123user
1.4 Command
-
d delete
sed '1d;2d;5d' 1.txt ----------------------------------- 1123user12323 111asda2323 00000user9999user8888user sed '1,4d' 1.txt # 删除1-4 所以只剩5 6了 ----------------------------------- 2131asdasd23423asdas35454dxcz 00000user9999user8888user -
p number of rows
sed -n '1p;2p;4p' 1.txt ------------------------------------ user12312 23123user 111asda2323 sed -n '1, /8user$/p' 1.txt # 输出第一行到 以8user结尾的内容 ------------------------------------ user12312 23123user 1123user12323 111asda2323 2131asdasd23423asdas35454dxcz 00000user9999user8888user -
s///g
sed 's/user/SuperUser/g' 1.txt  # 把所有行的user都替换为SuperUser g是一个声明相当于 global 把行所有的修改,不加只替换没行中的一个
----------------------------------
SuperUser12312
23123SuperUser
1123SuperUser12323
111asda2323
2131asdasd23423asdas35454dxcz
00000SuperUser9999SuperUser8888SuperUser

sed 's/user/SuperUser/' 1.txt   # 没有g
--------------------------------
SuperUser12312
23123SuperUser
1123SuperUser12323
111asda2323
2131asdasd23423asdas35454dxcz
00000SuperUser9999user8888user

sed 's/^user/SuperHero/g' 1.txt  #  以user开头的行中的user换成SuperHero
-------------------------------
SuperHero12312
23123user
1123user12323
111asda2323
2131asdasd23423asdas35454dxcz
00000user9999user8888user

sed '1, 4s/user/Waibi/g' 1.txt   # 替换1-4行user为waibi
------------------------------
Waibi12312
23123Waibi
1123Waibi12323
111asda2323
2131asdasd23423asdas35454dxcz
00000user9999user8888user


# 加上-i选项,直接修改文件,通常会在调试完毕确保没有问题后再加-i选项
sed '1, 4s/user/Waibi/g' 1.txt -i
cat 1.txt
------------------------------
Waibi12312
23123Waibi
1123Waibi12323
111asda2323
2131asdasd23423asdas35454dxcz
00000user9999user8888user
Commands can be used to connect multiple lines, such as 1d;3d;5d to delete lines 1, 3, and 5
2.awk
Awk is mainly used to process formatted text, such as
/etc/passwdthis, in fact, awk is a programming language that can complete very powerful operations independently, we will introduce in detail in shell programming
1.1 Usage
awk 选项 'pattern{action}' 文件路径
1.2 Options
-F specifies the line separator
1.3 Work process
awk -F: '{print $1,$3}' /etc/passwd
- Awk will read a line of the file and assign it to $0
- Then awk will divide the line into n segments with the separator specified by -F, up to 100 segments , the first segment is $1, the second segment is $2, and so on
- print outputs the first and third paragraphs of the line, the comma represents the output separator, the default is the same as -F
- Repeat steps 1, 2, 3 until the content of the file is read
1.4 Built-in variables
$0 A whole line of content
NR Record number, equivalent to line number
NF Number of segments separated by -F separator
1.5pattern can be
-
/Regular/
/Regular/ # The content of the line matches successfully
$1 ~ /正则/ # 第一段内容匹配成功正则
$1 !~ /正则/ # 第一段内容没有匹配成功正则
- Comparison operation:
NR >= 3 && NR <=5 # 3到5行
$1 == "root" # 第一段内容等于root
1.6 action can be
print $1,$3
1.7 Use
cat 2.txt  # 已编辑好的文本
---------------------------------
root:x:0:0:root:/root:/bin/bash
bin:x:1:1:bin:/bin:/sbin/nologin
daemon:x:2:2:daemon:/sbin:/sbin/nologin
adm:x:3:4:adm:/var/adm:/sbin/nologin
3.grep
1.1 Usage
grep 选项 '正则' 文件路径
1.2 Options
- -n, --line-number add its relative line number in the file in front of each filtered line
- -i, --ignore-case ignore case
- --Color color
- -l, --files-with-matches If the match is successful, only the file name will be printed, and if it fails, it will not be printed. Usually -rl is used together, grep -rl'root' /etc
- -R, -r, --recursive recursion
1.3 Example
grep '^root' /etc/passwd  # 过滤在/etc/passwd 文件下以root开头的文件
-------------------------------
root:x:0:0:root:/root:/bin/bash

grep -n '^root' /etc/passwd  # 过滤在/etc/passwd 文件下以root开头的文件
-------------------------------
1:root:x:0:0:root:/root:/bin/bash  # 行数

grep -n 'bash$' /etc/passwd  # 过滤在/etc/passwd 文件下以bashjiewei的文件
-------------------------------
1:root:x:0:0:root:/root:/bin/bash

grep -rl '^root' /etc  # 匹配 etc文件夹下 以root开头的文件 匹配成功打印出来 不成功不打印


# grep 也支持管道,我们可以发现三剑客命令都支持管道
[root@localhost ~]# ps aux |grep ssh
root 968 0.0 0.2 112908 4312 ? Ss 14:05 0:00 /usr/sbin/sshd
-D
root 1305 0.0 0.3 163604 6096 ? Ss 14:05 0:00 sshd:
root@pts/0
root 1406 0.0 0.3 163600 6240 ? Ss 14:05 0:00 sshd:
root@pts/1
root 2308 0.0 0.0 112724 984 pts/1 R+ 15:30 0:00 grep --
color=auto ssh
[root@localhost ~]# ps aux |grep [s]sh
root 968 0.0 0.2 112908 4312 ? Ss 14:05 0:00 /usr/sbin/sshd
-D
root 1305 0.0 0.3 163604 6096 ? Ss 14:05 0:00 sshd:
root@pts/0
root 1406 0.0 0.3 163600 6240 ? Ss 14:05 0:00 sshd:
root@pts/1
Two, file management-file search
1. View the file to which the command belongs
[root@hecs-x-medium-2-linux-20201118090009 home]# which ip
/usr/sbin/ip
[root@hecs-x-medium-2-linux-20201118090009 home]# whereis ip
ip: /usr/sbin/ip /usr/share/man/man8/ip.8.gz
2. Find files
find [options] [path...] [expression]
By file name
[root@localhost ~]# find /etc -name "ifcfg-eth0"
[root@localhost ~]# find /etc -iname "ifcfg-eth0" # -i忽略大小写
[root@localhost ~]# find /etc -iname "ifcfg-eth*"
By file size
[root@localhost ~]# find /etc -size +3M # 大于3M
[root@localhost ~]# find /etc -size 3M
[root@localhost ~]# find /etc -size -3M
[root@localhost ~]# find /etc -size +3M -ls # -ls找到的处理动作
Specify the depth of the search directory:
-maxdepth levels
[root@localhost ~]# find / -maxdepth 5 -a -name "ifcfg-eth0" # -a并且,-o或者,
不加-a,默认就是-a
Search by time (atime, mtime, ctime):
There is basically no difference in this, because we have not modified
[root@localhost ~]# find /etc -mtime +3 # 修改时间超过3天
[root@localhost ~]# find /etc -mtime 3 # 修改时间等于3天
[root@localhost ~]# find /etc -mtime -3 # 修改时间3天以内
Search by file owner and group:
[root@localhost ~]# find /home -user egon # 属主是egon的文件
[root@localhost ~]# find /home -group it # 属组是it组的文件
[root@localhost ~]# find /home -user egon -group it
[root@localhost ~]# find /home -user egon -a -group it # 同上意思一样
[root@localhost ~]# find /home -user egon -o -group it
[root@localhost ~]# find /home -nouser # 用户还存在,在/etc/passwd中删除了记录
[root@localhost ~]# find /home -nogroup # 用户还存在,在/etc/group中删除了记录
[root@localhost ~]# find /home -nouser -o -nogroup
By file type:
[root@localhost ~]# find /dev -type f # f普通
[root@localhost ~]# find /dev -type d # d目录
[root@localhost ~]# find /dev -type l # l链接
[root@localhost ~]# find /dev -type b # b块设备
[root@localhost ~]# find /dev -type c # c字符设备
[root@localhost ~]# find /dev -type s # s套接字
[root@localhost ~]# find /dev -type p # p管道文件
Find according to the inode number: -inum n
[root@localhost ~]# find / -inum 1811
By file permissions
[root@localhost ~]# find . -perm 644 -ls
[root@localhost ~]# find . -perm -644 -ls
[root@localhost ~]# find . -perm -600 -ls
[root@localhost ~]# find /sbin -perm -4000 -ls # 包含set uid
[root@localhost ~]# find /sbin -perm -2000 -ls # 包含set gid
[root@localhost ~]# find /sbin -perm -1000 -ls # 包含sticky
Find the post-processing action:
-print
-ls
-delete
-exec
-ok
[root@localhost ~]# find /etc -name "ifcfg*" -print # 必须加引号
[root@localhost ~]# find /etc -name "ifcfg*" -ls
[root@localhost ~]# find /etc -name "ifcfg*" -exec cp -rvf {} /tmp \; # 非交互
[root@localhost ~]# find /etc -name "ifcfg*" -ok cp -rvf {} /tmp \; # 交互 每个都要yes或者y
[root@localhost ~]# find /etc -name "ifcfg*" -exec rm -rf {} \;
[root@localhost ~]# find /etc -name "ifcfg*" -delete # 同上
3. File upload and download
1. Download
wget command
wget -O 本地路径 远程包链接地址 # 将远程包下载到本地,-O指定下载到哪里,可以生路-O 本地路径
# ps:如果wget下载提示无法建立SSL连接,则加上选项--no-check-certificate
wget --no-check-certificate -O 本地路径 远程包链接地址
curl command
#curl命令是一个利用URL规则在命令行下工作的文件传输工具。它支持文件的上传和下载,所以是综合传输工具,但按传统,习惯称curl为下载工具。作为一款强力工具,curl支持包括HTTP、HTTPS、[ftp]等众多协议,还支持POST、cookies、认证、从指定偏移处下载部分文件、用户代理字符串、限速、文件大小、进度条等特征。做网页处理流程和数据检索自动化,curl可以祝一臂之力。


[root@localhost ~]# curl -o 123.png https://www.xxx.com/img/hello.png
# ps: 如果遇到下载提示无法简历SSL链接,使用-k选项或者--insecure

curl -k -o name.jpg https://www.bing.com/th?id=OHR.BernCH_ZH-CN0890742909_1920x1080.jpg&rf=LaDigue_1920x1080.jpg&pid=HpEdgeAn
[External link image transfer failed. The origin site may have an anti-leech link mechanism. It is recommended to save the image and upload it directly (img-dEeFs3BR-1606126022318)(https://i.loli.net/2020/11/23/9qFoasYSEmQjcLi.png )]
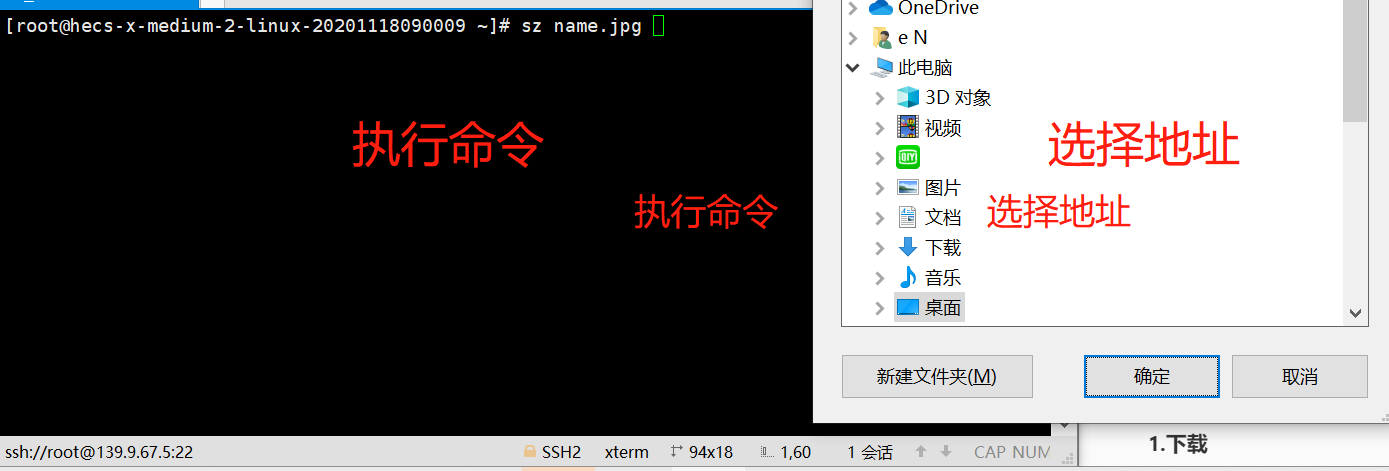
sz command This command needs to install lrzsz
The system does not have this command by default, you need to download: yum install lrzsz -y # Download/send the selected file on the server to the machine
2 Upload
The rz command does not need to be installed by default
# 系统默认没有该命令,需要下载:yum install lrzsz -y
# 运行该命令会弹出一个文件选择窗口,从本地选择文件上传到服务器。
[root@localhost opt]# rz # 如果文件已经存,则上传失败,可以用-E选项解决
[root@localhost opt]# rz -E # -E如果目标文件名已经存在,则重命名传入文件。新文件名将添加一
个点和一个数字(0..999)
[External link image transfer failed. The source site may have an anti-leech link mechanism. It is recommended to save the image and upload it directly (img-SjBUIXCp-1606126022322)(https://i.loli.net/2020/11/23/V4LzBTuXAECFIHc.png )]
Four file management: input and redirection
Five file management: character processing commands
1.sort command
Used to sort file contents
- -n # Sort by value
- -r # sort in reverse order
- -k # Sort by a column
- -t # Specify the separator, the default is to use a space as the separator
Prepare the file and write a section of unnecessary content
cat >> test.txt  <<GG  # 打开test.txt文件 追加写入(>>)内容 出现 GG时 结束写入
> b:3
> c:2
> a:4
> e:5
> d:1
> f:11
> GG
Basic sorting
sort test.txt  # 默认是以第一个排序的  不区分大小写
---------------------------
a:4
b:3
c:2
d:1
e:5
f:11
Z:77

sort test.txt -r  # 倒序 == sort -r test.txt
Z:77
f:11
e:5
d:1
c:2
b:3
a:4
Choose to sort content
sort -t ':' -n -k2 test.txt  # 以':'作为分隔(-t) 用分隔后的第二个(k2)数字(-n)元素 正向排序
-------------------------------------
d:1
c:2
b:3
a:4
e:5
f:11
Z:77

# 逆序同理
2.Uniq command is unique
Used to check and delete repeated rows and columns in text files, generally used in conjunction with the sort command
- -c # Display the number of repetitions of the row next to each column.
- -d # Only display the repeated rows and columns.
- -u # Only display the ranks once.
Prepare the file and write a piece of unordered content
cat >> 2.txt <<GG
> hello
> 123
> hello
> 123
> func
> gg
> GG
Basic use
sort 2.txt
-----------------------------
123
123
func
gg
hello
hello

sort 2.txt |uniq   # 不重复排序
----------------------------
123
func
gg
hello
-c use count number
sort 2.txt | uniq -c  # 不重复排序 并显示出现次数
---------------------------
      2 123
      1 func
      1 gg
      2 hello
The use of -d appears multiple times? duo?
sort 2.txt | uniq -d
--------------------------
123
hello
The use of -u unique appears once
sort 2.txt | uniq -u
-------------------------
func
gg
3.cut command
The cut command is used to display the specified part of the line and delete the specified field in the file
- -d # Specify the field separator, the default field separator is "TAB";
- -f # Display the content of the specified field;
head -1 /etc/passwd
------------------------------
1    2 3 4  5     6     7
root:x:0:0:root:/root:/bin/bash

head -1 /etc/passwd | cut -d ':' -f1,2,4,6,7  # 上条显示的内容 以':'分隔(-d) 显示(-f)1,2,4,6,7这几个内容
------------------------------
root:x:0:/root:/bin/bash
5.4 tr command
Replace or delete commands
- -d # delete characters
[root@localhost ~]# head -1 /etc/passwd |tr "root" "ROOT"
ROOT:x:0:0:ROOT:/ROOT:/bin/bash
[root@localhost ~]#
[root@localhost ~]# head -1 /etc/passwd |tr -d "root"  # 删除 root字符
:x:0:0::/:/bin/bash
[root@localhost ~]# echo "hello egon qq:378533872" > a.txt
[root@localhost ~]# tr "egon" "EGON" < a.txt
hEllO EGON qq:378533872  # 吧egon替换为大写
5.5 wc command
Statistics
- -c # Count the number of bytes of the file;
- -l # count the number of lines in the file;
- -w # Count the number of words in the file. By default, blank characters are used as separators
[root@localhost ~]# ll file.txt
-rw-r--r--. 1 root root 25 8月 12 20:09 file.txt
[root@localhost ~]# wc -c file.txt
25 file.txt
[root@localhost ~]# cat file.txt
hello
123
hello
123
func
[root@localhost ~]# wc -l file.txt
5 file.txt
[root@localhost ~]# grep "hello" file.txt |wc -l
2
[root@localhost ~]# cat file.txt
hello
123
hello
123
func
[root@localhost ~]# wc -w file.txt
5 file.txt