I asked me this question in an interview with a large company before: There are several ways to move a View. What is the difference between ScrollTo and ScrollBy?
I didn't mention the latter. . . . Rub,,,,,, then study and study. . . .
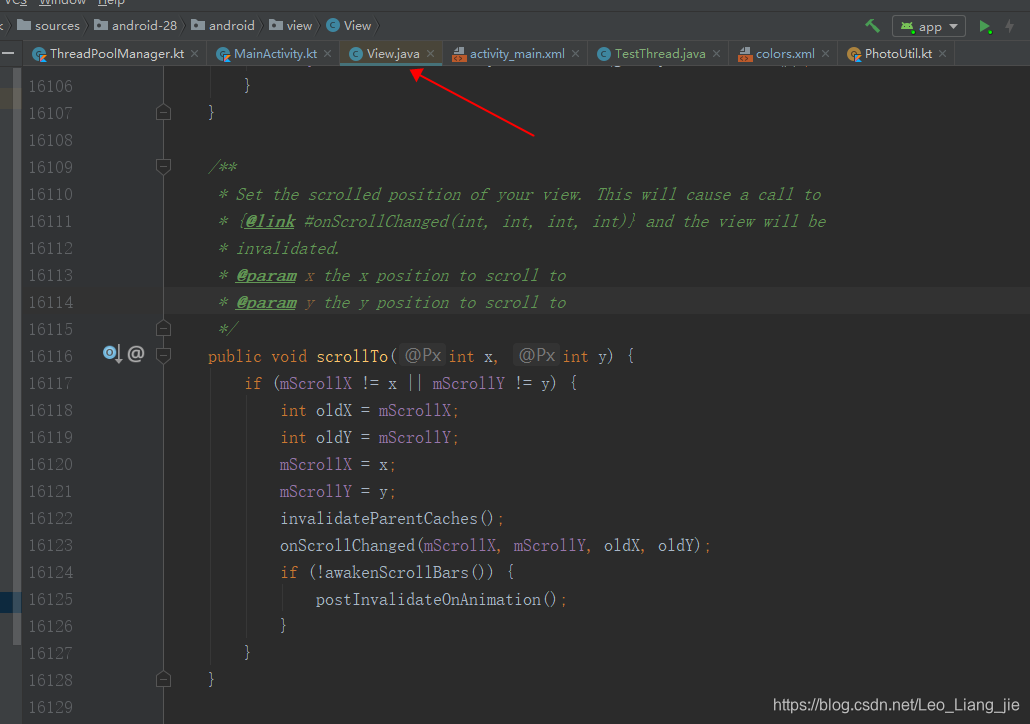
First, look at the source code of ScrollTo, which is a view layer method
Translate the source code comments:
Set the sliding position of your View, this will call the onScrollChanged() method, and then your View will be redrawn
x: slide to X
y: slide to Y
Note: In this method, the current offset mScrollX and mScrollY are recorded each time.
Then: What about mScrollX and mScrollY?

It is clear that mScrollX and mScrollY are the offset of the View content in pixels.
And every time ScrollTo () is called to move, the current XY axis offset will be saved.
Focus! ! ! It is the content of the offset
That is, using this ScrollTo() will not change the position of the View itself, only the position of the View content
What is content? For example, the text in the TextView is the content, and a Button is placed in a ViewGroup, and the Button is the content.
Another example is my following example:
A TextView is nested in ConstraintLayout, and the TextView can be moved by ConstraintLayout.ScrollTo()
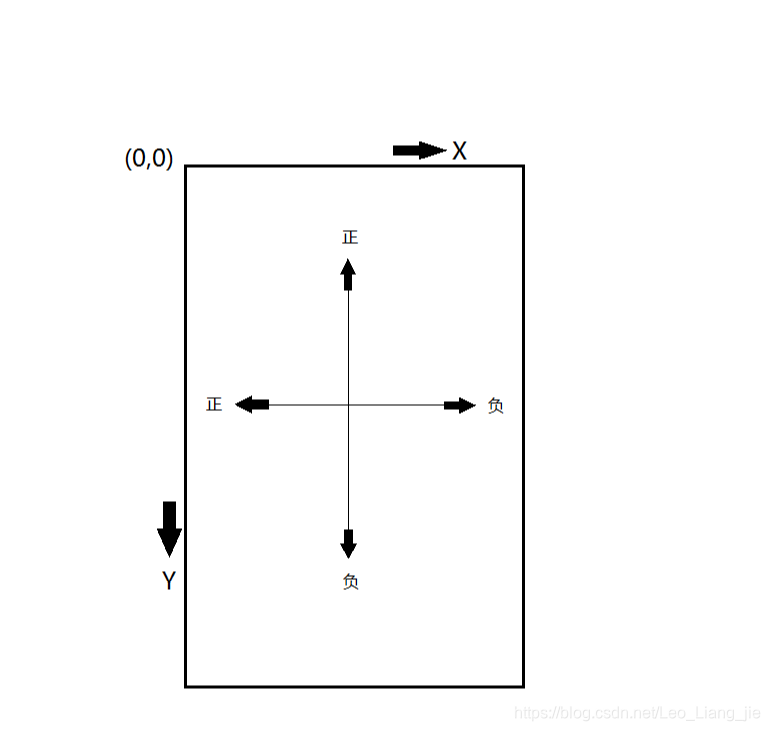
Before that, let me talk about how the XY axis coordinates of View are defined, as shown in the figure below.
1> The upper left corner is (0,0)
2> The level to the right is positive and vice versa.
3> Straight down is positive, otherwise it is negative.
Stop talking nonsense, look at the Demo first:
activity_main.xml<?xml version="1.0" encoding="utf-8"?>
<android.support.constraint.ConstraintLayout
xmlns:android="http://schemas.android.com/apk/res/android"
xmlns:tools="http://schemas.android.com/tools"
xmlns:app="http://schemas.android.com/apk/res-auto"
android:layout_width="match_parent"
android:layout_height="match_parent"
tools:context=".ui.MainActivity">
<TextView
android:id="@+id/button_down"
android:layout_width="wrap_content"
android:layout_height="wrap_content"
android:text="往右下"
android:paddingTop="10dp"
android:paddingBottom="10dp"
android:background="@color/color_00a3f3"
app:layout_constraintBottom_toBottomOf="parent"
app:layout_constraintLeft_toLeftOf="parent"
app:layout_constraintRight_toLeftOf="@id/button_up"
app:layout_constraintTop_toTopOf="parent"
app:layout_constraintHorizontal_chainStyle="spread"/>
<TextView
android:id="@+id/button_up"
android:layout_width="wrap_content"
android:layout_height="wrap_content"
android:background="@color/color_00a3f3"
android:text="往左上"
android:paddingTop="10dp"
android:paddingBottom="10dp"
app:layout_constraintLeft_toRightOf="@id/button_down"
app:layout_constraintRight_toLeftOf="@id/button_reset"
app:layout_constraintTop_toTopOf="parent"
app:layout_constraintBottom_toBottomOf="parent"
app:layout_constraintHorizontal_chainStyle="spread"/>
<TextView
android:id="@+id/button_reset"
android:layout_width="wrap_content"
android:layout_height="wrap_content"
android:background="@color/color_00a3f3"
android:text="回到原始位置"
android:paddingTop="10dp"
android:paddingBottom="10dp"
app:layout_constraintLeft_toRightOf="@id/button_up"
app:layout_constraintBottom_toBottomOf="parent"
app:layout_constraintRight_toLeftOf="@id/button_by_down"
app:layout_constraintTop_toTopOf="parent"
app:layout_constraintHorizontal_chainStyle="spread"/>
<TextView
android:id="@+id/button_by_down"
android:layout_width="wrap_content"
android:layout_height="wrap_content"
android:background="@color/color_00a3f3"
android:text="在现在位置基础上叠加右下"
android:paddingTop="10dp"
android:paddingBottom="10dp"
app:layout_constraintLeft_toRightOf="@id/button_reset"
app:layout_constraintBottom_toBottomOf="parent"
app:layout_constraintRight_toRightOf="parent"
app:layout_constraintTop_toTopOf="parent"
app:layout_constraintHorizontal_chainStyle="spread"/>
<android.support.constraint.ConstraintLayout
android:id="@+id/cl_contain"
android:layout_width="0dp"
android:layout_height="200dp"
app:layout_constraintLeft_toLeftOf="parent"
app:layout_constraintRight_toRightOf="parent"
app:layout_constraintBottom_toBottomOf="parent"
android:background="@color/colorAccent">
<TextView
android:id="@+id/scroll"
android:layout_width="wrap_content"
android:layout_height="wrap_content"
app:layout_constraintLeft_toLeftOf="parent"
app:layout_constraintRight_toRightOf="parent"
app:layout_constraintBottom_toBottomOf="parent"
app:layout_constraintTop_toTopOf="parent"
android:background="@color/colorPrimary"
android:padding="80dp"
android:textSize="18sp"
android:textColor="@color/color_239efe"
android:gravity="center"
android:text="scroll"/>
</android.support.constraint.ConstraintLayout>
</android.support.constraint.ConstraintLayout>
MainActivitypackage com.leo.dicaprio.myutilapp.ui
import android.support.v7.app.AppCompatActivity
import android.os.Bundle
import com.leo.dicaprio.myutilapp.R
import com.leo.dicaprio.myutilapp.thred.TestThread
import kotlinx.android.synthetic.main.activity_main.*
class MainActivity : AppCompatActivity() {
private var move: Boolean = false
override fun onCreate(savedInstanceState: Bundle?) {
super.onCreate(savedInstanceState)
setContentView(R.layout.activity_main)
button_down.setOnClickListener {
cl_contain.scrollTo(-100, -100)
}
button_up.setOnClickListener {
cl_contain.scrollTo(100, 100)
}
button_reset.setOnClickListener {
cl_contain.scrollTo(0, 0)
}
button_by_down.setOnClickListener {
cl_contain.scrollBy(-50, -50)
}
}
}
【Original position 1】
At the beginning, the red color is a ViewGroup, and the green block is a TextView, so the TextView (green) is moved by ViewGroup.scroll()
This original coordinate (0,0), and the following columns move content through ScrollTo or ScrollBy, are all based on this point.

【Move ScrollTo(-100,-100) to the bottom right】
Click - call method ScrollTo(-100,-100) to see the effect picture

Seeing this, it is estimated that some people will have problems. Is it a negative number or the opposite direction of xy coordinates?
(-100, -100) According to reason, it should be placed on the upper left to move, how could it be the lower right?
Don't worry, I will explain later, anyway, remember that the parameters passed in are opposite to the coordinate direction
【Move ScrollTo(100,100) to the upper left】
Click - call method ScrollTo(100,100) to see the effect picture
Obviously, the entire TextView moves to the upper left, and the coordinates of the upper left corner are (-100, -100)
Note that I made up the grass-green piece to show beyond the parent layout, but in fact it does not exist.
I just want to give the part of the content beyond the parent layout.

【Back to initial position ScrollTo(0,0)】
Click - call method ScrollTo(0,0) to see the effect picture
Obviously, it is the same as the first rendering.

So far, ScrollTo(x,y) is basically finished.
Let's say ScrollBy(x,y)
Look at its source code:

simple and clear.
Both add the original offset mScrollX and mScrollY, and then call ScrollTo()
and so:
1> ScrollBy is a relative movement based on the current position (mScrollX, mScrollY).
2> ScrollTo is an absolute movement based on the original position coordinates (0,0).
[ Call ScrollBy(-50,-50) multiple times ]
First restore to the original position, then click - call the method ScrollTo(-50,-50) to see the effect picture, move 50 pixels to the bottom right for the first time

Click - call the method ScrollTo(-50,-50) to see the effect picture. The second time, on the basis of the above picture, move 50 pixels to the bottom right

the 3rd time....
4th....
5th....
6th time...
.......
Know the 8th

So ScrollBy offsets based on the current position, and ScrollTo offsets based on the original position.
[ Why the parameters passed in are opposite to the coordinate axis direction? ? ? ? 】
In fact, through onScrollChanged (to redraw) to the final invalidate () method
There is such a method: tmpr.set(l-scrollX, t-scrollY, r-scrollX, b-scrollY) ,
The specified position of the drawing target is minus your offset.
So the direction of the XY axis is opposite.
The source code for specific tracking will not be posted, basically remember this theory.
Finally, let me talk about the first question:
Question 1: There are several ways to move a View?
1> Via ScrollTo or ScrollBy
2> Set the spacing with the parent layout through LayouParams
3> Through animation
The above code is no problem in the pro-test. If you have any questions, please leave a message to correct me, thank you!