News from the wind
Today, I read a blog Spring Boot killed Maven! I always wanted to build it myself.
Build the project
Enter this website to generate a SpringBoot Demo project.
As follows: After
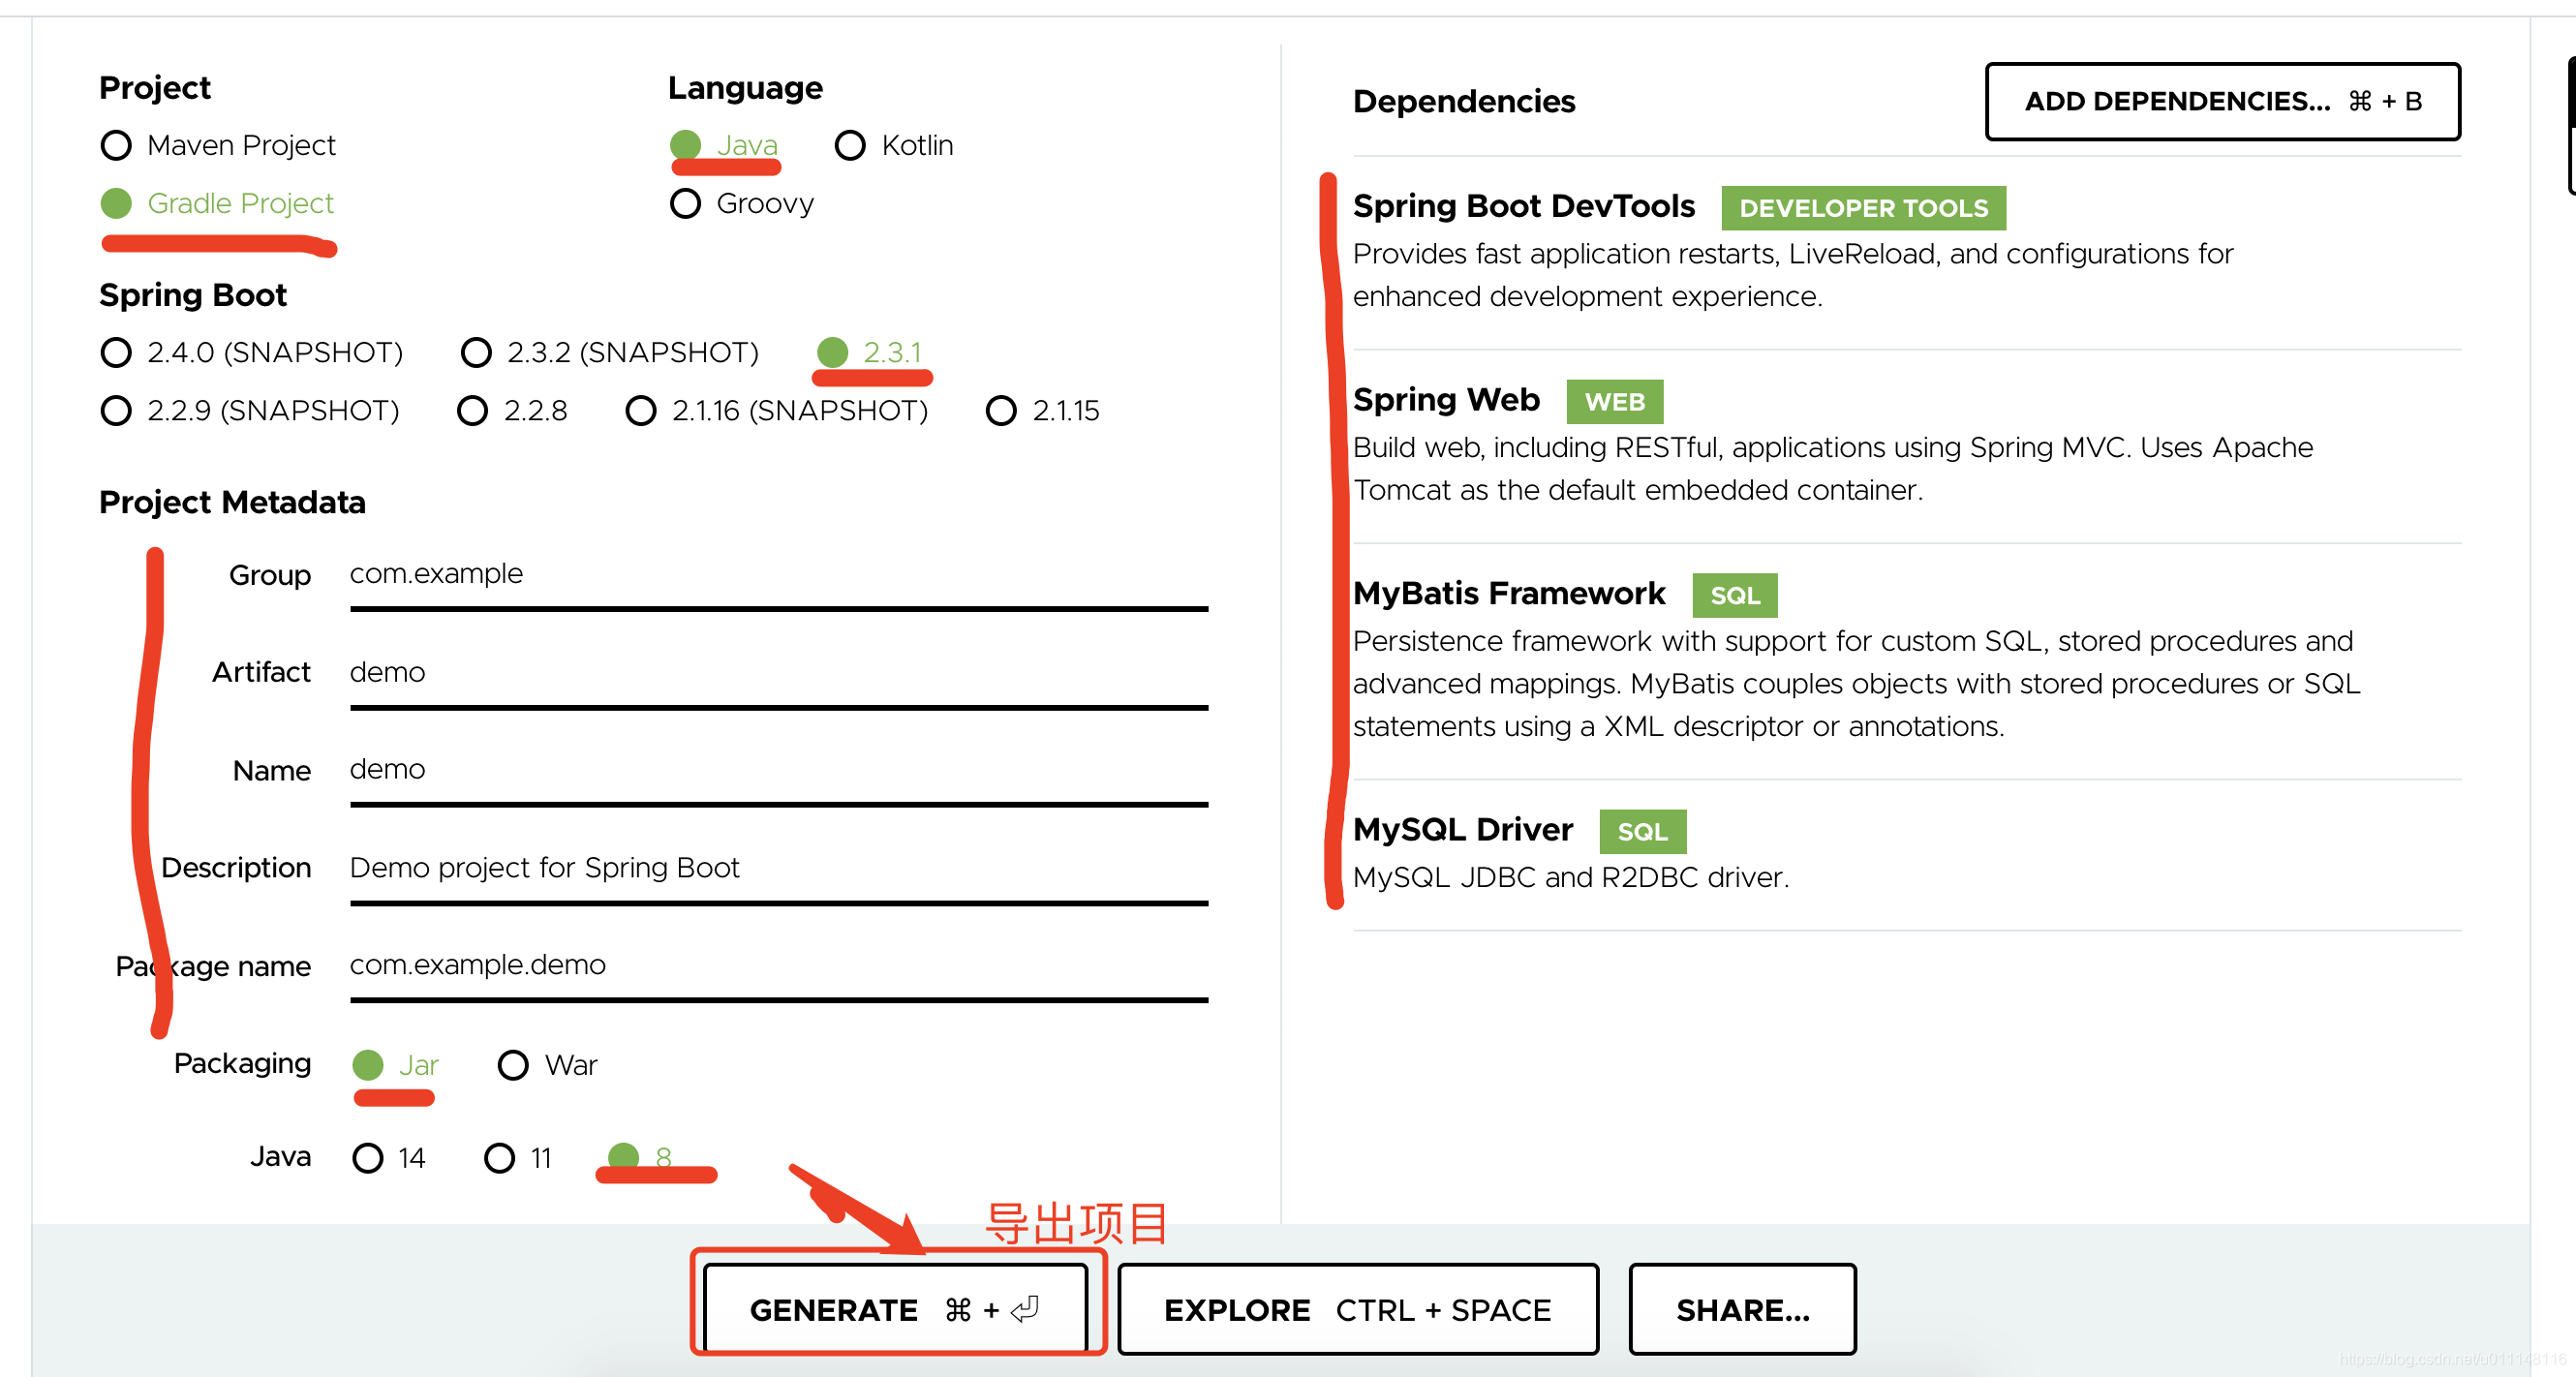
exporting the project, unzip it and place it in a directory and then pour it into IDEA.
These few include many, many core dependencies. After the basic import, we don't need to care too much about Spring related things. If you want to use third-party direct dependencies, see build.gradle below for details.
Import project
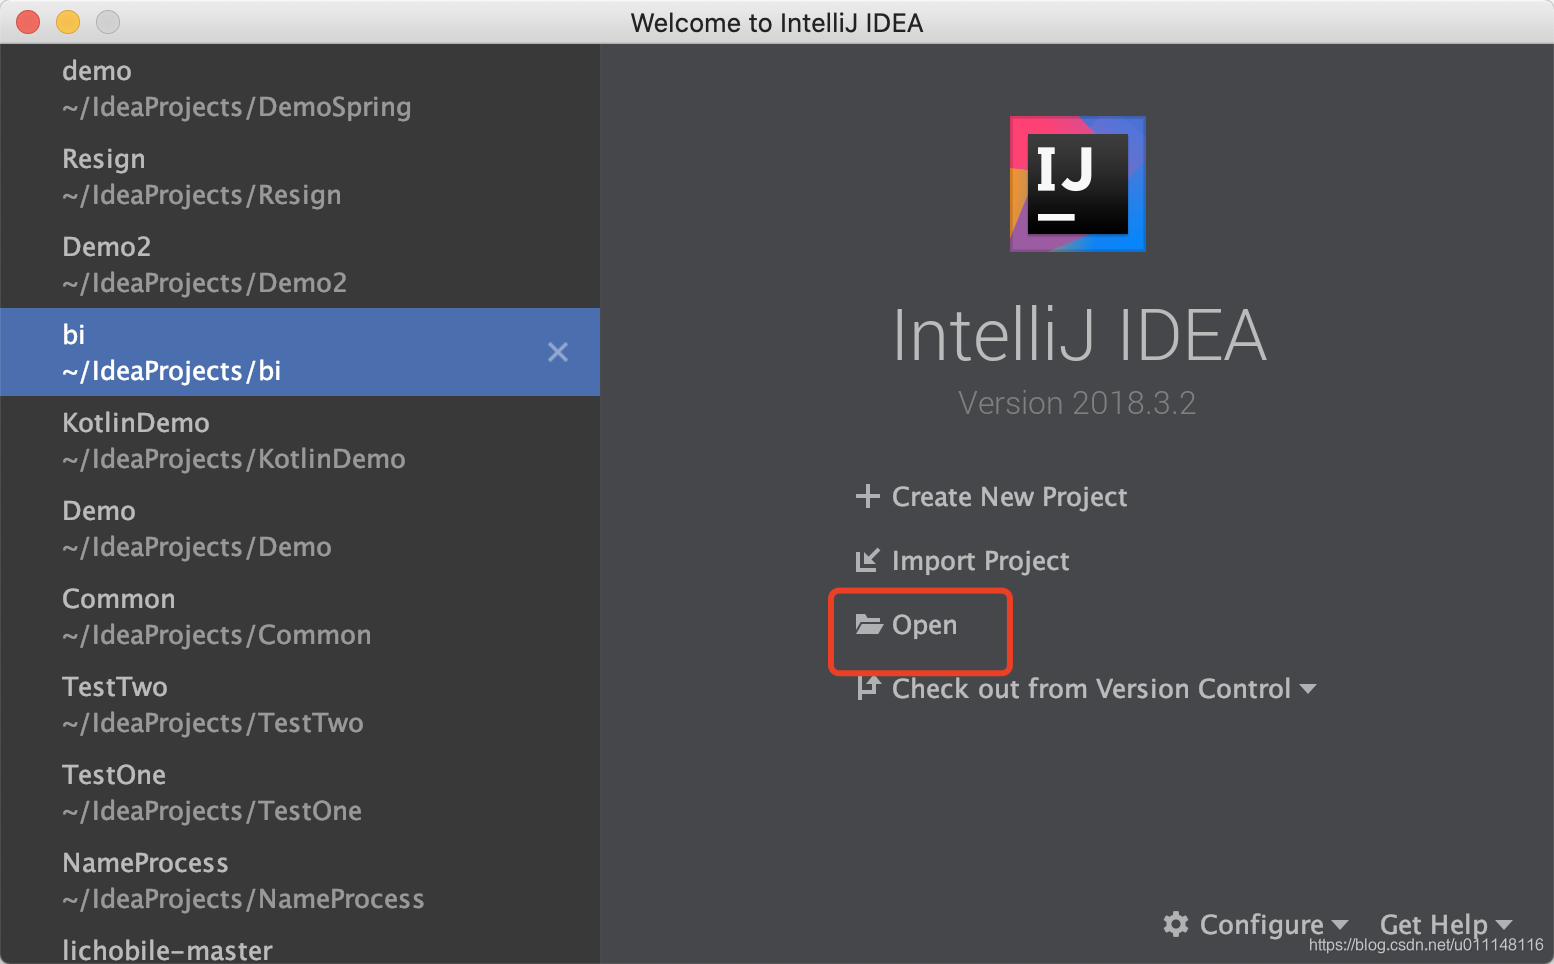
Select open, and then select your decompressed project. Generally, it will be called demo after decompression. If there is a conflict, change the name by yourself.
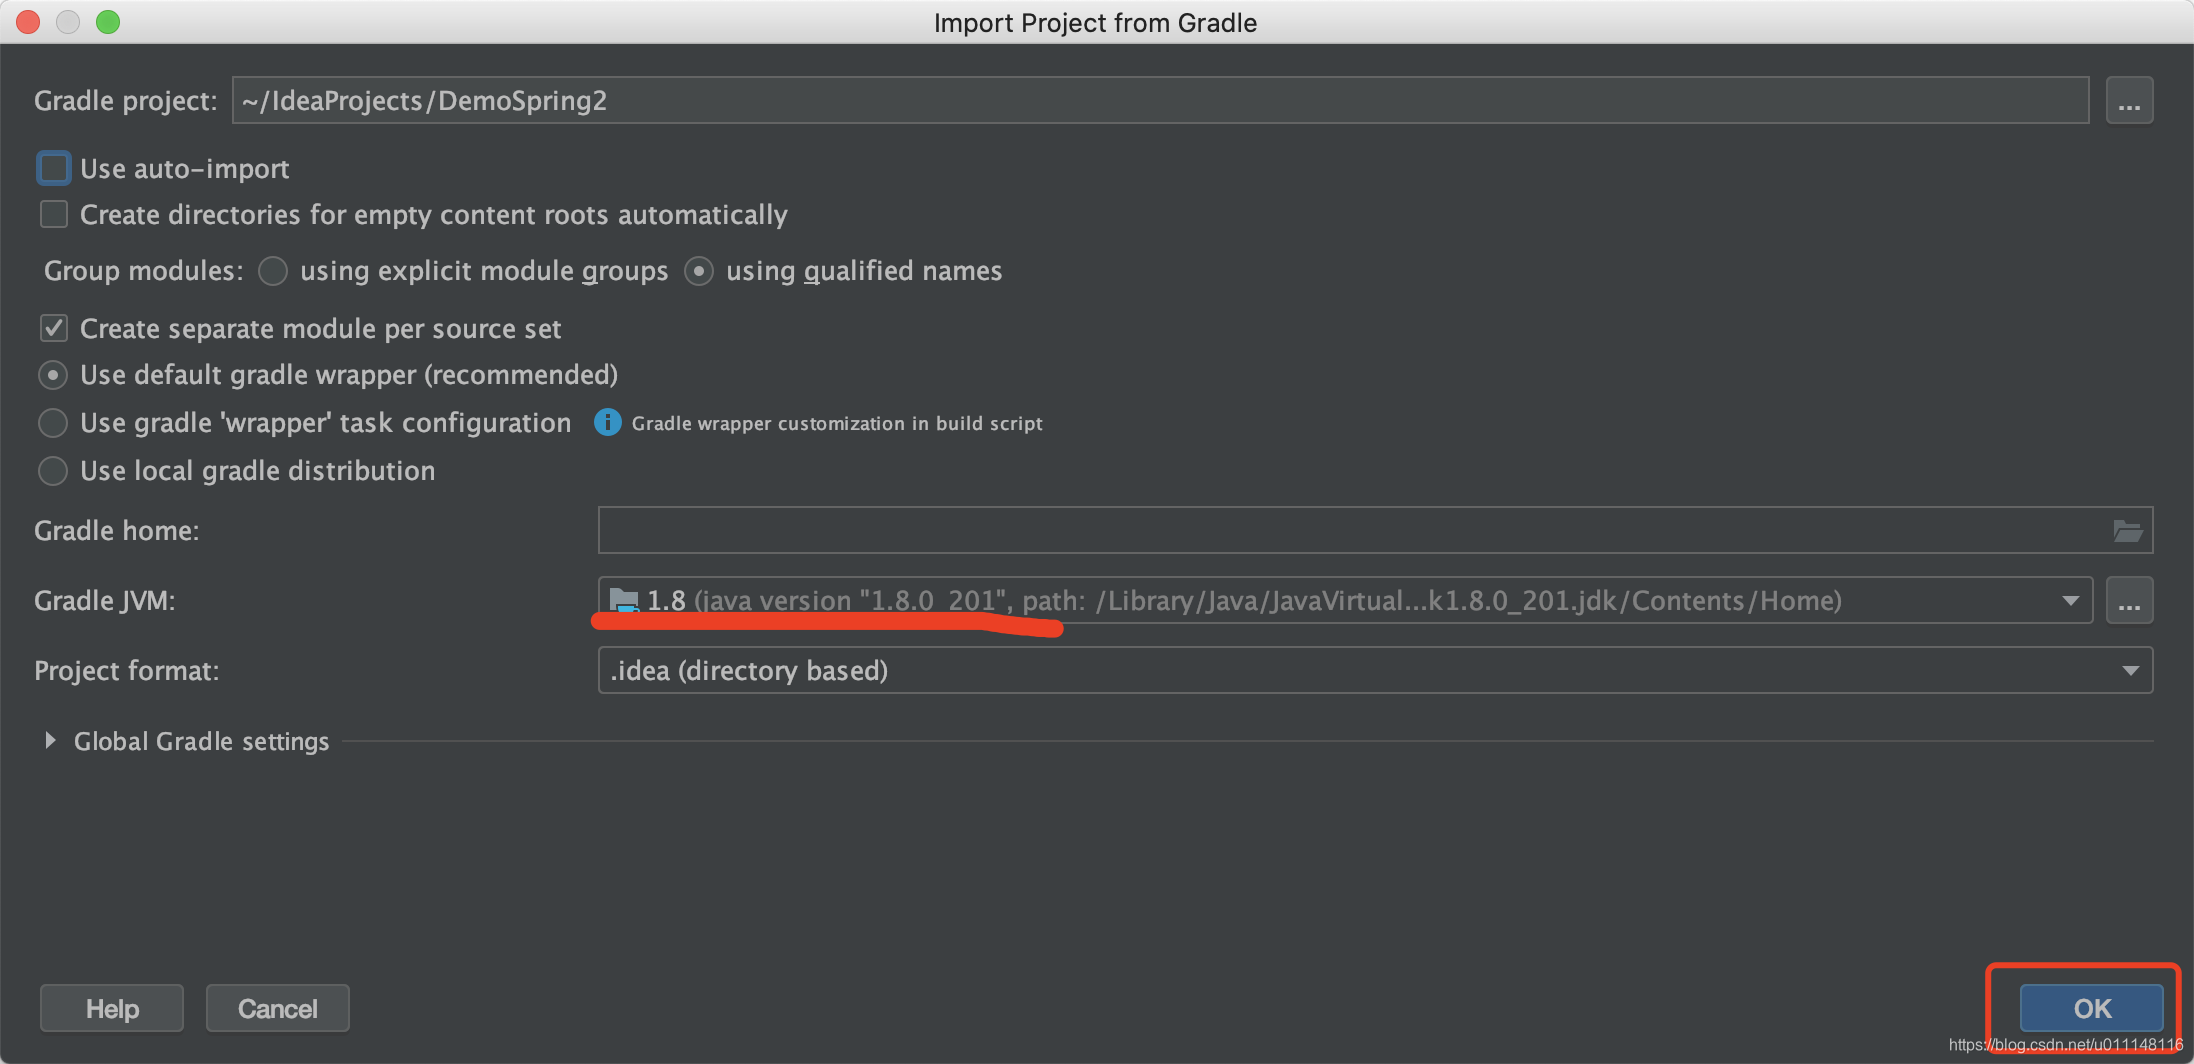
Then choose a JDK environment and it's OK to go to the next step.
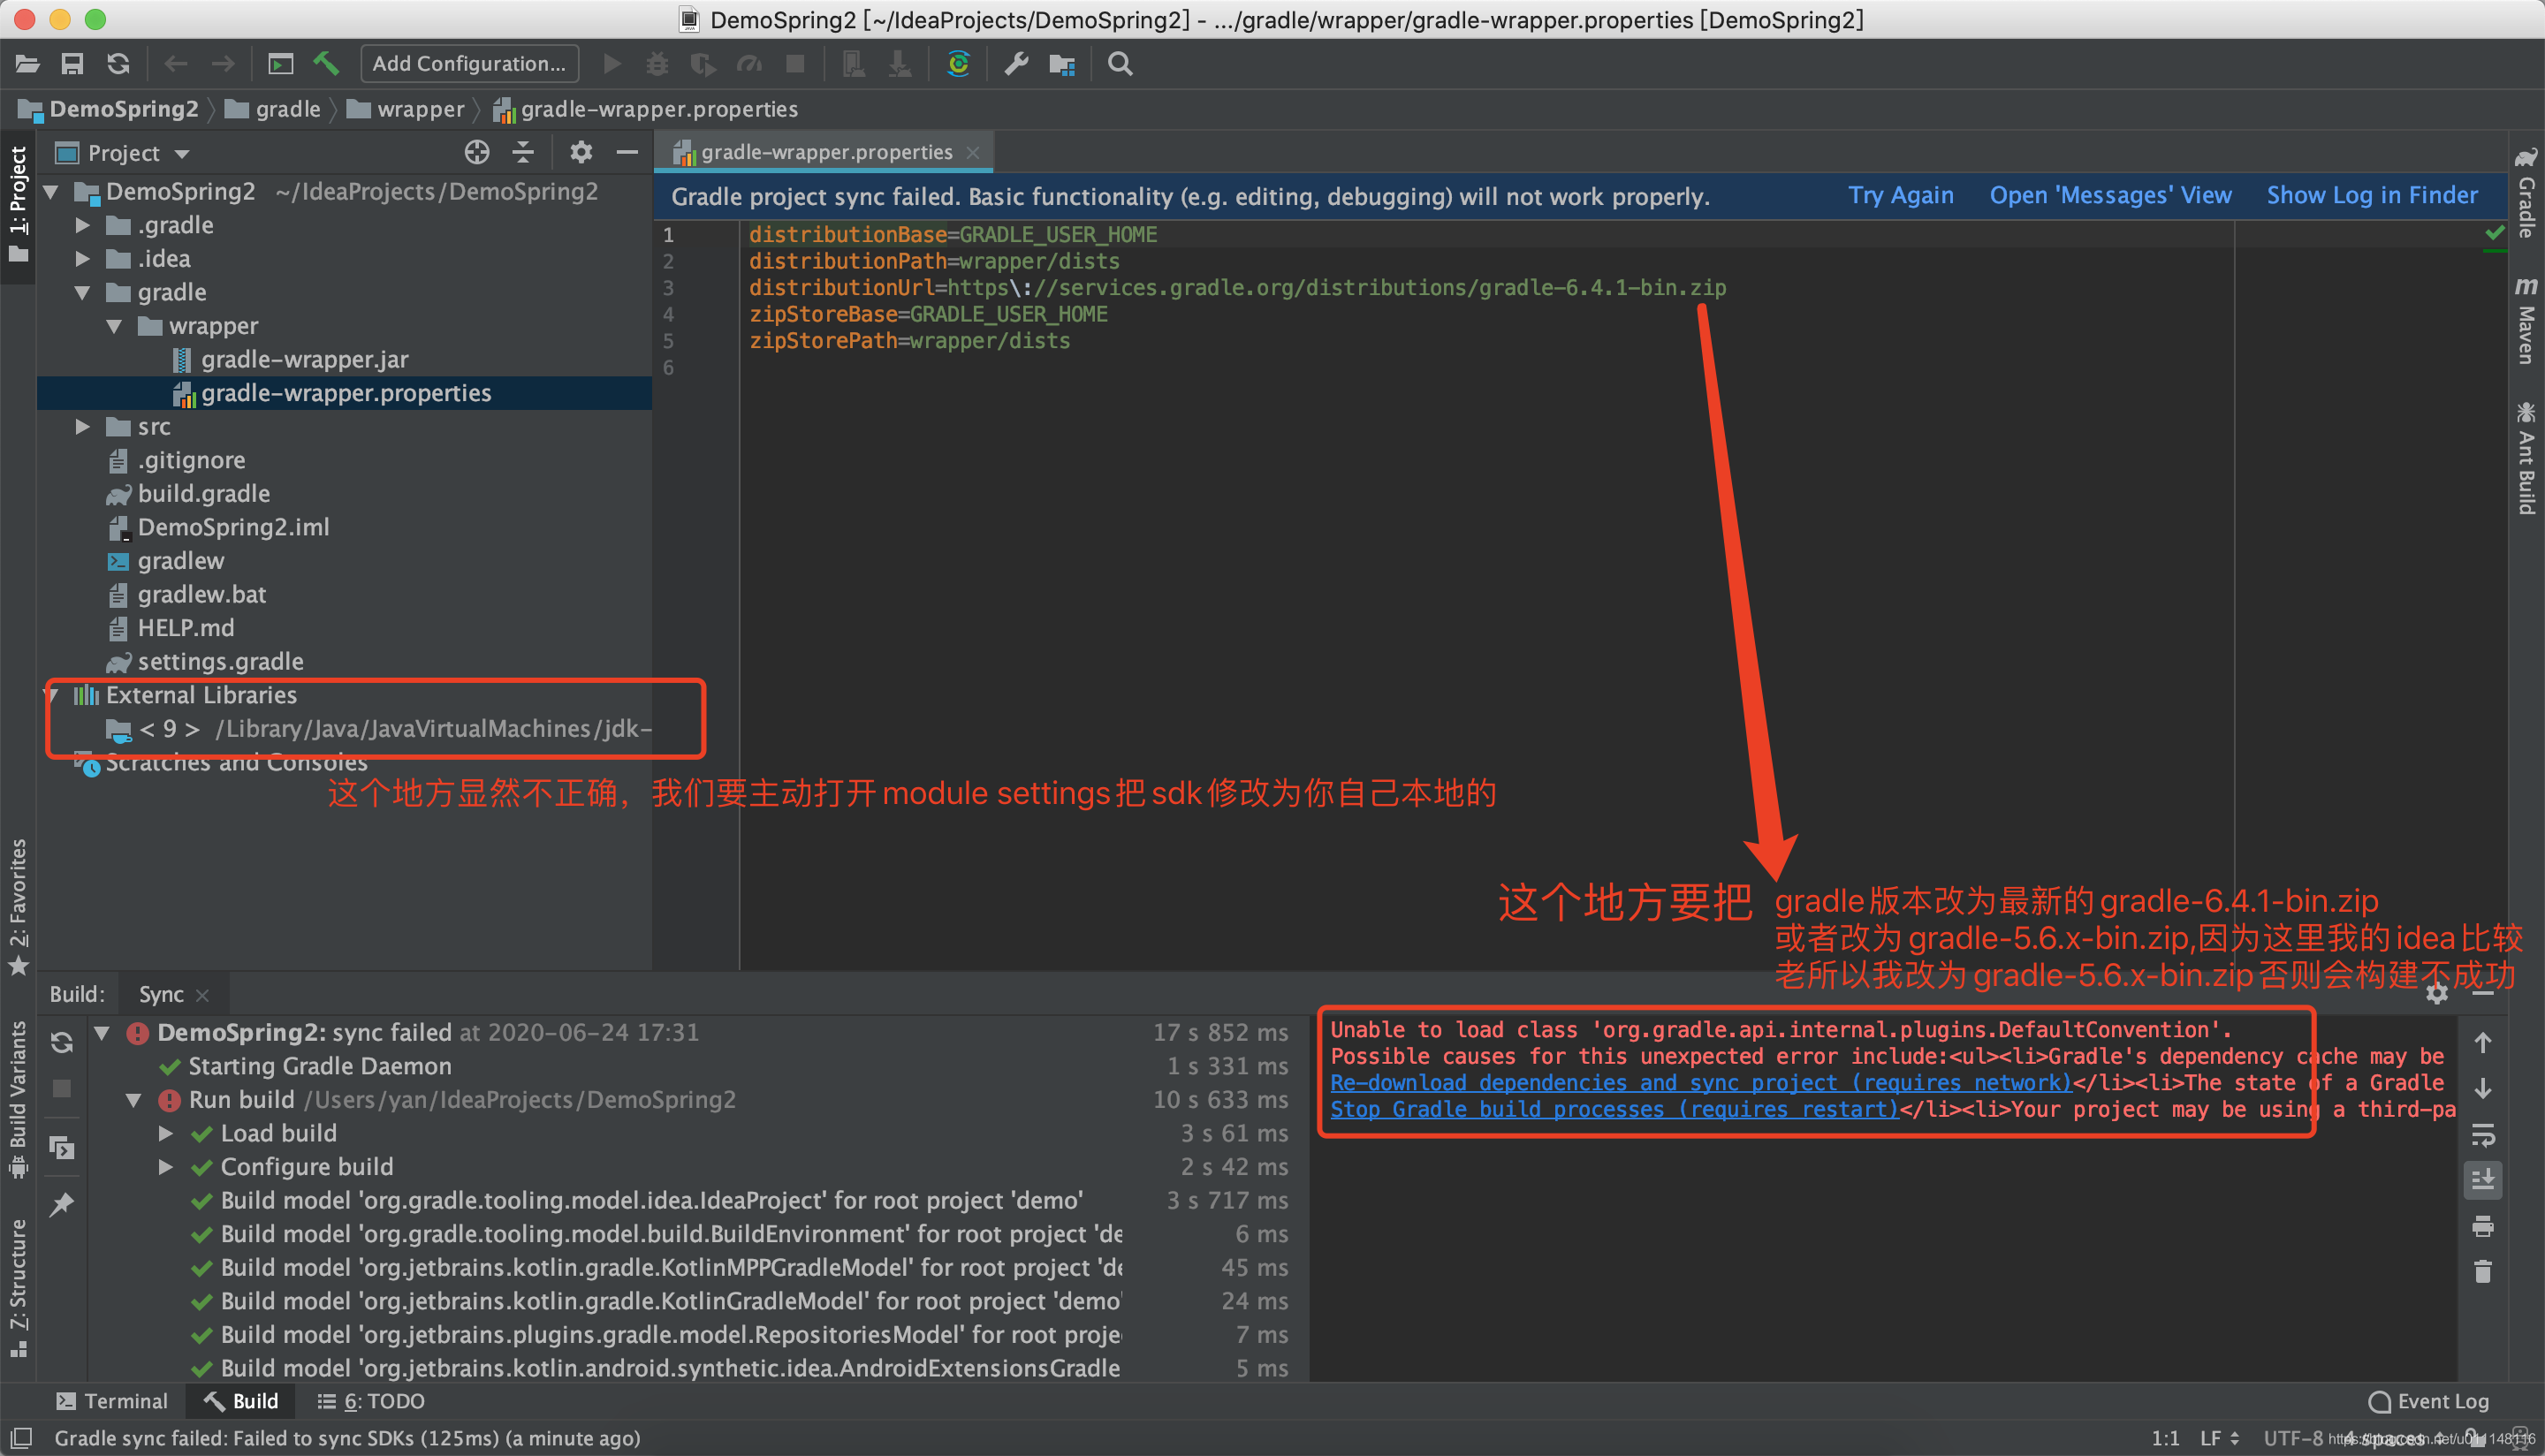
The problem in the lower right corner of the picture is because my gradle version is too high and my idea version is too low.
However , if the version set is too low or not the specified version, an error will be reported as shown below:
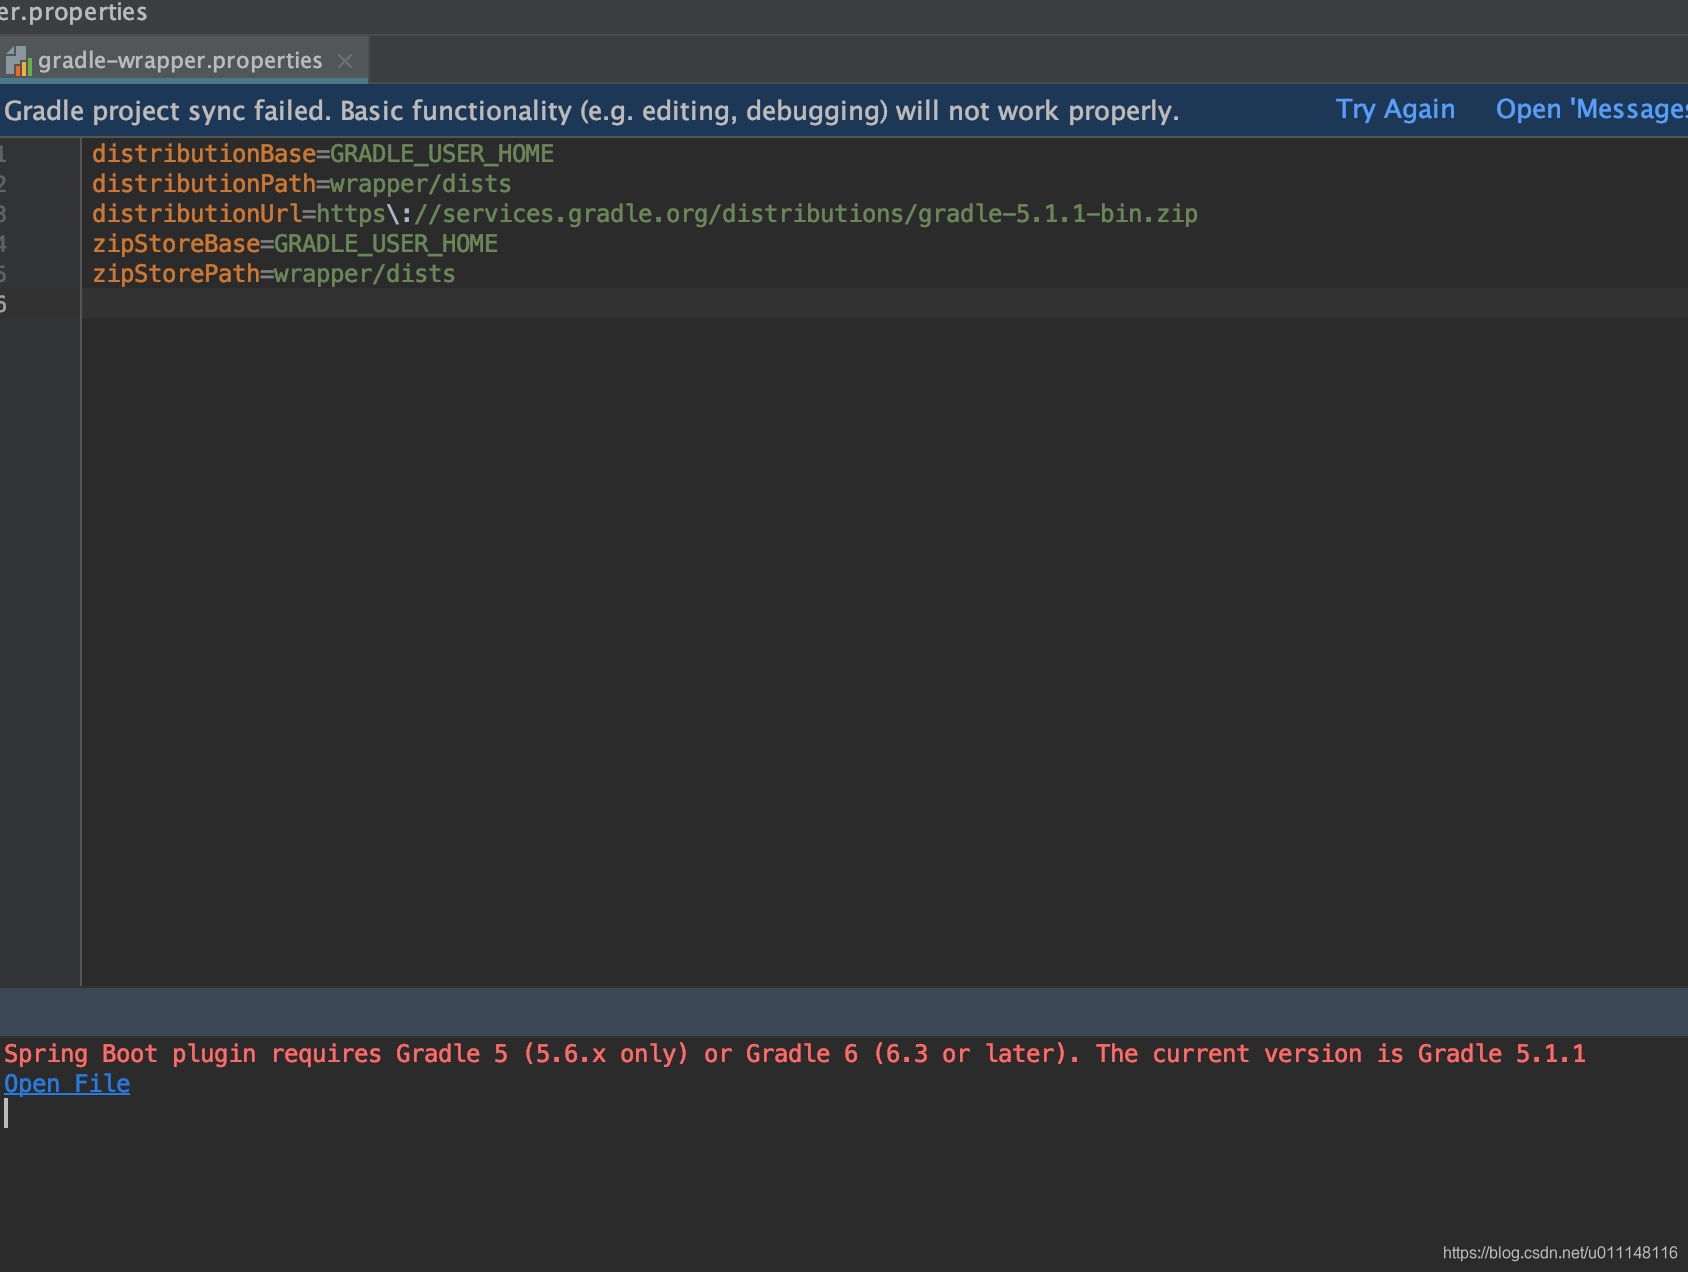
So in order to avoid the above problem, we set 5.6 .1. After setting, there will be a pop-up window in the lower right corner shown in the figure below, select Enable Auto-Import.

Then we select Build -> Build Project.

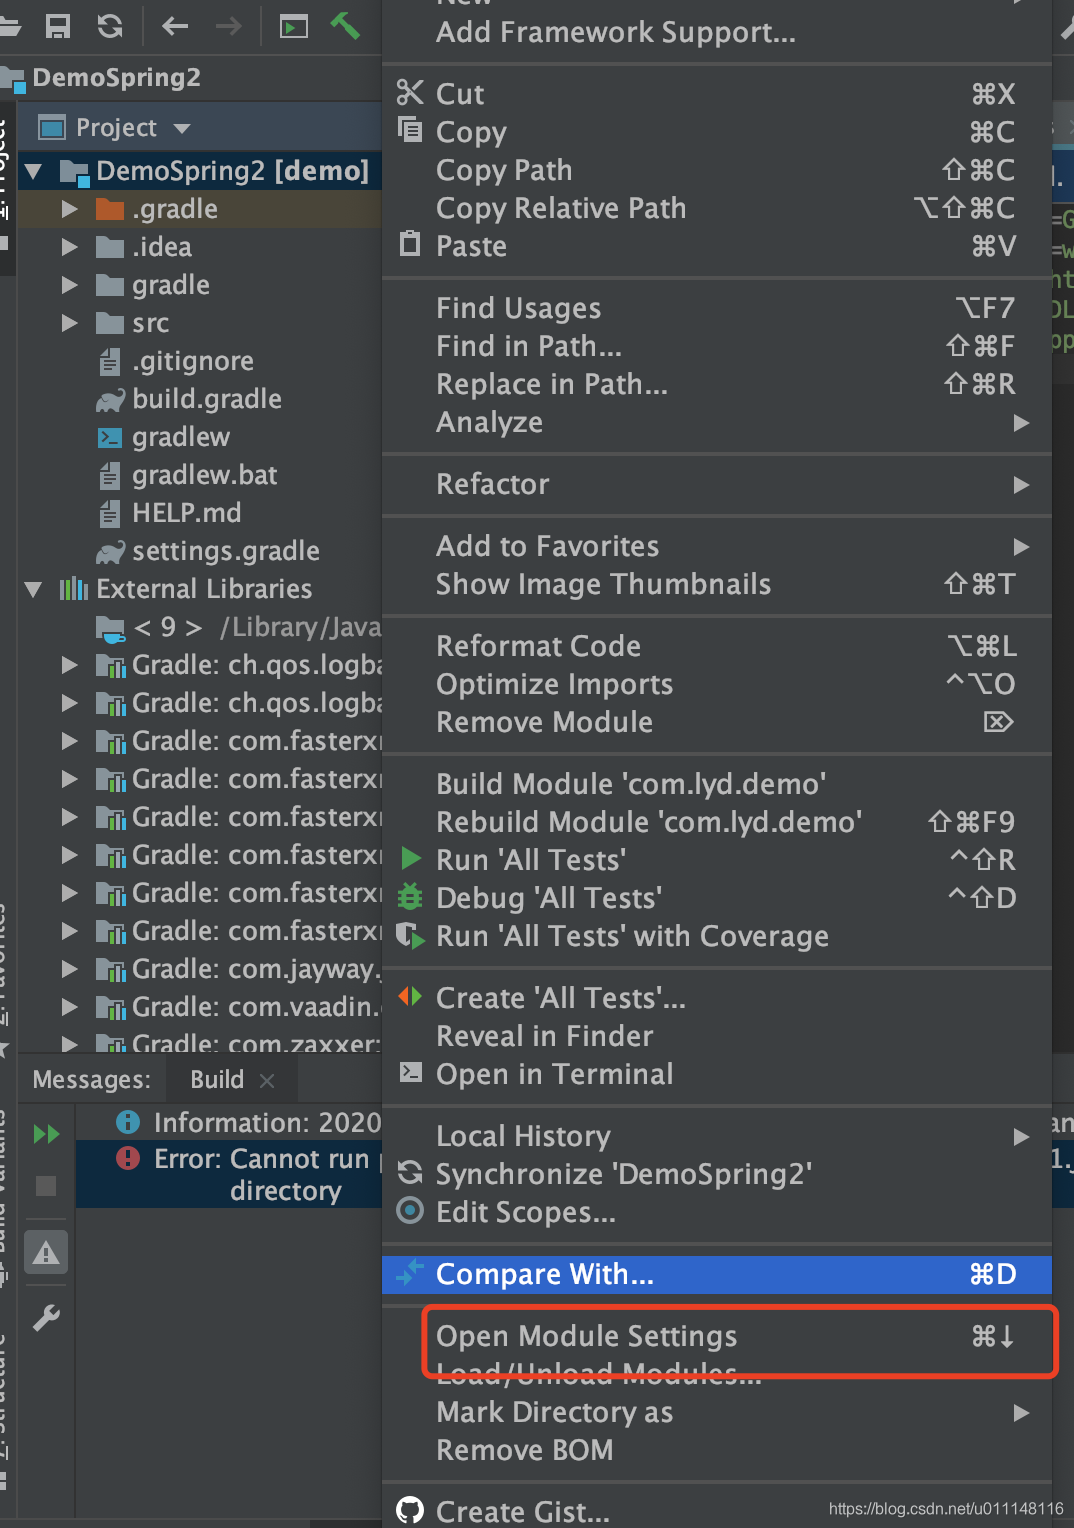
We need to open the module settings and select the JDK we have installed.
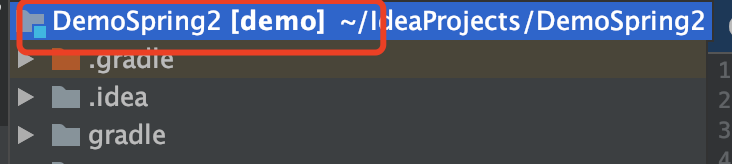
First select the project root directory, Command + Down key or My Fn + F4 can open it.
Then select Build -> Build Project again
Project configuration
Most of the project configuration has been selected when we regenerate.
build.gradle content
plugins {
	id 'org.springframework.boot' version '2.3.1.RELEASE'
	id 'io.spring.dependency-management' version '1.0.9.RELEASE'
	id 'java'
}

group = 'com.lyd'
version = '0.0.1-SNAPSHOT'
sourceCompatibility = '1.8'

configurations {
	compileOnly {
		extendsFrom annotationProcessor
	}
}

repositories {
	mavenCentral()
}

dependencies {
	implementation 'org.springframework.boot:spring-boot-starter-web'
	implementation 'org.mybatis.spring.boot:mybatis-spring-boot-starter:2.1.3'
	implementation 'com.alibaba:druid-spring-boot-starter:1.1.10'
	compileOnly 'org.projectlombok:lombok'
	developmentOnly 'org.springframework.boot:spring-boot-devtools'
	runtimeOnly 'mysql:mysql-connector-java'
	annotationProcessor 'org.projectlombok:lombok'
	testImplementation('org.springframework.boot:spring-boot-starter-test') {
		exclude group: 'org.junit.vintage', module: 'junit-vintage-engine'
	}
}

test {
	useJUnitPlatform()
}
Contents in the application.properties file
#datasource
spring.datasource.url=jdbc:mysql://localhost:3306/credit?characterEncoding=UTF-8
spring.datasource.username=root
spring.datasource.password=123456
spring.datasource.driver-class-name=com.mysql.jdbc.Driver


#set tomcat port context
#端口被占用的话就换一个
server.port=8082
server.servlet.context-path=/demo
In the new version, server.context-path has been invalidated. After setting a unified access path, it will not take effect. Modify it to server.servlet.context-path .
Content in the application.yml file
#spring的配置
spring:
  datasource:
    name: sqldata
    url: jdbc:mysql://localhost:3306/credit?characterEncoding=UTF-8 #配置在 配置中心
    username: root #配置在 配置中心
    password: 123456 #配置在 配置中心
    # 使用druid数据连接池
    type: com.alibaba.druid.pool.DruidDataSource
    driverClassName: com.mysql.jdbc.Driver
    filters: stat
    maxActive: 20
    initialSize: 1
    maxWait: 60000
    minIdle: 1
    timeBetweenEvictionRunsMillis: 60000
    minEvictableIdleTimeMillis: 300000
    validationQuery: SELECT 'x' FROM DUAL
    testWhileIdle: true
    testOnBorrow: false
    testOnReturn: false
    poolPreparedStatements: true
    maxOpenPreparedStatements: 20
  aop:
    proxy-target-class: true


#把内置的tomcat 参数 配置在 properties文件中,以便日后使用配置中心
# #tomcat容器的配置
#server:
#    context-path: /lyd
#    port: 8082

#mybatis的配置
mybatis:
  type-aliases-package: com.lyd.demo.mapper
  mapper-locations: classpath*:mappings/**/*.xml
Simple test code
SpringBoot boot configuration
We can refer to the code in step 2:
              package com.example.demo;
              import org.springframework.boot.SpringApplication;
              import org.springframework.boot.autoconfigure.SpringBootApplication;
              import org.springframework.web.bind.annotation.GetMapping;
              import org.springframework.web.bind.annotation.RequestParam;
              import org.springframework.web.bind.annotation.RestController;

              @SpringBootApplication
              @RestController
              public class DemoApplication {


                  public static void main(String[] args) {
                  SpringApplication.run(DemoApplication.class, args);
                  }

                  @GetMapping("/hello")
                  public String hello(@RequestParam(value = "name", defaultValue = "World") String name) {
                  return String.format("Hello %s!", name);
                  }

              }
Start service
We are a gradle project, we use
./gradlew rootRun
It doesn’t matter if the progress reaches 75%, it’s okay. When we see that there are no errors and no port occupations in the figure below, it is successful:

Next, we visit http://localhost:8082/demo/hello?name=xxxxxx

successfully!
Out of service
After reading a lot of stopping services, the simpler one is to view the service process ID and execute directly:
kill -9 [pid] 如:kill -9 800
How do we check the pid?
The first:
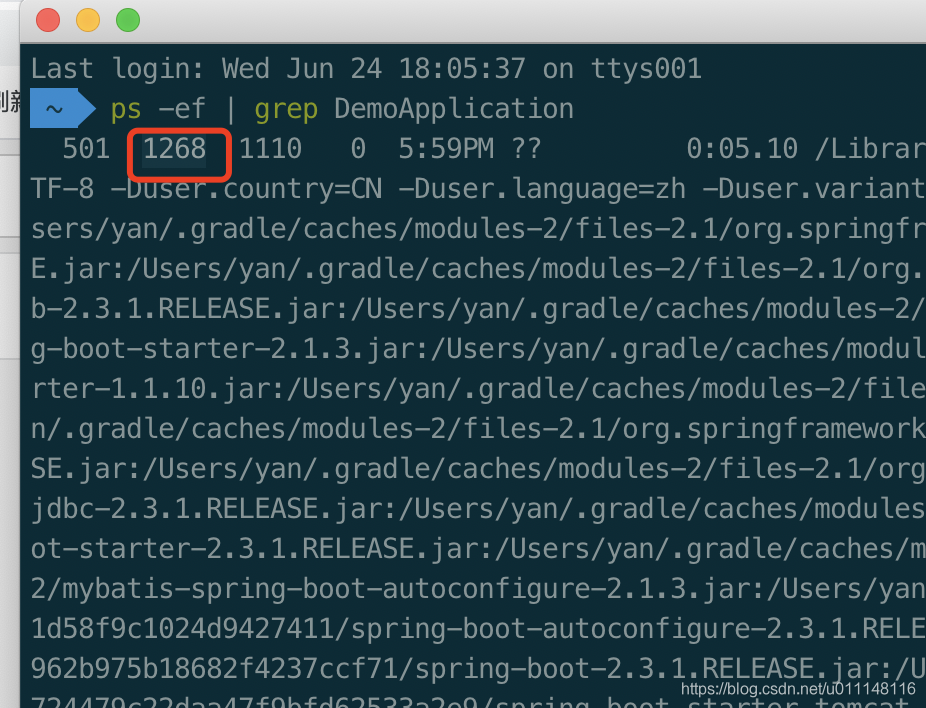
ps -ef | grep [Application名称,只要能查到就行]
如:ps -ef | grep DemoApplication
Then you can see that the second number in the figure below is the process ID; then execute kill -9 1268.
The second type: When
we execute ./gradlew bootRun, we will see the following figure:

Is there a process ID that matches us? The first method found the same.
Okay, let's execute kill -9 1268
Another point is that we re-execute the ./gradlew bootRun after we kill it. When we start the service, we have to wait a little longer, which may not start so fast, which leads us to keep requesting 404.