Welcome to my GitHub
https://github.com/zq2599/blog_demos
content: classification summary of all original articles and supporting source code, involving Java, Docker, Kubernetes, DevOPS, etc.;
About GitLab CI
In the article "Experiencing SpringBoot (2.3) Application Making Docker Image (Official Solution)" , we have mastered the image construction solution officially recommended by SpringBoot. The next thing to experience is the CI capability of GitLab, which is responsible for turning the code into a private warehouse The mirror image of, we can concentrate on coding;
The role of GitLab CI is shown in the figure below. After the developer submits the code to GitLab, it will trigger compilation, construction, mirroring, and pushing to the warehouse. Then the K8S environment can use the latest mirror:

This article content
This article continues to adhere to the actual combat style and complete the following operations with everyone:
- Prepare a SpringBoot-2.3 application;
- Write GitLab pipeline script;
- Submit the code to trigger the work of the pipeline script;
- K8S environment uses the latest image;
- Experience how GitLab automatically deploys the latest image to the K8S environment;
Environmental information
- GitLab:Community Edition 13.0.6
- GilLab Runner:13.1.0
- governors : 1.15.3
- SpringBoot:2.3.0.RELEASE
- JDK:1.8.0_121
- Maven:3.3.9
- Docker:19.03.8
- Operating system: CentOS Linux release 7.8.2003
ready
Before actual combat, you need to prepare the following environment:
- GitLab, refer to "Synology DS218+ Deployment GitLab"
- Private mirror warehouse, refer to "Synology DS218+ Deployment Harbor (1.10.3)"
- GitLab Runner, refer to "GitLab Runner Deployment (kubernetes Environment)"
- Kubernetes, refer to "kubespray2.11 install kubernetes1.15"
SpringBoot application source code
This actual combat uses the ordinary SpringBoot project. If you do not plan to write code, you can also download the source code of this actual combat from GitHub. The address and link information are shown in the following table:
| name | link | Remarks |
|---|---|---|
| Project homepage | https://github.com/zq2599/blog_demos | The project's homepage on GitHub |
| git warehouse address (https) | https://github.com/zq2599/blog_demos.git | The warehouse address of the project source code, https protocol |
| git warehouse address (ssh) | [email protected]:zq2599/blog_demos.git | The warehouse address of the source code of the project, ssh protocol |
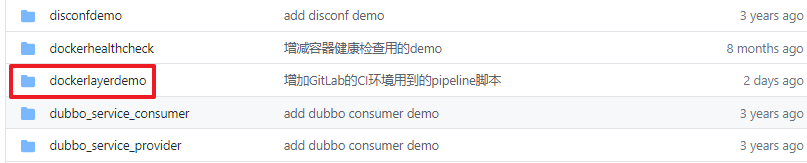
There are multiple folders in this git project. The application of this chapter is under the dockerlayerdemo folder, as shown in the following figure:
Actual operation
- Create a SpringBoot project named dockerlayerdemo , the SpringBoot version number is 2.3.0.RELEASE , and the content of pom.xml is as follows:
<?xml version="1.0" encoding="UTF-8"?>
<project xmlns="http://maven.apache.org/POM/4.0.0" xmlns:xsi="http://www.w3.org/2001/XMLSchema-instance"
	xsi:schemaLocation="http://maven.apache.org/POM/4.0.0 https://maven.apache.org/xsd/maven-4.0.0.xsd">
	<modelVersion>4.0.0</modelVersion>
	<parent>
		<groupId>org.springframework.boot</groupId>
		<artifactId>spring-boot-starter-parent</artifactId>
		<version>2.3.0.RELEASE</version>
		<relativePath/> <!-- lookup parent from repository -->
	</parent>
	<groupId>com.bolingcavalry</groupId>
	<artifactId>dockerlayerdemo</artifactId>
	<version>0.0.1-SNAPSHOT</version>
	<name>dockerlayerdemo</name>
	<description>Demo project for Spring Boot layer docker image</description>

	<properties>
		<java.version>1.8</java.version>
	</properties>

	<dependencies>
		<dependency>
			<groupId>org.springframework.boot</groupId>
			<artifactId>spring-boot-starter-web</artifactId>
		</dependency>

		<dependency>
			<groupId>org.springframework.boot</groupId>
			<artifactId>spring-boot-starter-test</artifactId>
			<scope>test</scope>
			<exclusions>
				<exclusion>
					<groupId>org.junit.vintage</groupId>
					<artifactId>junit-vintage-engine</artifactId>
				</exclusion>
			</exclusions>
		</dependency>
	</dependencies>

	<build>
		<plugins>
			<plugin>
				<groupId>org.springframework.boot</groupId>
				<artifactId>spring-boot-maven-plugin</artifactId>
				<version>2.3.0.RELEASE</version>
				<configuration>
					<layers>
						<enabled>true</enabled>
					</layers>
				</configuration>
			</plugin>
		</plugins>
	</build>
</project>
- The java code is not the point. An http interface is added to the application class:
package com.bolingcavalry.dockerlayerdemo;

import org.springframework.boot.SpringApplication;
import org.springframework.boot.autoconfigure.SpringBootApplication;
import org.springframework.web.bind.annotation.RequestMapping;
import org.springframework.web.bind.annotation.RestController;

import java.util.Date;

@SpringBootApplication
@RestController
public class DockerlayerdemoApplication {


	public static void main(String[] args) {


		SpringApplication.run(DockerlayerdemoApplication.class, args);
	}


	@RequestMapping(value = "/hello")
	public String hello(){


		return "hello " + new Date();
	}
}
- Add the folder .m2 to the directory where pom.xml is located , and put settings.xml in it. This is the maven configuration file and you can set your special maven information;
- Add a Dockerfile file to the directory where pom.xml is located for making a mirror:
# 指定基础镜像,这是分阶段构建的前期阶段
FROM openjdk:8u212-jdk-stretch as builder
# 执行工作目录
WORKDIR application
# 配置参数
ARG JAR_FILE=target/*.jar
# 将编译构建得到的jar文件复制到镜像空间中
COPY ${JAR_FILE} application.jar
# 通过工具spring-boot-jarmode-layertools从application.jar中提取拆分后的构建结果
RUN java -Djarmode=layertools -jar application.jar extract

# 正式构建镜像
FROM openjdk:8u212-jdk-stretch
WORKDIR application
# 前一阶段从jar中提取除了多个文件,这里分别执行COPY命令复制到镜像空间中,每次COPY都是一个layer
COPY --from=builder application/dependencies/ ./
COPY --from=builder application/spring-boot-loader/ ./
COPY --from=builder application/snapshot-dependencies/ ./
COPY --from=builder application/application/ ./
ENTRYPOINT ["java", "org.springframework.boot.loader.JarLauncher"]
- Add a .gitlab-ci.yml file to the directory where pom.xml is located . This is the pipeline script for CI:
image: maven:3.6.3-jdk-8

variables:
  MAVEN_CLI_OPTS: "-s .m2/settings.xml --batch-mode"
  MAVEN_OPTS: "-Dmaven.repo.local=.m2/repository"

# 定义缓存
# 如果gitlab runner是shell或者docker,此缓存功能没有问题
# 如果是k8s环境,要确保已经设置了分布式文件服务作为缓存
cache:
  key: dockerlayerdemo-ci-cache
  paths:
  - .m2/repository/
  - target/*.jar

# 本次构建的阶段:build package
stages:
- package
- build

# 生产jar的job
make_jar:
  image: maven:3.6.3-jdk-8
  stage: package
  tags:
  - k8s
  script:
  - echo "=============== 开始编译源码,在target目录生成jar文件 ==============="
  - mvn $MAVEN_CLI_OPTS clean compile package -Dmaven.test.skip=true
  - echo "target文件夹" `ls target/`

# 生产镜像的job
make_image:
  image: docker:latest
  stage: build
  tags:
  - k8s
  script:
  - echo "从缓存中恢复的target文件夹" `ls target/`
  - echo "=============== 登录Harbor  ==============="
  - docker login 192.168.50.43:5888 -u admin -p Harbor12345
  - echo "=============== 打包Docker镜像 : " gitlabci-java-demo:$CI_COMMIT_SHORT_SHA "==============="
  - docker build -t 192.168.50.43:5888/common/gitlabci-java-demo:$CI_COMMIT_SHORT_SHA .
  - echo "=============== 推送到镜像仓库  ==============="
  - docker push 192.168.50.43:5888/common/gitlabci-java-demo:$CI_COMMIT_SHORT_SHA
  - echo "=============== 登出  ==============="
  - docker logout
  - echo "清理掉本次构建的jar文件"
  - rm -rf target/*.jar
Regarding the above pipeline script, there are five points to note:
First: Regarding the cache, if your gitlab runner is of shell or docker type, you don’t need to pay attention. The cache is directly effective, but if your gitlab runner is K8S, you should pay attention to it . You need to fill in the cache-related configuration in the gitlab runner. , Let the distributed file service be the bottom layer of cache;
Second: A total of two stages are defined: package and build. The order is package first and then build. Note that the job that generates the jar must be package, and the job that uses jar to build the image must be build, so that it can be smoothly removed from the cache when the image is built Get the jar;
Third: The job script of make_image will execute the operation of logging in to the private mirror warehouse. For the convenience of operation, the login account and password are directly written in the script. Please do not do this in actual use. It is recommended to use Harbor's robot account Password, and write it into the environment variable configuration page of GitLab CI instead of writing it directly in the pipeline script
Fourth: The tags parameter is used to match the existing GitLab Runner, please set it according to your own runner;
Fifth: The tag of the generated docker image is equal to $CI_COMMIT_SHORT_SHA , which is the commit id of this submission. Therefore, each submission will result in an additional image in the mirror warehouse, and its tag is equal to the commit id;
- The final content of the entire project is as follows: So

far, all development work has been completed, and then verify the implementation;
Verify CI
- Submit all content to GitLab. If the CI environment configuration is OK, the build will be triggered immediately. The following figure shows the effect of successful build:

- First look at the execution of make_jar, as shown in the figure below, the SpringBoot project successfully builds the jar file:

- Look at the execution of make_image, as shown below:

- After the image is successfully created, it will be pushed to harbor:

- Finally complete the push, and clean up the remaining files:

- Finally, look at the overall situation of the pipeline, as shown below:

- From the above figure, we can see that the commit id is 02307851 , so there should be a mirror with tag equal to 02307851 in Harbor. Log in to Harbor to view it, as shown in the red box in the following figure:

Verify in K8S environment
Next, verify that the previous image can run normally in the K8S environment:
- Log in to the K8S environment through SSH, execute the following command to create a deployment with the latest image:
kubectl create deployment dockerlayerdemo \
--image=192.168.50.43:5888/common/gitlabci-java-demo:02307851
- Execute the following command to create a service of type NodePort:
kubectl create service nodeport \
dockerlayerdemo --tcp 8080:8080
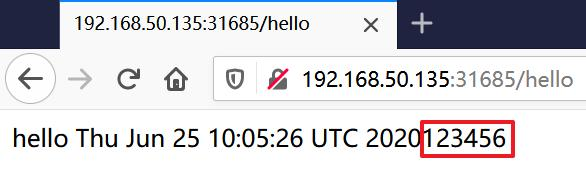
- The browser visits http://192.168.50.135:31685/hello , where 192.168.50.135 is the IP address of the K8S host, as shown in the figure below, you can access the SpringBoot service normally:

The value of GitLab CI
As the article sees this, our pipeline script has been written, the mirroring is available, and the services deployed on K8S have also been verified. Is this over?
—Not yet, let’s experience the process from modifying the code to taking effect on the K8S environment:
- Modify the java code as shown below:

- Submit code:

- The image is successfully generated:

- Execute the following commands in the K8S environment to complete the mirror update:
kubectl set image deployment dockerlayerdemo \
gitlabci-java-demo=192.168.50.43:5888/common/gitlabci-java-demo:8735c78d
- The gitlabci-java-demo in the above command comes from the container name displayed in the result of kubectl describe deployment dockerlayerdemo , as shown in the red box in the following figure:

- The system prompts that the update was successful:

- Use the browser to visit the same address again, as shown in the red box below, the modified code has taken effect: It
can be seen that with the help of GitLab CI, the process from coding to deployment has been simplified, and coding can be more focused;
Experience CD?
In addition to continuous integration (CI), continuous deployment (CD) can also be added to the pipeline script, so that we only need to submit the code, and the corresponding image will be automatically deployed to the K8S environment;
- Open .gitlab-ci.yml and add a stage to define deploy , as shown below, now there are three stages:
stages:
- package
- build
- deploy
- Then add a job at the end , as shown below, the image is named ictu/sshpass:latest , the image has built-in sshpass , and can connect to the K8S environment with SSH, execute the kubectl set image XXX command to update the image, pay attention to the package kubectl set image command is Double quotation marks , this is very important, only when double quotation marks are used, the $TAG inside will be replaced with the corresponding value:
# 生产镜像的job
deploy_k8s:
  # 禁用cache,避免上传、下载、压缩、解压缩带来的开销
  cache: {

    }
  image: ictu/sshpass:latest
  stage: deploy
  tags:
  - k8s
  script:
  - export TAG=$CI_COMMIT_SHORT_SHA
  - echo "TAG is "$TAG
  - sshpass -p 888888 ssh -o "StrictHostKeyChecking no" [email protected] "kubectl set image deployment dockerlayerdemo gitlabci-java-demo=192.168.50.43:5888/common/gitlabci-java-demo:$TAG"
- Again, in the above script, the account, IP and password should be placed in the parameter setting page of GitLab, and should not be written directly into the pipeline script;
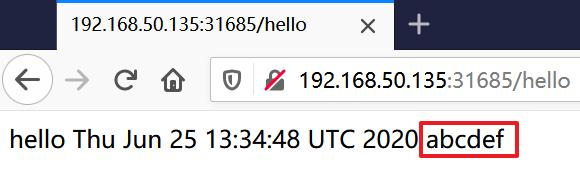
- As shown in the figure below, modify the java file again and change the return result of hello to abcdef :

- After submitting the code, you can observe the execution process of the new job on the CI page;
- After the script is completed, open the browser and try it. It really has been updated: So
far, CI and CD have been verified. It can be seen that the CI capability of GitLab has brought a lot of convenience to our daily development. I hope this article can bring you some references. ;