* Based on the balance sub Bowen " taught you how to create ARM Template Azure " to complete (basic just updated the old version of the command) on the basis of this special thanks.
* In this paper the following contents are AZURE CLI 2.x example. Operating environment Windows10.
This article helps handwritten azure newly recruited students to master the deployment template using the method of Visual Studio Code written templates. To create a storage account, deployed to Azure China as an example.
The first step to download Visual Studio Code (free, supports Windows, the MAC, Linux)
https://code.visualstudio.com/
The second step to install the plug-ARM "Azure Resource Manager Tools"
to open the Visual Studio Code, in the left-most point in the "Extensions", search after search box enter azure Manager Resoure:
* red box as shown below in the order 1,2,3 click
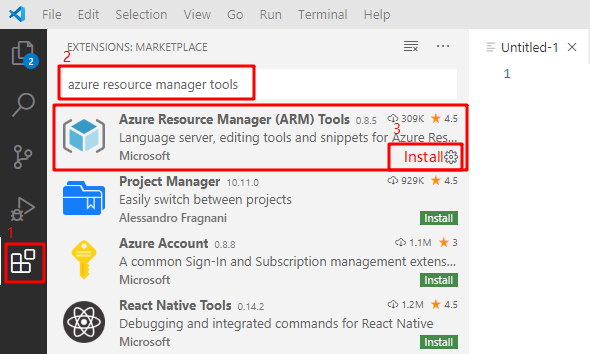
installation click Enable.
* You may need to restart Visual Studio Code (I did not have to restart success).
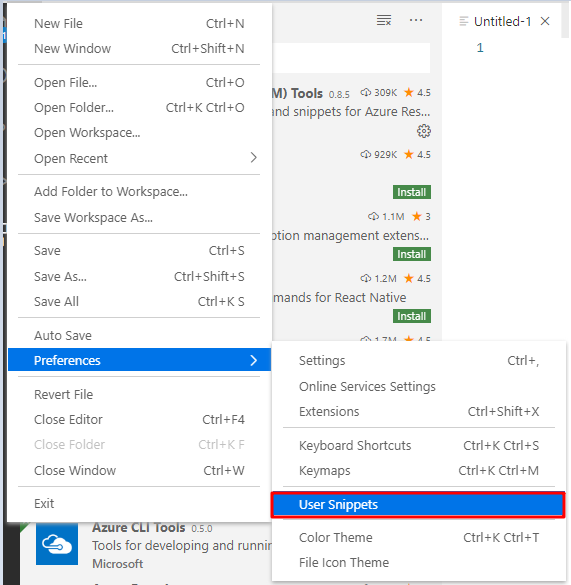
The third step is to configure Visual Studio Code
copy the contents of a json file to the clipboard https://raw.githubusercontent.com/Azure/azure-xplat-arm-tooling/master/VSCode/armsnippets.json
in the Visual Studio Code, File -> Preferences-> User Snippets:
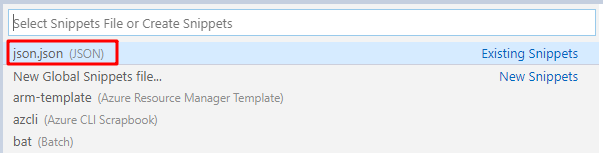
enter json, click JSON:
copy the contents of just copied in {}, where you can see json.json template to join the ARM some empty template json file
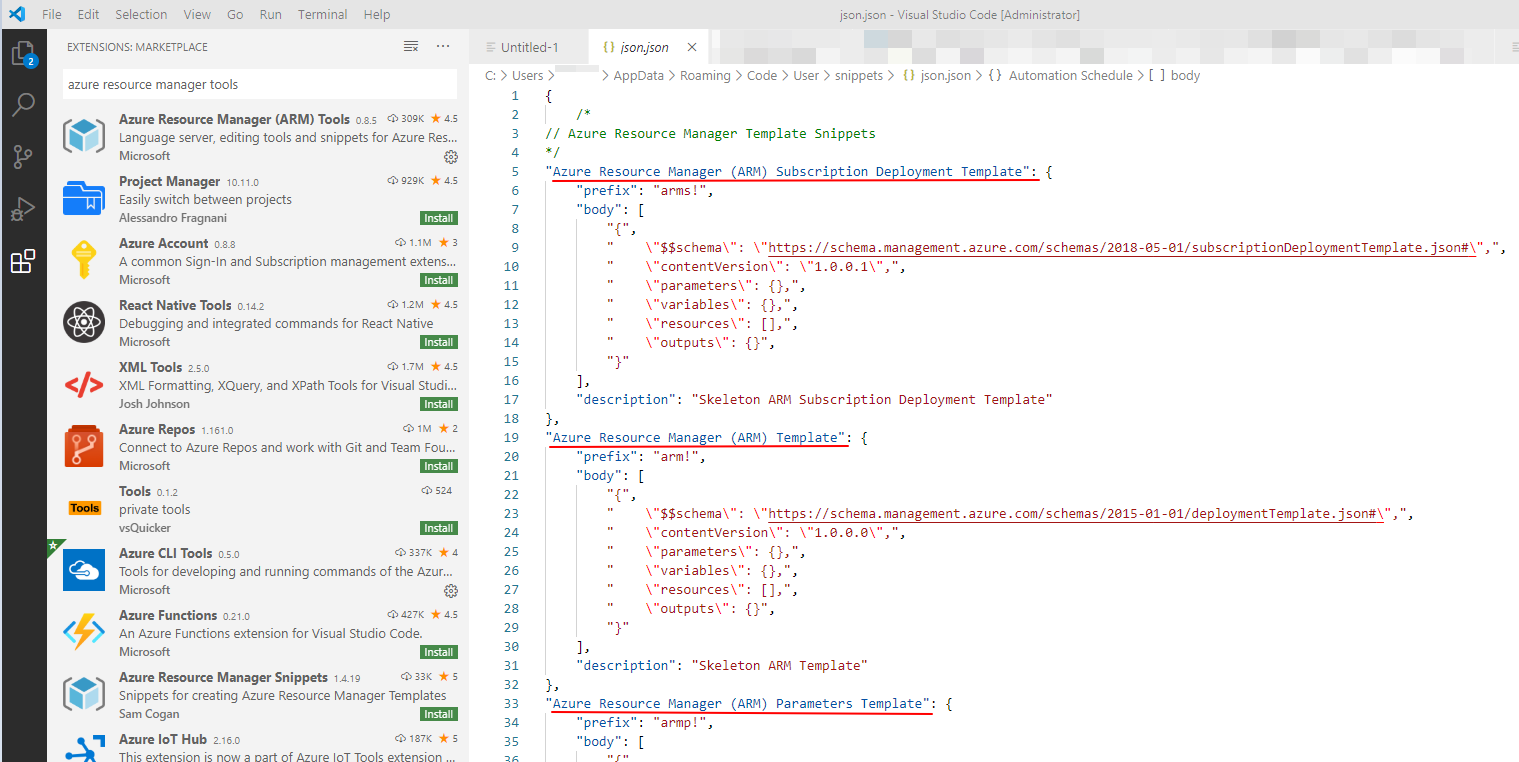
closed after Visual Ctrl-S to save Studio Code. Visual Studio Code configuration is complete.
The fourth step is to create a resource information prepared
1 StorageAccountName: xxxstorage03
2 StorageAccountType: Standard_LRS
3 Resource Group: the use of an existing xxxRG
The fifth step to prepare deployment json template
* Fifth, we will create a six-step deployment and parameter templates, respectively. deployment template resource description, parameter description of specific template resource name, size and so on.
Start writing deployment template file 01azureDeployment.json
open Visual Studio Code, create a new file, click Plain Text bottom right corner, enter json.
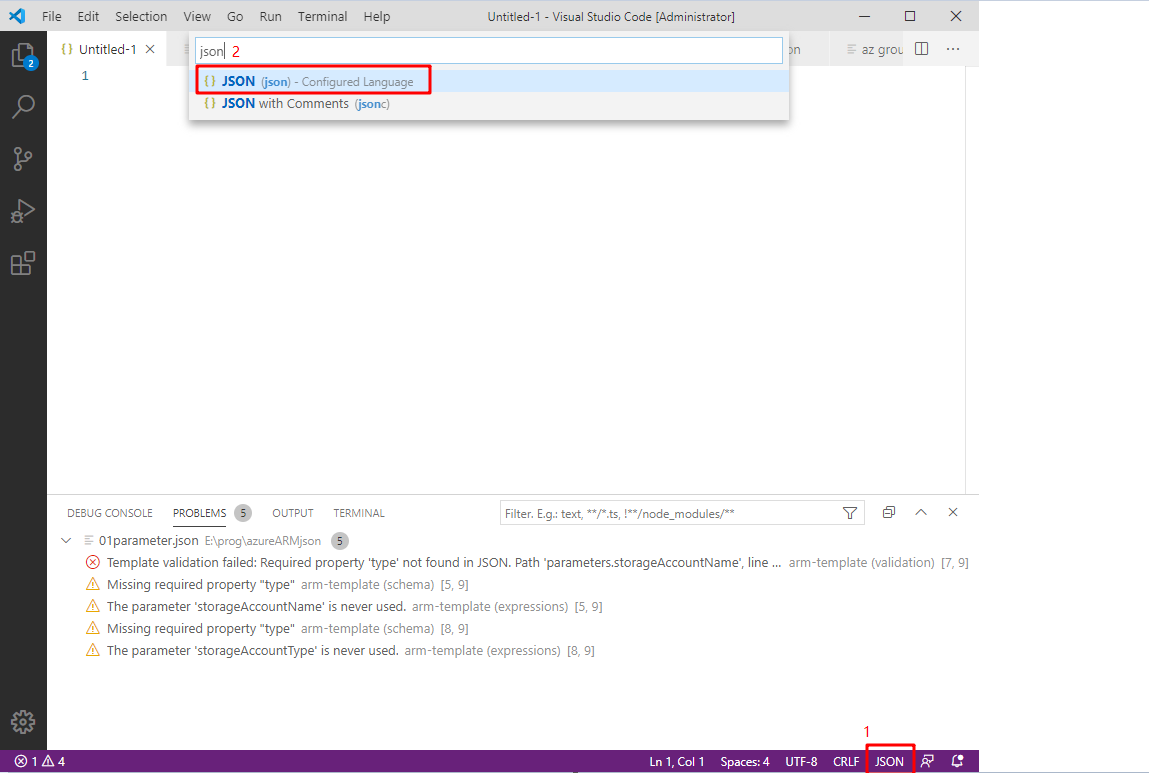
To determine the use json file syntax coloring.
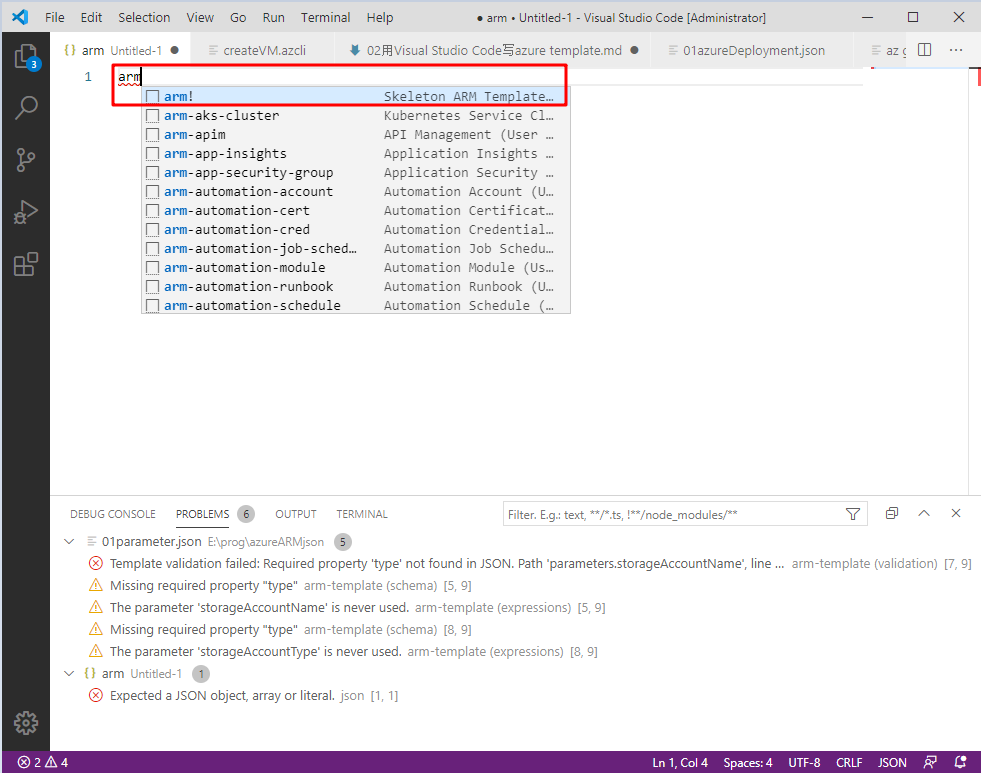
在编辑区输入"arm",点击下图第一行的模板。即可得到初始的deployment json 文件的框架。
{
"$schema": "https://schema.management.azure.com/schemas/2015-01-01/deploymentTemplate.json#",
"contentVersion": "1.0.0.0",
"parameters": { },
"variables": { },
"resources": [ ],
"outputs": { }
}
编辑文件,添加"storageAccountName" ,"storageAccountType","resources". 完成后内容如下。
*注意使用TAB键完成auto complete。并试着输入以下 ”{“ 和 ” “ “ 符号。体验一下Visual Studio Code的便利。
{
    "$schema": "https://schema.management.azure.com/schemas/2015-01-01/deploymentTemplate.json#",
    "contentVersion": "1.0.0.0",
    "parameters": {
        "storageAccountName":{"type":"string"},
        "storageAccountType":{
            "type":"string",
            "defaultValue":"Standard_LRS",
            "allowedValues":[
                "Standard_LRS",
                "Standard_GRS",
                "Premium_LRS"
            ]}},
    "variables": {},
    "resources": [
        {
            "type":"Microsoft.Storage/storageAccounts",
            "name":"[parameters('storageAccountName')]",
            "apiVersion":"2015-06-15",
            "location":"[resourceGroup().location]",
            "properties":{
                "accountType":"[parameters('storageAccountType')]"
            }}],
    "outputs": {}
}
第六步 编写parameter json模板
重复第五步的开始步骤,获得完全一样的初始json模板。
{
"$schema": "https://schema.management.azure.com/schemas/2015-01-01/deploymentTemplate.json#",
"contentVersion": "1.0.0.0",
"parameters": { },
"variables": { },
"resources": [ ],
"outputs": { }
}
编辑文件,添加"parameters"部分. 完成后内容如下。
*我们可以看到deployment和parameter模板都出自同一个框架文件,但是deployment包含resources和parameters,parameter模板主要是parameters部分.
{
    "$schema": "https://schema.management.azure.com/schemas/2015-01-01/deploymentTemplate.json#",
    "contentVersion": "1.0.0.0",
    "parameters": {
        "storageAccountName":{
            "value":"xxxstorage03"
        },
        "storageAccountType":{
            "value":"Standard_LRS"
        }
    },
    "variables": {},
    "resources": [],
    "outputs": {}
}
第七步 将模板发布到azure上,创建新的storage account
这里我是用的是azure cli 2.x的环境。
只需要输入一行命令就可以
az deployment group create --name="xxxdeploy" --resource-group="xxxRG" --template-file="01azureDeployment.json" --parameters="01parameter.json"
To two json file in the directory where otherwise need to specify the path * Note execute commands.
* This command azure latest version cli 2.x, similar commands are "az group deployment create" (The same task can be completed in azure cli 2.2, but already the old commands. If you enter will be "This command is implicitly deprecated "error).
there are also" az deployment create "command can also perform similar functions, mainly used in the case have not yet created the resource-group.
After the successful implementation of output is as follows:
C:\>az deployment group create --name="xxxdeploy" --resource-group="xxxRG" --template-file="01azureDeployment.json" --parameters="01parameter.json"
{
  "id": "/subscriptions/xxxxxxx-xxxx-xxxx-xxxx-xxxxxx/resourceGroups/xxxRG/providers/Microsoft.Resources/deployments/xxxdeploy",
  "location": null,
  "name": "xxxdeploy",
  ......[省略20+行]
    "provisioningState": "Succeeded",
    "template": null,
    "templateHash": "15968168005743428310",
    "templateLink": null,
    "timestamp": "2020-04-06T13:21:19.309045+00:00"
  },
  "resourceGroup": "xxxRG",
  "type": "Microsoft.Resources/deployments"
}
Note:
Visual Studio Code to modify the default black background:
File-> preference-> Color Theme
https://blog.csdn.net/DFF1993/article/details/90379079