OpenStack 一键部署体验
- 环境需求
| 系统 | CentOS 7.6 |
|---|---|
| CPU: | 双核双线程/开启虚拟化功能 |
| 内存 | 4G |
| 硬盘 | 30G+300G |
| 网卡 | NAT模式 |
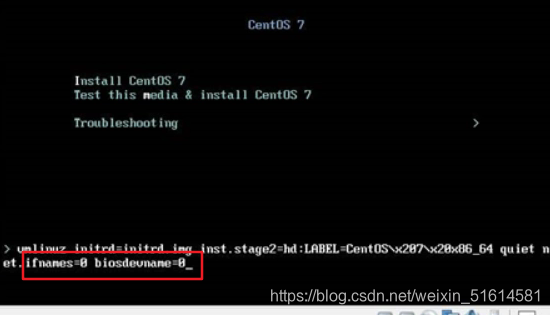
| 选做 | net.ifnames=0 biosdevname=0 (创建时可修改为eth0网卡) |
- 这步是为了将网卡变为eth0
环境配置
1、配置静态地址、主机名
BOOTPROTO=static
IPADDR=192.168.199.88
NETMASK=255.255.255.0
GATEWAY=192.168.199.2
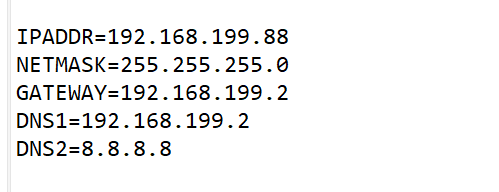
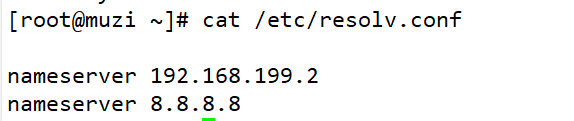
在/etc/resolv.conf中添加
nameserver 8.8.8.8
重启网卡
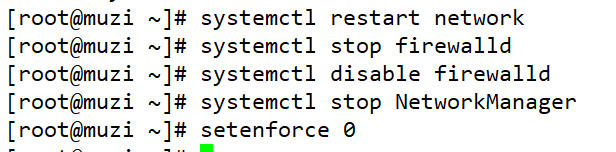
systemctl restart network

2、关闭(设置开机不启动)防火墙、核心防护、NetworkManager
systemctl stop firewalld
systemctl disable firewalld
systemctl stop NetworkManager
setenforce 0
3、安装时间同步服务
- 同步阿里云时钟服务器(ntp1、ntp2…)、设置周期性任务及设置开机自启
yum install -y ntpdate
ntpdate ntp.aliyun.com >>/var/log/ntpdate.log
crontab -e
*/30 * * * * /usr/sbin/ntpdate ntp.aliyun.com
4、配置yum源
[root@muzi ~]# cd /etc/yum.repos.d/
[root@muzi yum.repos.d]# mkdir bak
[root@muzi yum.repos.d]# mv C* bak/
[root@muzi yum.repos.d]# curl -o /etc/yum.repos.d/CentOS-Base.repo http://mirrors.aliyun.com/repo/Centos-7.repo
[root@muzi yum.repos.d]# yum -y install centos-release-openstack-train
[root@muzi yum.repos.d]# yum clean all
[root@muzi yum.repos.d]# yum makecache (fast)		#()部分可选择添加
5、重启、查看服务状态
reboot
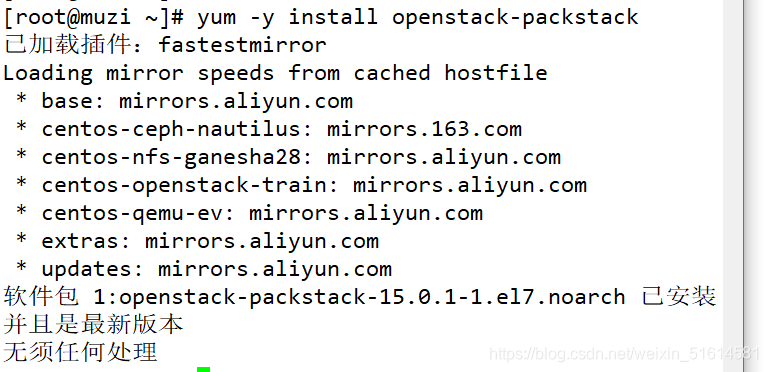
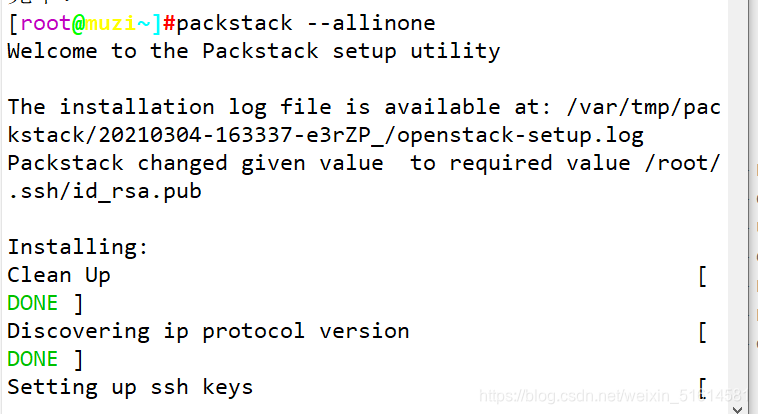
6、下载OpenStack 管理工具包、在线部署OpenStack
yum -y install openstack-packstack
packstack --allinone
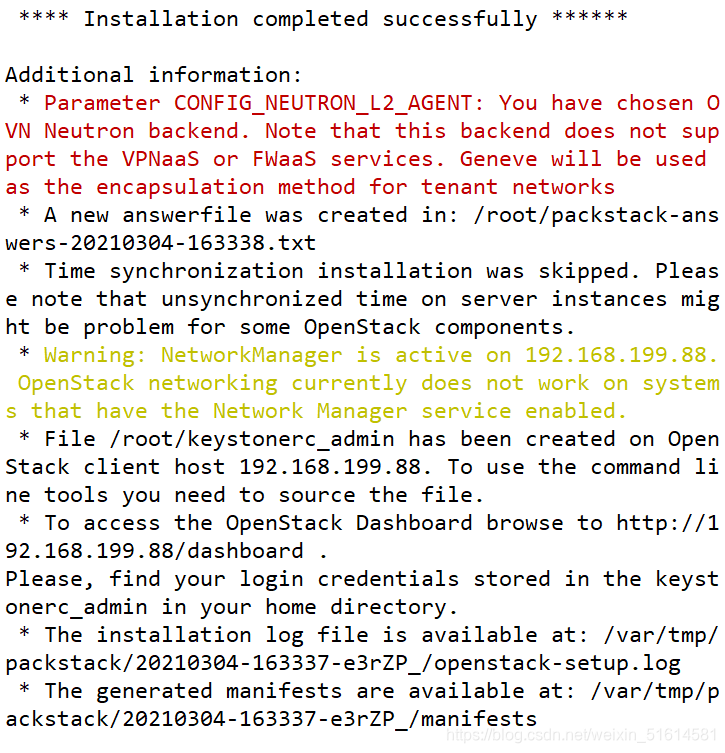
Installation completed successfully
Additional information:
 * Parameter CONFIG_NEUTRON_L2_AGENT: You have chosen OVN Neutron backend. Note that this backend does not support the VPNaaS or FWaaS services. Geneve will be used as the encapsulation method for tenant networks
 * A new answerfile was created in: /root/packstack-answers-20201018-191715.txt
 * Time synchronization installation was skipped. Please note that unsynchronized time on server instances might be problem for some OpenStack components.
 * File /root/keystonerc_admin has been created on OpenStack client host 192.168.226.150. To use the command line tools you need to source the file.
 * To access the OpenStack Dashboard browse to http://192.168.226.150/dashboard .
Please, find your login credentials stored in the keystonerc_admin in your home directory.
 * The installation log file is available at: /var/tmp/packstack/20201018-191715-BH2Wcy/openstack-setup.log
 * The generated manifests are available at: /var/tmp/packstack/20201018-191715-BH2Wcy/manifests
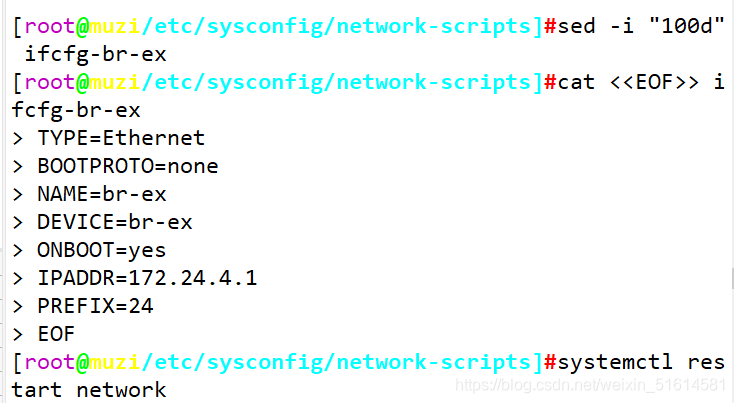
创建br-ex网卡配置文件
cd /etc/sysconfig/network-scripts/
cp ifcfg-eth0 ifcfg-br-ex
sed -i "100d" ifcfg-br-ex
cat <<EOF >> ifcfg-br-ex
TYPE=Ethernet
BOOTPROTO=none
NAME=br-ex
DEVICE=br-ex
ONBOOT=yes
IPADDR=172.24.4.1
PREFIX=24
EOF
systemctl restart network
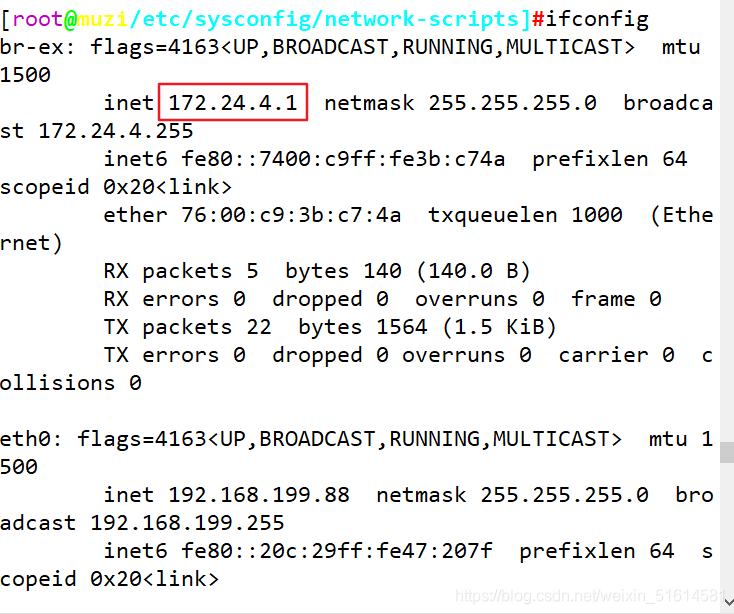
#ifconfig 查看

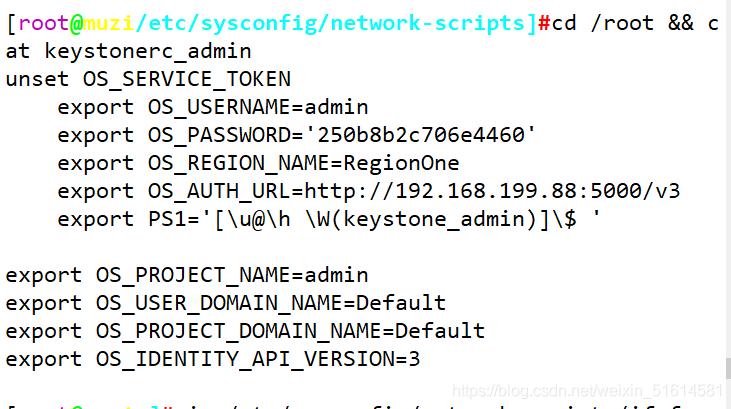
7、查看用户信息
- 可以用这个查询自己的账号和密码
cd /root && cat keystonerc_admin
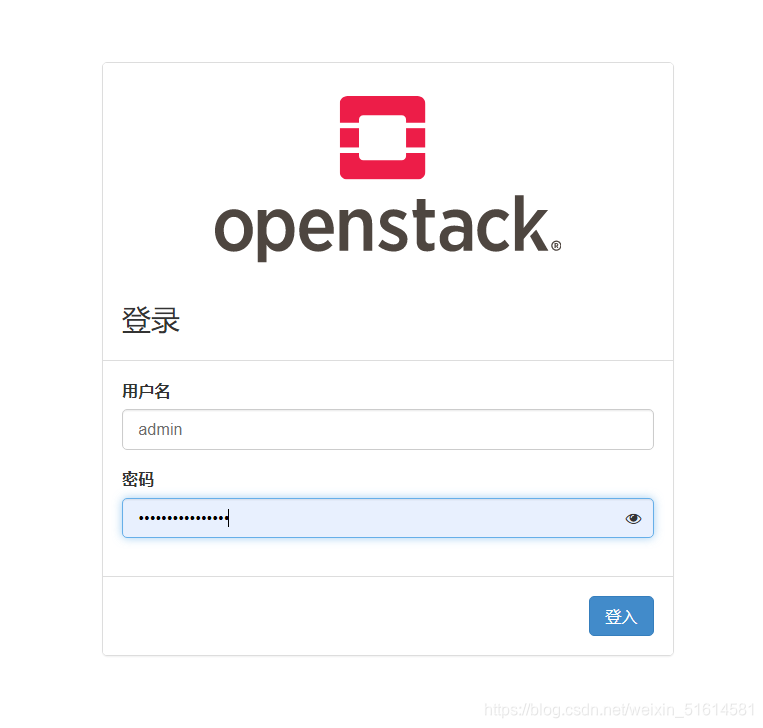
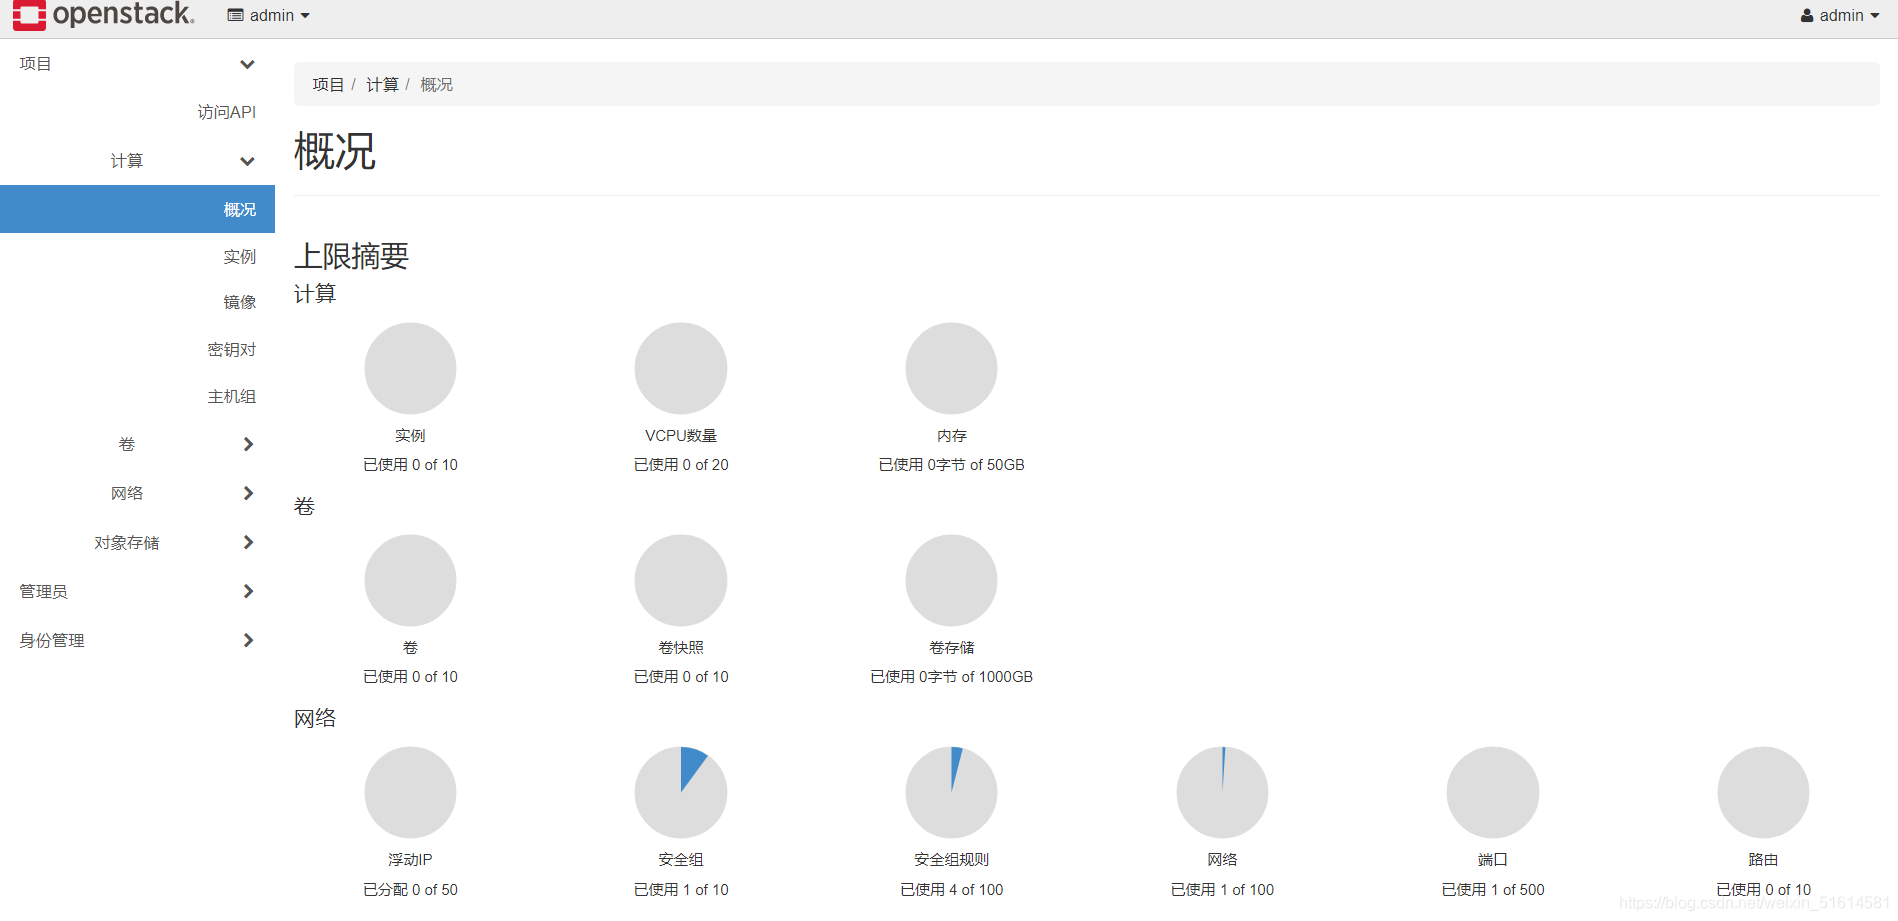
8、网页登陆
- 账户和密码都在上面都有查找方式,输入就好了
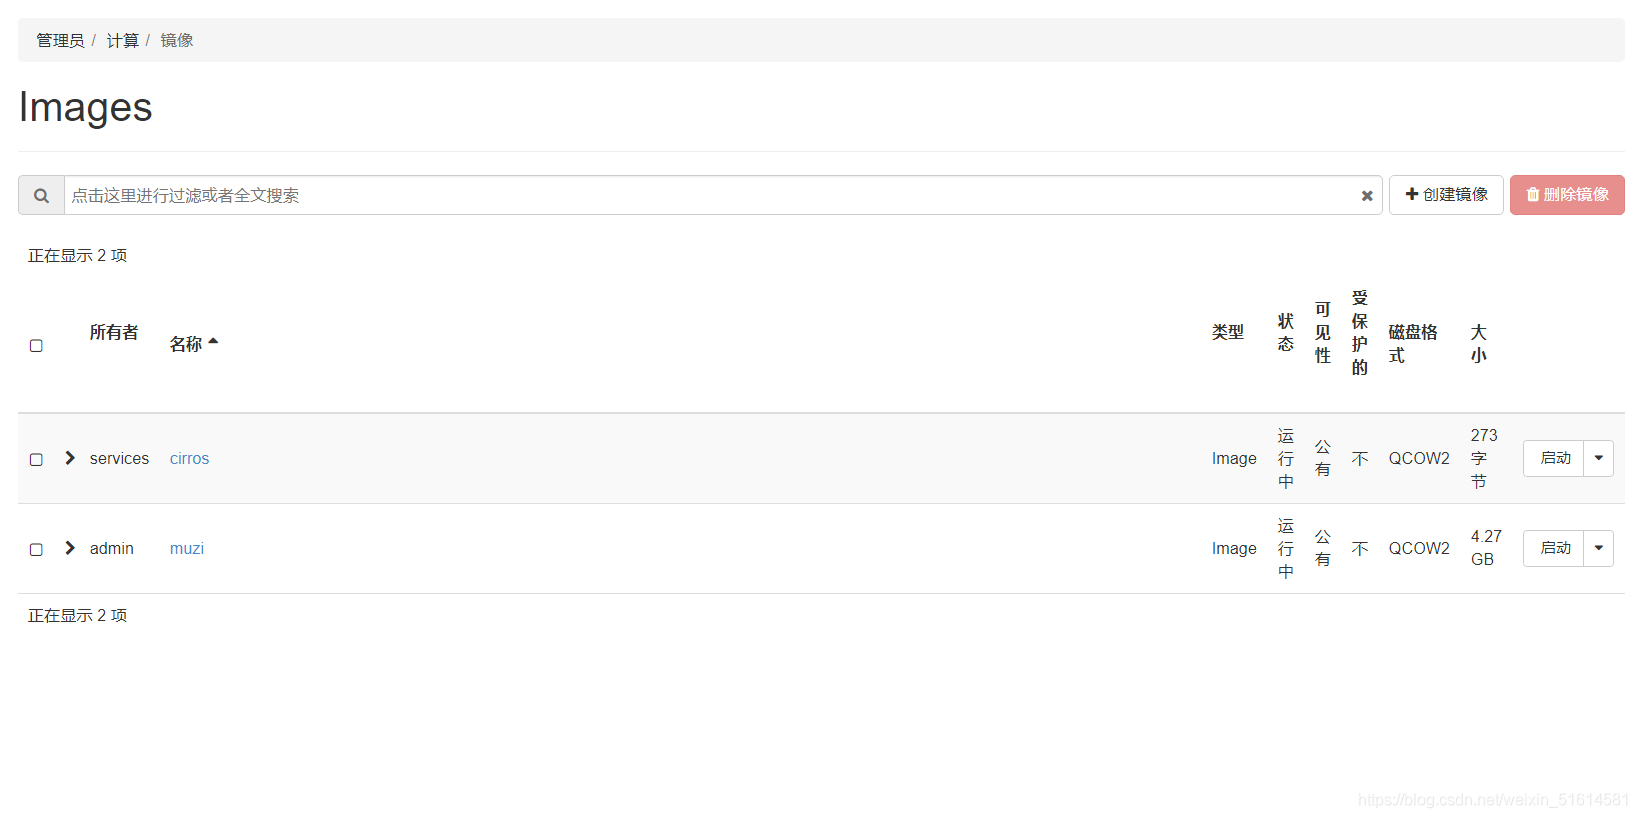
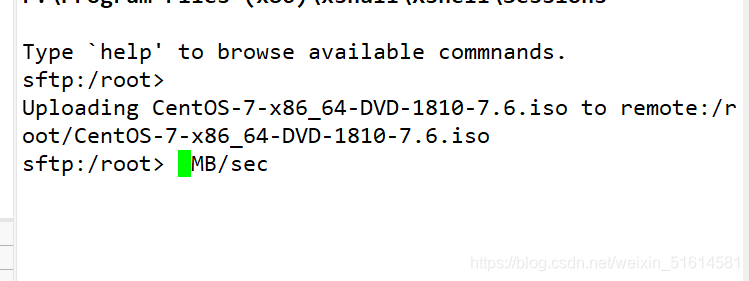
上传镜像
两种方式,我这里就先只使用命令行的方式来进行一次操作。
命令行
source keystonerc_admin
  openstack image create "muzi" --file CentOS-7-x86_64-DVD-1810-7.6.iso --disk-format qcow2 --container-format bare --public
- 在原本的openstack中只有一个镜像

- 将镜像传入到该机器中

- 刷新一次就会发现增加了一个镜像