描述
微信官方文档 https://mp.weixin.qq.com/wiki?t=resource/res_main&id=mp1421140842
WxJava SDK github地址 https://github.com/Wechat-Group/WxJava
授权步骤
1. 用户同意授权,获得code
2. 通过code换取网页授权access_token
3. 刷新access_token(如果需要,过期需刷新)
4. 拉取用户信息
详细可参考文档,这里采用SDK方式集成
编译环境:IDEA
前提准备
若无公众号,可使用微信测试号,较低代价实现网页授权
申请地址: https://mp.weixin.qq.com/wiki?t=resource/res_main&id=mp1421137522

扫码后可获得appID和appsecret

后扫码关注公众号获得用户权限

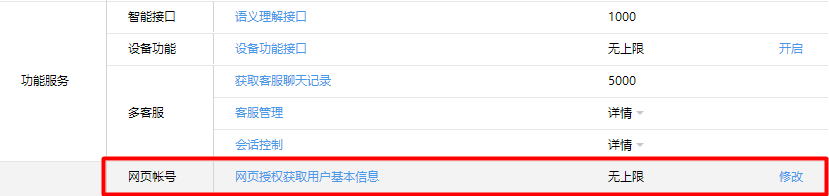
最重要的是修改登录的网页账号
由于是测试号,支持ip:端口的形式,若是正式环境必须使用域名,没有的话可以使用内网穿透,将公网域名映射到localhost:8080
我使用的是natapp https://natapp.cn/
流程
1. Maven依赖
//仅包含网页授权的依赖
<dependency>
    <groupId>com.github.binarywang</groupId>
    <artifactId>weixin-java-mp</artifactId>
    <version>2.7.0</version>
</dependency>
//不用写get和set方法的辅助依赖,可以根据需要选择不添加,那就要手动添加get()和set()方法
//若仅添加依赖还是报错,需要在File-settings-Plugins中搜索添加,也可百度详细安装方式
<dependency>
    <groupId>org.projectlombok</groupId>
    <artifactId>lombok</artifactId>
</dependency>
2. 创建appid和appsecret的配置文件 WechatAccountConfig
import lombok.Data;
import org.springframework.boot.context.properties.ConfigurationProperties;
import org.springframework.stereotype.Component;

import java.util.Map;

/**
 * Created by Sakura
 */
@Data
@Component
@ConfigurationProperties(prefix = "wechat")
public class WechatAccountConfig {

    /**
     * 公众平台id
     */
    private String mpAppId;

    /**
     * 公众平台密钥
     */
    private String mpAppSecret;

    /**
     * 公众平台回调地址
     */
    private String wechatMpAuthorize;
}
resource的application中配置,地址要填测试号中网页账号中地址,否则会报错

为sdk的WxMpService创建配置文件 WechatMpConfig
import me.chanjar.weixin.mp.api.WxMpConfigStorage;
import me.chanjar.weixin.mp.api.WxMpInMemoryConfigStorage;
import me.chanjar.weixin.mp.api.WxMpService;
import me.chanjar.weixin.mp.api.impl.WxMpServiceImpl;
import org.springframework.beans.factory.annotation.Autowired;
import org.springframework.context.annotation.Bean;
import org.springframework.stereotype.Component;

/**
 * Created by Sakura
 */
@Component
public class WechatMpConfig {

    @Autowired
    private WechatAccountConfig accountConfig;

    @Bean
    public WxMpService wxMpService() {
        WxMpService wxMpService = new WxMpServiceImpl();
        wxMpService.setWxMpConfigStorage(wxMpConfigStorage());
        return wxMpService;
    }

    @Bean
    public WxMpConfigStorage wxMpConfigStorage() {
        WxMpInMemoryConfigStorage wxMpConfigStorage = new WxMpInMemoryConfigStorage();
        wxMpConfigStorage.setAppId(accountConfig.getMpAppId());
        wxMpConfigStorage.setSecret(accountConfig.getMpAppSecret());
        return wxMpConfigStorage;
    }
}
3. 创建登陆授权controller WechatController
package com.imooc.cotroller;

import me.chanjar.weixin.common.api.WxConsts;
import me.chanjar.weixin.common.exception.WxErrorException;
import me.chanjar.weixin.mp.api.WxMpService;
import me.chanjar.weixin.mp.bean.result.WxMpOAuth2AccessToken;
import org.springframework.beans.factory.annotation.Autowired;
import org.springframework.stereotype.Controller;
import org.springframework.web.bind.annotation.GetMapping;
import org.springframework.web.bind.annotation.RequestMapping;
import org.springframework.web.bind.annotation.RequestParam;
import org.springframework.web.client.RestTemplate;

import java.net.URLEncoder;

/**
 * Created by Sakura
 */
@Controller
@RequestMapping("/wechat")
public class WechatController {

    @Autowired
    private WxMpService wxMpService;

    @Autowired
    private WechatAccountConfig accountConfig;

    @GetMapping("/authorize")
    public String authorize(@RequestParam("returnUrl") String returnUrl) throws Exception {
//        //1. 配置
//        //2. 调用方法
        String url = accountConfig.wechatMpAuthorize + "/wechat/userInfo"; //回调地址
        String redirectUrl = wxMpService.oauth2buildAuthorizationUrl(url, WxConsts.OAUTH2_SCOPE_BASE, URLEncoder.encode(returnUrl,"gbk"));
        return "redirect:" + redirectUrl;
    }

    @GetMapping("/userInfo")
    public String userInfo(@RequestParam("code") String code,
                         @RequestParam("state") String returnUrl) {
        WxMpOAuth2AccessToken wxMpOAuth2AccessToken = new WxMpOAuth2AccessToken();
        try {
            wxMpOAuth2AccessToken = wxMpService.oauth2getAccessToken(code);
        } catch (WxErrorException e) {
            e.printStackTrace();
        }

        String openId = wxMpOAuth2AccessToken.getOpenId();

        return "redirect:" + returnUrl + "?openid=" + openId;
    }
}
具体流程是,前端携带着获得登录信息后跳转的地址returnUrl访问localhost:8080/wechat/authorize接口,调用oauth2buildAuthorizationUrl方法,获得code并把returnUrl作为附加信息state(这里state是附加字段,可以存自定义参数),最终生成的字符串格式为
http://自己的wechatMpAuthorize回调地址?code=....&state=...后通过redirect访问localhost:8080/wechat/userInfo接口,拿到code和returnUrl(state中的值)后,调用oauth2getAccessToken方法获得信息列表,在列表中拿到openId,这就是我们的微信号,相当于网页授权成功,然后redirect到returnUrl附带openId参数。
其中在调用oauth2buildAuthorizationUrl方法时,第二个参数若设置为
WxConsts.OAUTH2_SCOPE_BASE则不弹出授权页面,直接跳转,只能获取用户openid
若设置为
WxConsts.OAUTH2_SCOPE_USER_INFO则会弹出授权页面,可通过openid拿到昵称、性别、所在地。并且, 即使在未关注的情况下,只要用户授权,也能获取其信息
