之前用了几种方式
1.后端生成二维码需要加密的字符窜,小程序前端利用二维码组件渲染canvas画出二维码,由于支付宝小程序没有这样的组件,于是去找微信小程序的解决方案,把微信小程序的二维码前端组件搬过来用,调试到不报错了,结果二维码显示不出来,原因很难找,宣告失败!
2.后端生成图片,并把图片的地址URL发到小程序前端,前端调用my.downloadFile 成功,但后端却要生成大量图片,并且二维码都是临时拿来用的,用完就扔,缺点太明显,后端要产生大量垃圾文件和IO操作,使用码的客户端多了,对服务器端有很大压力
3.后端生成图片的Base64字符串,小程序前端直接显示二维码
我最后使用的是第三种方式
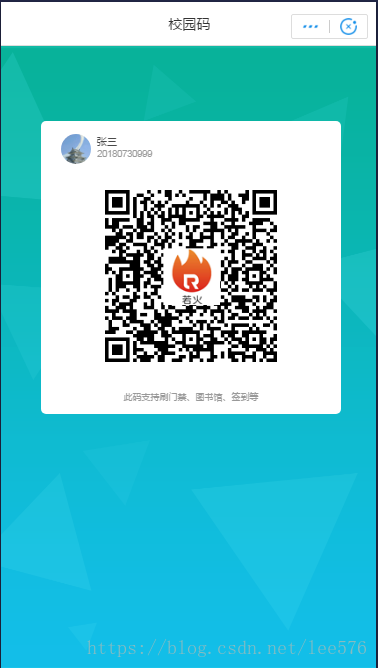
要生成二维码,首先是使用.net core 版本的QRCode,然后我们的需求是二维码中间加入一个logo,下面是一个工具类,可实现这个需求
using System;
using System.Drawing;
using System.Drawing.Drawing2D;
using System.Drawing.Imaging;
using System.IO;
using QRCoder;

namespace SchoolWebApi.Utility
{
    public class RaffQRCode : IQRCode
    {
        public byte[] StreamToBytes(Stream stream)
        {
            byte[] bytes = new byte[stream.Length];
            stream.Position = 0;
            stream.Read(bytes, 0, bytes.Length);
            stream.Close();
            return bytes;
        }

        /// <summary>
        /// 生成二维码图片
        /// </summary>
        /// <param name="logoPath"></param>
        /// <param name="content"></param>
        /// <param name="pixel">像素大小</param>
        /// <returns></returns>
        public byte[] GetQRCode(string logoPath, string content, int pixel)
        {
            var generator = new QRCodeGenerator();
            var codeData = generator.CreateQrCode(content, QRCodeGenerator.ECCLevel.M, true);
            var qrcode = new QRCode(codeData);
            var qrImage = qrcode.GetGraphic(pixel, Color.Black, Color.White, true);

            using (MemoryStream ms = new MemoryStream())
            {
                qrImage.Save(ms, ImageFormat.Png);
                using (MemoryStream ms1 = new MemoryStream())
                {
                    //把logo图片放到二维码图片正中心
                    var newImage = CombinImage(qrImage, logoPath);
                    newImage.Save(ms1, ImageFormat.Png);
                    return StreamToBytes(ms1);
                }
            }
        }

        /// <summary>
        /// 调用此函数后使此两种图片合并,类似相册,有个
        /// 背景图,中间贴自己的目标图片
        /// </summary>
        /// <param name="imgBack">粘贴的源图片</param>
        /// <param name="destImg">粘贴的目标图片</param>
        public static Image CombinImage(Image imgBack, string destImg)
        {
            Image img = Image.FromFile(destImg);        //照片图片
            if (img.Height != 65 || img.Width != 65)
            {
                img = KiResizeImage(img, 65, 65, 0);
            }
            Graphics g = Graphics.FromImage(imgBack);

            g.DrawImage(imgBack, 0, 0, imgBack.Width, imgBack.Height);      //g.DrawImage(imgBack, 0, 0, 相框宽, 相框高);

            //g.FillRectangle(System.Drawing.Brushes.White, imgBack.Width / 2 - img.Width / 2 - 1, imgBack.Width / 2 - img.Width / 2 - 1,1,1);//相片四周刷一层黑色边框
            //g.DrawImage(img, 照片与相框的左边距, 照片与相框的上边距, 照片宽, 照片高);

            g.DrawImage(img, imgBack.Width / 2 - img.Width / 2, imgBack.Width / 2 - img.Width / 2, img.Width, img.Height);
            GC.Collect();
            return imgBack;
        }

        /// <summary>
        /// Resize图片
        /// </summary>
        /// <param name="bmp">原始Bitmap</param>
        /// <param name="newW">新的宽度</param>
        /// <param name="newH">新的高度</param>
        /// <param name="Mode">保留着,暂时未用</param>
        /// <returns>处理以后的图片</returns>
        public static Image KiResizeImage(Image bmp, int newW, int newH, int Mode)
        {
            try
            {
                Image b = new Bitmap(newW, newH);
                Graphics g = Graphics.FromImage(b);
                // 插值算法的质量
                g.InterpolationMode = InterpolationMode.HighQualityBicubic;
                g.DrawImage(bmp, new Rectangle(0, 0, newW, newH), new Rectangle(0, 0, bmp.Width, bmp.Height), GraphicsUnit.Pixel);
                g.Dispose();
                return b;
            }
            catch
            {
                return null;
            }
        }
    }
}
上面自定义了一个接口 IQRCode
    public interface IQRCode
    {
        byte[] GetQRCode(string logoPath,string url, int pixel);
    }
方便在StartUp中注册
        // This method gets called by the runtime. Use this method to add services to the container.
        public void ConfigureServices(IServiceCollection services)
        {
            services.AddSingleton<IQRCode, RaffQRCode>();
            ......
然后可以在Controller的构造函数中注入了
        private IQRCode _iQRCode;
        public GenerateQRCodeController(
          IQRCode iQRCode)
        {
            _iQRCode = iQRCode;
        }
接着写出返回图片Base64字符串的方法,并在支付宝客户端调用
        /// <summary>
        /// 返回二维码图片的base64字符窜
        /// </summary>
        /// <param name="ali_user_id"></param>
        /// <returns></returns>
        [HttpGet]
        [Route("GetGRCodeGenrateImage")]
        public ActionResult GetGRCodeGenrateImage(string ali_user_id)
        {
            try
            {
                //根据支付宝账号查询用户表
                var findUser = _tb_school_user.FindByClause(t => t.ali_user_id == ali_user_id);
                if (findUser != null)
                {
                    var qrCodeFullStr = GetQrCodeString(ali_user_id, findUser);
                    var logoPath = host.WebRootPath + @"\images\logo.jpg";
                    var byteData = _iQRCode.GetQRCode(logoPath, qrCodeFullStr, 4);

                    //创建一个文件流
                    //using (FileStream fs = new FileStream(@"c:\666666666666.png", FileMode.Create))
                    //{
                    //    //将byte数组写入文件中
                    //    fs.Write(byteData, 0, byteData.Length);
                    //}

                    //处理返回提前台image图片
                    //FileContentResult img = new FileContentResult(byteData, "images/png");
                    //return img;

                    return Content(Convert.ToBase64String(byteData));
                }
                return Content(string.Empty);
            }
            catch (Exception ex)
            {
                log.Error("错误:" + ex);
                return Content("图片生成出错");
            }
        }
支付宝小程序前端的代码
const app = getApp();

Page({
  data: {
    src: '',
    username: '',
    studentid: '',
    QRCodeSrc: '',
    setInter:'',
  },
  GetQRCode : function(){
      var that = this;
      my.httpRequest({
         url: app.globalData.apiurl + '/api/GenerateQRCode/GetGRCodeGenrateImage',
         method: 'GET',
         dataType : 'text',
         data: {
            ali_user_id: app.globalData.aliuserid
         },
         header: {
            'content-type': 'application/octet-stream',
         },
         success: function(res) {
            var data = res.data
            if (res.status == 200) {
                that.setData ({
                    QRCodeSrc: 'data:image/png;base64,' + data,  //data 为接口返回的base64字符串
                })
            }
         },
         fail: function(res) {
            console.log(JSON.stringify(res));
            my.showToast({
              type: 'fail',
              content: '获取二维码失败',
              duration: 1000
            });
         },
         complete: function(res) {
            my.hideLoading();
         }
      })
  },
  //定时刷新二维码
  refreshQRCode : function(){
     var that = this;
     //每分钟刷新
     that.data.setInter = setInterval(function(){
       that.GetQRCode();
     },60000);
  },
  imageError: function (e) {
    console.log('image 发生错误', e.detail.errMsg)
  },
  imageLoad: function (e) {
    console.log('image 加载成功', e);
  },
  clearTimeInterval: function (that) {
    var interval = that.data.interval;
    clearInterval(interval)
  },
  onLoad(query) {
    var that = this
    // 页面加载
    app.getUserInfo().then(
      user => {
            console.info(user);
            //设置头像
            if (user.avatar.length > 0) {
               this.setData({src: user.avatar});
            }
            else {
               this.setData({src: '/images/tou.png'});
            }
            //设置用户名
            if (app.globalData.username) {
               this.setData({username: app.globalData.username});
            }
            else {
               this.setData({username: user.nickName});
            }
            //设置StudentId
            if(app.globalData.studentid) {
               this.setData({studentid: app.globalData.studentid});
            }

            //页面加载获取二维码
            this.GetQRCode();
            //开启定时刷新获取二维码
            this.refreshQRCode();
        }
    );
  },
  onShow() {
    // 页面显示
    my.onUserCaptureScreen(function() {
       my.alert({content: '收到用户截屏事件'});
    });
  },
  onReady() {
  },
  onUnload: function () {
      var that = this;
      //清除计时器  即清除setInter
      clearInterval(that.data.setInter)
  },
});
重点看GetQRCode 这个方法就可以了,如何在前端接收Base64格式并显示图片