laser point detection
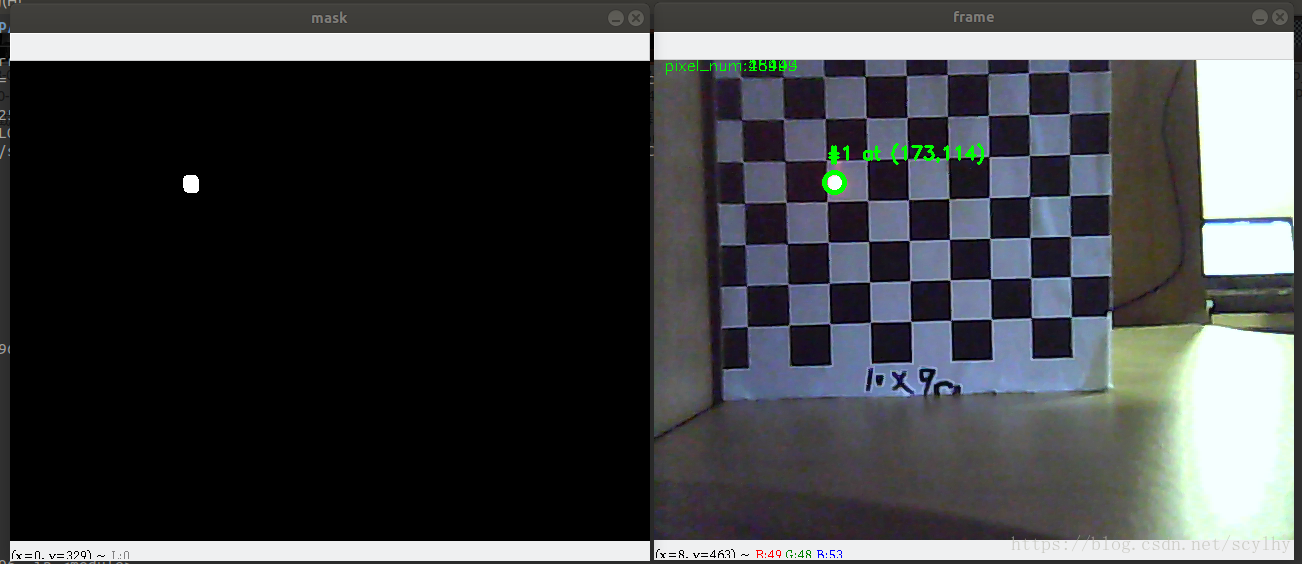
本文主要目的是通过检测激光点,通过相机光轴、激光束和激光点之前形成的几何关系求解距离信息,达到单目相机测距的功能。
检测结果
参考
1.DIY专区一、 用摄像头及激光来测距(opencv)
2.opencv激光点追踪代码
3.opencv-python中文教程:颜色空间转换
4.github.com/Ankur/OpenCV-Laser-Tracker
5.OpenCV-Laser-Tracker
6. Laser pointer detect and track
7.stack overflow:laser curved line detection using opencv and python
8.Python视觉处理(四)HSV处理
9.用python3 opencv3 实现相机学生证的实时跟踪
10.Opencv中SimpleBlobDetector的使用(斑点检测)
11.【转】使用OpenCV进行斑点检测Blob Detection Using OpenCV ( Python, C++ )
12.重点参考该内容:pyimagesearch.com:Detecting multiple bright spots in an image with Python and OpenCV
13.OpenCV 形状分析(上):计算轮廓中心
14.三角测距法的原理code
#!/usr/bin/python3
# import the necessary packages
from imutils import contours
from skimage import measure
import numpy as np
#import argparse
import imutils
import cv2
import math

CAM=2
cap = cv2.VideoCapture(CAM)


def nothing(x):
        pass

#添加参数控制
cv2.namedWindow("params")
cv2.createTrackbar("manual","params",0,1,nothing)
cv2.createTrackbar("pixels_num","params",0,2000,nothing)

ret,frame=cap.read()
W=frame.shape[0]
H=frame.shape[1]

while True:
    ret,frame=cap.read()
    image=frame
    # load the image, convert it to grayscale, and blur it
    gray = cv2.cvtColor(image, cv2.COLOR_BGR2GRAY)
    blurred = cv2.GaussianBlur(gray, (11, 11), 0)

    # threshold the image to reveal light regions in the
    # blurred image
    thresh = cv2.threshold(blurred, 200, 255, cv2.THRESH_BINARY)[1]

    # perform a series of erosions and dilations to remove
    # any small blobs of noise from the thresholded image
    thresh = cv2.erode(thresh, None, iterations=2)
    thresh = cv2.dilate(thresh, None, iterations=4)


    # perform a connected component analysis on the thresholded
    # image, then initialize a mask to store only the "large"
    # components
    labels = measure.label(thresh, neighbors=8, background=0)
    mask = np.zeros(thresh.shape, dtype="uint8")

    MANUAL=cv2.getTrackbarPos("manual","params")
    PIXEL_THRESH=cv2.getTrackbarPos("pixels_num","params") if MANUAL==1 else 500
    # loop over the unique components
    for label in np.unique(labels):
        # if this is the background label, ignore it
        if label == 0:
            continue
        # otherwise, construct the label mask and count the
        # number of pixels
        labelMask = np.zeros(thresh.shape, dtype="uint8")
        labelMask[labels == label] = 255
        numPixels = cv2.countNonZero(labelMask)

        # 通过斑点的像素面积确定激光斑点
        #if numPixels > 300:
        #print(numPixels) #debug

        cv2.putText(image, "pixel_num:{}".format(numPixels), (10, 10),cv2.FONT_HERSHEY_SIMPLEX, 0.5, (0, 255, 0), 1)
        if numPixels <PIXEL_THRESH:  #亮斑过滤,可调参数149 ,500,1269
            mask = cv2.add(mask, labelMask)

    # find the contours in the mask, then sort them from left to
    # right
    cnts= cv2.findContours(mask.copy(), cv2.RETR_EXTERNAL,cv2.CHAIN_APPROX_SIMPLE)
    #不同返回参数,不是一个算法!!? 打包成一个对象了
    #im,cnts,hierarchy = cv2.findContours(mask.copy(), cv2.RETR_EXTERNAL,cv2.CHAIN_APPROX_SIMPLE)


    if len(cnts) <2:
        print("未检测到轮廓")
        continue

    cnts = cnts[0] if imutils.is_cv2() else cnts[1]  #用以区分OpenCV2.4和OpenCV3
    #cnts = contours.sort_contours(cnts)[0]
    cnts = sorted(cnts, key = cv2.contourArea, reverse = True)[:5] #保留最大轮廓

    # loop over the contours
    for (i, c) in enumerate(cnts):
        # draw the bright spot on the image
        (x, y, w, h) = cv2.boundingRect(c)
        ((cX, cY), radius) = cv2.minEnclosingCircle(c)
        cv2.circle(image, (int(cX), int(cY)), int(radius),(0, 255, 0), 3)
        cv2.circle(image, (int(H/2), int(W/2)), int(3),(0, 0, 255), -1)

        cv2.putText(image, "#{} at ({},{})".format(i + 1,x,y), (x, y - 15),cv2.FONT_HERSHEY_SIMPLEX, 0.6, (0, 255, 0), 2)

        X=math.pow(abs(W/2-y),2) #|方向
        X=X+math.pow(abs(H/2-x),2) #-方向
        X1=abs(H/2-x)
        X2=abs(W/2-y)
        print("X_:",X1)
        print("X|:",X2)

        #X=math.sqrt(X)
        X=X1
        if X==0:
            continue
        print("X:",X)
        D=797.292/X*3.5  #camL f=797.29
        #D=832.52/X*3.5   #camR f=832.52
        print("D:",D,"cm")
        break
    cv2.imshow("mask",mask)
    cv2.imshow("image",image)
    k=cv2.waitKey(40)&0xff
    if k==27:
        break
cap.release()
cv2.destoryAllWindows()