Índice
Informações de configuração: arquivo de propriedades
Configuração personalizada de cafeína de vários gerenciadores de cache
springboot integra redis e personaliza cachemanager de configuração
cafeína integrada springboot
Cafeína é uma biblioteca de cache baseada em memória de servidor . Ele armazena dados na memória do aplicativo para acesso rápido aos dados e alto desempenho.
Como o cache Caffeine armazena dados na memória do servidor, ele é adequado para dados que precisam ser lidos rapidamente e acessados com frequência, como alguns dados populares, informações de configuração, resultados de consultas comuns, etc. Mas não é adequado para dados em grande escala ou que requerem armazenamento persistente , porque a memória do servidor é limitada e não pode armazenar grandes quantidades de dados, e os dados armazenados em cache serão perdidos após a reinicialização do aplicativo .
Dependências do Maven
<parent>
    <groupId>org.springframework.boot</groupId>
    <artifactId>spring-boot-starter-parent</artifactId>
    <version>2.5.2</version>
    <relativePath/>
</parent>

<dependencies>
    <dependency>
        <groupId>org.springframework.boot</groupId>
        <artifactId>spring-boot-starter</artifactId>
    </dependency>
    <dependency>
        <groupId>org.springframework.boot</groupId>
        <artifactId>spring-boot-starter-web</artifactId>
    </dependency>
    <!-- caffeine服务器本地缓存 -->
    <dependency>
        <groupId>org.springframework.boot</groupId>
        <artifactId>spring-boot-starter-cache</artifactId>
    </dependency>
    <!-- caffeine -->
    <dependency>
        <groupId>com.github.ben-manes.caffeine</groupId>
        <artifactId>caffeine</artifactId>
        <version>2.8.1</version>
    </dependency>
    <!--   可以对自定义配置的信息进行提示 -->
    <dependency>
        <groupId>org.springframework.boot</groupId>
        <artifactId>spring-boot-configuration-processor</artifactId>
    </dependency>
</dependencies>
Informações de configuração: arquivo de propriedades
/**
* Caffeine Cache自定义配置属性类
*/
@Data //lombok插件的 看自己需求是否引入
@Component
@ConfigurationProperties(prefix = "com.common.caffeine")
//这个ConfigurationProperties是为了方便配置yaml文件,
//如果有需要的话可以在yaml文件中进行配置,需要与spring-boot-configuration-processor
//这个依赖搭配使用,
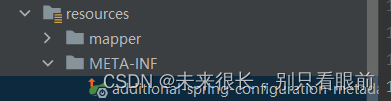
//然后再在resources目录下创建一个META-INF文件夹,该文件夹下存放一个配置文件提升信息(下面会贴出来的),
//这样的话在yaml文件中进行书写的时候就会有提升信息了
public class CaffeineCacheProperties {
/**
* 缓存初始容量 映射的话会很灵活 羊肉串写法与驼峰命名都可以和下面的属性进行映射
* com.ifi.performance.common.caffeine.init-cache-capacity
*/
private Integer initCacheCapacity = 256;
/**
* 缓存最大容量,超过之后会按照recently or very often(最近最少)策略进行缓存剔除
* com.ifi.performance.common.caffeine.max-cache-capacity
*/
private Long maxCacheCapacity = 10000L;
/**
* 是否允许空值null作为缓存的value
* com.ifi.performance.common.caffeine.allow-null-value
*/
private Boolean allowNullValue = Boolean.TRUE;
}Configure as informações de promoção do arquivo yaml: adicional-spring-configuration-metadata.json
{
  "properties": [
    {
      "name": "com.ifi.performance.common.caffeine.init-cache-capacity",
      "type": "java.lang.Integer",
      "description": "Caffeine缓存的初始容量",
      "defaultValue": 256
    },
    {
      "name": "com.ifi.performance.common.caffeine.max-cache-capacity",
      "type": "java.lang.Long",
      "description": "Caffeine缓存的最大容量",
      "defaultValue": "10000L"
    },
    {
      "name": "com.ifi.performance.common.caffeine.allow-null-value",
      "type": "java.lang.Boolean",
      "description": "Caffeine缓存是否允许null作为value的属性",
      "defaultValue": "true"
    }
  ]
}
Dessa forma, haverá uma mensagem de aviso quando com.common.caffeine for inserido no arquivo yaml.
configuração de configuração
/**
 * 服务端公用缓存常量类
 */
public interface CacheConstants {

    /**
     * 系统服务端公用缓存名称 默认缓存
     */
    String CACHE_NAME = "server_cache";
}
Escreva o arquivo de configuração: CaffeineCacheConfig.java
@SpringBootConfiguration
@EnableCaching  //开启注解扫描
@Slf4j
public class CaffeineCacheConfig {

    //刚刚编写的properties配置文件
    @Autowired
    private CaffeineCacheProperties properties;


    /**
     * 默认的全局缓存管理器
     * @return
     */
    @Bean("defaultCacheManager")
    public CaffeineCacheManager defaultCacheManager() {
        CaffeineCacheManager defaultCacheManager = new CaffeineCacheManager(CacheConstants.CACHE_NAME); //指定这个缓存的命名,这里我是使用了一个常量类
        defaultCacheManager.setAllowNullValues(properties.getAllowNullValue());
        Caffeine<Object, Object> caffeineBuilder = Caffeine.newBuilder()
                .initialCapacity(properties.getInitCacheCapacity())
                .maximumSize(properties.getMaxCacheCapacity()) //从配置文件中获取最大容量
                .expireAfterWrite(7, TimeUnit.DAYS); //过期时间
        defaultCacheManager.setCaffeine(caffeineBuilder);
        log.info("the caffeine cache manager is loaded successfully!");
        return defaultCacheManager;
    }
}
Casos de uso
Após a conclusão da configuração, o cache configurado pode ser usado no controlador e no serviço.
Por exemplo, se quisermos utilizá-lo em serviço, o caso é o seguinte:
@Autowired
@Qualifier(value = "defaultCacheManager") //这里可以直接使用Autowired就行,Autowired默认是按照对象类型进行依赖注入,如果容器中有两个及以上的同一种类型的bean,那么就会报bean冲突的错误,后面的定制化配置会用到这个Autowired
private CaffeineCacheManager defaultCacheManager;

Cache cache = defaultCacheManager.getCache(CacheConstants.CACHE_NAME); //配置类中对这个cachemanager设置的缓存名称
//下面就可以通过cache操作数据:存入缓存或者是从缓存中获取数据、删除数据了。
//存入缓存的数据是key-value形式的,key最好是一个唯一的标识,不然可能会出现缓存覆盖的情况,value可以是一个字符串也可以是自定义的对象,这里我是自定义了一个对象,比如UserCache对象,这个对象中有我需要缓存的数据,比如userid等自己需要的数据
UserCache usercache = new UserCache();
usercache.setuserId = "123456"; //实际业务场景中,比如用户登录成功,可以把用户id设置进来,方便其他业务进行获取  LOGIN_INFO 常量为自定义的一个标识符,方便在查询辨别缓存数据
cache.put(userId+CacheConstants.LOGIN_INFO,usercache);

//特别注意:get缓存数据的时候,很大可能获取到的是null对象,因为比如有一些业务没有被触发从而导致没有填充你需要的数据到缓存,所以这里一定要加一个空指针判断!!!
UserCache usercache = cache.get( userId + CacheConstants.LOGIN_INFO, UserCache.class);
if(usercache == null){
    return null;
}

//清除缓存中指定的数据  通过key来清除缓存中的数据,比如用户退出登录了可以把他的一些缓存信息给清除
cache.evict(userId + CacheConstants.LOGIN_INFO);
Como a interface de gerenciamento de cache que usamos é spring-cache, a API de operação no spring-cache não fornece um prazo de validade para configurar o cache de dados, portanto, se tivermos tais necessidades de negócios (por exemplo, as informações do código de verificação levam 5 minutos para expirar, as informações de login do usuário expiram em 30 dias), então você precisa customizar a configuração do cachemanager, para resolver o problema desde a origem.
Configuração personalizada de cafeína de vários gerenciadores de cache
A dependência é a mesma acima, bastando modificar a classe CaffeineCacheConfig e o método de uso.
@SpringBootConfiguration
@EnableCaching  //开启注解扫描
@Slf4j
public class CaffeineCacheConfig {

    @Autowired
    private CaffeineCacheProperties properties;


    /**
     * 默认的全局缓存管理器
     * @return
     */
    @Primary  //必须要加这个注解,用于标识一个Bean(组件)是首选的候选者。当有多个同类型的Bean(组件)时,使用了@Primary注解的Bean将会成为默认选择,如果没有其他限定符(如@Qualifier)指定具体要使用的Bean,则会优先选择带有@Primary注解的Bean。
    @Bean("defaultCacheManager")
    public CaffeineCacheManager defaultCacheManager() {
        CaffeineCacheManager defaultCacheManager = new CaffeineCacheManager(CacheConstants.ACHE_NAME);
        defaultCacheManager.setAllowNullValues(properties.getAllowNullValue());
        Caffeine<Object, Object> caffeineBuilder = Caffeine.newBuilder()
                .initialCapacity(properties.getInitCacheCapacity())
                .maximumSize(properties.getMaxCacheCapacity())
                .expireAfterWrite(7, TimeUnit.DAYS);
        defaultCacheManager.setCaffeine(caffeineBuilder);
        log.info("the caffeine cache manager is loaded successfully!");
        return defaultCacheManager;
    }

    /**
     *  用于管理验证码缓存,设置过期时间为300秒
     */
    @Bean("verificationCodeCacheManager")
    public CaffeineCacheManager verificationCodeCacheManager() {
        CaffeineCacheManager verificationCodeCacheManager = new CaffeineCacheManager(CacheConstants.CODE_CACHE_NAME);
        verificationCodeCacheManager.setCaffeine(Caffeine.newBuilder()
                .initialCapacity(properties.getInitCacheCapacity())
                .maximumSize(properties.getMaxCacheCapacity())
                .expireAfterWrite(300, TimeUnit.SECONDS));
        log.info("the verificationCodeCacheManager cache manager is loaded successfully!");
        return verificationCodeCacheManager;
    }

}
O uso é consistente com o caso acima, mas neste momento @Qualifier deve ser usado para especificar os beans relevantes. Todos os outros usos são iguais.
@Autowired
@Qualifier(value = "defaultCacheManager")
private CaffeineCacheManager defaultCacheManager;

@Autowired
@Qualifier(value = "verificationCodeCacheManager")
private CaffeineCacheManager verificationCodeCacheManager;
springboot integra redis e personaliza cachemanager de configuração
Dependências do Maven usadas pelo cache:
<!-- 集成redis依赖  -->
<dependency>
    <groupId>org.springframework.boot</groupId>
    <artifactId>spring-boot-starter-data-redis</artifactId>
</dependency>
<!-- 提供Redis连接池 -->
<dependency>
    <groupId>org.apache.commons</groupId>
    <artifactId>commons-pool2</artifactId>
</dependency>
arquivo yaml: configuração da parte Redis
spring:
  redis:
    database: 0
    host: localhost
    port: 6379
    password: abc123456  #这个看你的Redis版本,一些老的Redis用的是auth,一些比较新的用的是password配置
    timeout: 10s
    lettuce:
      pool:
        # 连接池最大连接数
        max-active: 200
        # 连接池最大阻塞等待时间(使用负值表示没有限制)
        max-wait: -1ms
        # 连接池中的最大空闲连接
        max-idle: 10
        # 连接池中的最小空闲连接
        min-idle: 3
classe de configuração de configuração:
@SpringBootConfiguration
@EnableCaching
@Slf4j
public class RedisCacheConfig {

    /**
     * 定制链接和操作Redis的客户端工具   配置一些序列化器,这样通过缓存管理工具看到的缓存数据就不是乱码了
     * @param redisConnectionFactory
     * @return
     */
    @Bean
    public RedisTemplate<String, Object> redisTemplate(RedisConnectionFactory redisConnectionFactory) {
        RedisTemplate<String, Object> redisTemplate = new RedisTemplate<>();
        redisTemplate.setConnectionFactory(redisConnectionFactory);

        //配置序列化器
        Jackson2JsonRedisSerializer<Object> jackson2JsonRedisSerializer = new Jackson2JsonRedisSerializer<>(Object.class);
        ObjectMapper objectMapper = new ObjectMapper();

        GenericJackson2JsonRedisSerializer genericJackson2JsonRedisSerializer = new GenericJackson2JsonRedisSerializer();
        redisTemplate.setDefaultSerializer(genericJackson2JsonRedisSerializer);
        objectMapper.setVisibility(PropertyAccessor.ALL, JsonAutoDetect.Visibility.ANY);
        objectMapper.enableDefaultTyping(ObjectMapper.DefaultTyping.NON_FINAL);
        jackson2JsonRedisSerializer.setObjectMapper(objectMapper);
        redisTemplate.setKeySerializer(new StringRedisSerializer());
        redisTemplate.setHashKeySerializer(new StringRedisSerializer());
        redisTemplate.setHashValueSerializer(genericJackson2JsonRedisSerializer);
        redisTemplate.setValueSerializer(genericJackson2JsonRedisSerializer);
        redisTemplate.afterPropertiesSet();
        return redisTemplate;

    }


    /**
     * 默认的全局缓存管理器   配置一些序列化器,这样通过缓存管理工具看到的缓存数据就不是乱码了
     * @return
     */
    @Primary  //关于这个相关的解释,上面的caffeine配置中都有说明,这里就不额外说明了
    @Bean("defaultCacheManager")
    public RedisCacheManager defaultCacheManager(RedisConnectionFactory redisConnectionFactory) {
        GenericJackson2JsonRedisSerializer genericJackson2JsonRedisSerializer = new GenericJackson2JsonRedisSerializer();
        StringRedisSerializer stringRedisSerializer = new StringRedisSerializer();

        RedisCacheConfiguration config = RedisCacheConfiguration.
                defaultCacheConfig()
                .serializeKeysWith(RedisSerializationContext.SerializationPair.fromSerializer(stringRedisSerializer))
                .serializeValuesWith(RedisSerializationContext.SerializationPair.fromSerializer(genericJackson2JsonRedisSerializer));

        RedisCacheManager defaultCacheManager = RedisCacheManager.builder(redisConnectionFactory)
                .cacheDefaults(config).build();

        log.info("the redis defaultCacheManager is loaded successfully!");
        return defaultCacheManager;
    }

    /**
     *  用于管理验证码缓存,设置过期时间为300秒
     */
    @Bean("verificationCodeCacheManager")
    public RedisCacheManager verificationCodeCacheManager(RedisConnectionFactory redisConnectionFactory) {
        GenericJackson2JsonRedisSerializer genericJackson2JsonRedisSerializer = new GenericJackson2JsonRedisSerializer();
        StringRedisSerializer stringRedisSerializer = new StringRedisSerializer();

        RedisCacheConfiguration config = RedisCacheConfiguration.
                defaultCacheConfig()
                .entryTtl(Duration.ofMinutes(5))
                .serializeKeysWith(RedisSerializationContext.SerializationPair.fromSerializer(stringRedisSerializer))
                .serializeValuesWith(RedisSerializationContext.SerializationPair.fromSerializer(genericJackson2JsonRedisSerializer));

        RedisCacheManager verificationCodeCacheManager = RedisCacheManager.builder(redisConnectionFactory)
                .cacheDefaults(config).build();

        log.info("the verificationCodeCacheManager cache manager is loaded successfully!");
        return verificationCodeCacheManager;
    }


}
O uso é consistente com o acima:
@Autowired
@Qualifier(value = "defaultCacheManager")
private CaffeineCacheManager defaultCacheManager;

Cache cache = defaultCacheManager.getCache(CacheConstants.CACHE_NAME); //配置类中对这个cachemanager设置的缓存名称

UserCache usercache = new UserCache();
usercache.setuserId = "123456";
//实际业务场景中,比如用户登录成功,可以把用户id设置进来,方便其他业务进行获取  LOGIN_INFO 常量为自定义的一个标识符,方便在查询辨别缓存数据
cache.put(userId+CacheConstants.LOGIN_INFO,usercache);

//特别注意:get缓存数据的时候,很大可能获取到的是null对象
UserCache usercache = cache.get( userId + CacheConstants.LOGIN_INFO, UserCache.class);
if(usercache == null){
    return null;
}

//清除缓存中指定的数据  通过key来清除缓存中的数据
cache.evict(userId + CacheConstants.LOGIN_INFO);