1. Introdução ao aplicativo uni
Usando o uniCloud, você pode lidar sozinho com o desenvolvimento front-end e back-end de pequenos programas. Não há necessidade de comprar um nome de domínio, não há necessidade de comprar um servidor em nuvem. O mais importante é que quando a quantidade de visitas ao applet é pequena, os recursos relacionados ao servidor back-end são gratuitos.
2. Uso do aplicativo uni (uniCloud)
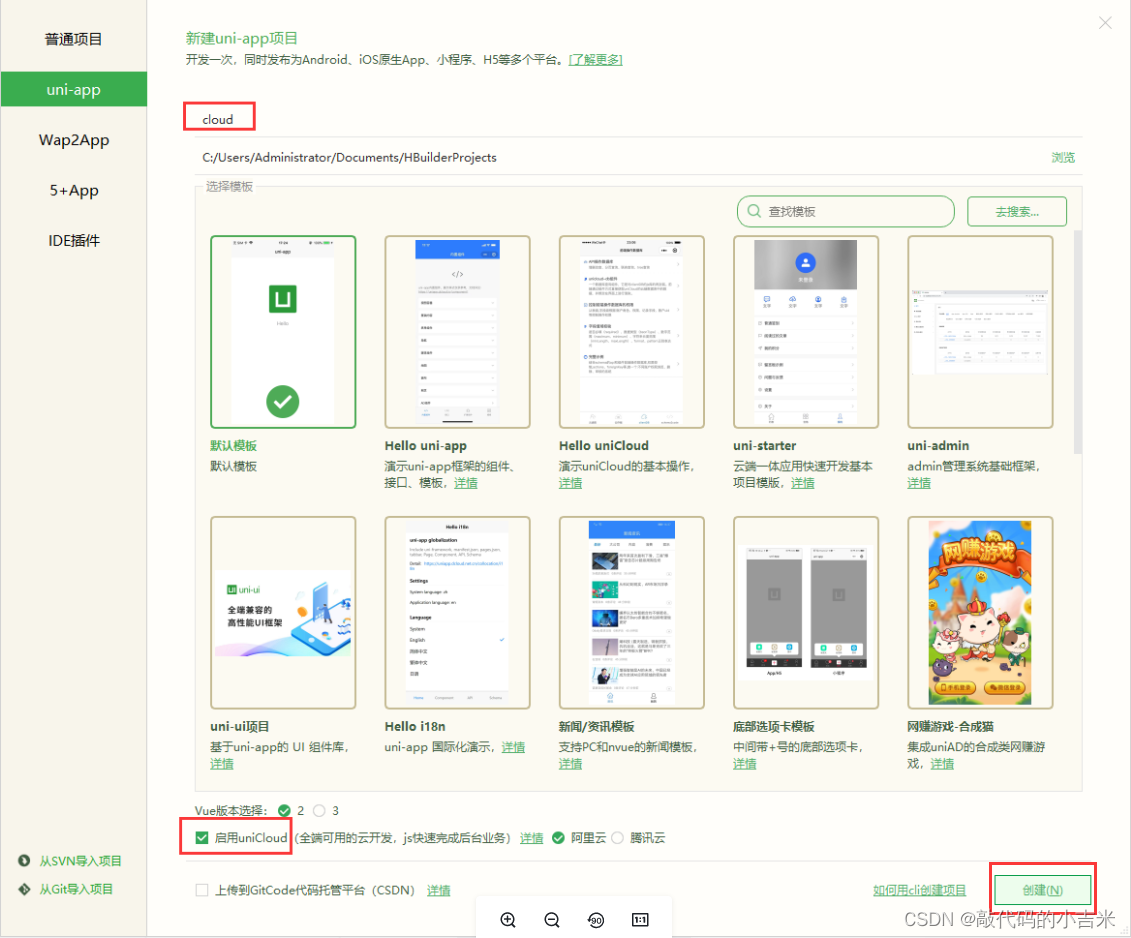
1. Crie um projeto uniCloud
2. Crie um espaço de serviço em nuvem
2.1 Espaço em nuvem associado
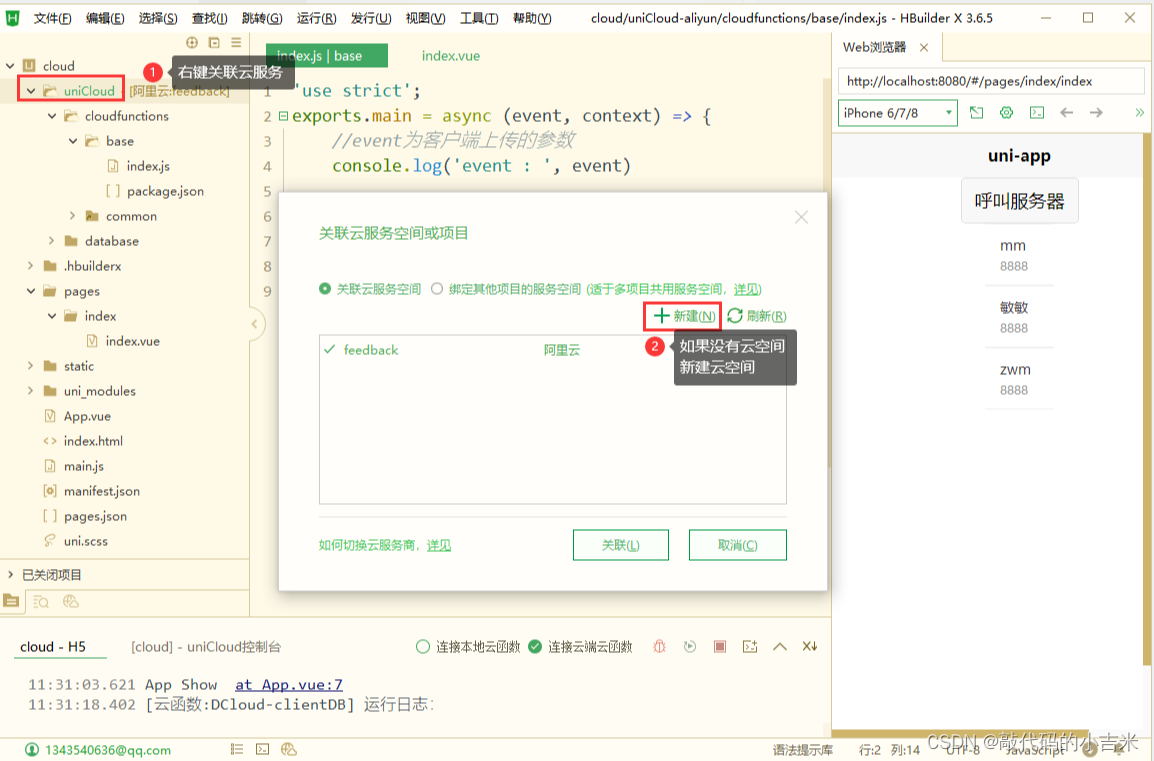
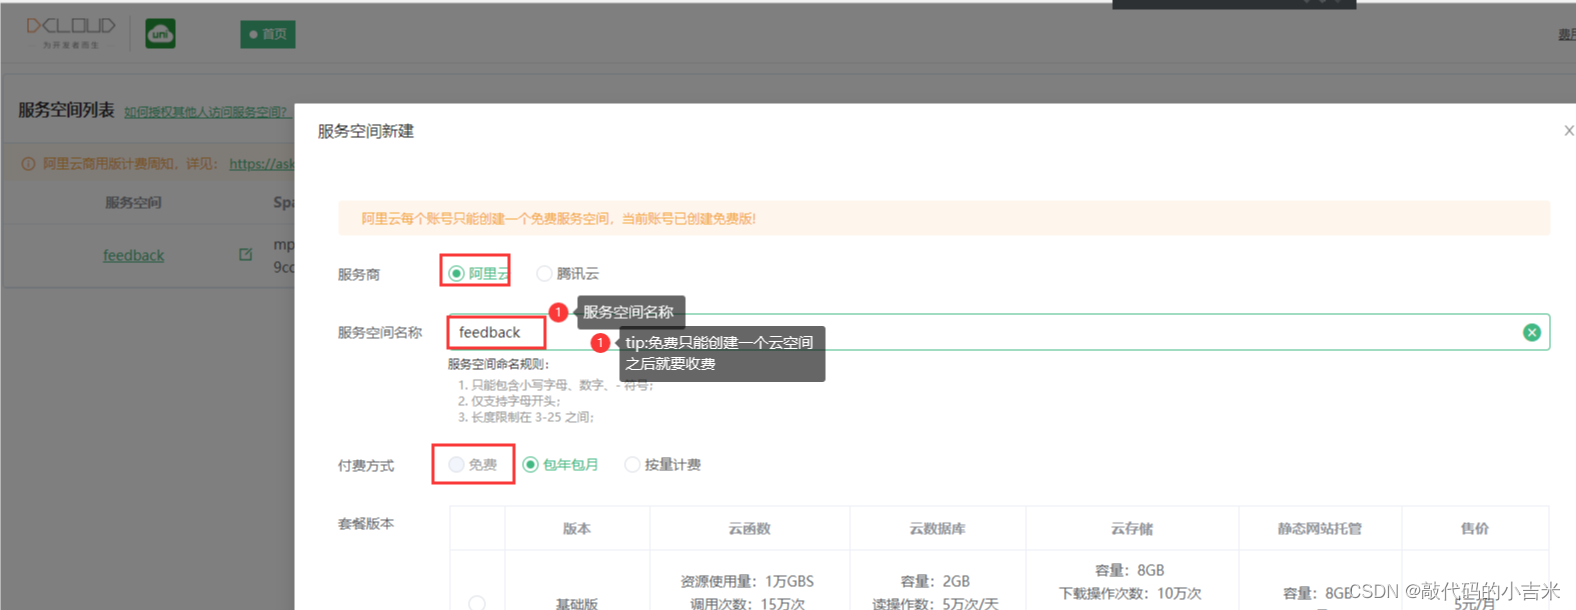
2.2 Crie um novo espaço na nuvem
3. Função de nuvem
3.1 Criar uma função de nuvem
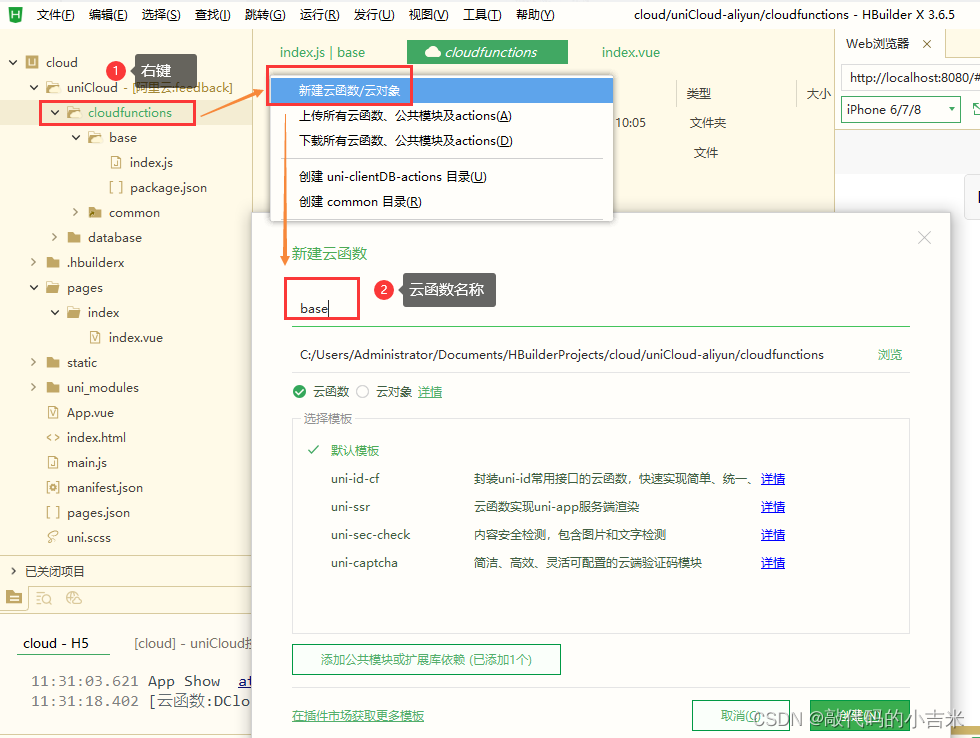
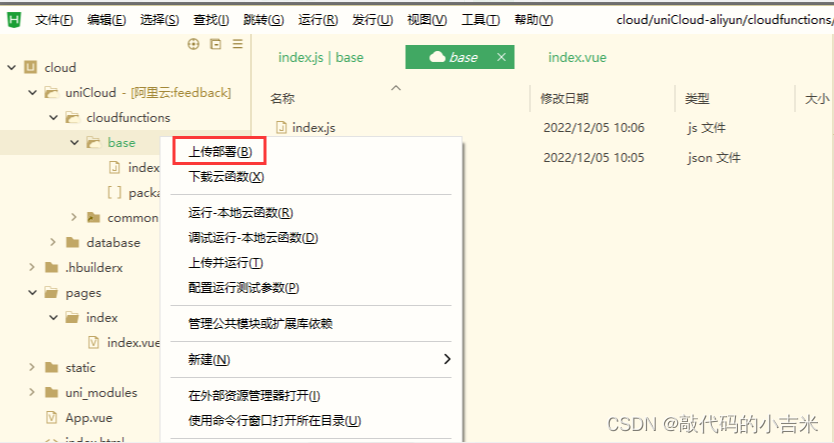
3.1.2 Carregar a função de nuvem
3.2 Chamada de página
em métodos

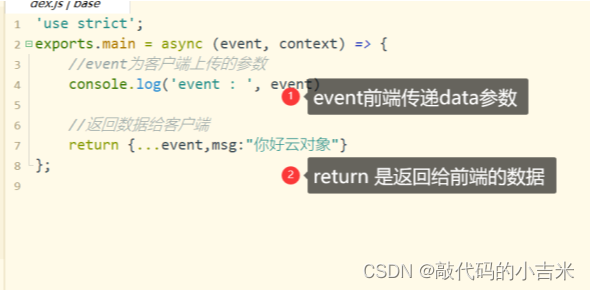
3.3 Escrevendo funções de nuvem
função de nuvem index.js
4. Banco de dados em nuvem
4.1 Criar dados na nuvem
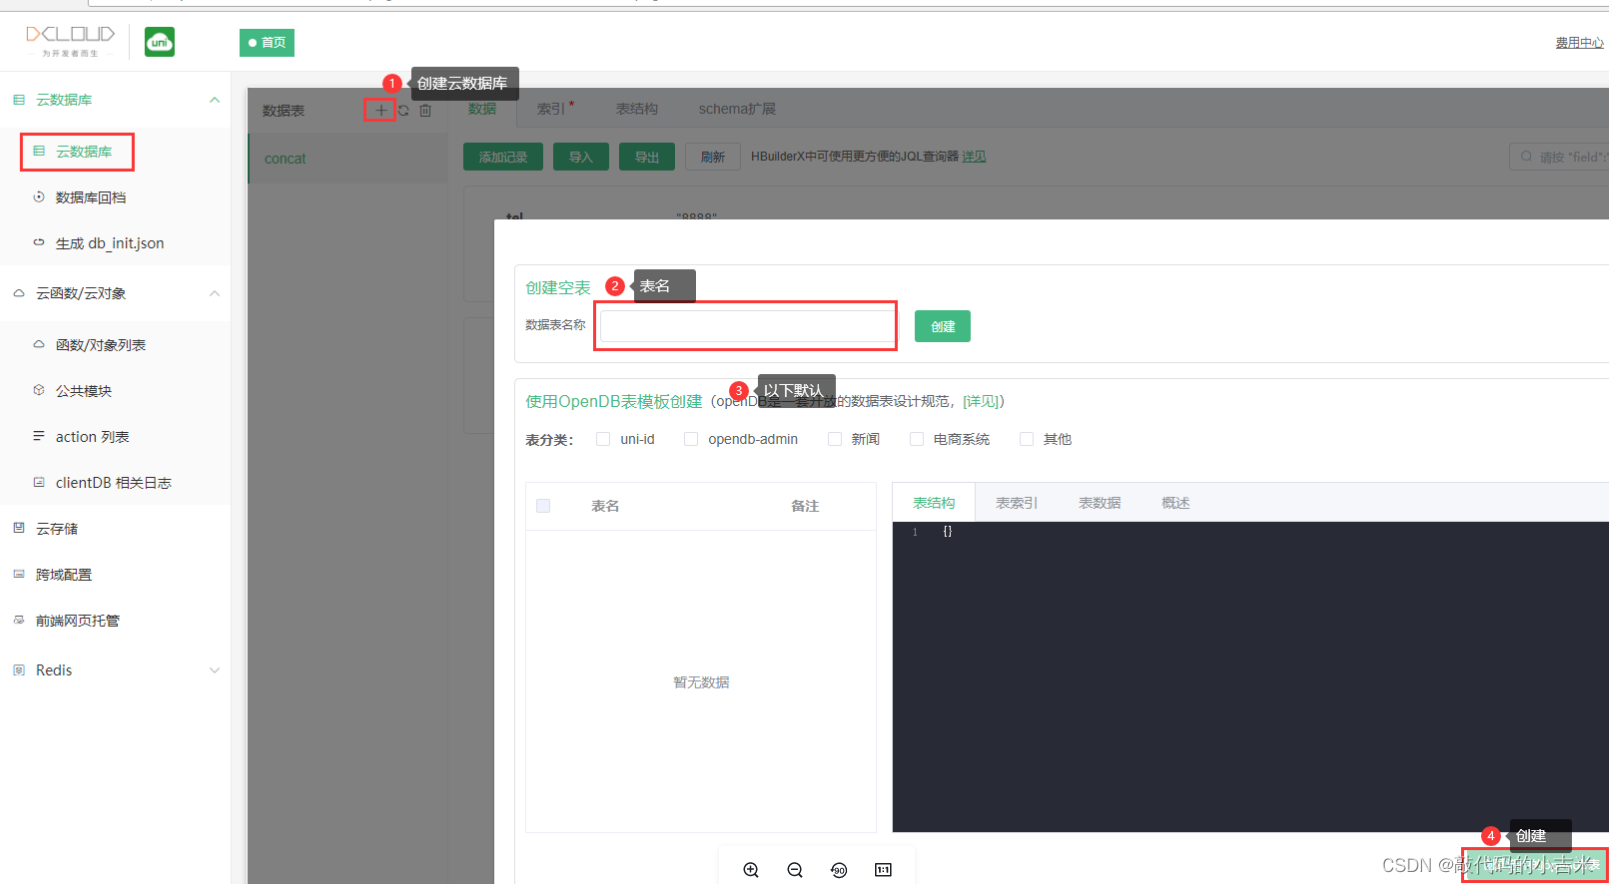
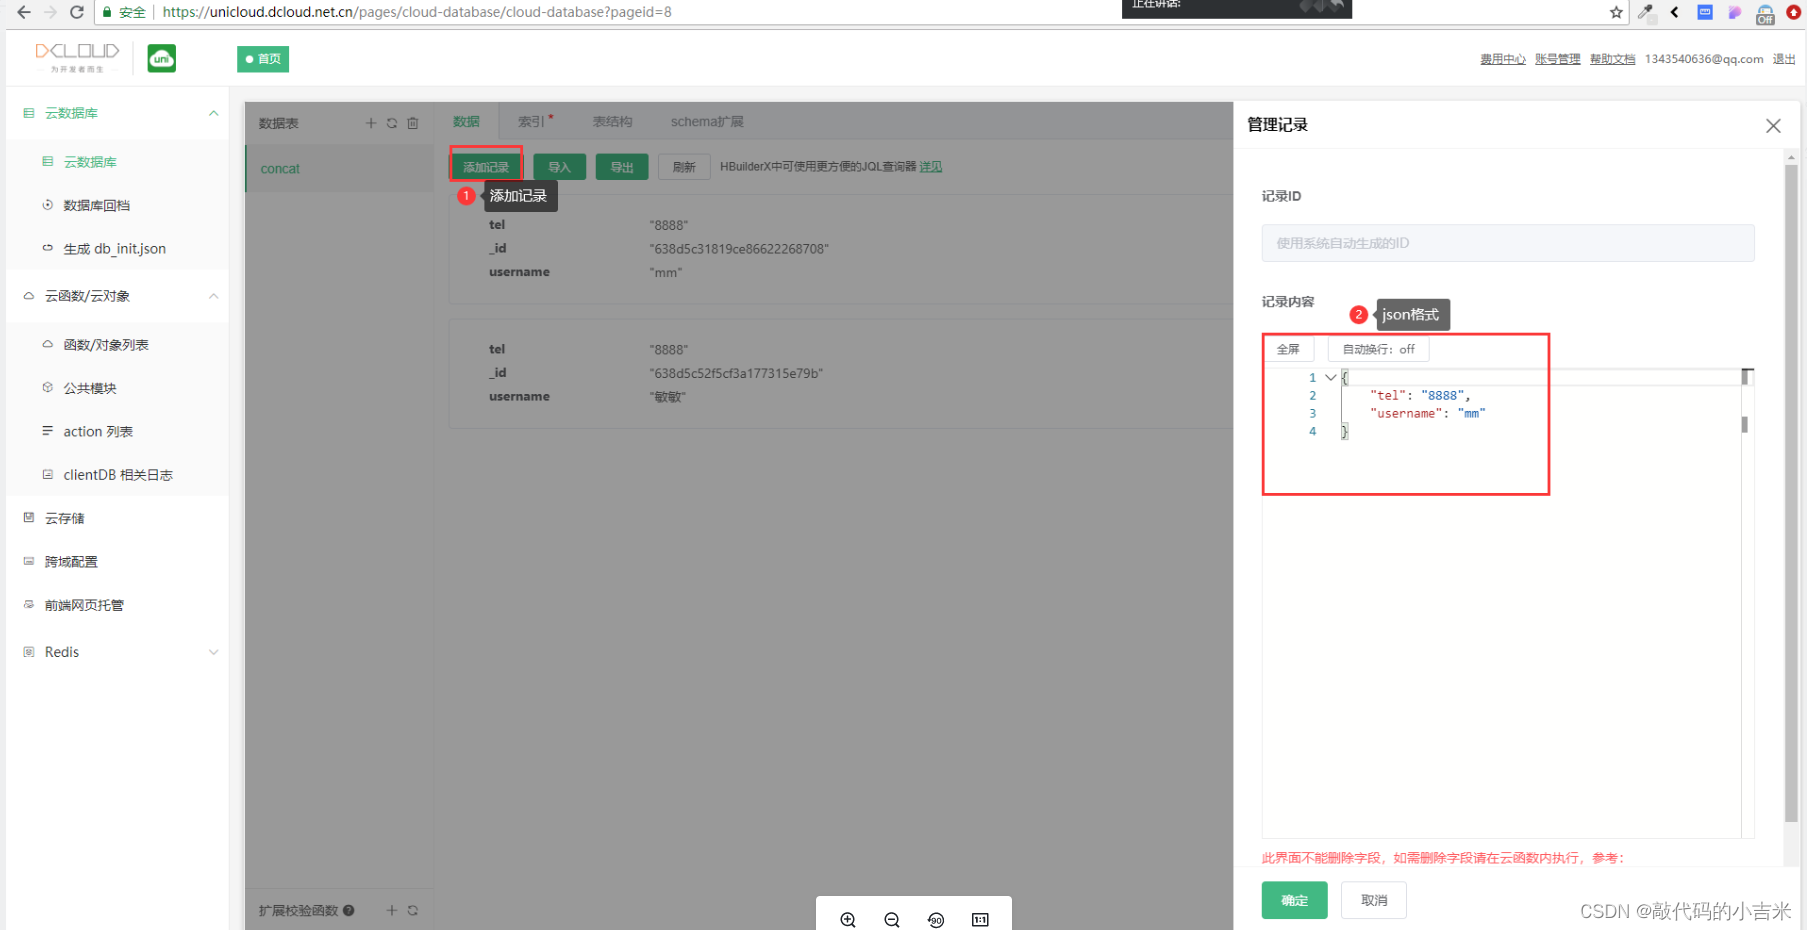
4.2 Adicionar dados na nuvem
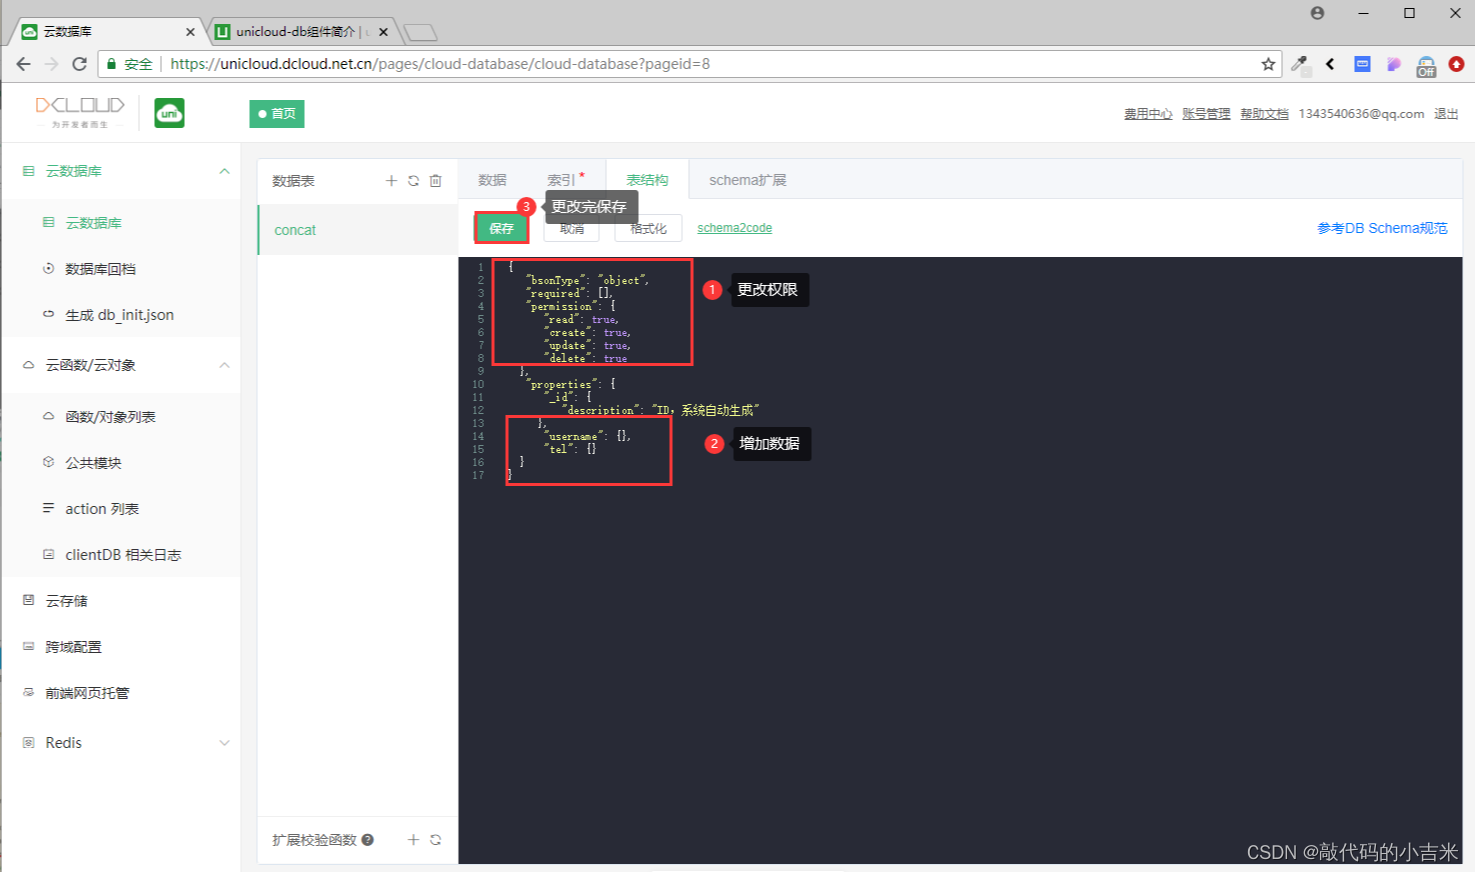
4.3 Dados em Nuvem - Introdução à Estrutura da Tabela
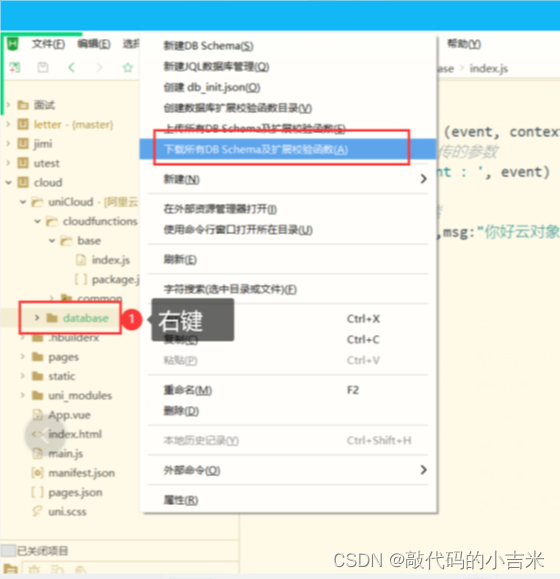
4.4 Estrutura da tabela de download (faça o download quando necessário)
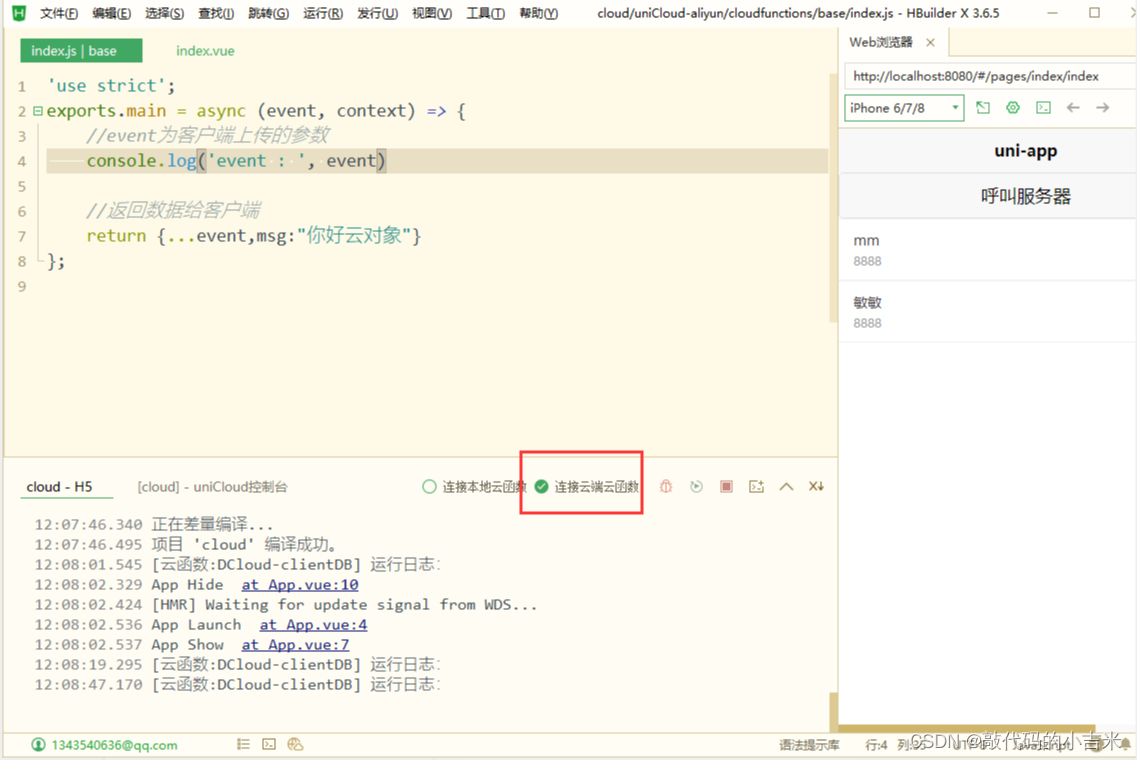
4.5 Executando o projeto
dica: conecte a função de nuvem
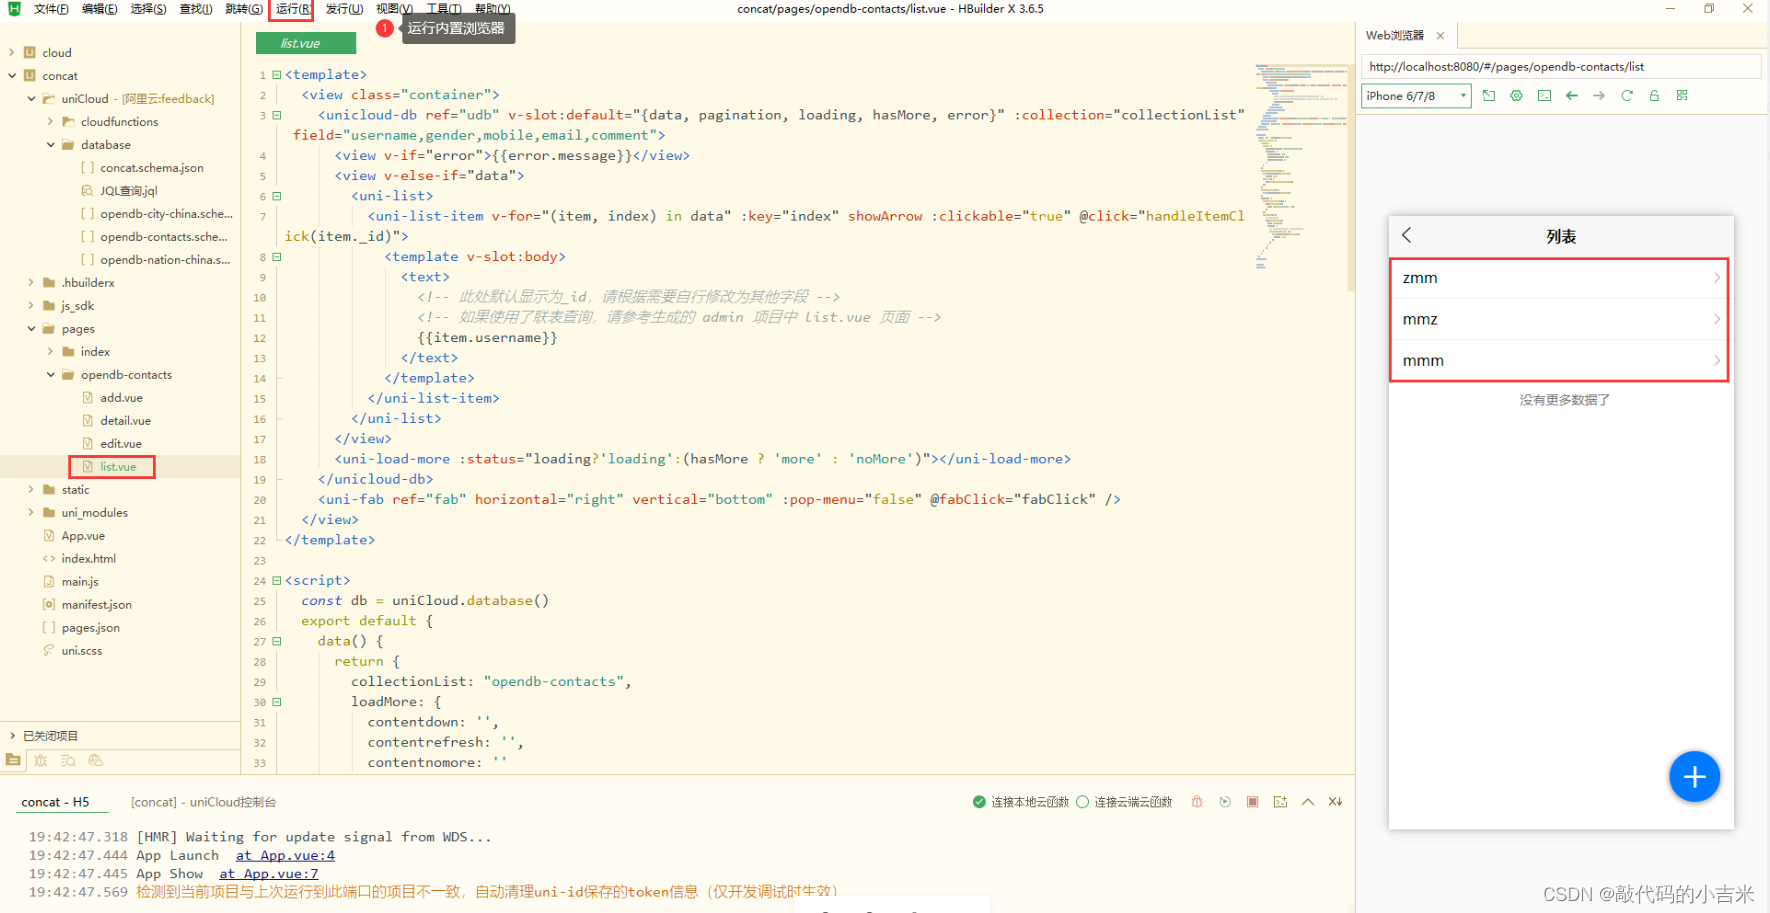
4.6 Exibir dados (front-end)
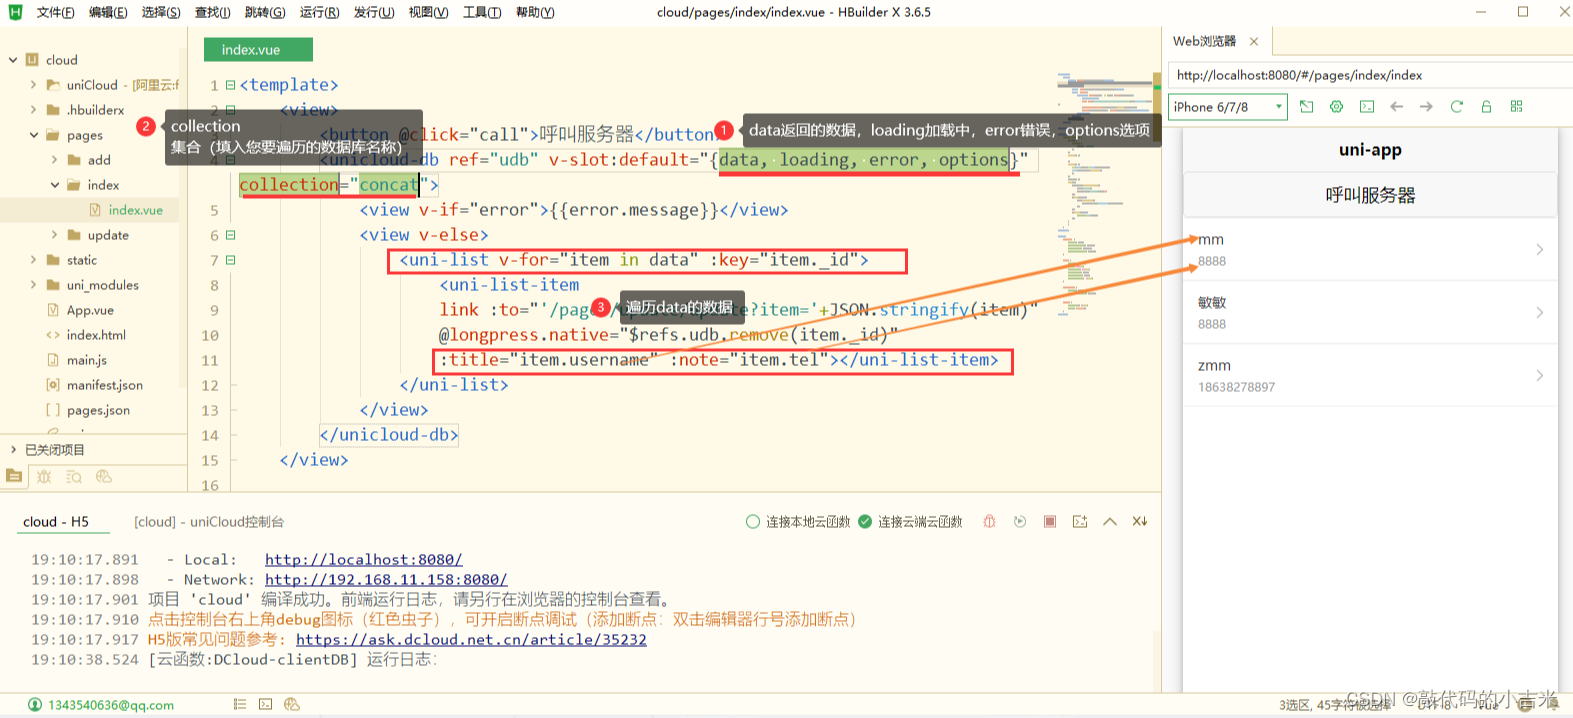
o código
<template>
	<view>
		<button @click="call">呼叫服务器</button>
		<unicloud-db v-slot:default="{data, loading, error, options}" collection="concat">
			<view v-if="error">{

   {error.message}}</view>
			<view v-else>
				<uni-list v-for="item in data" :key="item._id">
					<uni-list-item
					:title="item.username" :note="item.tel"></uni-list-item>
				</uni-list>
			</view>
		</unicloud-db>
	</view>

</template>

<script>
	export default {


		data() {


			return {


				title: 'Hello'
			}
		},
		onLoad() {


		},
		onShow() {


			if(this.$refs&&this.$refs.udb){


			this.$refs.udb.$refresh()
			}
		},
		methods: {


		call(){


			uniCloud.callFunction({


				name:"base",
				data:{

      name:"mumu",age:18}
			})
			.then(res=>{


				uni.showModal({


					content:JSON.stringify(res.result)
				})
			})
			.catch(err=>{


				console.log(err);
			})
		}
		}
	}
</script>

<style>
	.content {


		display: flex;
		flex-direction: column;
		align-items: center;
		justify-content: center;
	}

	.logo {


		height: 200rpx;
		width: 200rpx;
		margin-top: 200rpx;
		margin-left: auto;
		margin-right: auto;
		margin-bottom: 50rpx;
	}

	.text-area {


		display: flex;
		justify-content: center;
	}

	.title {


		font-size: 36rpx;
		color: #8f8f94;
	}
</style>
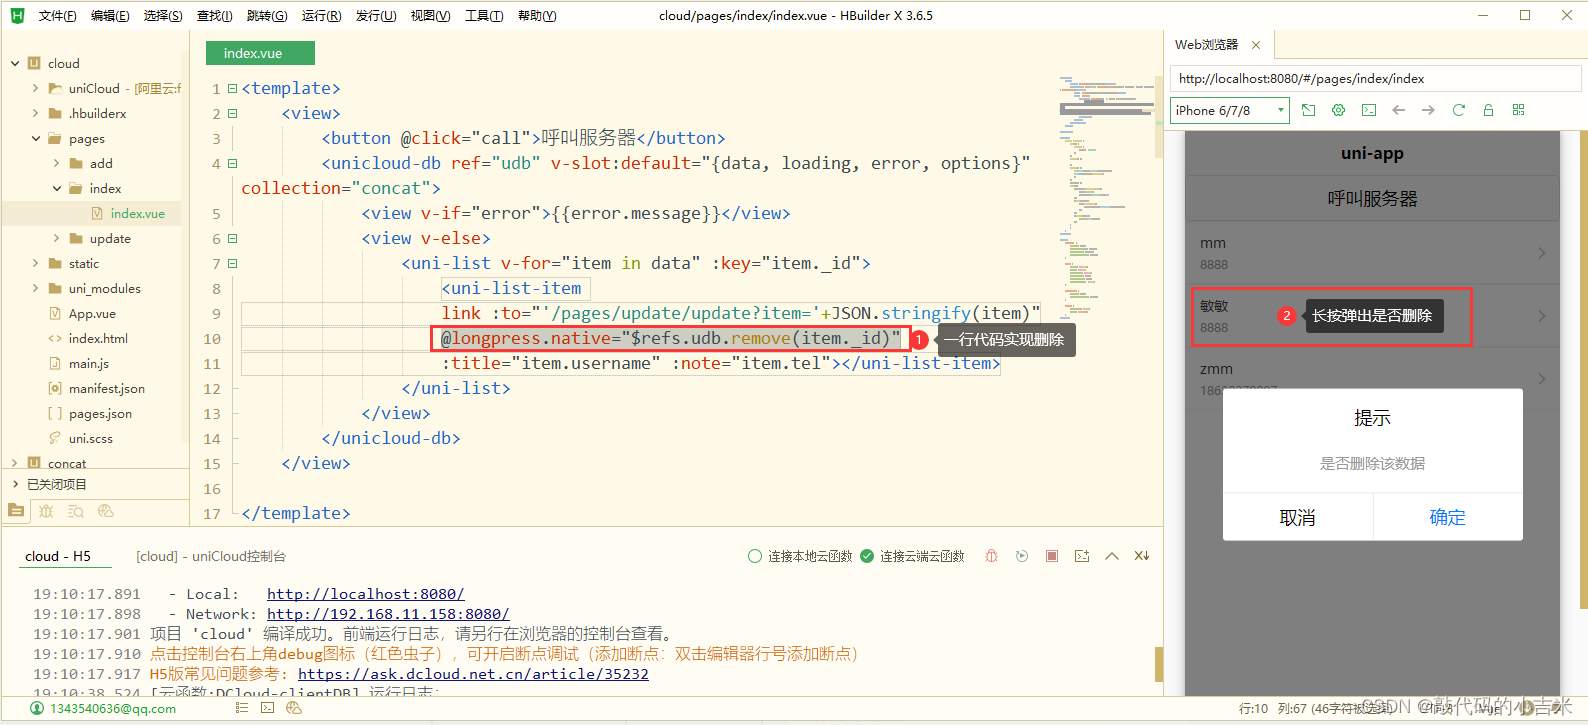
5. Adição, exclusão e modificação de dados em nuvem
5.1 Excluir dados da nuvem
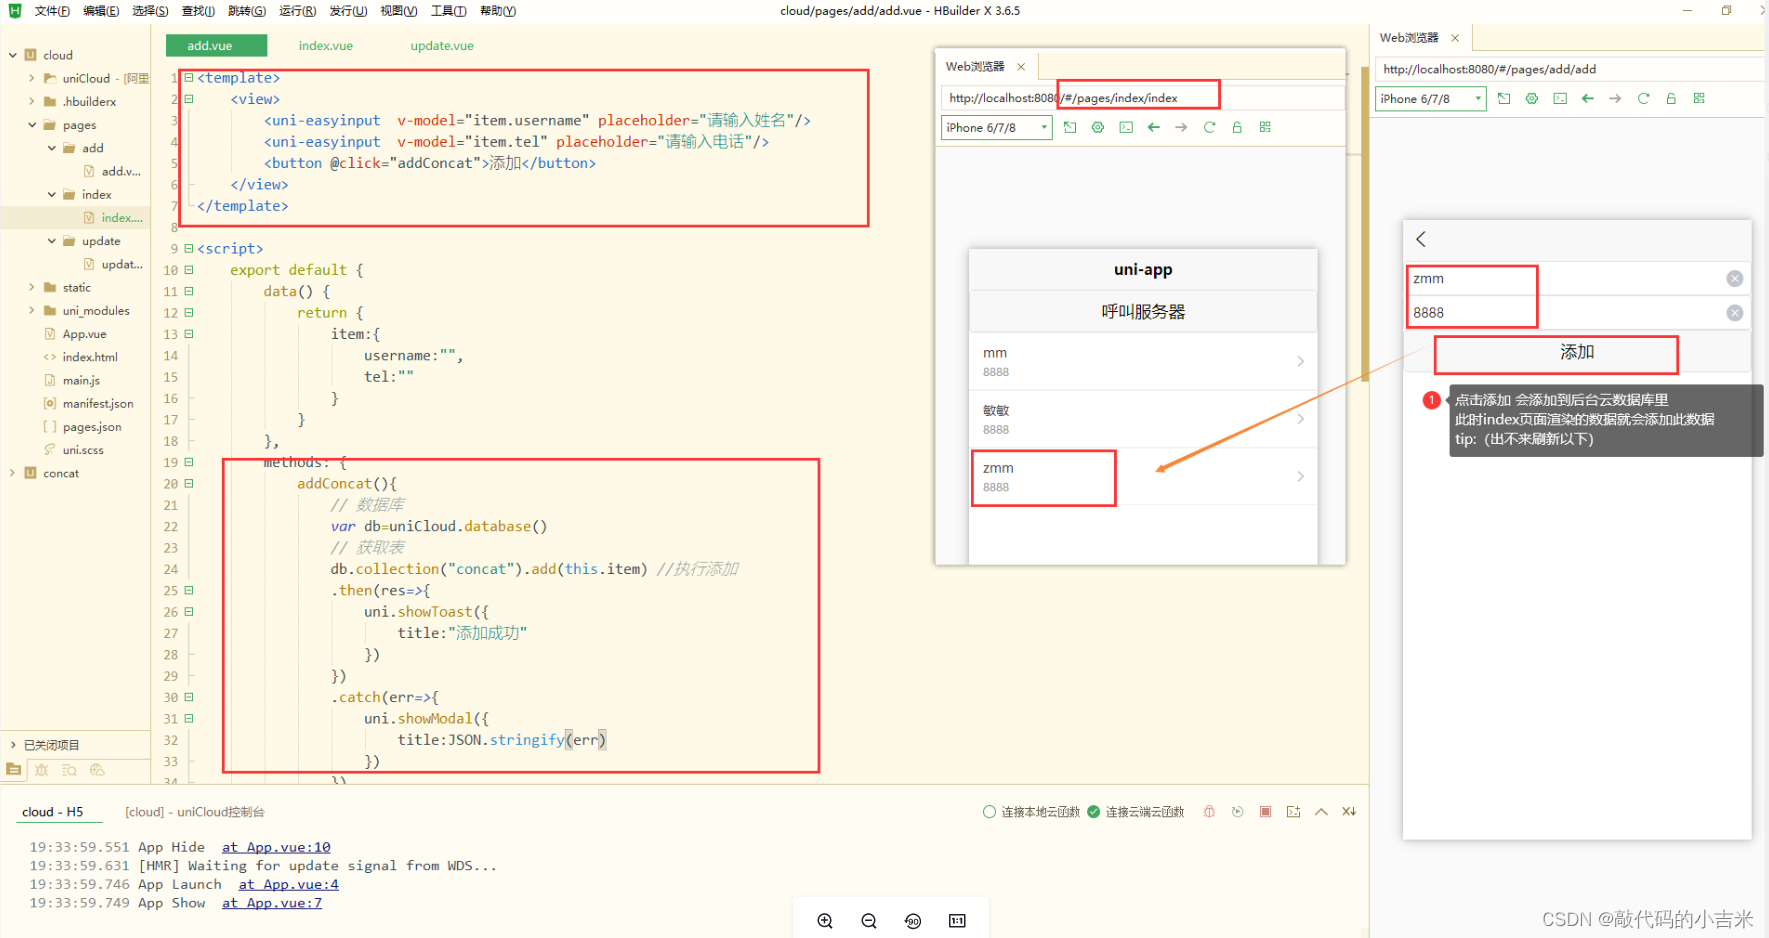
5.2 Adicionar dados na nuvem
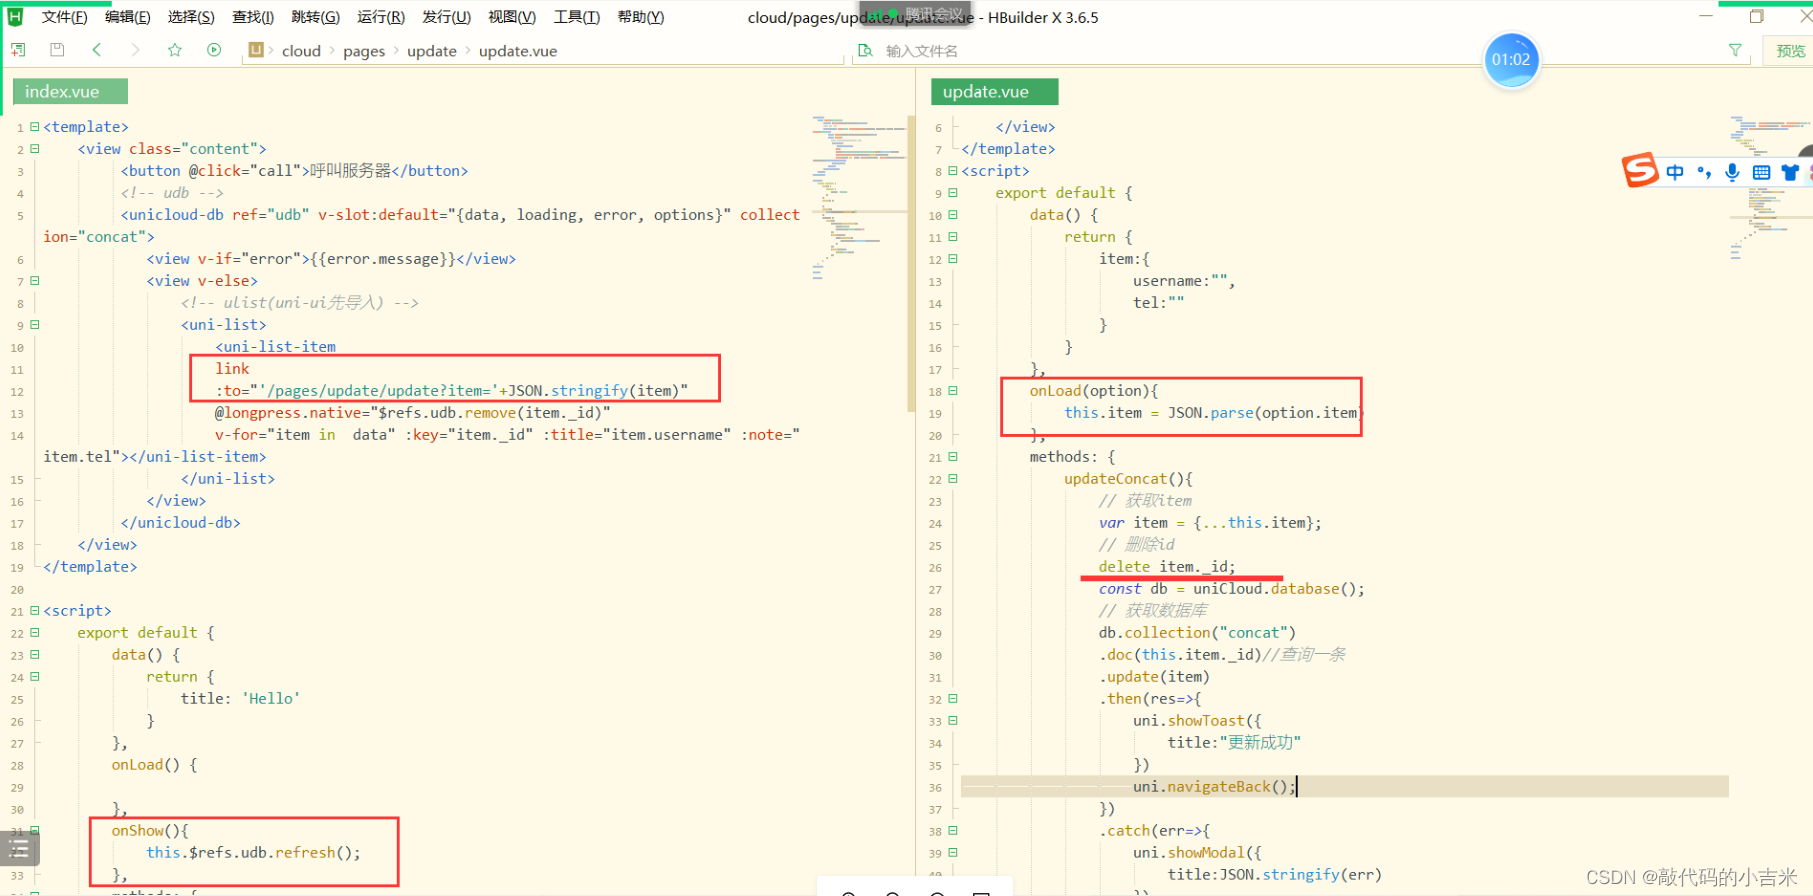
5.3 Modificar dados na nuvem
código de índice (excluído)
<template>
	<view>
		<button @click="call">呼叫服务器</button>
		<unicloud-db ref="udb" v-slot:default="{data, loading, error, options}" collection="concat">
			<view v-if="error">{

   {error.message}}</view>
			<view v-else>
				<uni-list v-for="item in data" :key="item._id">
					<uni-list-item
					link :to="'/pages/update/update?item='+JSON.stringify(item)"
					@longpress.native="$refs.udb.remove(item._id)"
					:title="item.username" :note="item.tel"></uni-list-item>
				</uni-list>
			</view>
		</unicloud-db>
	</view>

</template>

<script>
	export default {


		data() {


			return {


				title: 'Hello'
			}
		},
		onLoad() {


		},
		onShow() {


			if(this.$refs&&this.$refs.udb){


			this.$refs.udb.$refresh()
			}
		},
		methods: {


		call(){


			uniCloud.callFunction({


				name:"base",
				data:{

      name:"mumu",age:18}
			})
			.then(res=>{


				uni.showModal({


					content:JSON.stringify(res.result)
				})
			})
			.catch(err=>{


				console.log(err);
			})
		}
		}
	}
</script>

<style>
	.content {


		display: flex;
		flex-direction: column;
		align-items: center;
		justify-content: center;
	}

	.logo {


		height: 200rpx;
		width: 200rpx;
		margin-top: 200rpx;
		margin-left: auto;
		margin-right: auto;
		margin-bottom: 50rpx;
	}

	.text-area {


		display: flex;
		justify-content: center;
	}

	.title {


		font-size: 36rpx;
		color: #8f8f94;
	}
</style>
adicionar código
<template>
	<view>
		<uni-easyinput  v-model="item.username" placeholder="请输入姓名"/>
		<uni-easyinput  v-model="item.tel" placeholder="请输入电话"/>
		<button @click="addConcat">添加</button>
	</view>
</template>

<script>
	export default {


		data() {


			return {


				item:{


					username:"",
					tel:""
				}
			}
		},
		methods: {


			addConcat(){


				// 数据库
				var db=uniCloud.database()
				// 获取表
				db.collection("concat").add(this.item) //执行添加
				.then(res=>{


					uni.showToast({


						title:"添加成功"
					})
				})
				.catch(err=>{


					uni.showModal({


						title:JSON.stringify(err)
					})
				})
			}
		}
	}
</script>

<style>

</style>
modifique o código
<template>
	<view>
		<uni-easyinput  v-model="item.username" placeholder="请输入姓名"/>
		<uni-easyinput  v-model="item.tel" placeholder="请输入电话"/>
		<button @click="updateConcat">更新</button>
	</view>
</template>

<script>
	export default {


		data() {


			return {


				item:{


					username:"",
					tel:""
				}
			}
		},
		methods: {


			updateConcat(){


				var item={

      ...this.item}
				// 删除id
				delete item._id
				const db=uniCloud.database()
				db.collection("concat")
				.doc(this.item._id)
				.update(item)
				.then(res=>{


					uni.showToast({


						title:"更新成功"
					})
				})
				.catch(err=>{


					uni.showModal({


					title:JSON.stringify(err)
					})
				})
			}
		},
		onLoad(option) {


			this.item=JSON.parse(option.item)
		}
	}
</script>

<style>

</style>
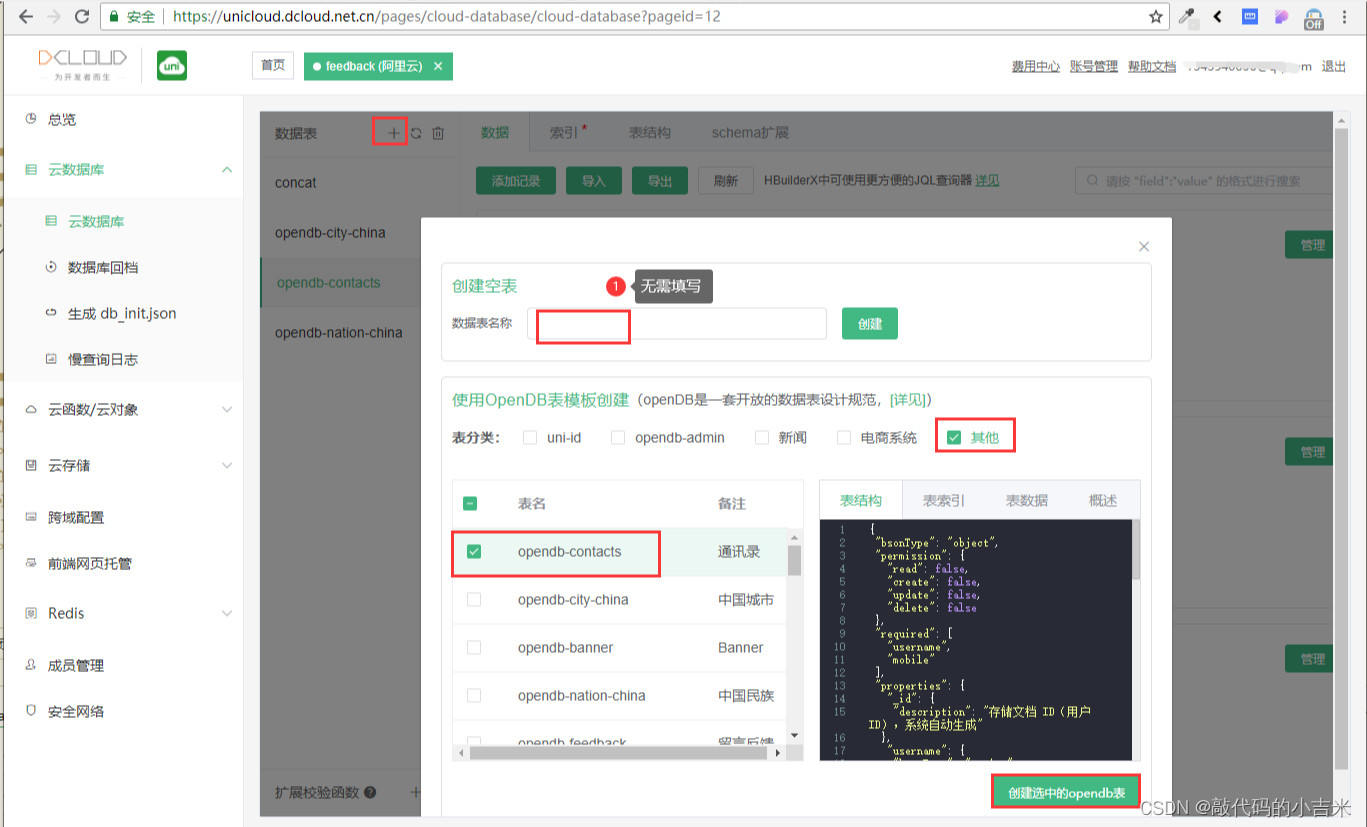
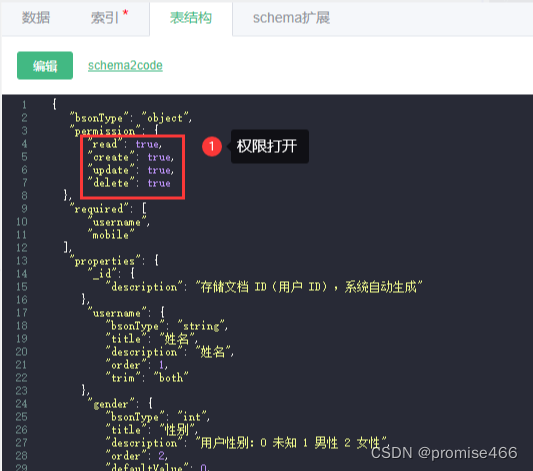
6. O esquema gera código automaticamente
6.1 Criar dados na nuvem
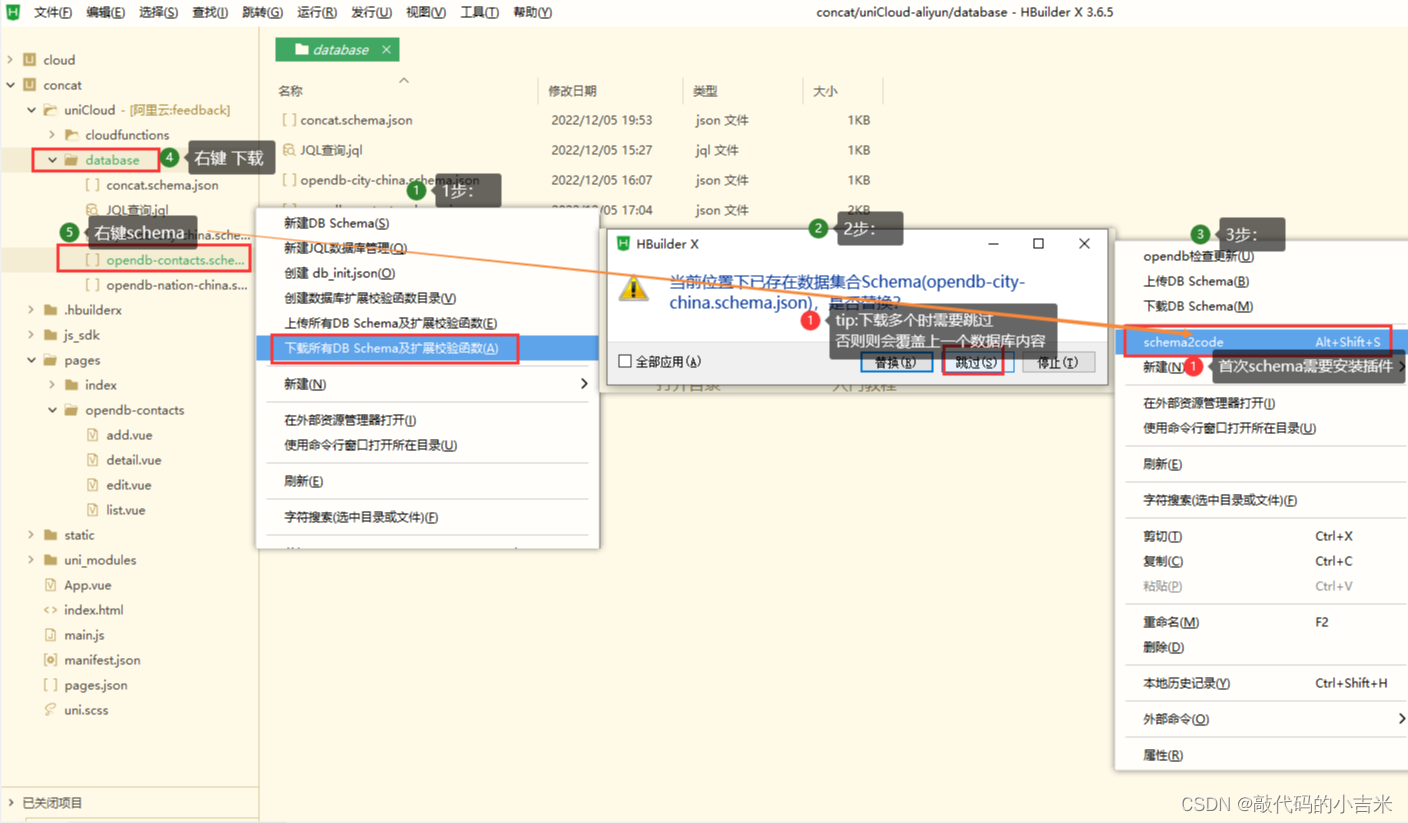
6.2 Baixe e confie na mesclagem de esquema
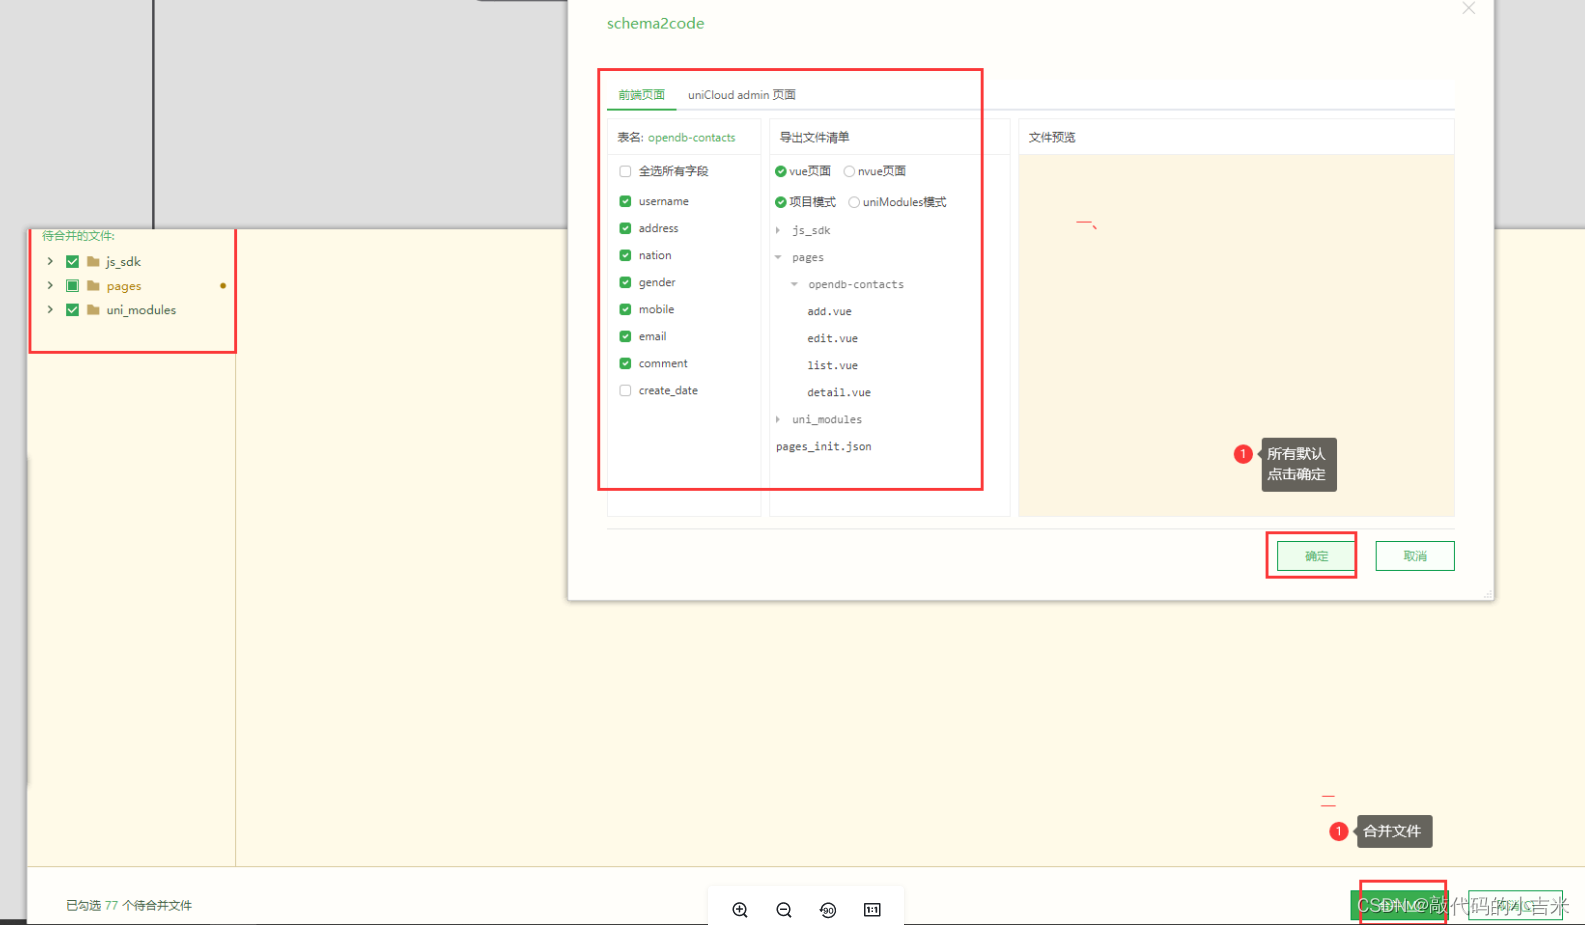
6.3 correr