第四章 配置系统让系统可以启动1. Script de inicialização LFS
cd /sources
tar xvf lfs-bootscripts-20200818.tar.xz
cd lfs-bootscripts-20200818
make install
cd ..
rm -rf lfs-bootscripts-20200818
2. Crie regras udev personalizadas:
bash /lib/udev/init-net-rules.sh
cat /etc/udev/rules.d/70-persistent-net.rules
3. Crie um arquivo de configuração de rede:
cd /etc/sysconfig/
cat > ifconfig.enp0s3 << "EOF"
ONBOOT=yes
IFACE=enp0s3
SERVICE=ipv4-static
IP=192.168.3.27
GATEWAY=192.168.3.1
PREFIX=24
BROADCAST=192.168.3.255
EOF
Configure o arquivo de rede de acordo com sua configuração real aqui. É o primeiro capítulo, diga-me o nome da placa de rede, endereço IP e assim por diante.
4. Crie o arquivo /etc/resolv.conf:
cat > /etc/resolv.conf << "EOF"
# Begin /etc/resolv.conf

domain mylfs10.0
nameserver 192.168.3.1

# End /etc/resolv.conf
EOF
5. Configure o nome do host do sistema:
echo "lfs10.0" > /etc/hostname6. Crie o arquivo / etc / hosts:
cat > /etc/hosts << "EOF"
# Begin /etc/hosts

127.0.0.1 localhost
192.168.3.20 lfs10.0

# End /etc/hosts
EOF
7. Crie o arquivo / etc / inittab:
cat > /etc/inittab << "EOF"
# Begin /etc/inittab

id:3:initdefault:

si::sysinit:/etc/rc.d/init.d/rc S

l0:0:wait:/etc/rc.d/init.d/rc 0
l1:S1:wait:/etc/rc.d/init.d/rc 1
l2:2:wait:/etc/rc.d/init.d/rc 2
l3:3:wait:/etc/rc.d/init.d/rc 3
l4:4:wait:/etc/rc.d/init.d/rc 4
l5:5:wait:/etc/rc.d/init.d/rc 5
l6:6:wait:/etc/rc.d/init.d/rc 6

ca:12345:ctrlaltdel:/sbin/shutdown -t1 -a -r now

su:S016:once:/sbin/sulogin

1:2345:respawn:/sbin/agetty --noclear tty1 9600
2:2345:respawn:/sbin/agetty tty2 9600
3:2345:respawn:/sbin/agetty tty3 9600
4:2345:respawn:/sbin/agetty tty4 9600
5:2345:respawn:/sbin/agetty tty5 9600
6:2345:respawn:/sbin/agetty tty6 9600

# End /etc/inittab
EOF
8. Crie o arquivo / etc / sysconfig / clock:
cat > /etc/sysconfig/clock << "EOF"
# Begin /etc/sysconfig/clock

UTC=1

# Set this to any options you might need to give to hwclock,
# such as machine hardware clock type for Alphas.
CLOCKPARAMS=

# End /etc/sysconfig/clock
EOF
9. Configure o ambiente de idioma do console e crie o arquivo / etc / profile:
cat > /etc/locale.conf << "EOF"

LANG=en_US.UTF-8

EOF

cat > /etc/profile << "EOF"
# Begin /etc/profile

export LANG=en_US.UTF-8

# End /etc/profile
EOF
10. Crie o arquivo / etc / inputrc:
cat > /etc/inputrc << "EOF"
# Begin /etc/inputrc
# Modified by Chris Lynn <[email protected]>

# Allow the command prompt to wrap to the next line
set horizontal-scroll-mode Off

# Enable 8bit input
set meta-flag On
set input-meta On

# Turns off 8th bit stripping
set convert-meta Off

# Keep the 8th bit for display
set output-meta On

# none, visible or audible
set bell-style none

# All of the following map the escape sequence of the value
# contained in the 1st argument to the readline specific functions
"\eOd": backward-word
"\eOc": forward-word

# for linux console
"\e[1~": beginning-of-line
"\e[4~": end-of-line
"\e[5~": beginning-of-history
"\e[6~": end-of-history
"\e[3~": delete-char
"\e[2~": quoted-insert

# for xterm
"\eOH": beginning-of-line
"\eOF": end-of-line

# for Konsole
"\e[H": beginning-of-line
"\e[F": end-of-line

# End /etc/inputrc
EOF
11. Crie o arquivo / etc / shells
cat > /etc/shells << "EOF"
# Begin /etc/shells

/bin/sh
/bin/bash

# End /etc/shells
EOF
12. Crie o arquivo / etc / fstab:
cat > /etc/fstab << "EOF"
# Begin /etc/fstab

# file system  mount-point  type     options             dump  fsck
#                                                              order

/dev/sda2     /            ext4    defaults            1     1
/dev/sda1     swap         swap     pri=1               0     0
proc           /proc        proc     nosuid,noexec,nodev 0     0
sysfs          /sys         sysfs    nosuid,noexec,nodev 0     0
devpts         /dev/pts     devpts   gid=5,mode=620      0     0
tmpfs          /run         tmpfs    defaults            0     0
devtmpfs       /dev         devtmpfs mode=0755,nosuid    0     0

# End /etc/fstab
EOF
Aqui você precisa alterar <XXX> (disco de inicialização do sistema), <yyy> (partição de troca do sistema) e <fff> (formato da partição do disco de inicialização).
13. Configure, compile e instale o kernel linux5.8.3:
cd /sources
tar xvf linux-5.8.3.tar.xz
cd linux-5.8.3
make mrproper
make defconfig
make menuconfig
Certifique-se das seguintes opções:
Device Drivers  --->
  Generic Driver Options  --->
   [ ] Support for uevent helper [CONFIG_UEVENT_HELPER]
   [*] Maintain a devtmpfs filesystem to mount at /dev [CONFIG_DEVTMPFS]
Processor type and features --->
[*] EFI stub support [CONFIG_EFI_STUB]General setup -->
[*] Control Group support [CONFIG_CGROUPS]Após a configuração, salve e saia.
Compile a imagem do kernel e os módulos e instale:
make
make modules_install
Mova a imagem do kernel para / boot (arquitetura x86):
cp -iv arch/x86/boot/bzImage /boot/vmlinuz-5.8.3-lfs-10.0O arquivo de símbolo do kernel:
cp -iv System.map /boot/System.map-5.8.3Documentação para instalar o kernel Linux:
install -d /usr/share/doc/linux-5.8.3
cp -r Documentation/* /usr/share/doc/linux-5.8.3
Crie o arquivo /etc/modprobe.d/usb.conf:
install -v -m755 -d /etc/modprobe.d
cat > /etc/modprobe.d/usb.conf << "EOF"
# Begin /etc/modprobe.d/usb.conf

install ohci_hcd /sbin/modprobe ehci_hcd ; /sbin/modprobe -i ohci_hcd ; true
install uhci_hcd /sbin/modprobe ehci_hcd ; /sbin/modprobe -i uhci_hcd ; true

# End /etc/modprobe.d/usb.conf
EOF
14. Configure o processo de inicialização do GRUB.
Instale o arquivo GRUB em / boot / grub e defina o setor de inicialização:
grub-install /dev/sdaCrie o arquivo /boot/grub/grub.cfg:
cat > /boot/grub/grub.cfg << "EOF"
# Begin /boot/grub/grub.cfg
set default=0
set timeout=5

insmod ext2
set root=(hd0,2)

menuentry "GNU/Linux, Linux 5.8.3-lfs-10.0" {
        linux   /boot/vmlinuz-5.8.3-lfs-10.0 root=/dev/sda2 ro
}
EOF
15. Crie o arquivo / etc / lfs-release:
echo 10.0 > /etc/lfs-release16. Crie o arquivo / etc / lsb-release:
cat > /etc/lsb-release << "EOF"
DISTRIB_ID="Linux From Scratch"
DISTRIB_RELEASE="10.0"
DISTRIB_CODENAME="<your name here>"
DISTRIB_DESCRIPTION="Linux From Scratch"
EOF
17. Crie o arquivo / etc / os-release:
cat > /etc/os-release << "EOF"
NAME="Linux From Scratch"
VERSION="10.0"
ID=lfs
PRETTY_NAME="Linux From Scratch 10.0"
VERSION_CODENAME="<your name here>"
EOF
18. A última etapa é reiniciar o sistema e
sair do ambiente chroot:
logoutDesmonte o sistema de arquivos virtual:
umount -v $LFS/dev/pts
umount -v $LFS/dev
umount -v $LFS/run
umount -v $LFS/proc
umount -v $LFS/sys
Desmonte a partição primária:
umount -v $LFSReinicialize o sistema:
shutdown -r now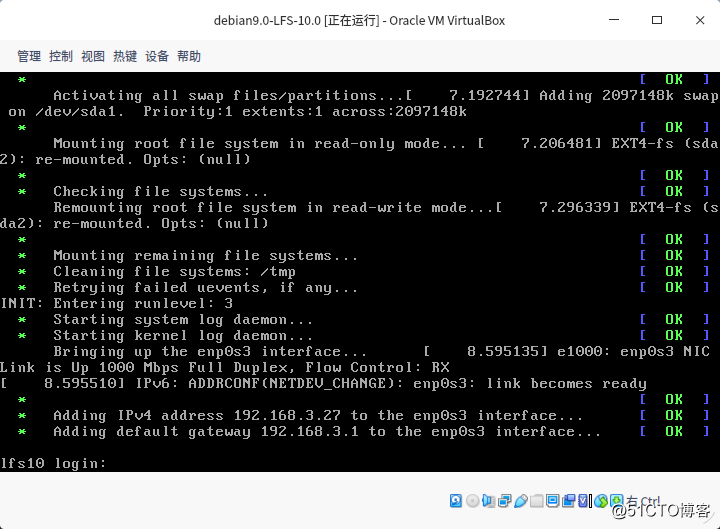
Em seguida, luta de Blfs!
Espero que todos possam criticar e corrigir as deficiências!
Obrigado por assistir ~! ~