序文
数ヶ月インターンシップ前に、ブログの更新がダウン遅れている、と今流行の影響を受けて学校に戻ることはできませんが、それでもスキルを失うことができないので、長い時間が详细をクロール記事今日使用scrapyを書き、実際のブログを書いていませんそれの実際。
scrapyプロジェクトの作成
ターゲットサイト:http://search.dangdang.com/?key=python&category_path=01.00.00.00.00.00&page_index=1これはPythonのページを取得详细の検索キーワードであります
最初のステップは、まだ作業ディレクトリに作成scrapyプロジェクトにコマンドラインスイッチを使用しています
- D:\ pythonwork \ cnblog> scrapy startprojectのcnblog_dangdang

そして、クローラーを作成するには、fileコマンドを使用して、フォルダ、プロジェクト内のクモのファイルを入力するには、cdコマンドを使用します(注:全体ではなく、ウェブサイトより、先URLのURLと、このコマンドは、ドメイン名がされます)
- D:\ pythonwork \ cnblog \ cnblog_dangdang \ cnblog_dangdang \クモ> scrapy genspider dangdang_spider dangdang.com

この時点で、我々はファイルが作成された爬虫類で基礎を投影し、その後、書き込みコードがpycharmを使用してプロジェクトを開きます
文章分析
私たちは、クロール対象のサイト分析を開くために必要なもの
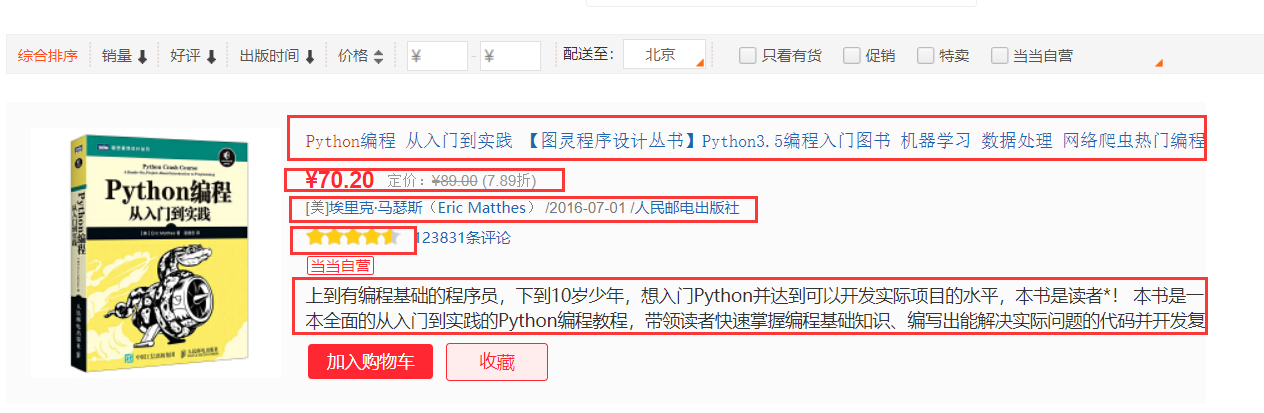
商品ブック先のサイトについては、我々はそのタイトル、価格、作者、スコアをクロールする必要があり、5つの部分に集約します
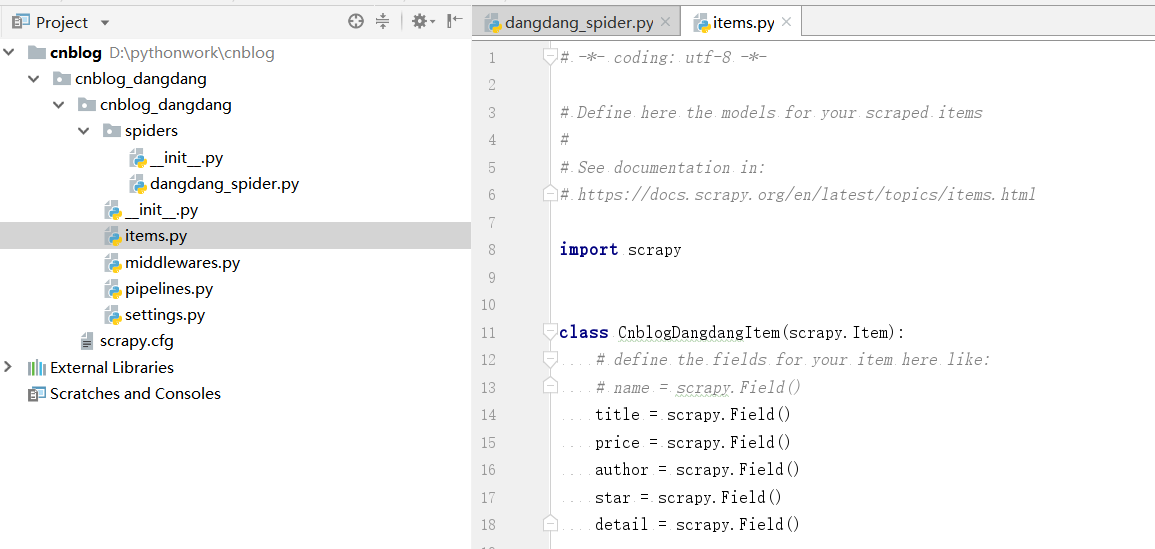
だから、最初に私たちはプロジェクトのためにitems.pyファイルにクロール必要なものを宣言します。
items.py
#- * -コーディング:UTF-8を- * -

#あなたの掻き取りのアイテムはこちらモデルを定義します
。#
#参照文書で:
#https://docs.scrapy.org/en/latest/topics/items.html

輸入scrapyの


クラスCnblogDangdangItem(scrapy.Item):
    #は:のようにここにあなたの項目のためのフィールドを定義
    #の名前= scrapy.Field()
    タイトル= scrapy.Field()
    価格 = scrapy.Field()
    作者 = scrapy.Field()
    スター = scrapy。フィールド()
    詳細 = scrapy.Field()
次のようにしたがって、我々のデータのSQL文は、表を作成します。
CREATE TABLE IF NOT EXISTS dangdang_item (
id INT UNSIGNED AUTO_INCREMENT,
title CHAR(100) NOT NULL,
price CHAR(100) NOT NULL,
author CHAR(100) NOT NULL,
star CHAR(10) NOT NULL,
detail VARCHAR(1000),
PRIMARY KEY (id)
)ENGINE=InnoDB DEFAULT CHARSET=utf8mb4;
爬虫文件编写
内容分析完成之后我们到了最关键的爬虫文件编写部分,首先我们要测试下该网站有没有反爬措施。
这一步我们只需要简单的将spiders文件夹中的dangdang_spider.py文件进行简单的修改让其输出目标站点的响应内容即可
dangdang_spider.py
# -*- coding: utf-8 -*-
import scrapy


class DangdangSpiderSpider(scrapy.Spider):
    name = 'dangdang_spider'
    allowed_domains = ['dangdang.com']
    start_urls = ['http://search.dangdang.com/?key=python&category_path=01.00.00.00.00.00&page_index=1']

    def parse(self, response):
        print(response.text)
        pass
为了方便我们进行调试,我们在项目下创建一个main.py文件用于启动爬虫,不然我们每次启动都需要在命令行中使用scrapy命令。
main.py
from scrapy import cmdline
cmdline.execute('scrapy crawl dangdang_spider'.split())
然后直接运行main.py文件,发现输出了目标网站的html源代码,所以目标网站并没有反爬措施,我们可以直接拿取内容,接下来就开始拿取内容了。
五部分内容使用xpath拿取,网页结构很简单,直接从源码分析xpath即可。
开始实际编写爬虫文件dangdang_spider.py
# -*- coding: utf-8 -*-
import scrapy
import re
from cnblog_dangdang.items import CnblogDangdangItem

str_re = re.compile('\d+')

class DangdangSpiderSpider(scrapy.Spider):
    name = 'dangdang_spider'
    allowed_domains = ['dangdang.com']
    start_urls = ['http://search.dangdang.com/?key=python&category_path=01.00.00.00.00.00&page_index=1']


    def parse(self, response):
        book_item = CnblogDangdangItem()
        items = response.xpath("//ul[@class='bigimg']/li")#不用加get 因为此步骤为了拿到一个xpath对象
        for item in items:
            book_item['title'] = item.xpath("./a/@title").get()
            book_item['price'] = item.xpath("./p[@class='price']").xpath("string(.)").get()#使用string(.)方法为了拿取目标节点下的所有子节点文本
            book_item['author'] = item.xpath("./p[@class='search_book_author']").xpath("string(.)").get()
            book_item['star'] = int(str_re.findall(item.xpath("./p[@class='search_star_line']/span/span/@style").get())[0])/20
            book_item['detail'] = item.xpath("./p[@class='detail']//text()").get()
            print(book_item)
            yield book_item

        next_url_end = response.xpath("//li[@class='next']/a/@href").get()
        #如果拿到了下一页链接,则访问
        if next_url_end:
            next_url ='http://search.dangdang.com/'+ next_url_end
            yield scrapy.Request(next_url,callback=self.parse)
再次运行爬虫,发现现在已经可以输出拿取到的信息
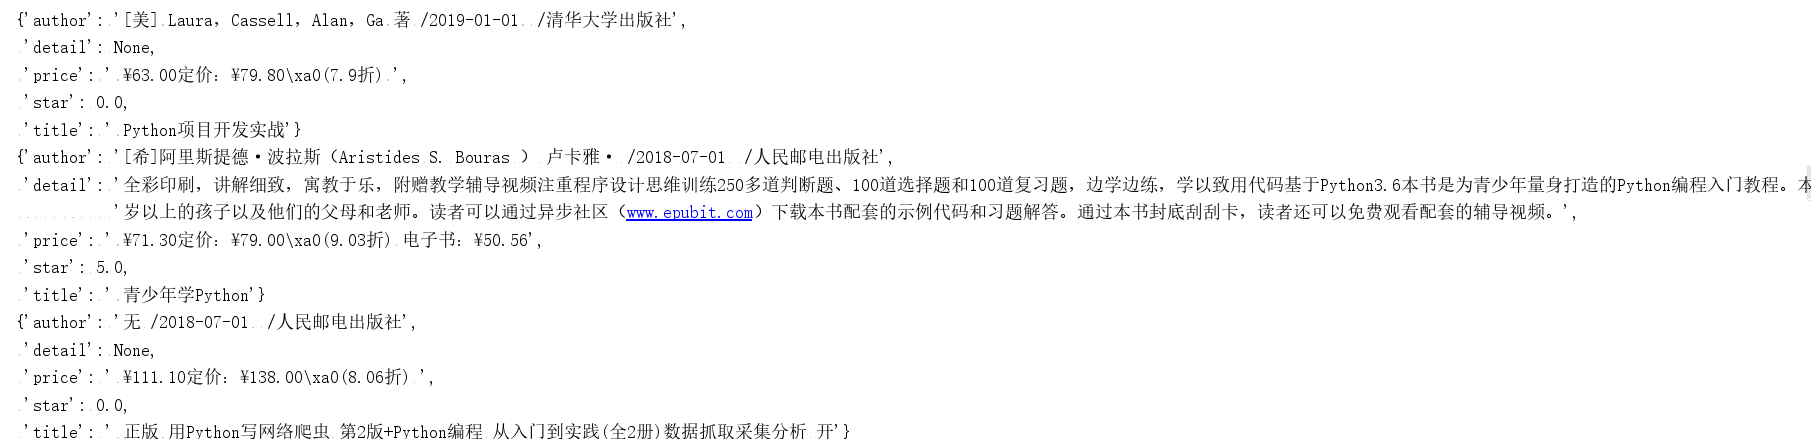
说明我们的爬虫文件编写成功,接下来就是对我们拿取到的数据进行处理。
数据的存储
此次我们选择使用mysql进行数据的存储,那么我们首先要干什么呢?是直接编写pipeline.py文件吗?并不是,我们还有一个很重要的地方没有弄,就是settings.py文件。
我们想要通过pipeline.py文件来处理爬取到的数据,首先就需要去settings.py中开启我们的pipeline选项,很简单只需要在settings.py中将ITEM_PIPELINES的注释消掉即可如下图

接下来就可以编写pipeline.py文件来对我们的数据进行操作了
pipeline.py
# -*- coding: utf-8 -*-

# Define your item pipelines here
#
# Don't forget to add your pipeline to the ITEM_PIPELINES setting
# See: https://docs.scrapy.org/en/latest/topics/item-pipeline.html

import pymysql

number = 0
class DangdangPipeline(object):

    # open_spider()爬虫开启时执行一次
    def open_spider(self,spider):
        # 连接数据库
        print("连接数据库,准备写入数据")
        self.db = pymysql.connect('localhost', '你的mysql账户', '你的mysql密码', '你的数据库名称')
        self.cursor = self.db.cursor()

    def process_item(self, item, spider):
        global number
        number = number+1
        print('当前写入第'+str(number)+'个商品数据')
        #使用replace是为了避免数据中存在引号与sql语句冲突
        title=str(item['title']).replace("'","\\'").replace('"','\\"')
        price=str(item['price']).replace("'","\\'").replace('"','\\"')
        author=str(item['author']).replace("'","\\'").replace('"','\\"')
        star=str(item['star']).replace("'","\\'").replace('"','\\"')
        detail=str(item['detail']).replace("'","\\'").replace('"','\\"')
        sql = f'INSERT INTO dangdang_item (title,price,author,star,detail) VALUES (\'{title}\',\'{price}\',\'{author}\',\'{star}\',\'{detail}\');'
        #执行sql语句
        self.cursor.execute(sql)
        #数据库提交修改
        self.db.commit()
        return item

    # close_spider()爬虫关闭后执行
    def close_spider(self,spider):
        print('写入完成,一共'+str(number)+'个数据')
        # 关闭连接
        self.cursor.close()
        self.db.close()
接下来再次运行main.py文件,看看爬虫效果。

我们去数据库中看一下我们刚刚爬取的数据
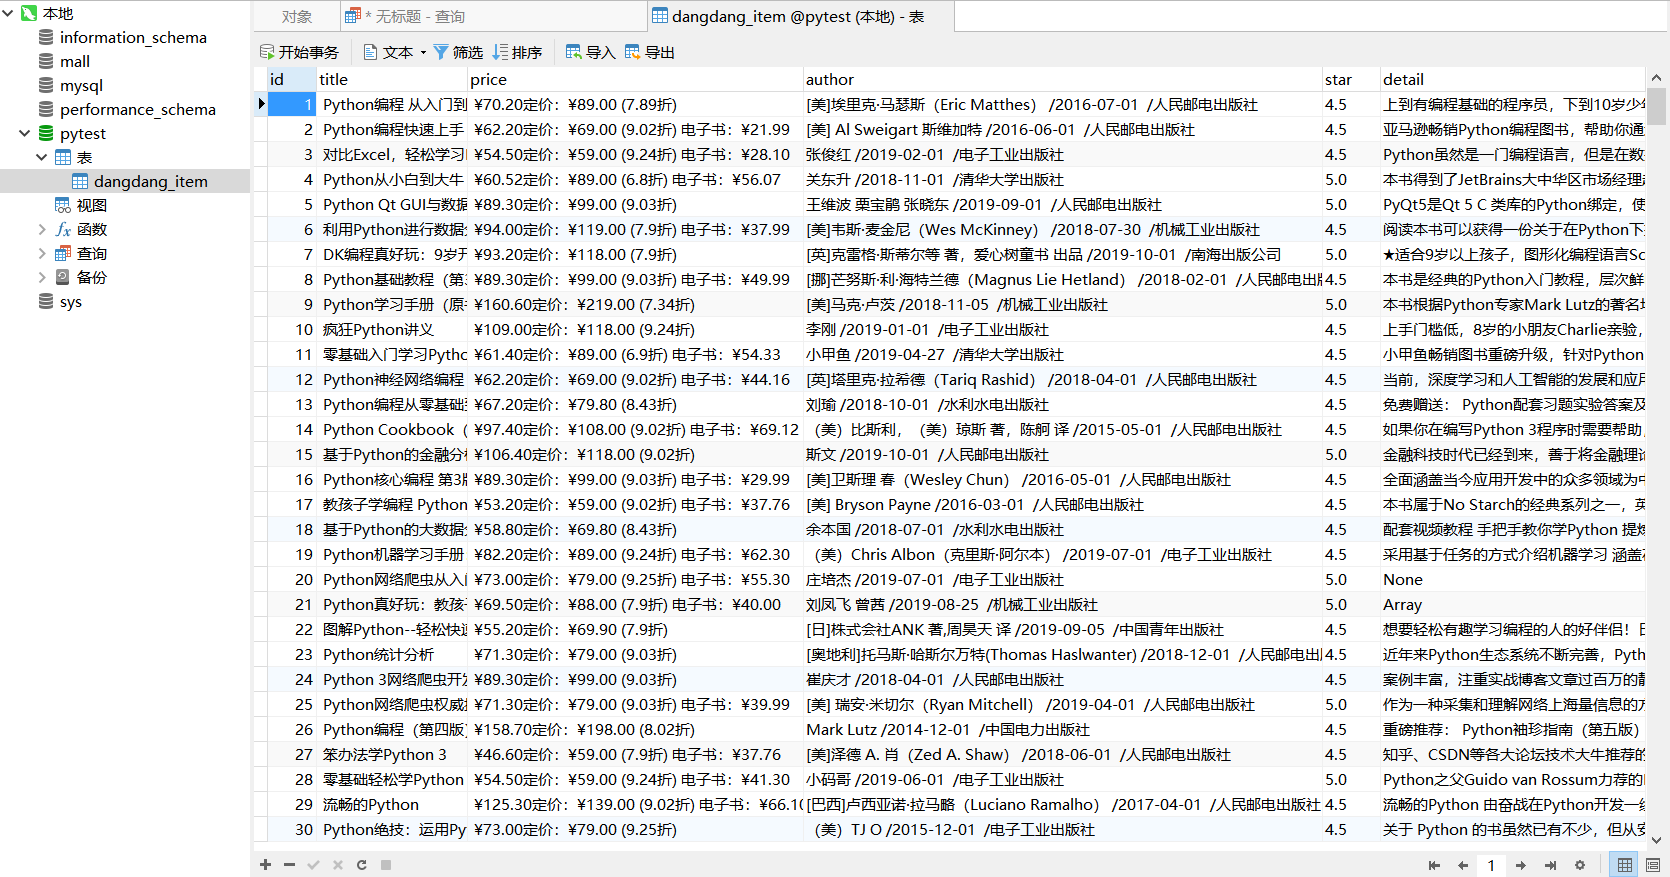
ok,大功完成了,我们的当当网scrapy爬虫就编写好了。