ナコスは、簡単に使用できる機能セット、速い動的なサービス検出、サービス構成、サービスのメタデータおよびトラフィック管理のセットを提供します。
より機敏かつ簡単にビルド、マイクロサービスプラットフォームを提供し、管理します。
主な特長:
サービス検出および健康監視サービス
ダイナミック・コンフィギュレーション・サービス
ダイナミックDNSサービス
サービスとメタデータの管理
1.サービス
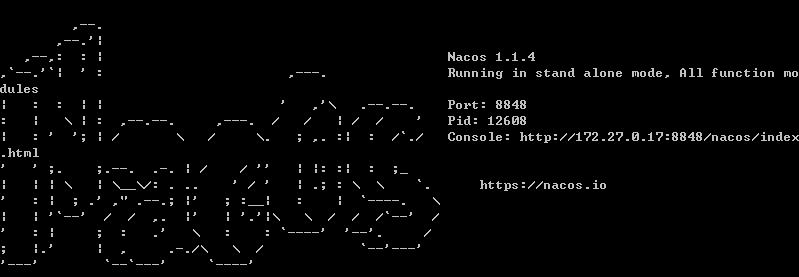
ダウンロード アドレス
減圧
STARTUP.CMDをダブルクリックします
2.サーバープロバイダ
(1)は、依存関係を追加します
   <プロパティ>
        <のjava.version> 1.8 </java.version>
        <nacos.version> 2.1。1 .RELEASE </nacos.version>
        <スプリングcloud.version> Greenwich.SR3 </spring-cloud.version>
    </プロパティ>

    <依存性>
        <依存性>
            <のgroupId> org.springframework.boot </のgroupId>
            <たartifactId>春・ブート・スターター・ウェブ</たartifactId>
        </依存関係>

        <依存>
            <groupIdを> com.alibaba.cloud </ groupIdを>
            <たartifactId>春・クラウド・スターター・アリババ・ナコス-発見</たartifactId>


    <dependencyManagement>
        <依存性>
            <依存性>
                <のgroupId> org.springframework.cloud </のgroupId>
                <たartifactId>ばねクラウド依存性</たartifactId>
                <バージョン> $ {ばねcloud.version} </バージョン>
                <タイプ> POM </タイプ>
                <スコープ>インポート</スコープ>
            </依存>
        </依存関係>
    </ dependencyManagement>
(2)設定を追加
server.port = 8010
spring.application.name = service- プロバイダが
spring.cloud.nacos.discovery.enabled = 真
spring.cloud.nacos.discovery.server -addr = 127.0。0.1:8848
spring.cloud.nacos.discovery.service = $ {spring.application.name}
management.endpoints.web.exposure.include = *
management.endpoint.health.show -details =常に
(3)試験方法
パッケージcom.xyz.provider1.controller。

輸入org.springframework.web.bind.annotation.RequestMapping。
輸入org.springframework.web.bind.annotation.RestController;

@RestController
パブリック クラスdemoController {
    @RequestMapping( "/ハロー" )
     パブリック文字列のHello(){
         リターン "こんにちは、プロバイダ" 。
    }

}
Provider1、ポート8011、テストメソッドの出力を追加します。
「こんにちは、別のプロバイダ」
3.クライアントの顧客
(1)は、依存関係を追加します
  <プロパティ>
        <のjava.version> 1.8 </java.version>
        <nacos.version> 2.1.1.RELEASE </nacos.version>
        <スプリングcloud.version> Greenwich.SR4 </spring-cloud.version>
    < /プロパティ>

    <依存性>
        <依存性>
            <のgroupId> org.springframework.boot </のgroupId>
            <たartifactId>ばねブートスタータウェブ</たartifactId>
        </依存>
        <依存性>
            <のgroupId> com.alibaba.cloud </のgroupId>
            <たartifactId>ばねクラウドスタータアリババ-ナコス発見</たartifactId>
            <バージョン> $ {nacos.version} </バージョン>
        </依存関係>
    </依存関係>

    <dependencyManagement>
        <依存性>
            <依存性>
                <のgroupId> org.springframework.cloud </のgroupId>
                <たartifactId>ばねクラウド依存性</たartifactId>
                <バージョン> $ {ばねcloud.version} </バージョン>
                <タイプ> POM </タイプ>
                <スコープ> インポート </スコープ>
            </依存>
        </依存関係>
    </ dependencyManagement>
(2)設定を追加
server.port = 8015
spring.application.name = service- comsumer

management.endpoints.web.exposure.include = *
management.endpoint.health.show -details = 常に

spring.cloud.nacos.discovery.enabled = 真
spring.cloud .nacos.discovery.server -addr = 127.0.0.1:8848
spring.cloud.nacos.discovery.service = $ {spring.application.name}

#service -provider.ribbon.NFLoadBalancerRuleClassName = com.netflix.loadbalancer.RandomRule

スプリング。 cloud.nacos.config.server -addr = 127.0.0.1:8848
spring.cloud.nacos.config.file -extension =プロパティ
(3)試験方法
パッケージcom.xyz.comsumer.controller。

輸入org.springframework.beans.factory.annotation.Autowired;
輸入org.springframework.beans.factory.annotation.Value;
輸入org.springframework.cloud.client.ServiceInstance。
輸入org.springframework.cloud.client.discovery.DiscoveryClient;
輸入org.springframework.cloud.client.loadbalancer.LoadBalancerClient;
輸入org.springframework.cloud.context.config.annotation.RefreshScope;
輸入org.springframework.web.bind.annotation.RequestMapping。
輸入org.springframework.web.bind.annotation.RestController;
インポートorg.springframework.web.client.RestTemplate;

@RefreshScope
@RestController
パブリック クラスHelloController {
    @Autowired
    プライベートLoadBalancerClientロードバランサ;
    @Autowired
    プライベートDiscoveryClient discoveryClient;
     プライベート文字列serviceNameを= "サービス・プロバイダ" ;

    / **
     *すべてのサービスを取得します
     * /
    @ (@RequestMapping "/サービス" )
     パブリックオブジェクトサービス(){
         戻りdiscoveryClient.getInstances(serviceNameを);
    }

    / **
     *すべてのサービスからサービス(ポーリング)を選択する
     * /
    @RequestMapping("/発見" )
     パブリックオブジェクト(){発見
         戻りloadBalancer.choose(serviceNameを).getUri()toString()を。
    }

    @RequestMapping( "/ハロー" )
     パブリック文字列のHello(){
        ServiceInstance serviceInstance = loadBalancer.choose(serviceNameを)。
        ストリングcallServiceResult = 新しい RestTemplate()getForObject(serviceInstance.getUri()のtoString()+ "/こんにちは"、文字列。。。クラス)。
        callServiceResult + = "スローサービス" 。
        返すcallServiceResultを。
    }

}
4.ゲートウェイZuul
(1)は、依存関係を追加します
<プロパティ>
        <のjava.version> 1.8 </java.version>
        <nacos.version> 2.1.1.RELEASE </nacos.version>
        <スプリングcloud.version> Greenwich.SR2 </spring-cloud.version>
    < /プロパティ>

    <依存性>
        <依存性>
            <のgroupId> org.springframework.cloud </のgroupId>
            <たartifactId>ばねクラウドスタータのNetflix-zuul </たartifactId>
        </依存>

        <依存性>
            <のgroupId> com.alibaba .cloud </のgroupId>
            <たartifactId>ばねクラウドスタータアリババ-ナコス発見</たartifactId>
            <バージョン> $ {nacos.version} </バージョン>
        </依存関係>

    </依存関係>
(2)設定を追加
server.port = 8090

spring.application.name = service- zuul

spring.cloud.nacos.discovery.enabled = 真
spring.cloud.nacos.discovery.server -addr = 127.0.0.1:8848
spring.cloud.nacos.discovery。サービス = $ {} spring.application.name

management.endpoints.web.exposure.include = *
management.endpoint.health.show -details = 常に

zuul.routes.api.path = / API / **
zuul.routes.api .serviceId =サービスプロバイダー
(3)起動クラス
パッケージcom.xyz.zuul。

輸入org.springframework.boot.SpringApplication。
輸入org.springframework.boot.autoconfigure.SpringBootApplication。
輸入org.springframework.cloud.client.discovery.EnableDiscoveryClient;
輸入org.springframework.cloud.netflix.zuul.EnableZuulProxy;

@EnableZuulProxy
@SpringBootApplication
パブリック クラスZuulApplication {

    公共 静的 ボイドメイン(文字列[]引数){
        SpringApplication.run(ZuulApplication。クラス、引数)。
    }

}
4.テスト
スタートプロバイダ、provider1、顧客
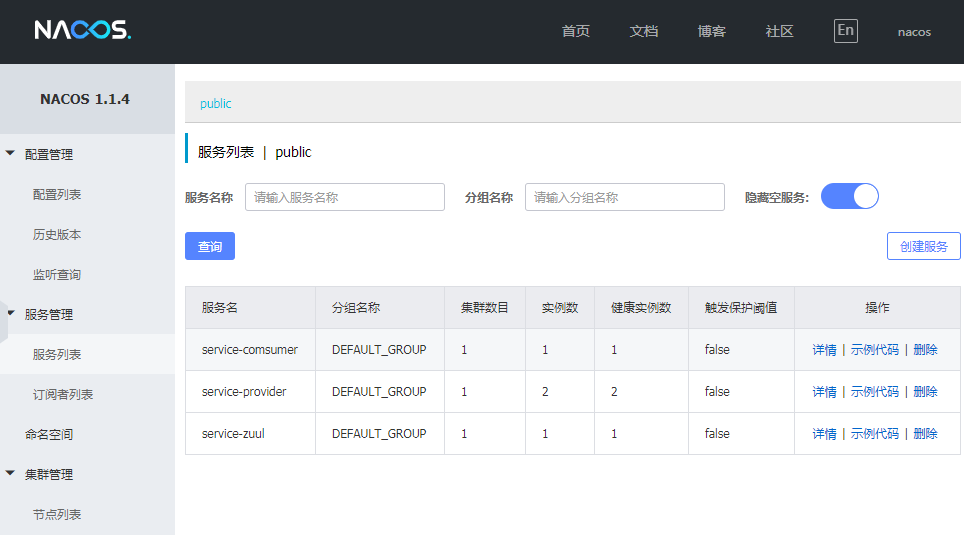
http:// localhostを:8848 /ナコス/、ユーザー名ナコス、パスワードナコス
http:// localhostを:8090 / API /ハロー
代替戻り値
hello,provider或hello,another provider
5.修改客户端,添加统一配置
(1)修改添加依赖
<properties>
        <java.version>1.8</java.version>
        <nacos.version>2.1.1.RELEASE</nacos.version>
        <spring-cloud.version>Greenwich.SR2</spring-cloud.version>
    </properties>

    <dependencies>
        <dependency>
            <groupId>org.springframework.cloud</groupId>
            <artifactId>spring-cloud-starter-netflix-zuul</artifactId>
        </dependency>

        <dependency>
            <groupId>com.alibaba.cloud</groupId>
            <artifactId>spring-cloud-starter-alibaba-nacos-discovery</artifactId>
            <version>${nacos.version}</version>
        </dependency>

    </dependencies>

    <dependencyManagement>
        <dependencies>
            <dependency>
                <groupId>org.springframework.cloud</groupId>
                <artifactId>spring-cloud-dependencies</artifactId>
                <version>${spring-cloud.version}</version>
                <type>pom</type>
                <scope>import</scope>
            </dependency>
        </dependencies>
    </dependencyManagement>
(2)将配置写入 bootstrap.properties
server.port=8015
spring.application.name=service-comsumer

management.endpoints.web.exposure.include=*
management.endpoint.health.show-details=always

spring.cloud.nacos.discovery.enabled=true
spring.cloud.nacos.discovery.server-addr=127.0.0.1:8848
spring.cloud.nacos.discovery.service=${spring.application.name}

spring.cloud.nacos.config.server-addr=127.0.0.1:8848
spring.cloud.nacos.config.file-extension=properties
(3)测试方法
package com.xyz.comsumer.controller;

import org.springframework.beans.factory.annotation.Value;
import org.springframework.cloud.context.config.annotation.RefreshScope;
import org.springframework.web.bind.annotation.RequestMapping;
import org.springframework.web.bind.annotation.RestController;

@RefreshScope
@RestController
public class HelloController {

    @Value("${hello-string}")
    private String helloString;

    @RequestMapping("/configTest")
    public String configTest() {
        return helloString;
    }
}
登录http://localhost:8848/nacos
添加配置service-comsumer.properties
hello-string=customer
重新启动customer
http://localhost:8015/configTest
输出
customer
修改配置后,刷新会立即生效