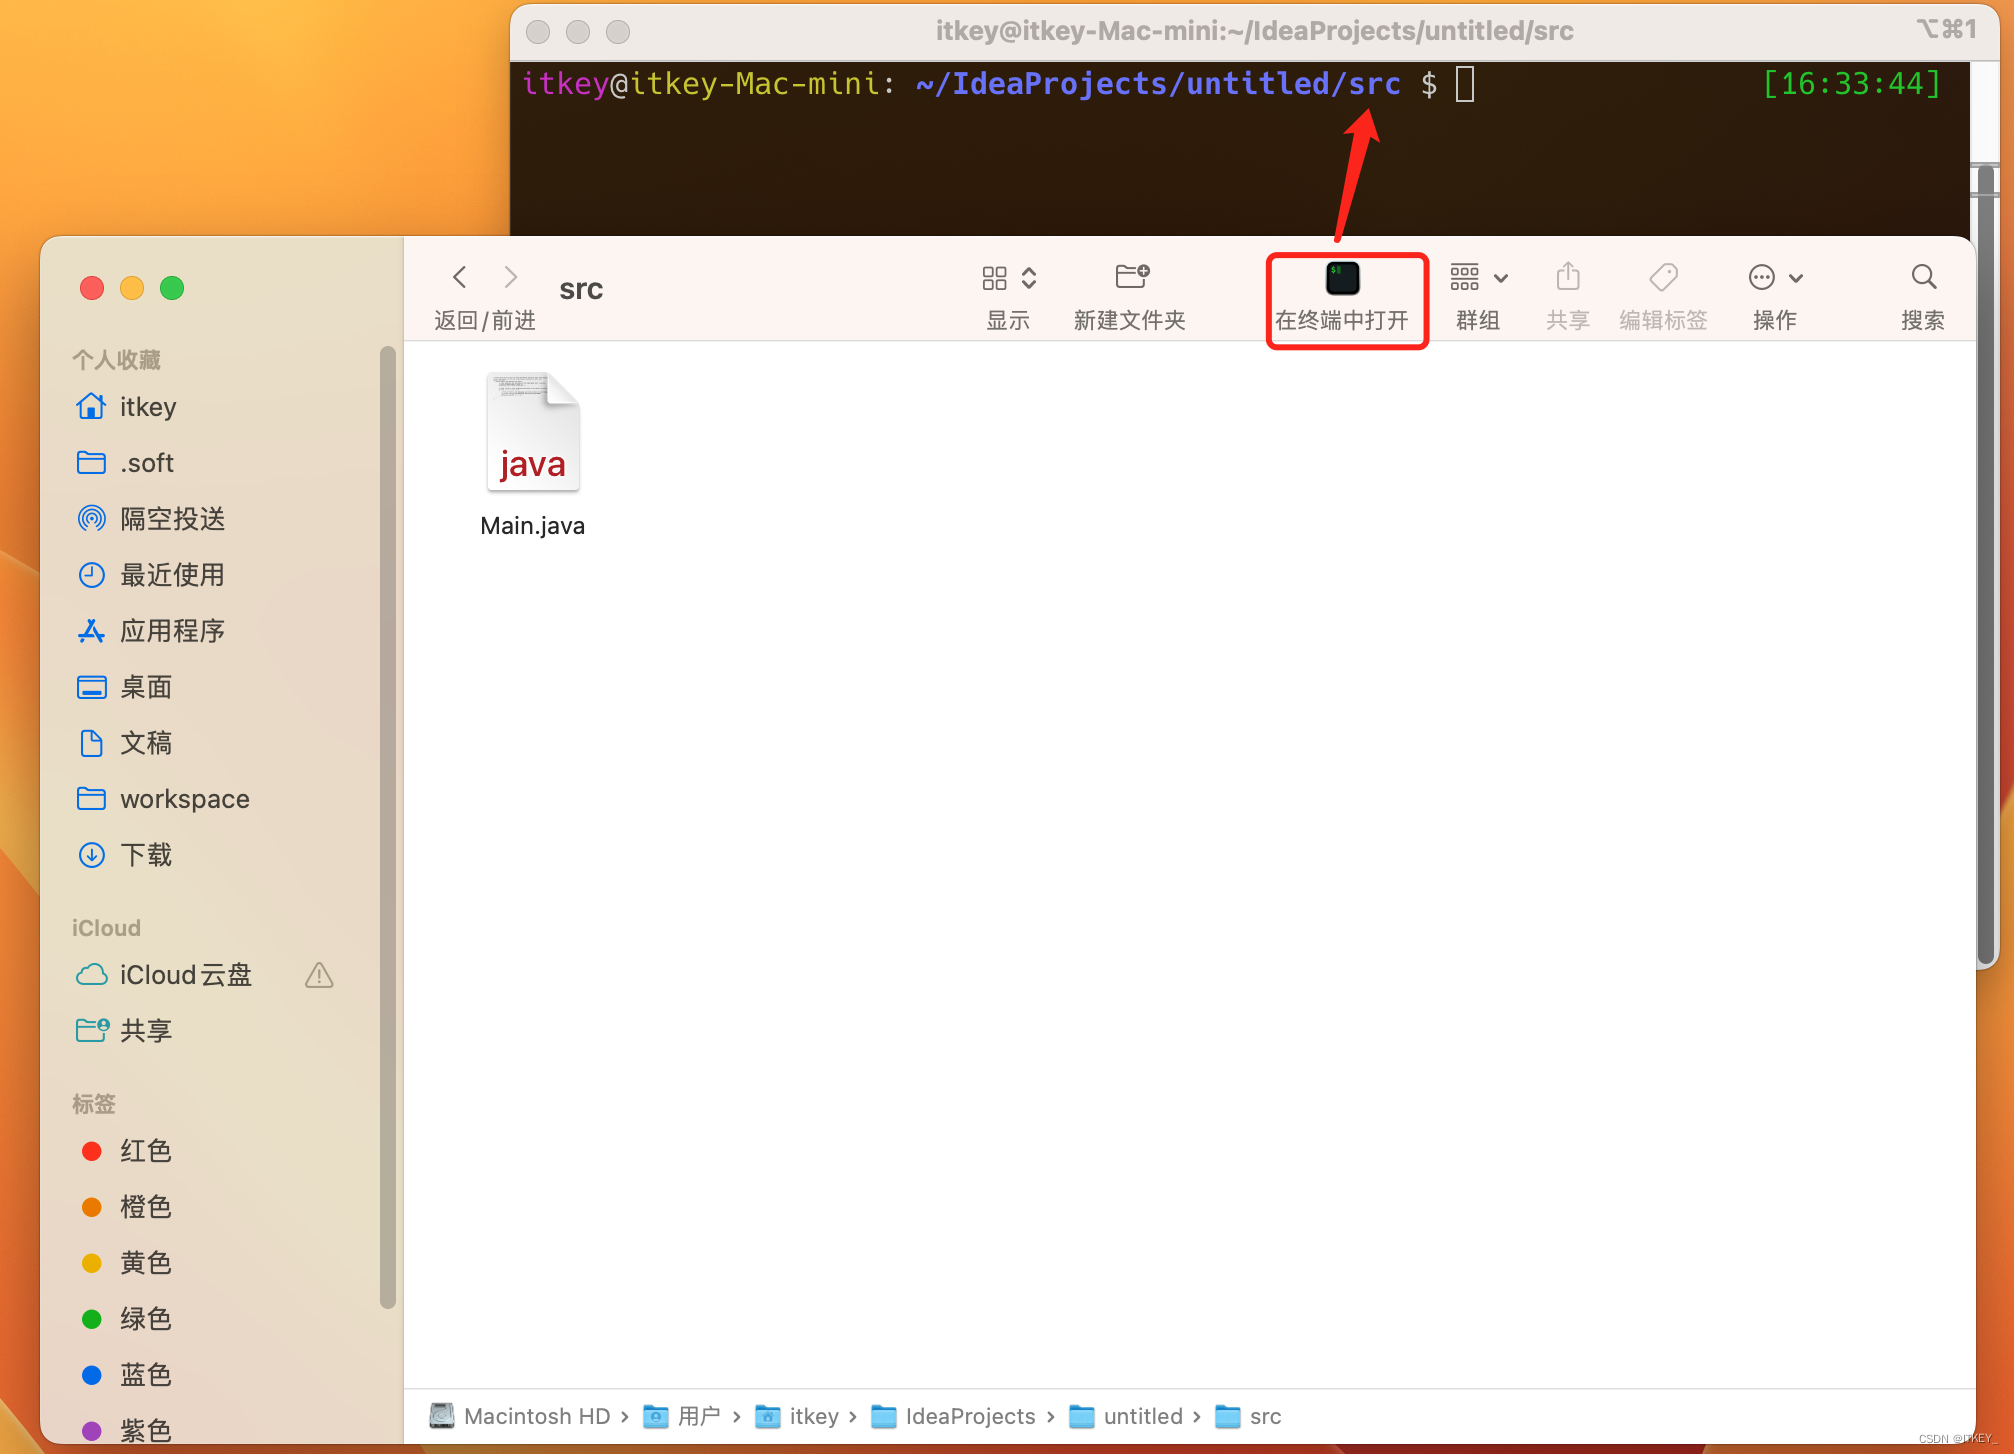
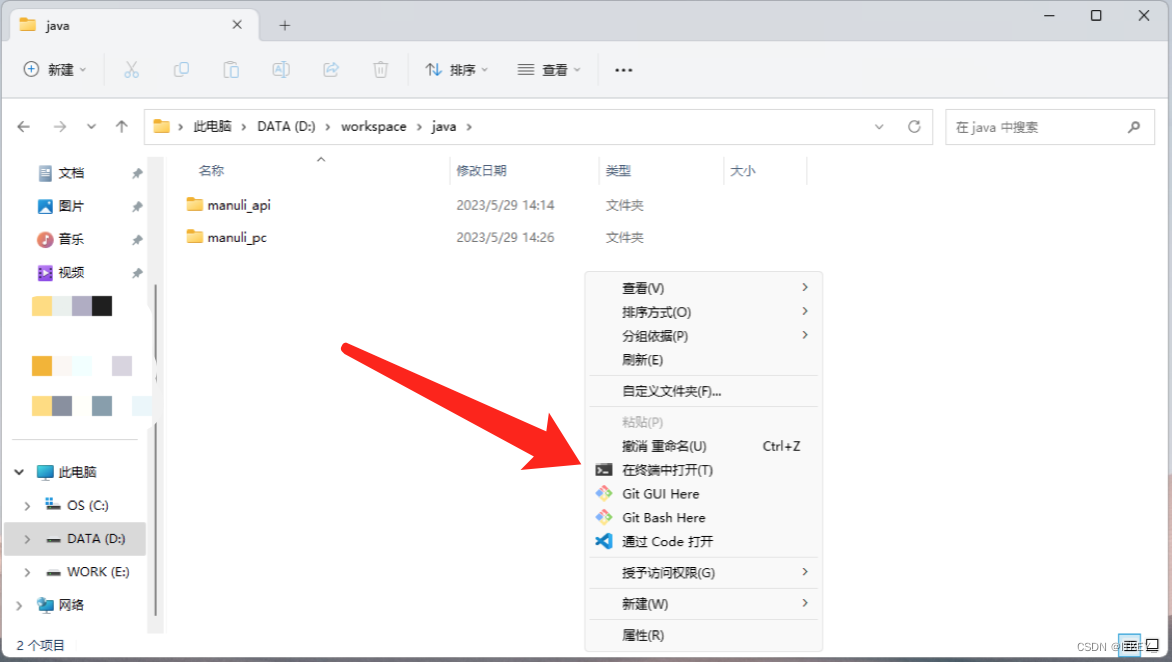
Windows 11では、[このコンピュータ]内の任意のフォルダを右クリックし、カレントディレクトリ内の[ターミナル]を直接開くことができます。長く使うのにとても便利だと感じます。
macOS と同様に、同様の機能も取得したいと考えています。それを達成する方法が文書化されています。
実際の戦闘プロセス
実際の戦闘環境は、
OS:macOS Venture 13.4
端末:iTerm2
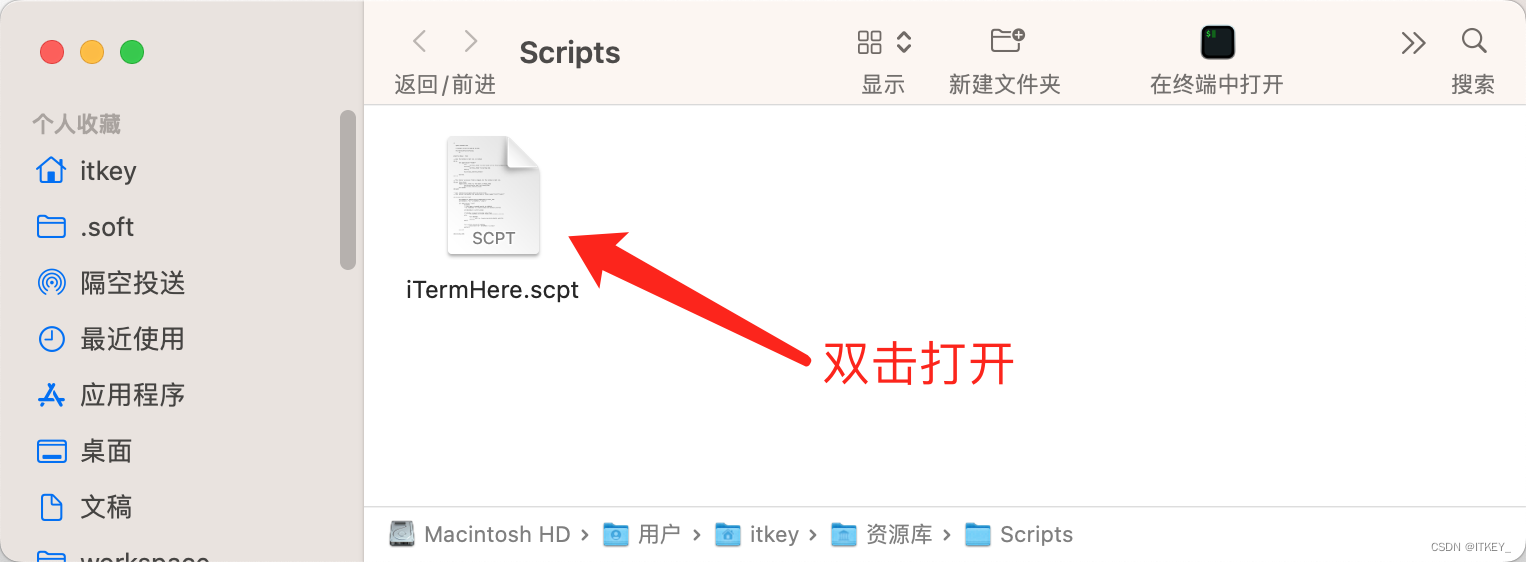
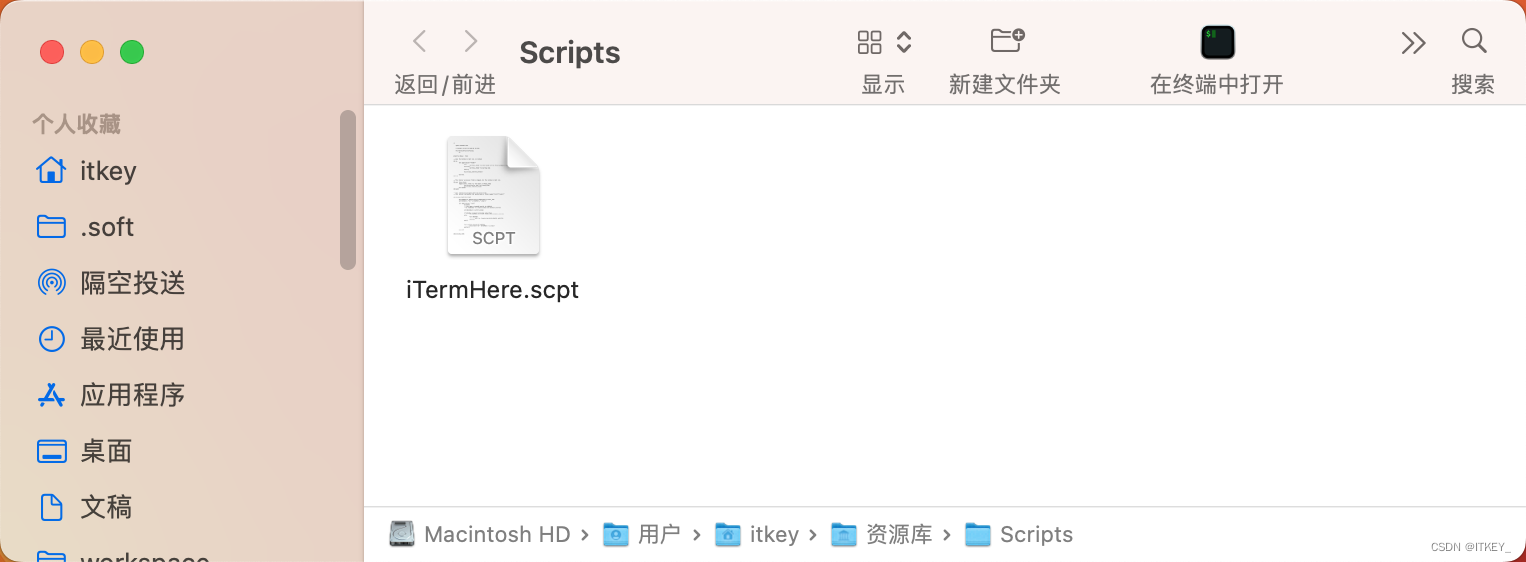
iTermHere.scpt
任意のテキスト エディタを使用してスクリプトを作成します。
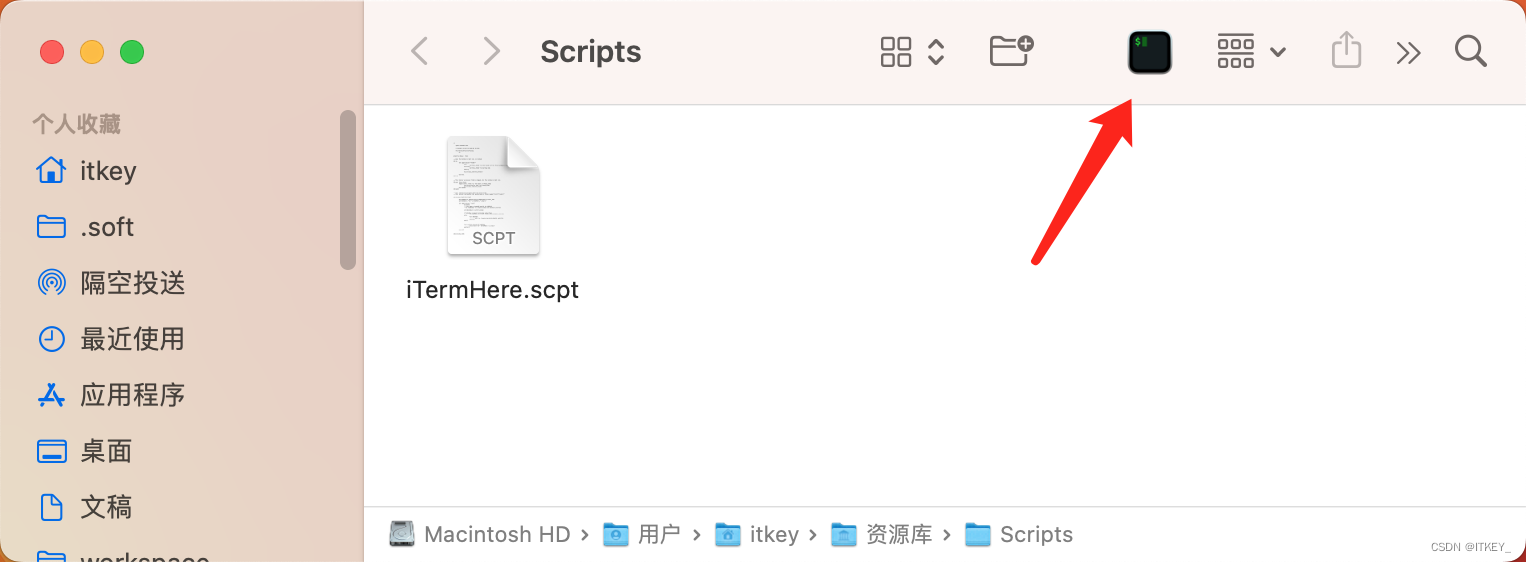
~/Library/Scripts/iTermHere.scpt
スクリプト パスはどこにでも保存でき、好きなパスを選択するだけです。
スクリプトの内容は次のとおりです。
(*

    Open Terminal Here

    A toolbar script for Mac OS X 10.3+

    Written by Brian Schlining
	*)


property debug : false

-- when the toolbar script icon is clicked
--
on run
	tell application "Finder"
		try
			set this_folder to (the target of the front window) as alias
		on error
			set this_folder to startup disk
		end try

		my process_item(this_folder)

	end tell
end run


-- This handler processes folders dropped onto the toolbar script icon
--
on open these_items
	repeat with i from 1 to the count of these_items
		set this_item to item i of these_items
		my process_item(this_item)
	end repeat
end open


-- this subroutine processes does the actual work
-- this version can handle this weirdo case: a folder named "te'st"ö te%s`t"

on process_item(this_item)

	set thePath to quoted form of POSIX path of this_item
	set theCmd to "cd " & thePath & ";clear;"

	tell application "iTerm"
		activate
		-- just open a terminal and cd to thePath
		--set newWindow to (create window with default profile)

		set aWindow to current window

		if aWindow is equal to missing value then
			set aWindow to (create window with default profile)
		else
			tell aWindow
				set t to (create tab with default profile)
			end tell
		end if


		tell current session of aWindow
			write text "cd " & thePath & ";clear;"
		end tell

	end tell


end process_item
スクリプトコンパイラがスクリプトを開きます
スクリプト エディターを使用して、ファイルを直接ダブルクリックしてスクリプトを開くことができます。
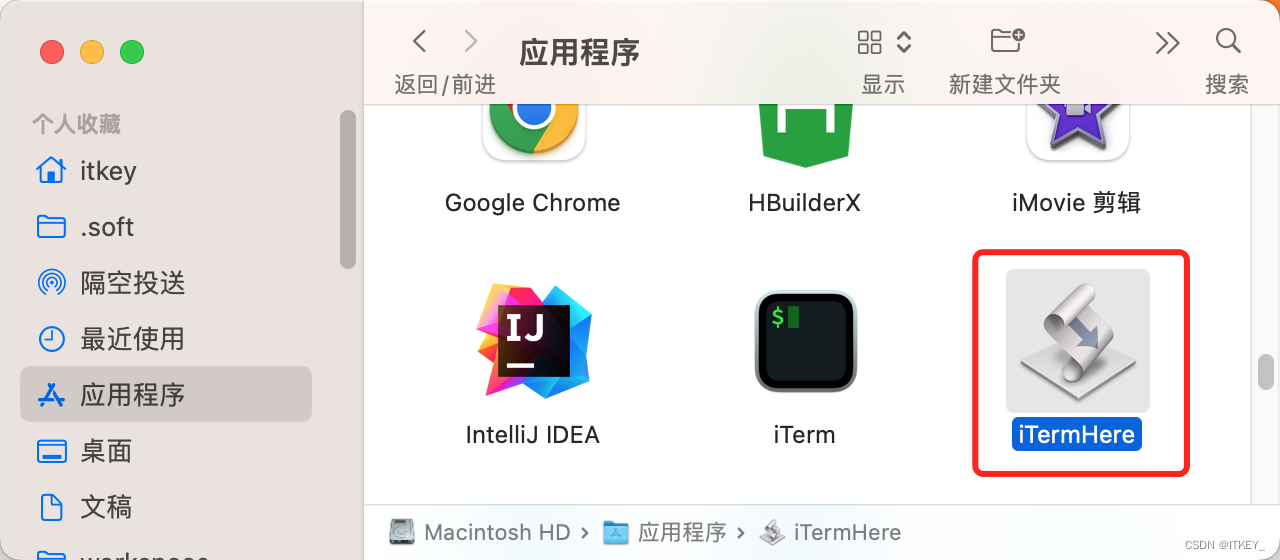
プログラムにエクスポートする
ファイル ==> エクスポート...

ファイル形式: アプリケーション
の場所: アプリケーション
コード署名: ローカルで実行する
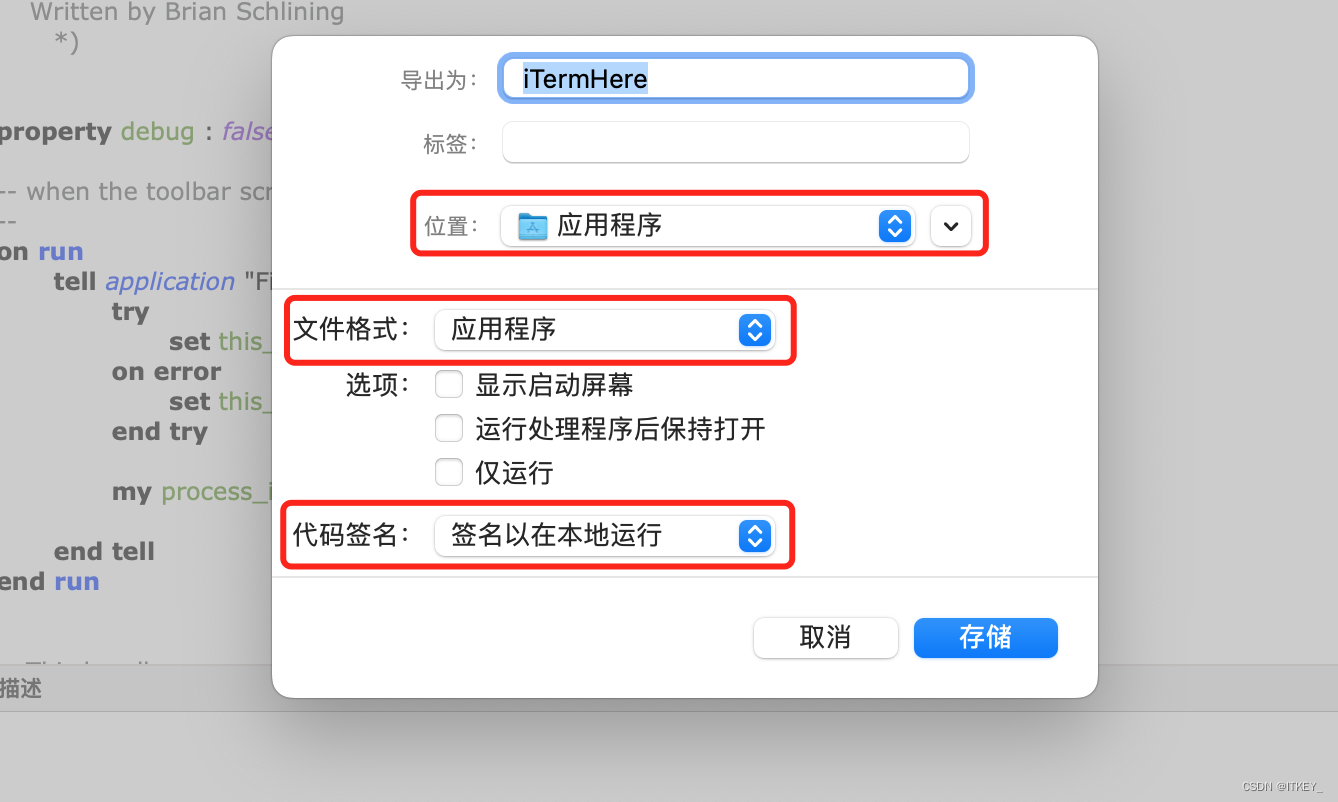
ために署名 [保存] をクリックすると、プログラム iTermHere がアプリケーションに表示されます。
アイコンを定義する
プログラムを選択し、⌘+iディスプレイプロファイルを押すと、アイコンを変更できます。アイコン リソースがある場合は、ここにドラッグするだけです。
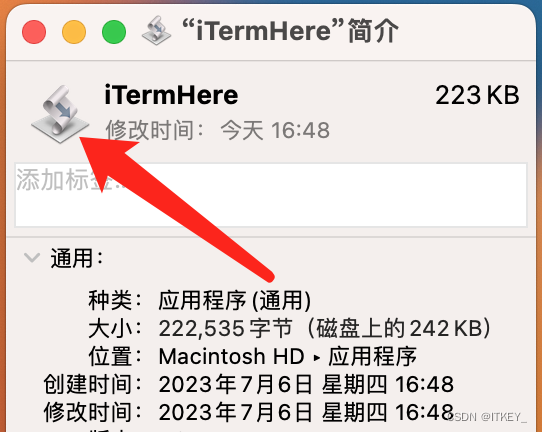
ここでは iTerm と同じアイコンを使用したいのですが、次のようにアイコンをコピーできます:
左上隅の ⌘+c でコピーし、⌘+v でペーストします。

このようにして、アイコンをカスタマイズできます。
名前が気に入らない場合は、名前を変更することもできますので、[ターミナルで開く]に変更します。

Finder ツールバーに追加
Finder の右クリックメニューから選択し自定义工具栏...
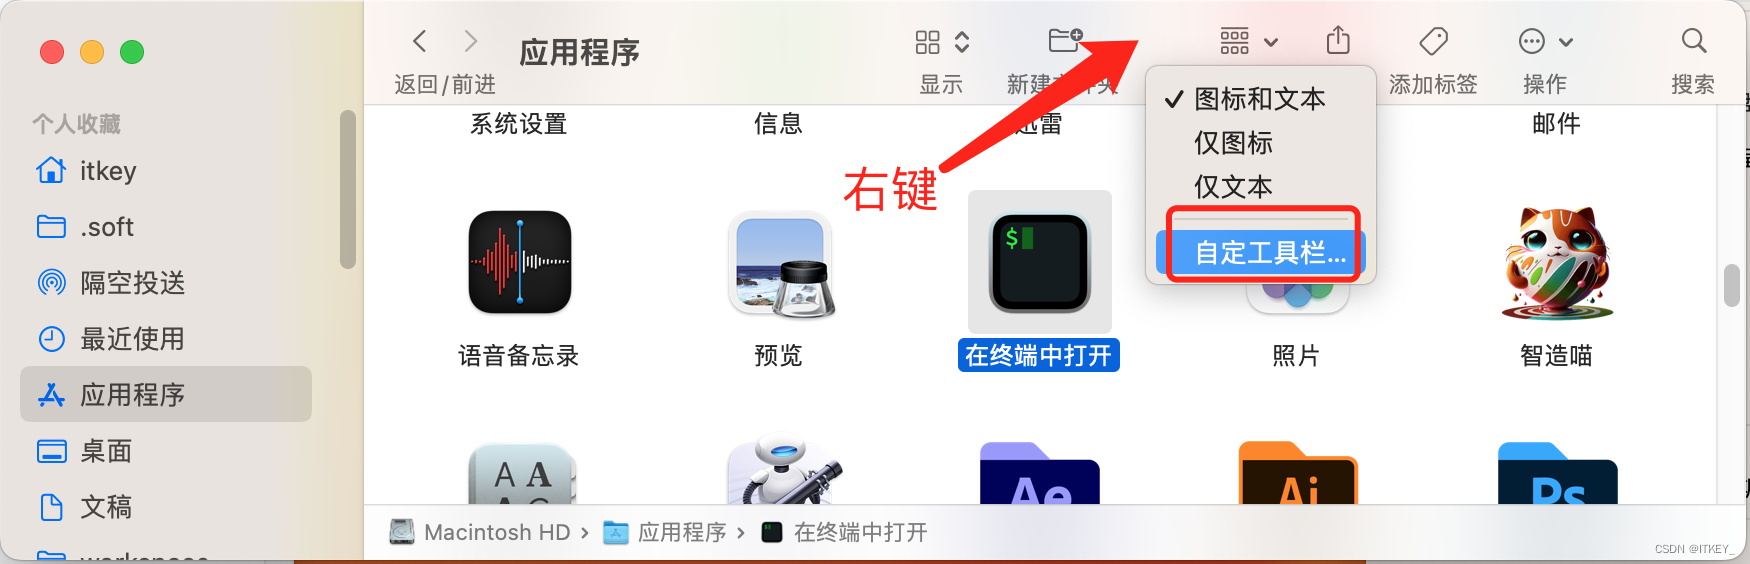
、Finder を再起動してアプリケーションを開き、[ターミナルで開く] をマウスで上部の小ボックスにドラッグします。
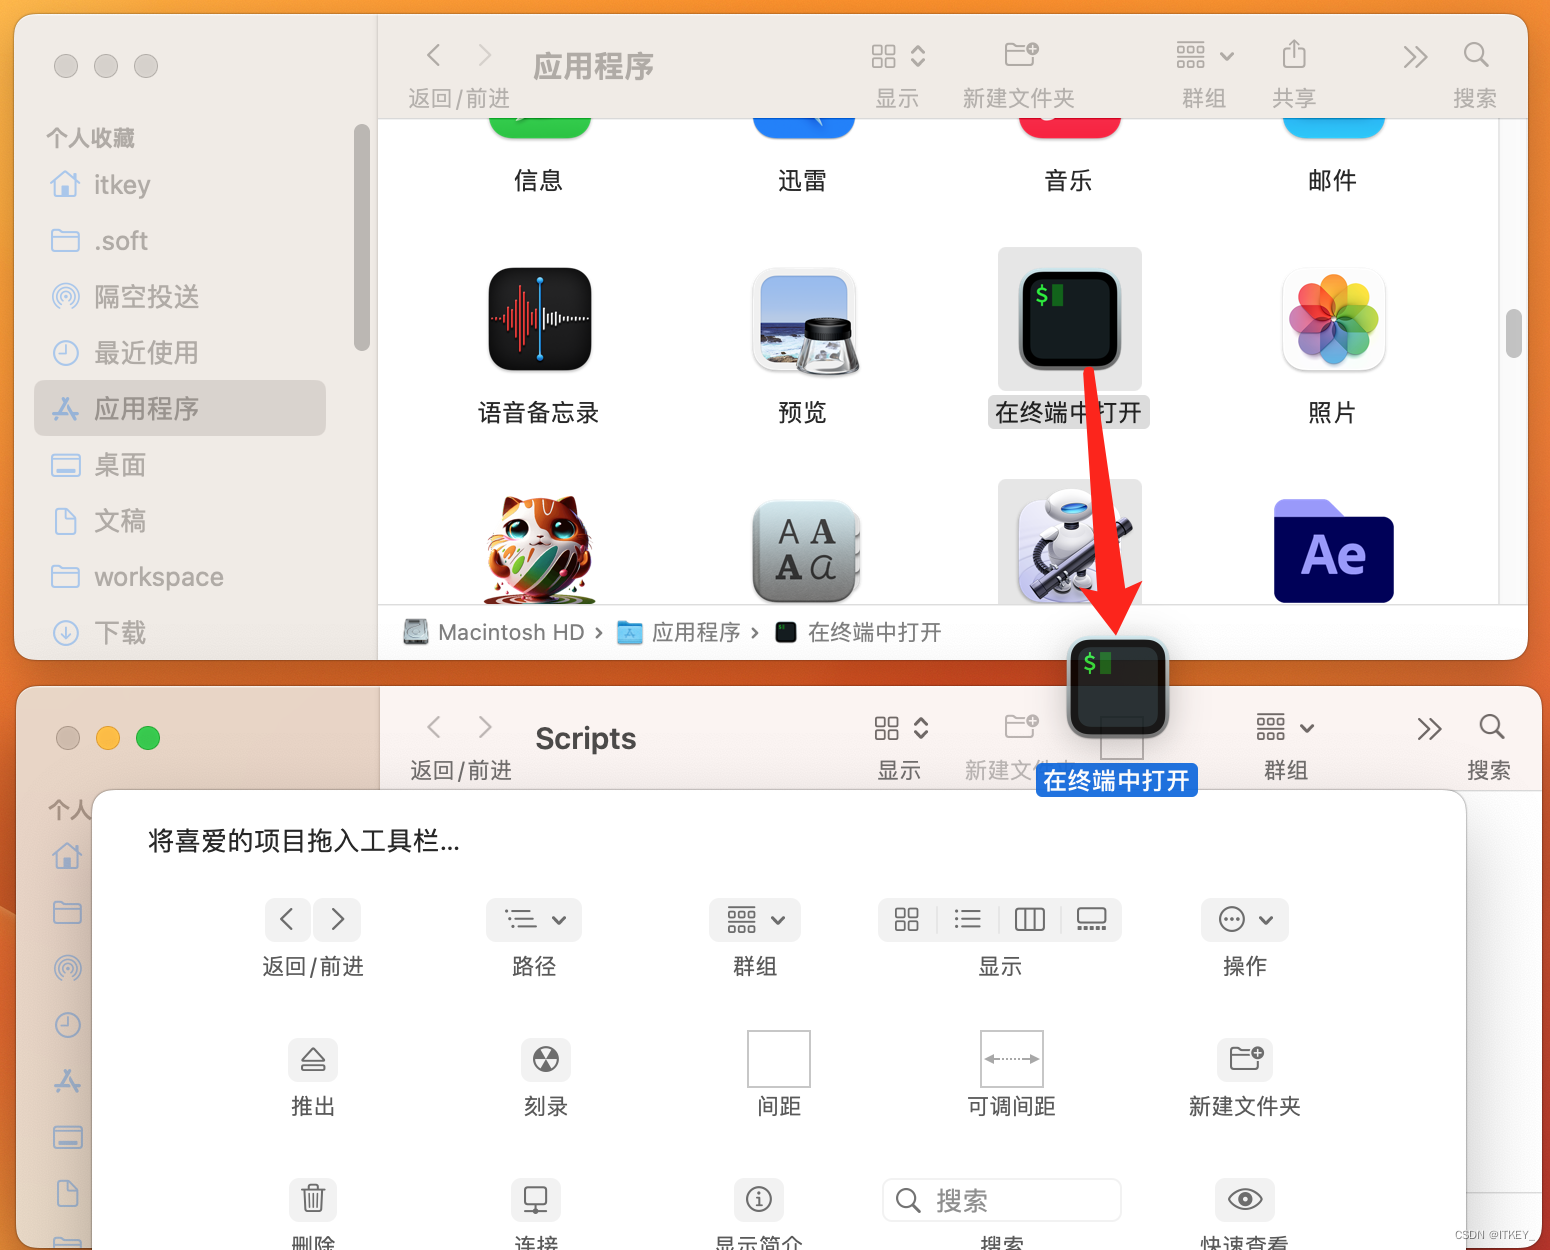
最終的な効果は以下の通りです。
1. ラベルが表示されている場合
2. アイコンのみが表示されている場合
補足 1: iTerm2 には以下が付属します
上記の手順を完了した後、iTerm2 自体にも独自の type 関数があることに偶然気づきました。
操作は次のとおりです。
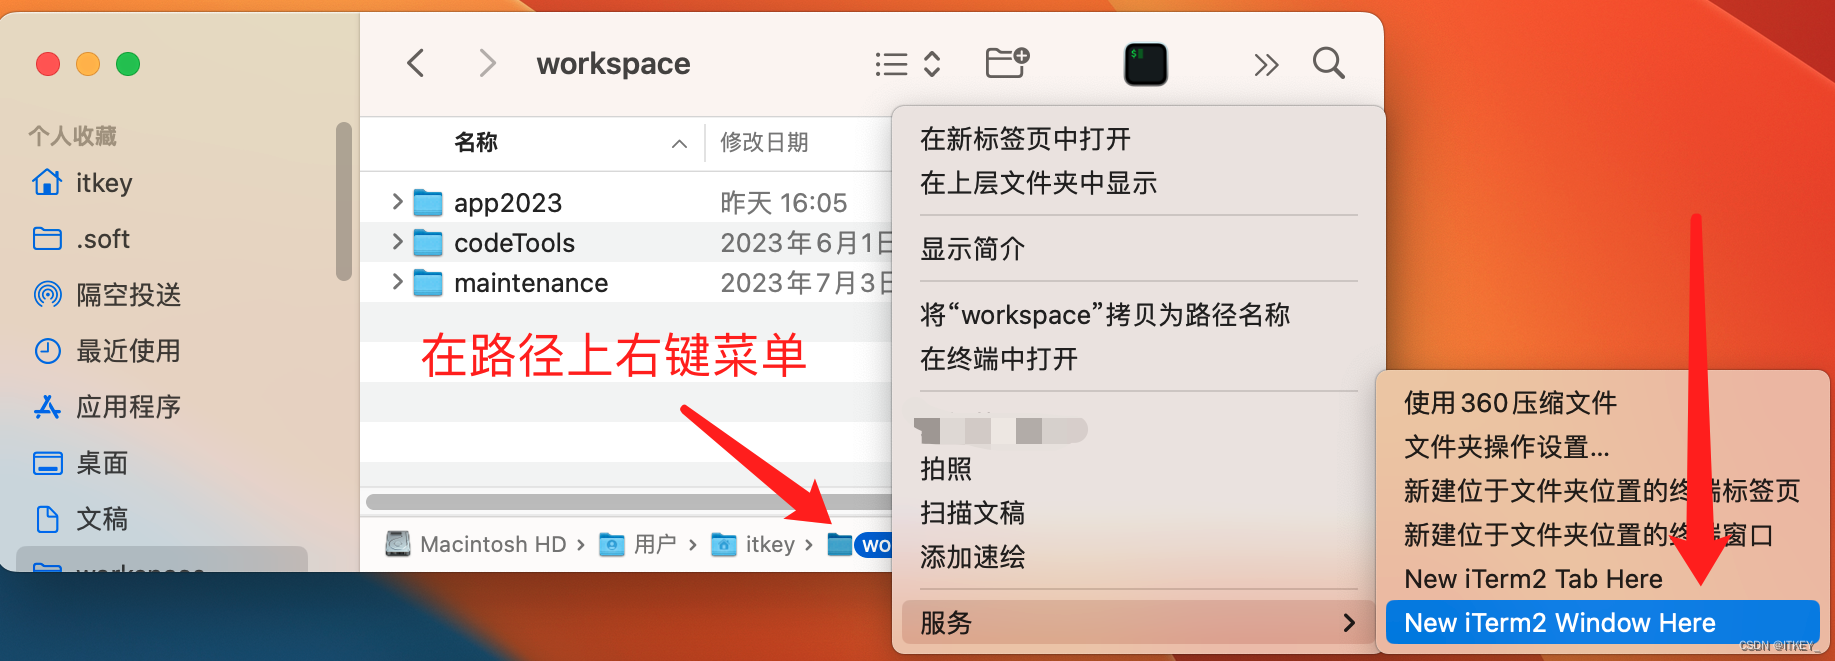
確かにできるのですが、操作が少し面倒です。
上記の方法を完了するには、マウスの左ボタンをクリックするだけです。そして、この方法は、
- 右クリック
- 選択したサービス
- 左ボタンで関連するメニューをクリックする
には 2 つの追加手順が必要ですが、幸いなことに、この機能はデフォルトで利用できるため、クリックする必要はありません。
補足 2: macOS には以下が付属しています
これは私の問題ですが、後で macOS 自体にもこの機能があることがわかりました。操作は次のとおりです。
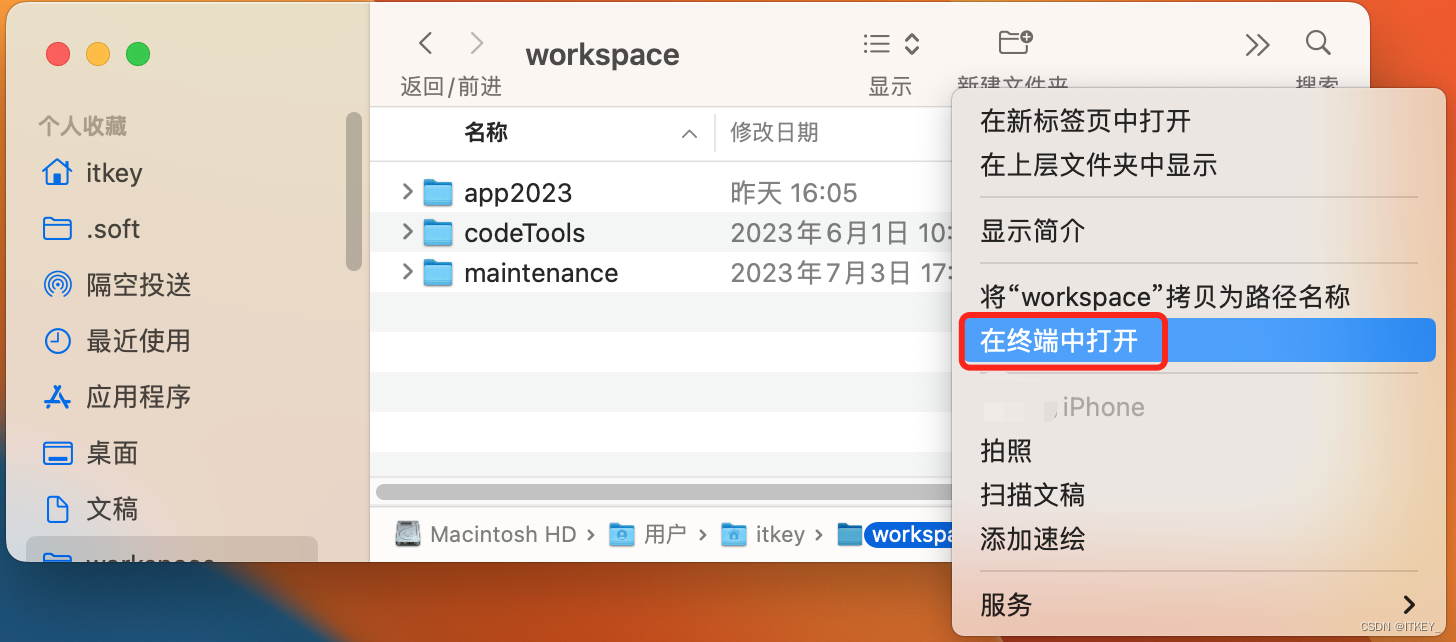
以前からそこにあったことが判明しましたが、私はそれを知りません。
要約する
操作は少し面倒ですが、一度でOKです。依然として非常に便利に使用できます。そして、このメソッドを通じて、vscode を使用してこのディレクトリを開くなど、さらに多くのカスタム ツールバーを実行できます。
参考
《iTerm2 v.3 を Mac の Finder と統合する》
https://schlining.medium.com/integrate-iterm2-v-3-with-your-macs-finder-f3825acd3e0b