2.SpringBoot の使用開始
2.1 システムツール一覧
- JDK 1.8 以降。
- maven3.x: Maven 3.3 以降。
- IntelliJ IDEA、STS;
- Spring Boot の公式バージョンは 2.6.9 です。
2.2 maven 設定
Maven コンパイラをバージョン 1.8 に設定し、maven の settings.xml 構成ファイルのプロファイル タグに追加します。
<profile>
    <id>jdk-1.8</id>
    <activation>
        <activeByDefault>true</activeByDefault>
        <jdk>1.8</jdk>
    </activation>
    <properties>
        <maven.compiler.source>1.8</maven.compiler.source>
        <maven.compiler.target>1.8</maven.compiler.target>
        <maven.compiler.compilerVersion>1.8</maven.compiler.compilerVersion>
    </properties>
</profile>
2.3 プロジェクト実現機能
ブラウザは hello リクエストを送信し、サーバーはリクエストを受け入れて処理し、Hello World 文字列で応答します。
スプリング ブート プロジェクトを作成するには、主に 2 つの方法があります。
- Maven プロジェクトを作成し、対応する pom 依存関係を追加します。
- spring boot が提供する Initializer を使用してプロジェクトを作成します。
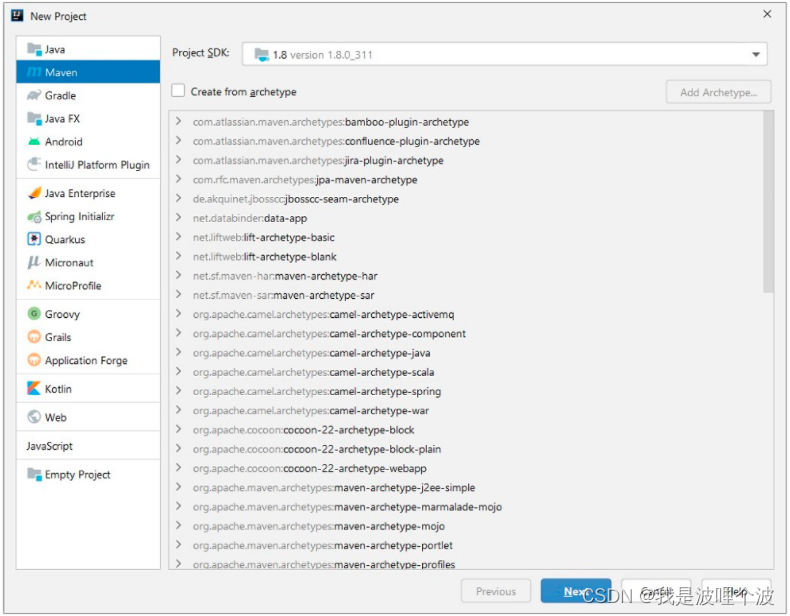
2.3.1 Maven プロジェクトの作成


2.3.2 依存関係の導入
<?xml version="1.0" encoding="UTF-8"?>
<project xmlns="http://maven.apache.org/POM/4.0.0"
         xmlns:xsi="http://www.w3.org/2001/XMLSchema-instance"
         xsi:schemaLocation="http://maven.apache.org/POM/4.0.0 http://maven.apache.org/xsd/maven-4.0.0.xsd">
    <modelVersion>4.0.0</modelVersion>

    <!--引入spirngboot的父项目-->
    <parent>
        <groupId>org.springframework.boot</groupId>
        <artifactId>spring-boot-starter-parent</artifactId>
        <version>2.6.9</version>
    </parent>

    <groupId>com.newcapec</groupId>
    <artifactId>springboot01-helloworld</artifactId>
    <version>1.0-SNAPSHOT</version>
    <!--当前项目到打包方式为jar-->
    <packaging>jar</packaging>

    <!--引入核心依赖-->
    <dependencies>
        <dependency>
            <groupId>org.springframework.boot</groupId>
            <artifactId>spring-boot-starter-web</artifactId>
        </dependency>
    </dependencies>
</project>
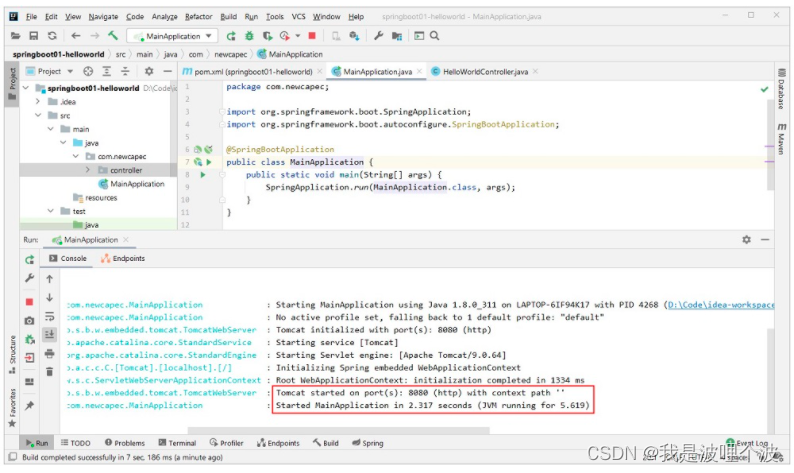
2.3.3 メインプログラムを書く
import org.springframework.boot.SpringApplication;
import org.springframework.boot.autoconfigure.SpringBootApplication;

/**
 *  @SpringBootApplication 来标注一个主程序类,说明这是一个Spring Boot应用
 */
@SpringBootApplication
public class MainApplication {


    public static void main(String[] args) {


        //通过SpringApplication启动程序
        SpringApplication.run(MainApplication.class, args);
    }
}
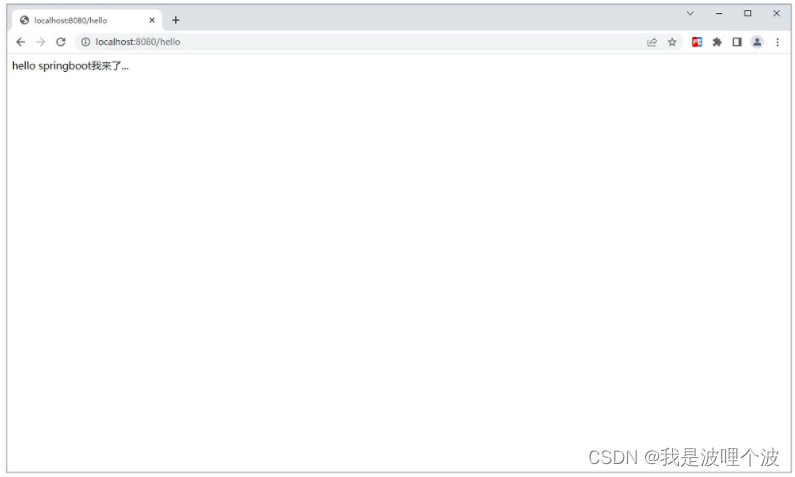
2.3.4 書き込みコントローラー
import org.springframework.web.bind.annotation.GetMapping;
import org.springframework.web.bind.annotation.RestController;

@RestController
public class HelloWorldController {


    @GetMapping("/hello")
    public String hello(){


        System.out.println("hello方法执行了...");
        return "hello springboot我来了...";
    }
}
2.3.5 テストの実行
MainApplicaiton クラスに戻り、main() メソッドを実行して springboot アプリケーションを開始します。
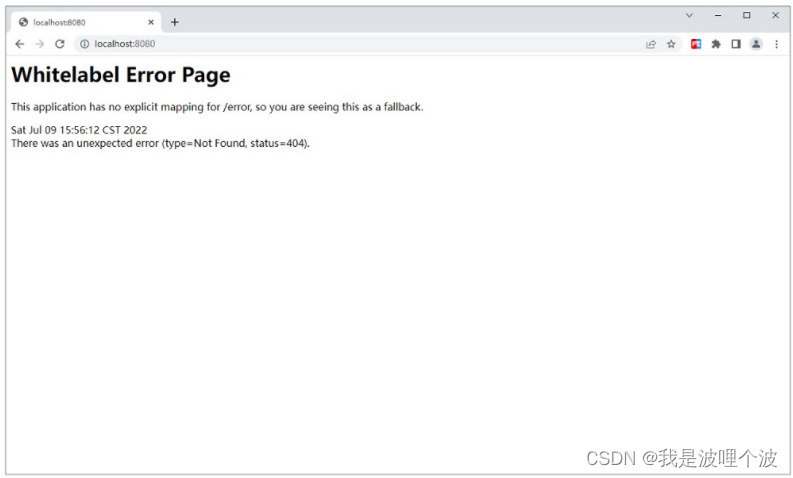
ブラウザに localhost:8080 と入力してテストします。
ブラウザに localhost:8080/hello と入力してテストします。
2.3.6 展開の簡素化
Springboot パッケージ化プラグインは、アプリケーションを実行可能な jar パッケージにパッケージ化できます。
<!--Springboot打包插件-->
<build>
    <plugins>
        <plugin>
            <groupId>org.springframework.boot</groupId>
            <artifactId>spring-boot-maven-plugin</artifactId>
        </plugin>
    </plugins>
</build>
idea の maven プラグインを呼び出して実行し、packageパッケージング コマンドを実行します。
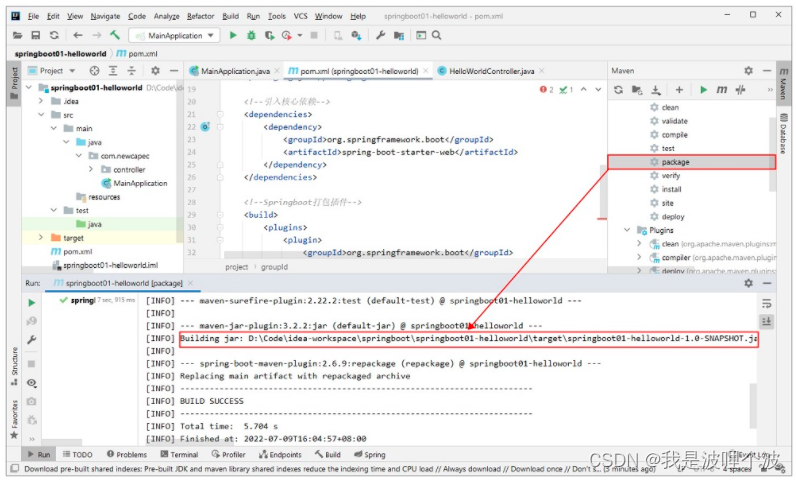
cmdコマンドライン ウィンドウに入り、jar ファイルがパッケージされているディレクトリに移動します。
このアプリケーションを jar パッケージにパッケージ化し、コマンドjava -jar springboot01-helloworld-1.0-SNAPSHOT.jarを使用して。
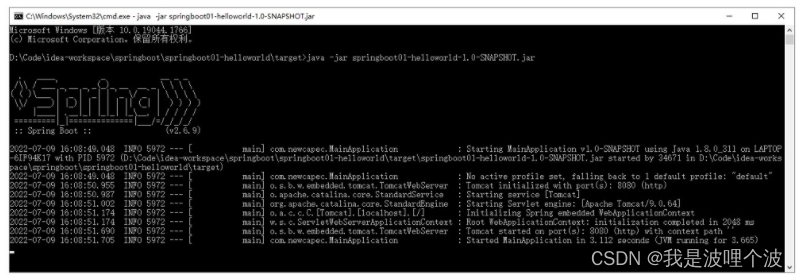
プログラムが正常に実行された後、hello サービスがブラウザーを介して正しく返されるかどうかを再度確認できます。
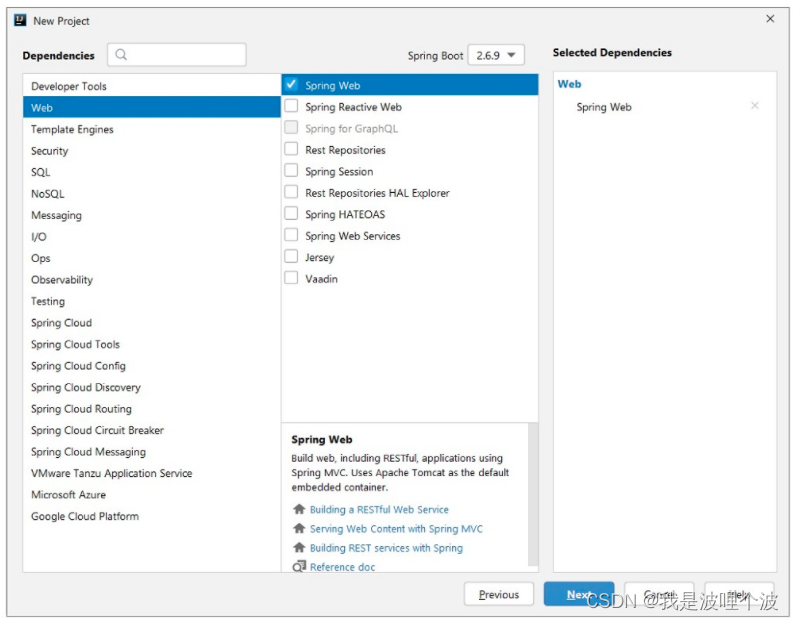
2.4 春の初期化
Spring Boot Maven プロジェクトをビルドするには、Spring Initializr (https://start.spring.io) を強くお勧めします。これは基本的に、Spring Boot プロジェクト構造を生成できる Web アプリケーションです。
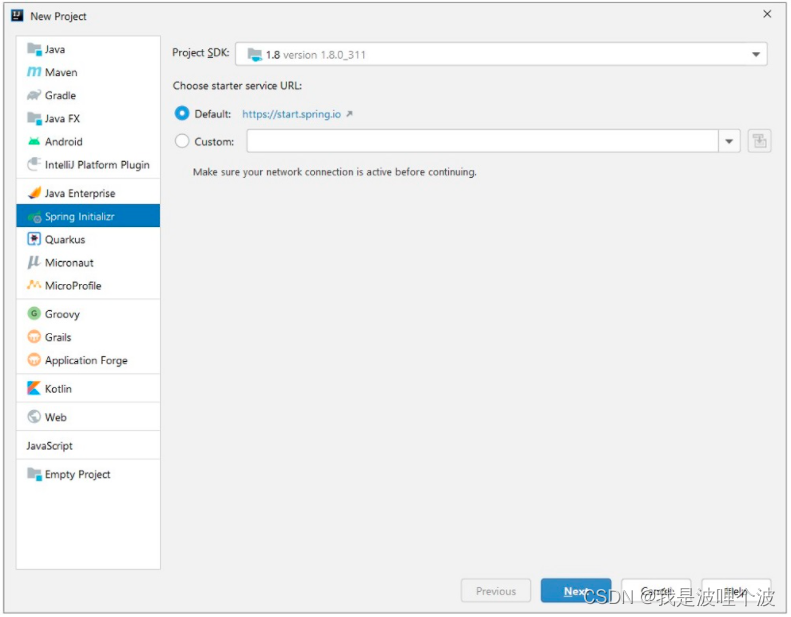
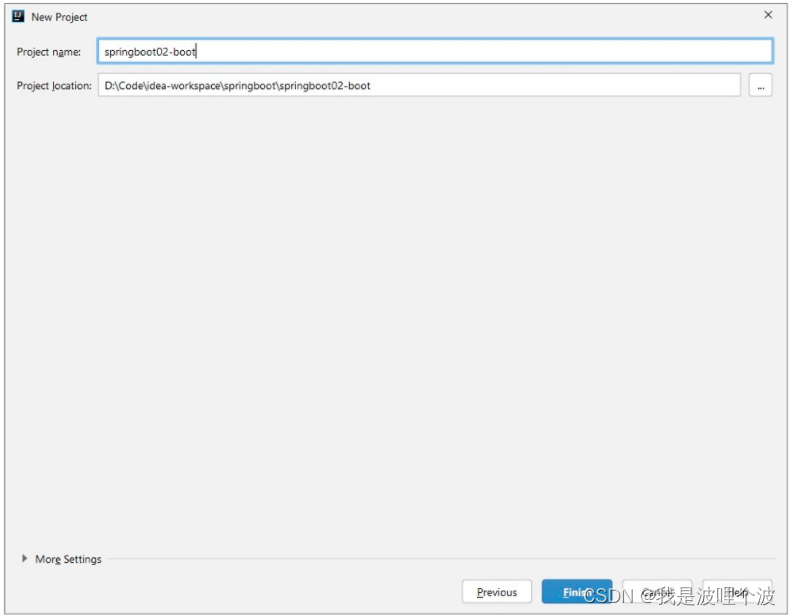
IntelliJ IDEA を使用して Spring Boot を作成する手順は次のとおりです。
- [ファイル] メニューで、[新規] > [プロジェクト] を選択します。
- 次に、Spring Initializr を選択します。
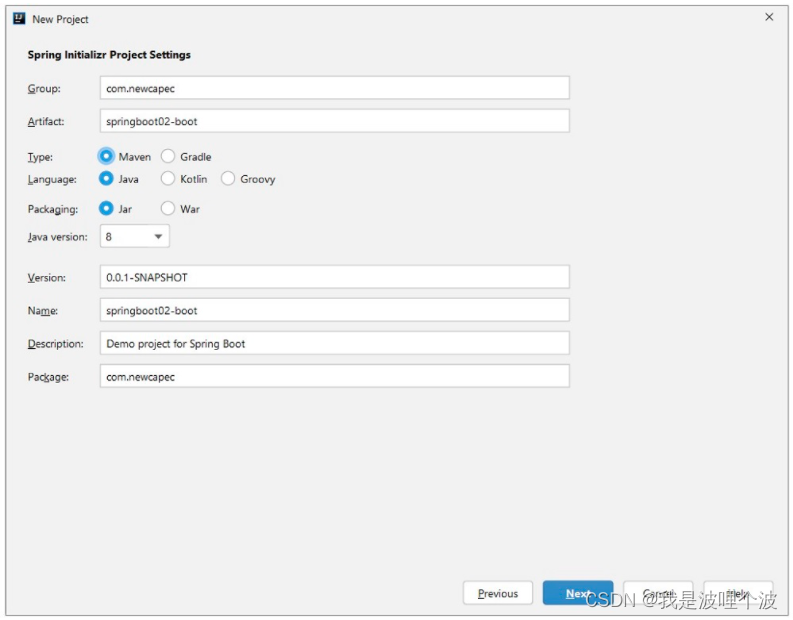
- プロジェクト情報を入力します。
- オプション Springboot のバージョンと依存関係。
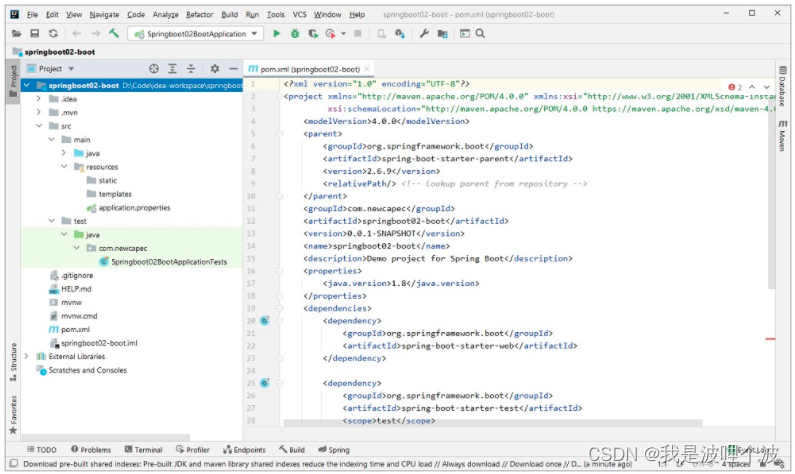
デフォルトで生成された Spring Boot プロジェクト:
- メイン プログラムが生成されたので、必要なビジネス ロジック制御コード (コントローラー、サービス、dao など) を追加するだけです。
- src、ソース コード ディレクトリ。
- リソース フォルダー内のディレクトリ構造。
- static: すべての静的リソース (js、css、画像) を保存します。
- templates: すべてのテンプレート ページを保存します。Spring Boot のデフォルトの jar パッケージは組み込みの Tomcat を使用し、JSP ページをサポートせず、テンプレート エンジン (freemarker、thymeleaf) を使用できます。
- application.properties: Spring Boot アプリケーションの構成ファイル。
- .gitignore – 分散バージョン管理システム git の構成ファイル。コミットを無視することを意味します。
- mvnw – フルネームはmaven wrapper. その原則は、使用したいmavenバージョンをmaven-wrapper.propertiesファイルに記録することです. ユーザーがmvnw cleanコマンドを実行し、現在のユーザーのmavenバージョンが期待されるバージョン、次に目的のバージョンをダウンロードし、目的のバージョンを使用して、mvn clean just now などの mvn コマンドを実行します。
- .mvn フォルダー – maven-wrapper.properties および関連する jar パッケージを保存します。
- mvn.cmd – mvnw コマンドを実行するための cmd エントリ。
- .Idea は、履歴レコード、バージョン管理情報などを含む、プロジェクトの構成情報を保存します。実際、無視することも、IDEA で非表示に設定することもできます。