Build Nginx server
Install the nginx package using the source package
[root@proxy ~]# yum -y install gcc pcre-devel openssl-devel        #安装依赖包
[root@proxy ~]# useradd -s /sbin/nologin nginx
[root@proxy ~]# tar  -xf   nginx-1.17.6.tar.gz
[root@proxy ~]# cd  nginx-1.17.6
[root@proxy nginx-1.17.6]# ./configure   \
--prefix=/usr/local/nginx   \                #指定安装路径
--user=nginx   \                            #指定用户
--group=nginx  \                            #指定组
--with-http_ssl_module                    #开启SSL加密功能
[root@proxy nginx-1.17.6]# make && make install #编译并安装- make: It is a construction tool that can automatically build and compile software through Makefile files.
- gcc: The GNU compiler suite, which can compile programs in multiple programming languages.
- pcre-devel: PCRE is an efficient and widely used regular expression library. pcre-devel is the development file of the library, which can be used to build applications that use the PCRE library.
- openssl-devel: OpenSSL is an open source secure socket library. openssl-devel provides the development files of the library, which can be used to write secure network applications in development.
- --with-http_ssl_module: Provide SSL encryption function
- --User: specify the account
- --group: specify the group
Usage of nginx command
[root@proxy ~]# /usr/local/nginx/sbin/nginx                    #启动服务
[root@proxy ~]# /usr/local/nginx/sbin/nginx -s stop            #关闭服务
[root@proxy ~]# /usr/local/nginx/sbin/nginx -s reload        #重新加载配置文件
[root@proxy ~]# /usr/local/nginx/sbin/nginx -V                #查看软件信息
Netstat -anptu | Grape Enjinx
-a displays information about all ports
-n display port number in numeric format
-t shows the port of the TCP connection
-u show port for UDP connection
-l displays the port information that the service is listening to. For example, after httpd starts, it will always listen to port 80
-p shows what the service name of the listening port is (that is, the program name)
The main reason why ss is faster than netstat is that netstat traverses each PID directory under /proc, and ss directly reads the statistical information under /proc/net. Therefore, when ss is executed, it consumes much less resources and time than netstat
User Authentication
To implement web page authentication through Nginx, you need to modify the Nginx configuration file and add auth statement in the configuration file to implement user authentication. Finally, use the htpasswd command to create a user and password
vim /usr/local/nginx/conf/nginx.conf
.. ..
server {
        listen       80;
        server_name  localhost;
        auth_basic "Input Password:";                        //认证提示符信息
        auth_basic_user_file  "/usr/local/nginx/pass";        //认证的密码文件
        location / {
            root   html;
            index  index.html index.htm;
        }
  }
Generate password file, create user and password
[root@proxy ~]# yum -y install  httpd-tools
[root@proxy ~]# htpasswd -c /usr/local/nginx/pass   tom        //创建密码文件
New password:
Re-type new password:
Adding password for user tom
[root@proxy ~]# htpasswd  /usr/local/nginx/pass   jerry      //追加用户,不使用-c选项
New password:
Re-type new password:
Adding password for user jerry
[root@proxy ~]# cat /usr/local/nginx/pass
xx-based virtual hosting
Generally, virtual hosts can be divided into: domain name-based, IP-based and port-based virtual hosts
基于域名的虚拟主机
[root@proxy ~]# vim /usr/local/nginx/conf/nginx.conf
.. ..
server {
        listen       80;                                      //端口
        server_name  www.a.com;                                //域名
location / {
            root   html;                                    //指定网站根路径
            index  index.html index.htm;
       }
}
… …
server {
        listen  80;                                        //端口
        server_name  www.b.com;                                //域名
location / {
        root   www;                                 //指定网站根路径
        index  index.html index.htm;
    }
}

基于端口的虚拟主机

server {
        listen       9999;                        //端口
        server_name  web1.example.com;          //域名
        ......
}
    server {
        listen       8888;                         //端口
        server_name  web1.example.com;           //域名
      .......
}

基于IP的虚拟主机

server {
        listen       192.168.0.1:80;              //IP地址与端口
        server_name  web1.example.com;          //域名
  ... ...
}
    server {
        listen       192.168.0.2:80;             //IP地址与端口
        server_name  web1.example.com;
... ...
}
SSL virtual host (accessible after trusting the certificate)
When installing Nginx from source code, you must use the --with-http_ssl_module parameter to enable the encryption module, and add ssl-related instructions for sites that require SSL encryption (set the private key and certificate required by the site)
openssl genrsa > cert.key
openssl req -new -x509 -key cert.key > cert.pem
The first command will generate an RSA private key certificate using the genrsa option and output it to the cert.key file.
The second command will generate a new self-signed certificate request using the req option, signed with the RSA key just generated. This command will generate a certificate in X.509 format and output it to the cert.pem file.
[root@proxy ~]# vim  /usr/local/nginx/conf/nginx.conf
… …
server {
        listen       443 ssl;
        server_name            www.c.com;
        ssl_certificate      cert.pem;         #这里是证书文件
        ssl_certificate_key  cert.key;         #这里是私钥文件
        ssl_session_cache    shared:SSL:1m;
        ssl_session_timeout  5m;
        ssl_ciphers  HIGH:!aNULL:!MD5;
        ssl_prefer_server_ciphers  on;
        location / {
            root   html;
            index  index.html index.htm;
        }
}- The ssl_session_cache directive enables the SSL session cache, which is used to store SSL session information to improve the response time of the SSL connection. It uses a shared memory area to store the SSL session cache, named "SSL", and the size is 1MB;
- The ssl_session_timeout directive configures the expiration time of the SSL session cache, the default is 5 minutes, and the SSL session information will be deleted after expiration;
- The ssl_ciphers directive defines the SSL cipher suites supported by the server, where the specified server supports high-security cipher suites, and does not support invalid cipher suites and MD5 algorithms;
- The ssl_prefer_server_ciphers directive indicates that the server prefers to use the cipher suite configured by itself instead of the cipher suite provided by the client.
MariaDB, PHP environment
Current websites generally have dynamic and static data. By default, nginx can only process static data. When a user accesses any data, the corresponding file will be returned directly. If the access is a script, it will directly return a script to the user. And the user does not have a script interpreter, nor can he understand the script source code!
mariadb、mariadb-server、mariadb-devel
php (open source scripting language), php-fpm (FastCGI process manager), php-mysql (the function of PHP interacting with MySQL database)
Memory consumption of FastCGI, a PHP-FPM interpreter will consume about 25M of memory /etc/php-fpm.d/www.conf
Modify the Nginx configuration file and start the service
[root@proxy ~]# vim /usr/local/nginx/conf/nginx.conf
location / {
            root   html;
            index  index.php  index.html   index.htm;
#设置默认首页为index.php,当用户在浏览器地址栏中只写域名或IP,不说访问什么页面时,服务器会把默认首页index.php返回给用户
        }
 location  ~  \.php$  {
            root           html;
            fastcgi_pass   127.0.0.1:9000;    #将请求转发给本机9000端口,PHP解释器
            fastcgi_index  index.php;
            #fastcgi_param   SCRIPT_FILENAME  $document_root$fastcgi_script_name;
            include        fastcgi.conf;       #加载其他配置文件
        }
Address rewriting (rewrite)
[root@proxy ~]# vim /usr/local/nginx/conf/nginx.conf
.. ..
server {
        listen       80;
        server_name  localhost;
rewrite  /a.html  /b.html;
location / {
    root   html;
index  index.html index.htm;
}
}
Visit a.html and redirect to b.html (jump address bar redirect)
[root@proxy ~]# vim /usr/local/nginx/conf/nginx.conf
.. ..
server {
        listen       80;
        server_name  localhost;
rewrite /a.html  /b.html  redirect;
location / {
    root   html;
index  index.html index.htm;
}
}
rewrite ^/ http://www.tmooc.cn/ When matching the root path ("/"), replace it with http://www.tmooc.cn/
rewrite ^/(.*)$ http://www.tmooc.cn/$1; This rule uses regular expressions to match all requests and add http://www.tmooc.cn/ before the matched URL, The rewritten URL is then passed to the next handler. Unlike direct redirects, this rule does not change the URL displayed in the browser, but instead sends the request to the new URL
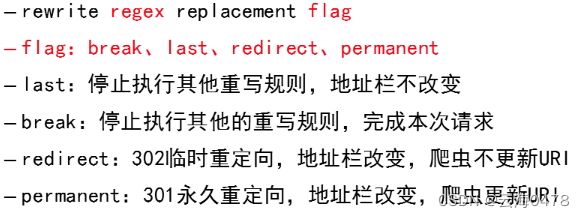
rewrite old address new address [options];
last no longer read other rewrite
break no longer read other statements, end the request
redirect Temporary redirection
permanent permanent redirection
reverse proxy
Reverse proxy: client->reverse proxy server->backend server->reverse proxy server->client (reverse proxy server acts as a forward proxy:
client->forward proxy server->target server->forward proxy server->client (forward proxy server acts as a "proxy" middle layer);
[root@proxy ~]# vim /usr/local/nginx/conf/nginx.conf
.. ..
http {
.. ..
#使用upstream定义后端服务器集群,集群名称任意(如webserver)
#使用server定义集群中的具体服务器和端口
upstream webserver {
                server 192.168.99.100:80;
                server 192.168.99.200:80;
        }
.. ..
server {
        listen        80;
        server_name  localhost;
            location / {
#通过proxy_pass将用户的请求转发给webserver集群
            proxy_pass http://webserver;
        }
}
[root@proxy ~]# vim /usr/local/nginx/conf/nginx.conf
.. ..
http {
.. ..
upstream webserver {
server 192.168.99.100 weight=1 max_fails=1 fail_timeout=30;
server 192.168.99.200 weight=2 max_fails=2 fail_timeout=30;
server 192.168.2.101 down;
}
#weight设置服务器权重值,默认值为1
#max_fails设置最大失败次数,测试服务器几次才确认服务器失败
#fail_timeout设置失败超时时间,单位为秒
#down标记服务器已关机,不参与集群调度
.. ..
server {
listen 80;
server_name localhost;
location / {
proxy_pass http://webserver;
}
}Custom error page
You can find the modification in the configuration file
Apache scheduling algorithm
[root@proxy ~]# vim /usr/local/nginx/conf/nginx.conf
.. ..
http {
.. ..
upstream webserver {
#通过ip_hash设置调度规则为:相同客户端访问相同服务器
                 ip_hash;
                server 192.168.99.100 weight=1 max_fails=2 fail_timeout=10;
                server 192.168.99.200 weight=2 max_fails=2 fail_timeout=10;
        }
.. ..
server {
        listen        80;
        server_name  www.tarena.com;
            location / {
            proxy_pass http://webserver;
        }
}
Define status page
Active connections: The number of currently active connections.
Accepts: The total number of connections that have been accepted by the client.
Handled: The total number of client connections that have been handled.
(Generally consistent with accepts, unless the server limits the number of connections).
Requests: The number of requests sent by the client.
Reading: The current server is reading the number of client request headers.
Writing: The current server is writing the number of response messages.
Waiting: How many clients are currently waiting for the server's response.
[root@proxy ~]# curl  http://192.168.88.5/status
Active connections: 1
server accepts handled requests
 10 10 3
Reading: 0 Writing: 1 Waiting: 0
Optimizing Nginx Concurrency
ab -n 2000 -c 2000 http://192.168.88.5/
[root@proxy ~]# vim /usr/local/nginx/conf/nginx.conf
.. ..
worker_processes  2;                    //与CPU核心数量一致
events {
worker_connections 65535;        //每个worker最大并发连接数
}
.. ..
[root@proxy ~]# /usr/local/nginx/sbin/nginx -s reload
Optimize Linux kernel parameters (maximum number of files)
[root@proxy ~]# ulimit -a                        //查看所有属性值
[root@proxy ~]# ulimit -Hn 100000                //设置硬限制(临时规则)
[root@proxy ~]# ulimit -Sn 100000                //设置软限制(临时规则)
[root@proxy ~]# vim /etc/security/limits.conf
    .. ..
*               soft    nofile            100000
*               hard    nofile            100000
#该配置文件分4列,分别如下:
#用户或组    硬限制或软限制    需要限制的项目   限制的值
Increase packet header cache size
[root@proxy ~]# vim /usr/local/nginx/conf/nginx.conf
.. ..
http {
client_header_buffer_size    1k;        //默认请求包头信息的缓存
large_client_header_buffers  4 4k;        //大请求包头部信息的缓存个数与容量
.. ..
}
[root@proxy ~]# /usr/local/nginx/sbin/nginx -s reload
Define the cache time for static pages
[root@proxy ~]# vim /usr/local/nginx/conf/nginx.conf
server {
        listen       80;
        server_name  localhost;
        location / {
            root   html;
            index  index.html index.htm;
        }
location ~* \.(jpg|jpeg|gif|png|css|js|ico|xml)$ {
expires        30d;            //定义客户端缓存时间为30天
}
}
Session and cookies
Session: Stored on the server side, saving user name, login status and other information.
Cookies: issued by the server to the client and stored in a file on the client.
Modify the Nginx configuration file (modify the default home page and separate dynamic and static)
[root@web2 ~]# vim /usr/local/nginx/conf/nginx.conf
location / {
            root   html;
            index  index.php  index.html   index.htm;
        }
 location  ~  \.php$  {
            root           html;
            fastcgi_pass   127.0.0.1:9000;
            fastcgi_index  index.php;
           # fastcgi_param   SCRIPT_FILENAME  $document_root$fastcgi_script_name;
            include        fastcgi.conf;
        }
Tomcat deployment
[root@web1 ~]# yum -y install  java-1.8.0-openjdk                //安装JDK
[root@web1 ~]# yum -y install java-1.8.0-openjdk-headless        //安装JDK
[root@web1 ~]# java -version
heads - Install JDK header files, which are required when compiling and installing other software
Start the tomcat service
/usr/local/tomcat/bin/startup.sh
virtual host
[root@web1 ~]# vim /usr/local/tomcat/conf/server.xml
… …
<Host name="www.a.com" appBase="a" unpackWARS="true" autoDeploy="true">
</Host>
<Host name="www.b.com" appBase="b" unpackWARS="true" autoDeploy="true">
</Host>
Use Maven to deploy the website system
Install the maven tool and the java environment
[root@web1 ~]# tar -xf apache-maven-3.6.3-bin.tar.gz
[root@web1 ~]# mv apache-maven-3.6.3 /usr/local/maven
[root@web1 ~]# yum -y install java-1.8.0-openjdk
[root@web1 ~]# yum -y install java-devel
[root@web1 ~]# /usr/local/maven/bin/mvn -v
Modify the mirror address and add it under line 158
[root@web1 ~]# vim /usr/local/maven/conf/settings.xml
<mirror>
          <id>nexus-aliyun</id>
          <mirrorOf>*</mirrorOf>
          <name>Nexus aliyun</name>
          <url>http://maven.aliyun.com/nexus/content/groups/public</url>
</mirror>
Configure the database and package the project
[root@web1 ~]# yum install -y mariadb-server
[root@web1 ~]# systemctl start mariadb
[root@web1 ~]# cd CMS/
[root@web1 CMS]# cp src/main/resources/shishuocms.properties .
[root@web1 CMS]# mysql -uroot < sql/install.sql
[root@web1 CMS]# mysqladmin password
packaged items
[root@web1 CMS]# /usr/local/maven/bin/mvn clean packageOnline test
[root@web1 CMS]#cp target/shishuocms-2.0.1.war /usr/local/tomcat/webapps/ROOT.war
[root@web1 CMS]#/usr/local/tomcat/bin/startup.sh
Make nginx RPM package (rpmbuild)
Install rpm-build package, write SPEC configuration file, create new RPM package
[root@web1 ~]# yum -y install  rpm-build
[root@web1 ~]# rpmbuild -ba nginx.spec                //会报错,没有文件或目录
[root@web1 ~]# ls /root/rpmbuild                    //自动生成的目录结构
BUILD  BUILDROOT  RPMS  SOURCES  SPECS  SRPMS
Copy the source code software to the SOURCES directory
cp nginx-1.17.6.tar.gz /root/rpmbuild/SOURCES/Create and modify SPEC configuration files
[root@web1 ~]# vim /root/rpmbuild/SPECS/nginx.spec
Name:nginx                                        #源码包软件名称
Version:1.17.6                                    #源码包软件的版本号
Release:    10                                        #制作的RPM包版本号
Summary: Nginx is a web server software.            #RPM软件的概述
License:GPL                                        #软件的协议
URL:    www.test.com                                    #网址
Source0:nginx-1.17.6.tar.gz                        #源码包文件的全称
#BuildRequires:                                    #制作RPM时的依赖关系
#Requires:                                        #安装RPM时的依赖关系
%description
nginx [engine x] is an HTTP and reverse proxy server.    #软件的详细描述
%post
useradd nginx                               #非必需操作:安装后脚本(创建账户)
%prep
%setup -q                                #自动解压源码包,并cd进入目录
%build
./configure
make %{?_smp_mflags}
%install
make install DESTDIR=%{buildroot}
%files
%doc
/usr/local/nginx/*                    #对哪些文件与目录打包
%changelog
Use configuration files to create RPM packages\install dependent packages
[root@web1 ~]# yum -y install gcc pcre-devel openssl-devel[root@web1 ~]# rpmbuild -ba /root/rpmbuild/SPECS/nginx.spec
[root@web1 ~]# ls /root/rpmbuild/RPMS/x86_64/nginx-1.17.6-10.x86_64.rpm
[root@web1 ~]# yum install /root/rpmbuild/RPMS/x86_64/nginx-1.17.6-10.x86_64.rpm
[root@web1 ~]# rpm -qa |grep nginx
[root@web1 ~]# ls /usr/local/nginx/Write systemd Unit file
Which statements in the Unit file of systemd can control the process startup sequence
- After
- Before
cp /usr/lib/systemd/system/{crond.service,test.service}
vim /usr/lib/systemd/system/test.service
[Unit]
Description=my test script
After=time-sync.target
[Service]
ExecStart=/root/test.sh
ExecReload=/bin/kill -HUP $MAINPID
KillMode=process
[Install]
WantedBy=multi-user.target
Manage Nginx services with systemd
[root@web1 ~]# vim /usr/lib/systemd/system/nginx.service
[Unit]
Description=The Nginx HTTP Server        #描述信息
After=network.target remote-fs.target nss-lookup.target
[Service]
Type=forking
#仅启动一个主进程的服务为simple,需要启动若干子进程的服务为forking
ExecStart=/usr/local/nginx/sbin/nginx
ExecReload=/usr/local/nginx/sbin/nginx -s reload
ExecStop=/bin/kill -s QUIT ${MAINPID}
[Install]
WantedBy=multi-user.target