参照
https://paperswithcode.com/paper/dsfd-dual-shot-face-detector
https://github.com/Tencent/FaceDetection-DSFD
https://arxiv.org/pdf/1810.10220.pdf

0.環境
ubuntu16.04
python3.6
torch==0.4.1 # (cuda90)  @ https://download.pytorch.org/whl/cu90/torch-0.4.1-cp36-cp36m-linux_x86_64.whl
cycler==0.10.0
kiwisolver==1.3.1
matplotlib==3.3.3
numpy==1.19.4
opencv-python==4.4.0.46
Pillow==8.0.1
pyparsing==2.4.7
python-dateutil==2.8.1
PyYAML==5.3.1
scipy==1.2.0
six==1.15.0
torchvision==0.2.2
tqdm==4.19.9
Cython
ipython
1.変更
(1)ImportError:名前 'pa_sfd_match'をインポートできません
# FaceDetection-DSFD-master\layers\modules\multibox_loss.py line 13
from ..box_utils import (log_sum_exp, match, pa_sfd_match, refine_match,
                         sfd_match)
改为
from ..box_utils import (log_sum_exp, match, sfd_match, refine_match,
                         sfd_match)
(2)モデルのダウンロード
https://download.pytorch.org/models/resnet152-b121ed2d.pth
(3)データのダウンロード
http://shuoyang1213.me/WIDERFACE/
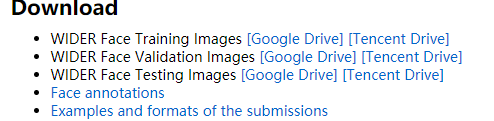
wget http://mmlab.ie.cuhk.edu.hk/projects/WIDERFace/support/bbx_annotation/wider_face_split.zipワイドフェイスディレクトリであるファイルディレクトリでそれらを解凍します。
widerface
    wider_face_split
    WIDER_test
    WIDER_train
    WIDER_val
(4)wideface_val.pyの変更
# about cuda device

# line 41 add
device = torch.device("cuda:0" if torch.cuda.is_available() else "cpu")

# line 230
net.load_state_dict(torch.load(args.trained_model, map_location='cpu'))
net.to(device)

# line 61-67
x = Variable(x.to(device), volatile=True)
#net.priorbox = PriorBoxLayer(width,height)
y = net(x)
detections = y.data
scale = torch.Tensor([width, height, width, height])

#改为:

with torch.no_grad():
        x = Variable(x.to(device))

        #net.priorbox = PriorBoxLayer(width,height)
        y = net(x)
        detections = y.data
        scale = torch.Tensor([width, height, width, height])
        torch.cuda.empty_cache()
2.テスト
2.1テスト
テストにはおそらく7〜8Gのビデオメモリが必要です。
CUDA_VISIBLE_DEVICES=0 python widerface_val.py --trained_model ./weights/WIDERFace_DSFD_RES152.pth --save_folder ./results/ --widerface_root ./data/widerface/ --cuda=True2.2テスト結果
Retinaface_Pytorchと同様に、テスト結果はファイルに書き込まれ、最後に、以前に使用されたRetinaface_Pytorchでの評価を通じていくつかのインジケーターがカウントされます。

3.評価
3.1評価
ここには対応するgt(マットファイル)がないため、SRNを参照し、対応するディレクトリ構造に従って対応するファイルをコピーして作成します。ディレクトリ構造は次のとおりです。
tools
    box_overlaps.c  #这四个文件复制自Pytorch_Retinaface
    box_overlaps.pyx
    evaluation.py
    setup.py
    widerface_eval #复制自SRN
    results #复制自本方法测试后结果,在根目录下
Evaluation.pyを変更します(287-288行目):
parser.add_argument('-p', '--pred', default="./results/")
parser.add_argument('-g', '--gt', default='./widerface_eval/ground_truth/')
cd ./tools
python setup.py build_ext --inplace3.2評価結果
cp -r results/ ./tools/
python evaluation.py