Hystrixを統合する
- 依存関係を追加
  <dependency>
            <groupId>org.springframework.cloud</groupId>
            <artifactId>spring-cloud-starter-netflix-hystrix</artifactId>
  </dependency>
- 注釈を開く
メインクラスに@EnableFeignClientsを追加します。
- 構成ファイルで開く(EおよびFバージョンはデフォルトで閉じています)
feign.hystrix.enabled = true
- テストコード
@RestController
@RequestMapping("/user")
public class UserController {

    @Autowired
    private UserApi userApi;

    @RequestMapping("/getUserById")
    public User getUserById(@RequestParam(name = "id") Integer id){
        System.out.println("调用方法");
        if(id==1){
            int i=1/0;
        }
        User user = new User();
        user.setId(1);
        user.setName("小明");
        return user;
    }

    @RequestMapping("/test")
    public User test(Integer id){
        User user = userApi.getUserById(id);
        return user;
    }
}
テスト:
httpを呼び出す:// localhost:8003 / user / test?Id = 2
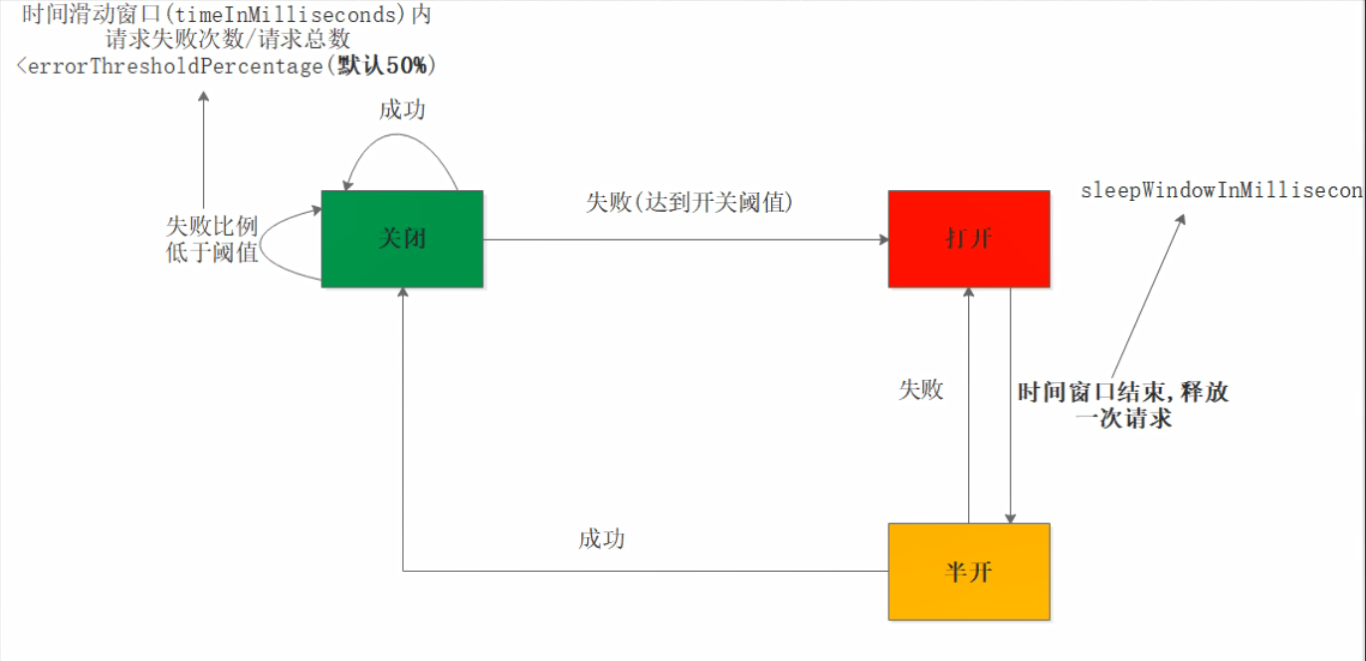
添付:
hystrix回路ブレーカーの3状態変換図
- 常用配置
//全局超时时间
ribbon.ReadTimeout=2000
ribbon.ConnectTimeout=2000

//一个rolling window内最小的请求数。如果设为20,那么当一个rolling window的时间内收到19个请求,即使请求都失败,也不会触发circuit break。默认20
hystrix.command.default.circuitBreaker.requestVolumeThreshold=20

//触发短路的时间值,当该值设为5000时,则当触发circuit break后的5000毫秒内都会拒绝request
hystrix.command.default.circuitBreaker.sleepWindowInMilliseconds