まず、準備作業
1.1)ソースパッケージ
MySQLの-5.6.26.tar.gz
1.2)解決の依存関係
[00:37:56 root@tuxing ~]#yum install -y cmake ncurses-devel
第二に、元のインストールMySQLの
1.1)特定のディレクトリ(/ usr / local / SRC)に解凍
ディレクトリに展開を
[午前11時42分54秒ルート@ tuxingソフトウェア] #tar XFのMySQL-5.6.26.tar.gz -C
は/ usr / local / SRC /。CD /usr/local/src/mysql-5.6.26
[mysqlの-5.6.26をtuxing @午前11時42分59秒ルート]#
1.2)mysqlユーザを作成します。
11:42:59 root@tuxing mysql-5.6.26]#useradd -M -s /sbin/nologin mysql
1.3)コンパイルmysqlの
[11:46:53 root@tuxing mysql-5.6.26]# cmake \
 -DCMAKE_INSTALL_PREFIX=/usr/local/mysql \
 -DMYSQL_UNIX_ADDR=/tmp/mysql.sock \
 -DDEFAULT_CHARSET=utf8 \
 -DDEFAULT_COLLATION=utf8_general_ci \
 -DWITH_EXTRA_CHARSETS=all \
 -DWITH_MYISAM_STORAGE_ENGINE=1 \
 -DWITH_INNOBASE_STORAGE_ENGINE=1 \
 -DWITH_MEMORY_STORAGE_ENGINE=1 \
 -DWITH_READLINE=1 \
 -DENABLED_LOCAL_INFILE=1 \
 -DMYSQL_DATADIR=/usr/local/mysql/data \
 -DMYSQL-USER=mysql
エラーの場合、2段階の再コンパイル
yum install -y git gcc gcc-c++
rm CMakeCache.txt
直接実行に戻ります
[11:46:53 root@tuxing mysql-5.6.26]#make -j 2 ; make install
//make过程有点长,我们耐心等待!
1.4)の設定mysqlの
[11:58:18 root@tuxing ~]#chown -R mysql:mysql /usr/local/mysql/   #属主属组更改
[11:59:10 root@tuxing ~]# cp /usr/local/mysql/support-files/my-default.cnf /etc/my.cnf
cp: overwrite ‘/etc/my.cnf’? y
[11:59:13 root@tuxing ~]#							#覆盖原配置文件
[11:59:13 root@tuxing ~]# cp /usr/local/mysql/support-files/mysql.server /etc/init.d/mysqld
					#启动脚本
[12:01:42 root@tuxing ~]#vi /etc/init.d/mysqld
basedir=/usr/local/mysql
datadir=/usr/local/mysql/data		#找到并添加
[12:03:29 root@tuxing ~]#chkconfig mysqld  on		#开机启动
第三に、データベースを初期化します
[12:05:12 root@tuxing ~]#/usr/local/mysql/scripts/mysql_install_db \
--defaults-file=/etc/my.cnf  \
--basedir=/usr/local/mysql/ \
--datadir=/usr/local/mysql/data/ \
--user=mysql
2は、それが成功を意味表示されているかどうかを確認する------------------------------ OK
[午前12時05分12秒ルート@ tuxing〜] #lsは/ usr / local / mysqlの/データ/#のテストのためのMySQLとチェック

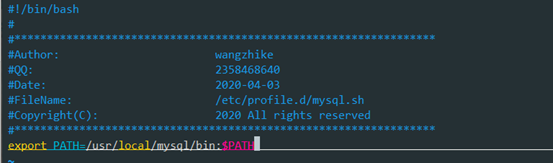
[午前12時07分15秒でルートをtuxing @〜] #vim /etc/profile.d/mysql .SH#環境変数の追加
フォローアップ操作を:
[12:10:11 root@tuxing ~]#source /etc/profile.d/mysql.sh		#source一下脚本
[12:11:42 root@tuxing ~]# service mysqld  start				#启动数据库成功
Starting MySQL. SUCCESS!
[12:11:58 root@tuxing ~]#systemctl start mysqld				#centos7.5中启动数据库
[ルート@午前12時12分28秒tuxingが
〜]##mysql_secure_installationは、初期のセキュリティ設定は、パスワードは自分のに応じて設定することができます(rootパスワード、123456を設定し)、他の人が直接入力することができます[tuxing @ 12時13分34秒ルートを〜] #mysql -uroot - p123456#ログ(OK)
Warning: Using a password on the command line interface can be insecure.
Welcome to the MySQL monitor.  Commands end with ; or \g.
Your MySQL connection id is 12
Server version: 5.6.26 Source distribution

Copyright (c) 2000, 2015, Oracle and/or its affiliates. All rights reserved.

Oracle is a registered trademark of Oracle Corporation and/or its
affiliates. Other names may be trademarks of their respective
owners.

Type 'help;' or '\h' for help. Type '\c' to clear the current input statement.

mysql>
これまでのところは、MySQLのLNMPは正常にインストール!!!
