About the implementation of one master, three slaves and three sentinels in redis
Preface
When it comes to database management systems, Redis is like that magic wizard that can make your applications faster and more reliable, just like magic. Today, we will enter the magical world of Redis and explore an interesting and powerful architecture - One Master, Three Slaves, Three Sentinels.
In this story, the masternode is our hero, it is the guardian of the data and is responsible for handling all write operations. The three slave nodes are loyal followers of the master node. They are always ready to learn everything about the master node and help when needed. The sentries are like the guardians of this magical world. They are responsible for monitoring and protecting the master node to ensure that it will never fall.
This story will lead us deep into the mystery of Redis and reveal the magic of the one master, three slaves and three sentinels architecture. Together, we'll explore how to configure, manage, and maintain this powerful architecture so that your applications can thrive in any situation.
So, get ready to enter the magical world of Redis and let’s start this fun and exciting adventure together!
[Explanation] It is built using docker-compose.
docker related
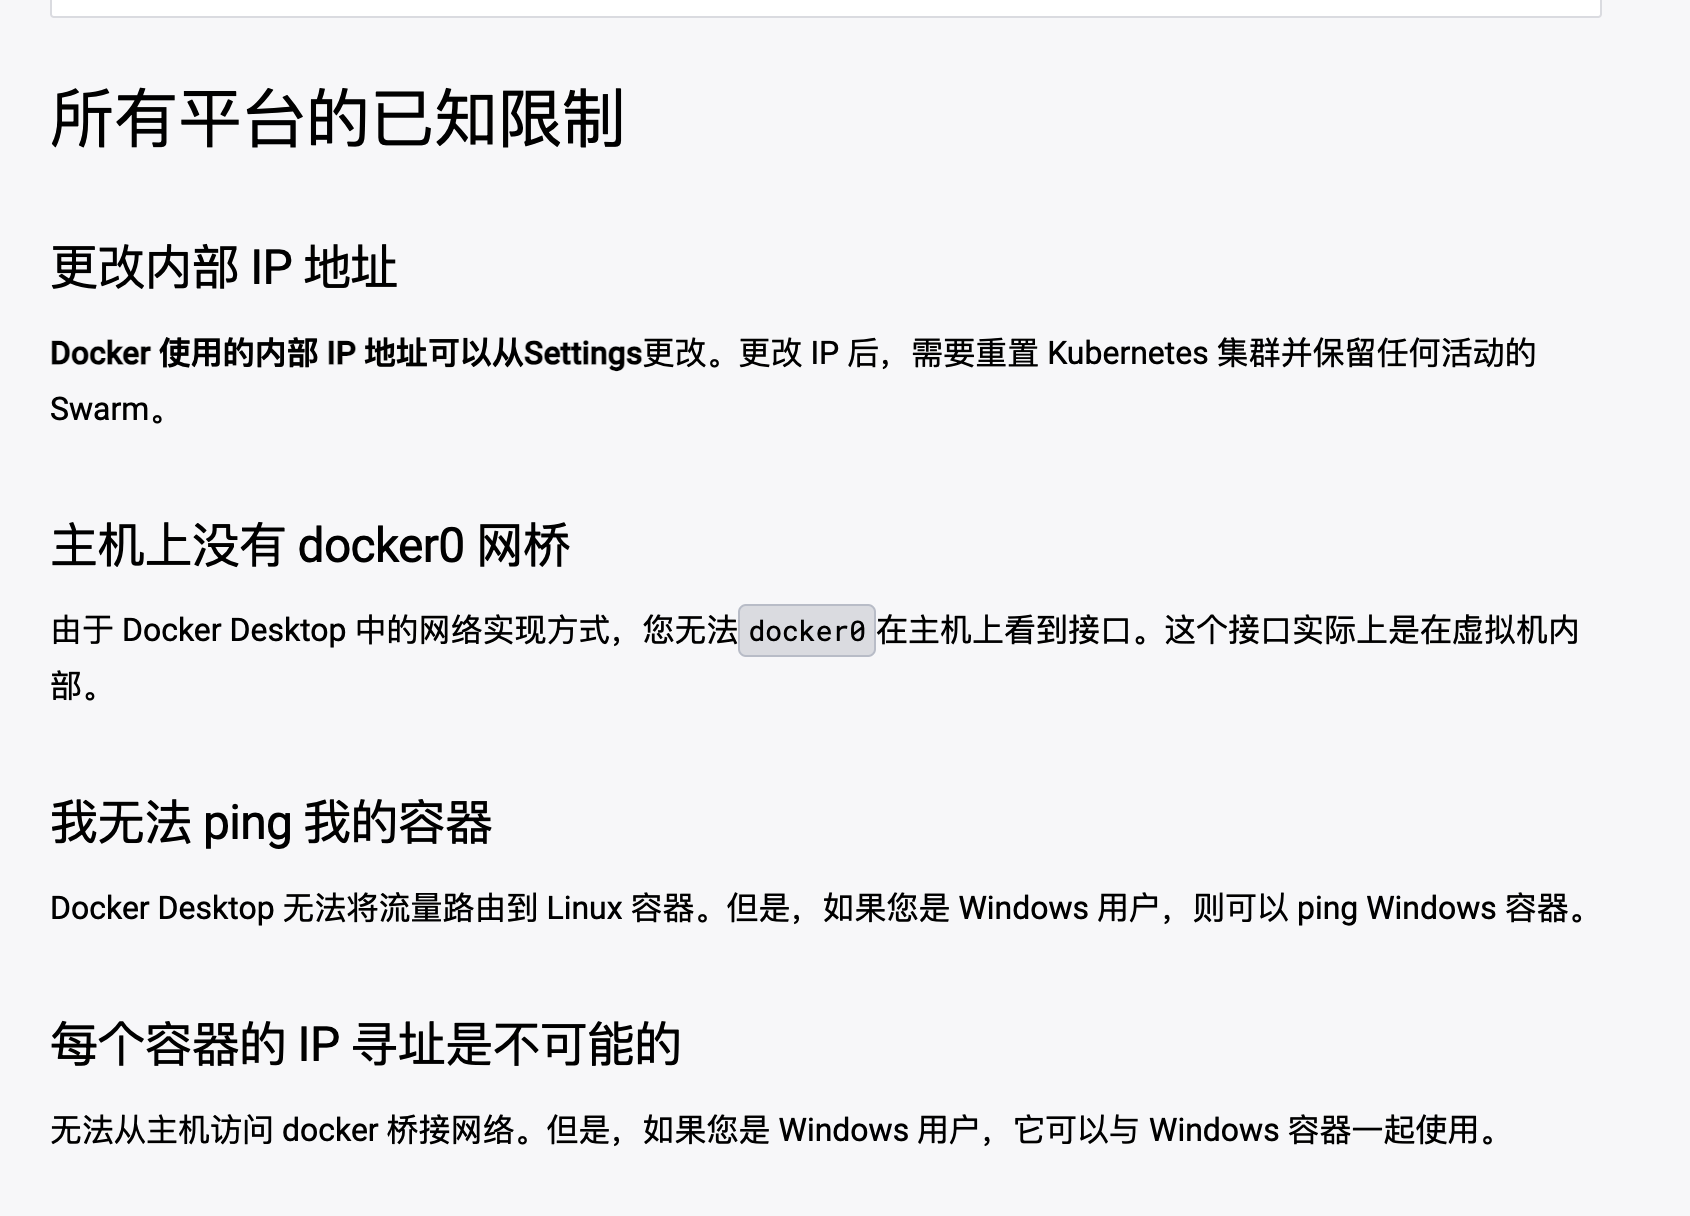
1️⃣: Regarding the virtual network docker0, for mac it relies ondocker desktop, however it does not have this docker0. So our host cannot directly access the container IP in docker.
https://docs.docker.com/desktop/networking/#i-cannot-ping-my-containers
2️⃣: Differences about network
- Bridge mode :
- Default network mode.
- Create a local virtual network so that containers can communicate with each other while being isolated from the host.
- Containers can communicate by container name or IP address.
- Containers can communicate with the outside world using mapped ports.
- Host mode :
- Containers share the host's network namespace.
- The container shares the IP address and port with the host and can directly use the host's network resources.
- There is less network isolation between the container and the host, but it can also lead to network conflicts or instability.
- None mode :
- The container does not join any network and is completely isolated from the external network.
- Suitable for some special use cases, such as certain isolated network tasks that need to be performed within the container.
- Overlay mode :
- Used to create a cross-host virtual network on multiple Docker hosts, such as in a cluster environment.
- Communication can be established between containers on different hosts, even if the containers are on different hosts.
- Macvlan mode :
- Allows containers to be assigned a MAC address corresponding to the host's network interface.
- Containers can have their own MAC addresses, just like actual physical machines.
- Bridge-Network mode :
- Create connected containers on a user-defined Docker network.
- Users can control communication and isolation between containers by setting network options.
[Warning] Even if we create a bridged network here, the container and the host cannot communicate with each other, but it can be done under centos. I also tried using host mode here, but it still didn’t work. I finally found that in host mode, it asked The host is the IP in docker desktop, that is, 127.0.0.1 is relative to docker desktop rather than your host
docker-compose.yml
version: '3'

services:
  # Redis 主节点配置
  redis-master:
    image: myredis:latest
    container_name: redis-master
    ports:
      - "6399:6379" # 将主节点的6379端口映射到宿主机的6379端口
    command: redis-server --appendonly yes --save 900 1 --save 300 10 --save 60 10000
    volumes:
      - ./data/master:/data # 将主节点的数据持久化到宿主机的./data/master目录
    networks:
      - redis-network

  # Redis 从节点1配置
  redis-slave-1:
    image: myredis:latest
    container_name: redis-slave-1
    ports:
      - "6398:6379"
    command: redis-server --slaveof redis-master 6379 # 设置从节点1为主节点的从节点
    volumes:
      - ./data/slave-1:/data # 将从节点1的数据持久化到宿主机的./data/slave-1目录
    networks:
      - redis-network
    extra_hosts:
      - "host.docker.internal:192.168.1.75"  # 设置自定义网络别名

  # Redis 从节点2配置
  redis-slave-2:
    image: myredis:latest
    container_name: redis-slave-2
    ports:
      - "6397:6379"
    command: redis-server --slaveof redis-master 6379 # 设置从节点2为主节点的从节点
    volumes:
      - ./data/slave-2:/data # 将从节点2的数据持久化到宿主机的./data/slave-2目录
    networks:
      - redis-network
    extra_hosts:
      - "host.docker.internal:192.168.1.75"  # 设置自定义网络别名

  # Redis 从节点3配置
  redis-slave-3:
    image: myredis:latest
    container_name: redis-slave-3
    ports:
      - "6396:6379"
    command: redis-server --slaveof redis-master 6379  # 设置从节点3为主节点的从节点
    volumes:
      - ./data/slave-3:/data # 将从节点3的数据持久化到宿主机的./data/slave-3目录
    networks:
      - redis-network
    extra_hosts:
      - "host.docker.internal:192.168.1.75"  # 设置自定义网络别名

  # Redis 哨兵配置
  sentinel-1:
    image: myredis:latest
    container_name: redis-sentinel-1
    ports:
      - "26379:26379"
    command: redis-sentinel /sentinel.conf # 启动哨兵服务并加载sentinel.conf配置
    volumes:
      - ./sentinel.conf:/sentinel.conf # 将哨兵的配置文件挂载到容器中
      - ./redis.conf:/redis.conf # 添加 Redis 配置文件挂载
      - ./sentinel-logs-1:/var/log # 挂载哨兵的日志目录
    depends_on:
      - redis-master
      - redis-slave-1
      - redis-slave-2
      - redis-slave-3
    networks:
      - redis-network

  # Redis 哨兵配置
  sentinel-2:
    image: myredis:latest
    container_name: redis-sentinel-2
    ports:
      - "26378:26379"
    command: redis-sentinel /sentinel.conf # 启动哨兵服务并加载sentinel.conf配置
    volumes:
      - ./sentinel.conf:/sentinel.conf # 将哨兵的配置文件挂载到容器中
      - ./redis.conf:/redis.conf # 添加 Redis 配置文件挂载
      - ./sentinel-logs-2:/var/log # 挂载哨兵的日志目录
    depends_on:
      - redis-master
      - redis-slave-1
      - redis-slave-2
      - redis-slave-3
    networks:
      - redis-network
  # Redis 哨兵配置
  sentinel-3:
    image: myredis:latest
    container_name: redis-sentinel-3
    command: redis-sentinel /sentinel.conf # 启动哨兵服务并加载sentinel.conf配置
    volumes:
      - ./sentinel.conf:/sentinel.conf # 将哨兵的配置文件挂载到容器中
      - ./redis.conf:/redis.conf # 添加 Redis 配置文件挂载
      - ./sentinel-logs-3:/var/log # 挂载哨兵的日志目录
    depends_on:
      - redis-master
      - redis-slave-1
      - redis-slave-2
      - redis-slave-3
    networks:
      - redis-network
networks:
  redis-network:
    driver: bridge
[Explanation] If you want to use host mode, you can delete networks directly, and then add the port specified by port to the command in each configuration, as shown below

sentinel.conf
# 哨兵监控的主节点名称,后面的参数2代表的是quorum,表示需要两个哨兵的时候才可以进行故障转移
sentinel monitor mymaster 127.0.0.1 6399 2

# 哨兵配置文件的名称
sentinel config-epoch mymaster 0

# 哨兵当前的配置版本号
sentinel leader-epoch mymaster 0

# 选举超时时间
sentinel down-after-milliseconds mymaster 5000

# 故障判定下线阈值和判定上线阈值
sentinel failover-timeout mymaster 10000
sentinel parallel-syncs mymaster 1
Let’s focus on explaining the above statement
redis-server --appendonly yes --save 900 1 --save 300 10 --save 60 10000
--appendonly yes:
This parameter is used to enable the "Append Only File" (AOF) mechanism in Redis's persistence mode.
When AOF is enabled, Redis appends each write operation to a file so that these operations can be replayed when the server is restarted for data persistence.
--save 900 1 --save 300 10 --save 60 10000:
This parameter is used to configure the conditions of Redis data snapshot.
Each --save argument specifies a time in seconds and a threshold for the number of keys to change.
Within the specified time, if the number of changed keys reaches the specified threshold, Redis will trigger a data snapshot to save the current data in memory to disk.
In this example, there are three --save parameters:
If at least 1 key is changed within 900 seconds, a data snapshot is triggered.
If at least 10 keys are changed within 300 seconds, a data snapshot is triggered.
A data snapshot is triggered if at least 10,000 keys are changed within 60 seconds.
[Explanation] Why are AOF and RDB used here? In fact, you can only use the default RDB mode, but if you want to achieve better persistence, you can use AOF+RDB, that is, directly add AOF to the two RDBs.
sentinel monitor mymaster 127.0.0.1 6399 2
sentinel: Indicates that this is the configuration of Redis Sentinel.monitor mymaster: This is a command that tells Sentinel to monitor a master node named "mymaster".127.0.0.1: This is the IP address or hostname of the master node. Here, it is set to 127.0.0.1, meaning the master node is running locally (same machine).6399: This is the port number of the master node. In this example, the master node's Redis service listens on port 6399.2: This is a configuration parameter for fault judgment, indicating how many Sentinel consents are needed when Sentinel determines whether the master node is down. If Sentinel finds that the primary node is failed, at least one2Sentinel agrees that the primary node is down, and then a failover operation will be performed.
[Note] The 2 here means that at least 2 Sentinels agree. The general sentinels are 3, 5, and 7.