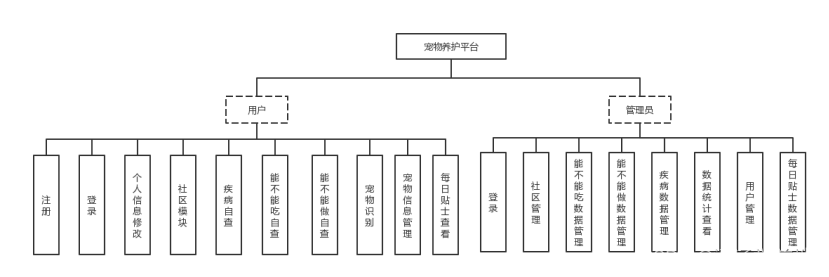
1. Function description
The pet care platform has two roles: user and administrator. Users can register an account on this platform. After logging in to the platform, they can communicate in the community module. They can self-examine whether pets can eat and do pets, and can identify pets. , pet disease self-examination, personal information modification, pet information management and other operations.
Administrators can log in to the backend management system to manage the community module, manage daily tips data, whether they can eat or not, whether they can do food, and disease information, manage the status of users using the platform, and can also view the statistics of this platform. .
The overall system structure module of this platform is shown in Figure 1-1.
2. Main technologies
The server side of this platform is developed using Node's Express framework, and the front end uses Vue3.0+Element-Plus. The data is stored in the relational database Mysql. In order to simplify database management and reduce management costs, Navicat Premium 15 is used to operate the database during development. The Vue front-end uses Axios to request the back-end server interface. The specific configuration of the application is as follows:
Development system: window10
development environment configuration: node.js
development tools: Visual Studio Code, Navicat Premium 15
Database: MySQL
development language: html+css+js, Node.js (Express framework)
front-end construction Tools: vite
framework and plug-ins: Vue 3.0, Element-Plus, Echarts, multer, jsonwebtoken, vuex
3. System functions
3.1 Software installation and configuration
The front-end and back-end systems of this platform are developed on Visual Studio Code. The project is built using vue. The packaging tool is vite. At the same time, node.js needs to be installed and environment variables configured, and then npm install is used to install and download the dependencies required for the project.
The backend of this platform uses Express of Node.js as the development language. For development in Visual Studio Code, you also need to install node.js and configure environment variables. Then visit http://localhost:3000 in the browser to access the corresponding interface.
3.2 How to use user modules
(1) After the user enters the platform, he must first log in. If he does not have an account, he can choose to register. After successful registration, he can jump directly to the login page. See Figure 3-1 for user login and Figure 3-2 for user registration.
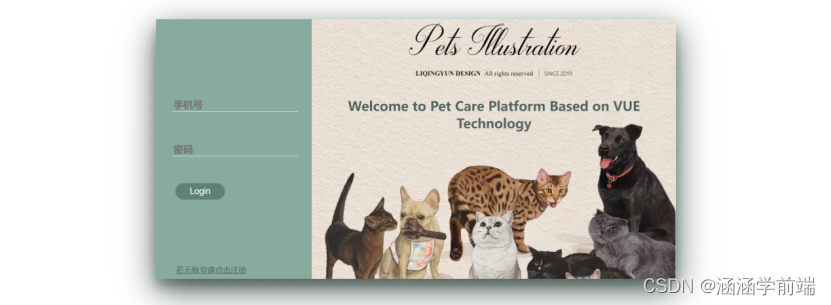 Figure 3-1 User login
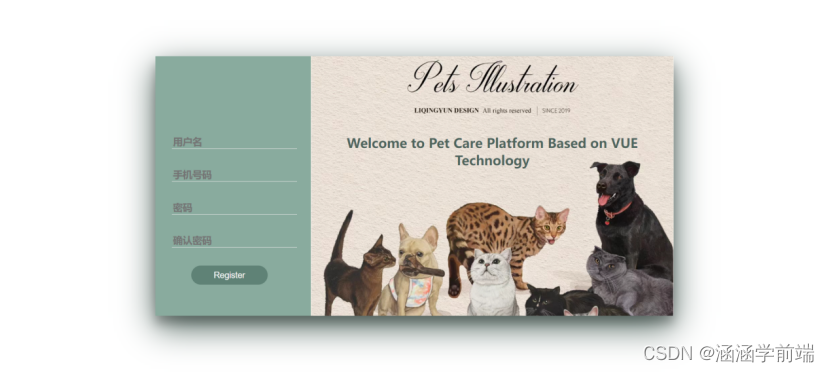
Figure 3-2 User registration
(2) After successful login, jump directly to the home page, where you can see carousel images, daily tips and contact information. See Figure 3-3 for the homepage.
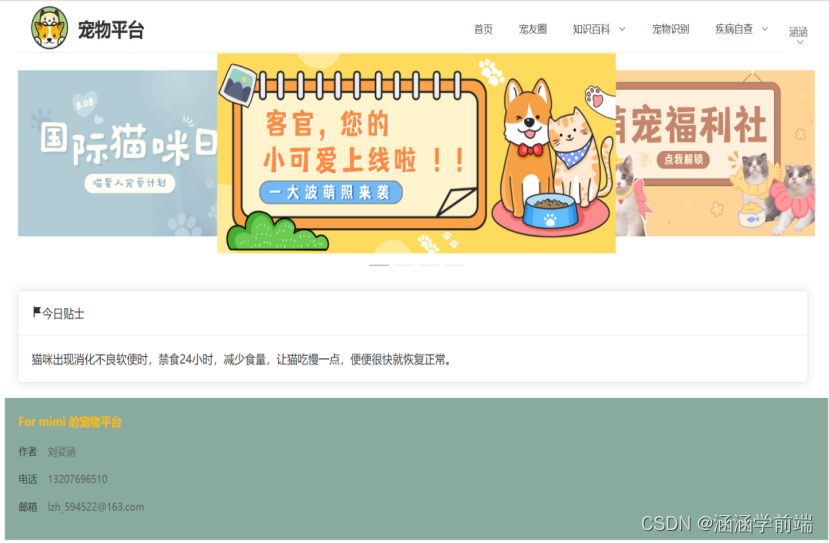
Figure 3-3 Home page
(3) Click "Friends Circle" in the upper navigation bar to enter the community module. The community module is shown in Figure 3-4. You
can directly browse the posts posted by users. You can select the type of post in area 1. In area 2, you can select the category of posts you want to publish. From top to bottom, they are talk, question, and grass note. After selecting the type of post you want to publish, click, and the pop-up box shown in Figure 3-5 will pop up. Write and publish posts in this area.

Figure 3-4 Community module
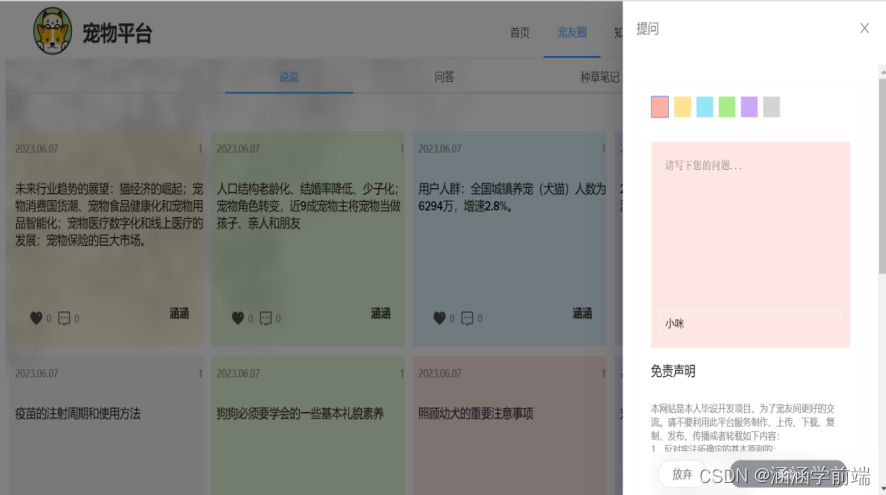
Figure 3-5 Post a post
. Click the heart in the lower left corner of the post to like the post. After selecting the post, a pop-up box as shown in 3-6 will pop up. Users can comment in area 1; if this If the post is posted by this user, area 2 will be displayed, where the post can be deleted; area 3 can be used to report the post.

Figure 3-6 Post comments, reports, and deletions
(4) Click "Knowledge Encyclopedia - Can it be eaten" in the upper navigation bar, select whether cats can eat it or whether dogs can eat it, and then you can enter the self-checking module of whether it can be eaten. The self-examination module for not eating is shown in Figure 3-7. You can search by food name at the top of the page. After clicking on the food you want to view, the food information will be displayed in the pop-up box, as shown in Figure 3-8.
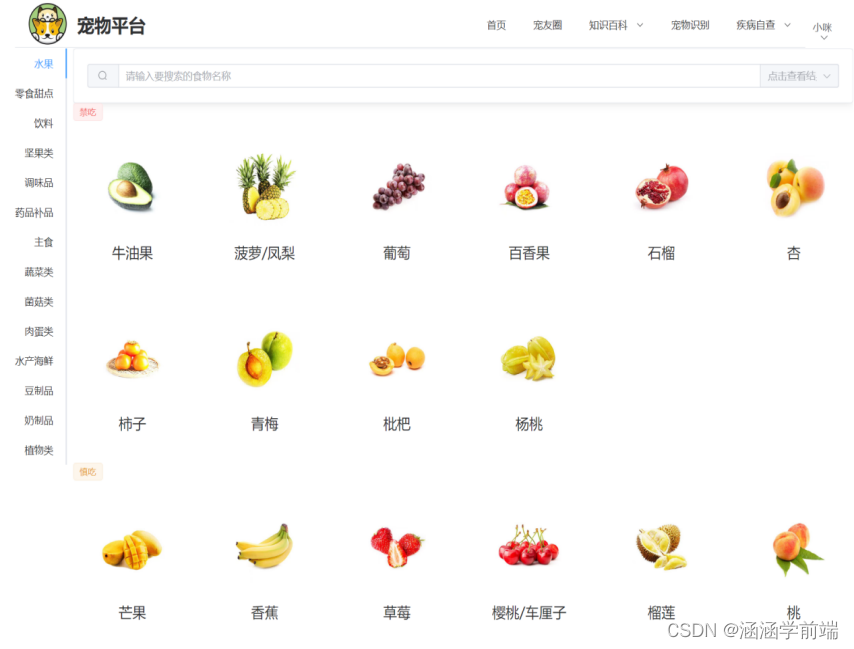
Figure 3-7 Self-examination on whether you can eat food
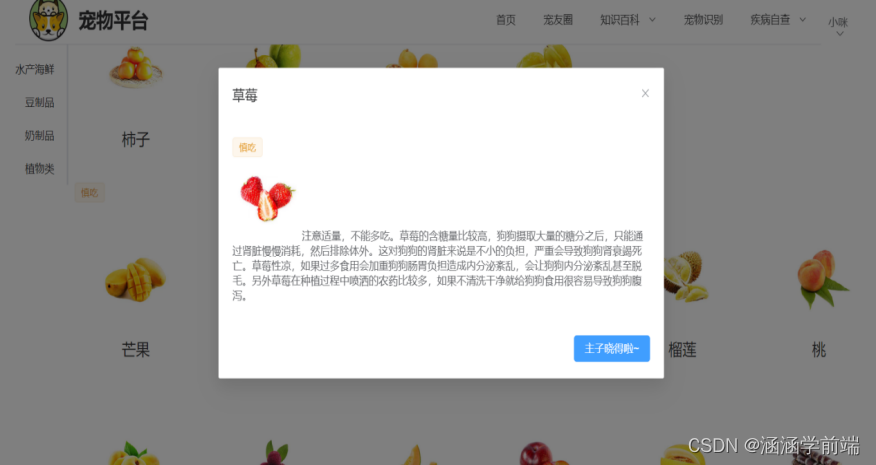 Figure 3-8 Details of whether you can eat food
(5) Click "Knowledge Encyclopedia - Can it be done" in the upper navigation bar, and select whether cats can do it or whether dogs can do it, and then you can enter Whether the self-examination module can be used and whether the self-examination module can be used are classified as shown in Figure 3-9. Click the corresponding module to display whether the data can be used, as shown in Figures 3-10 and 3-11.
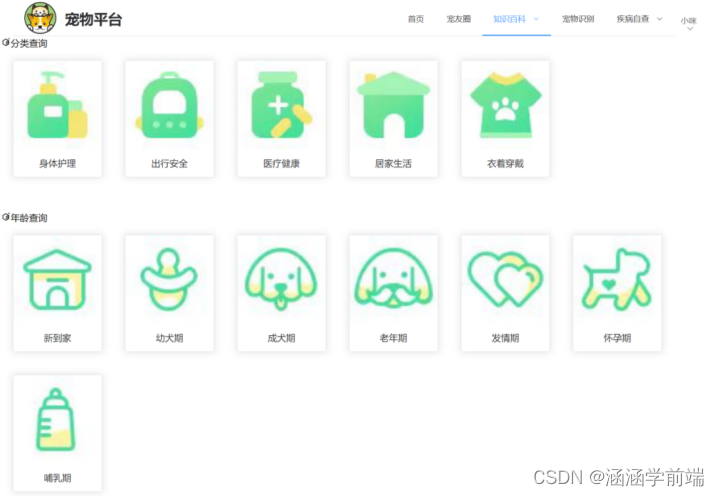

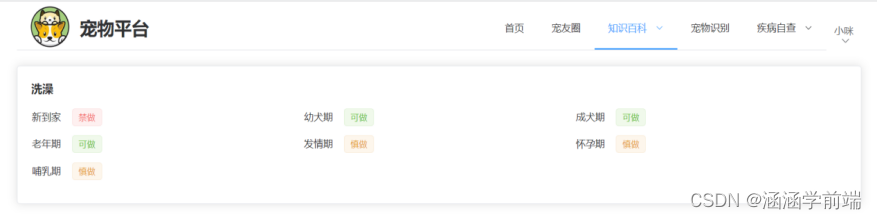 Figure 3-11 Can list data be displayed?
(6) Click "Pet Recognition" in the upper navigation bar, upload the pet image to be identified on the left, and get the recognition results on the right. See Figure 3-12.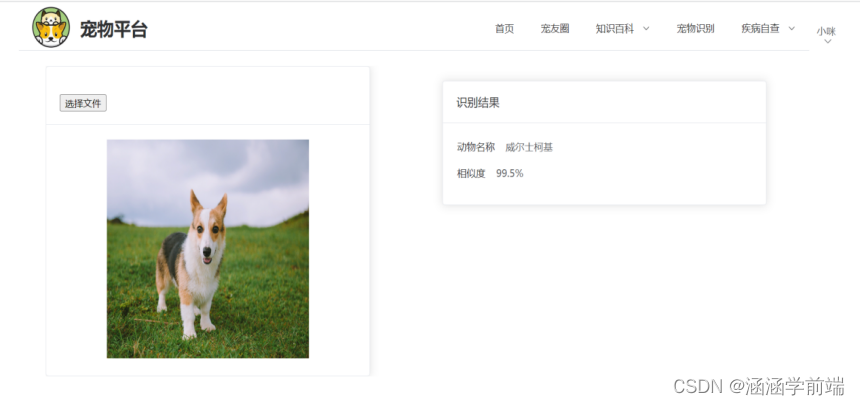
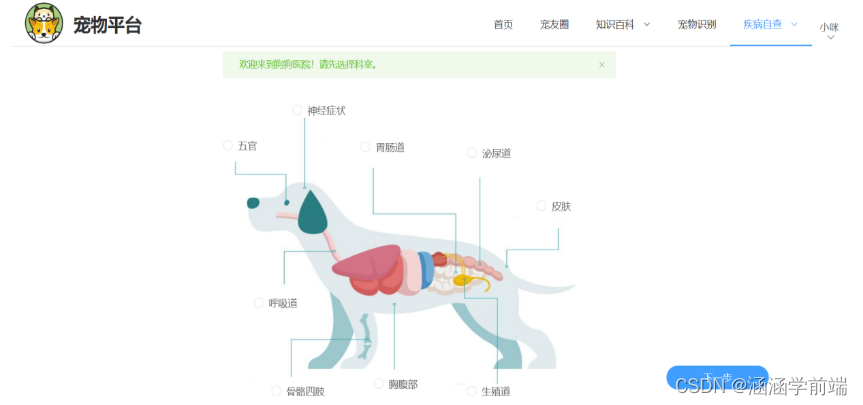
(7) Click "Disease Self-examination" in the upper navigation bar, you can choose a cat hospital or a dog hospital, and follow the prompts to complete the disease self-examination. The disease module is shown in Figure 3-13 and Figure 3-14.
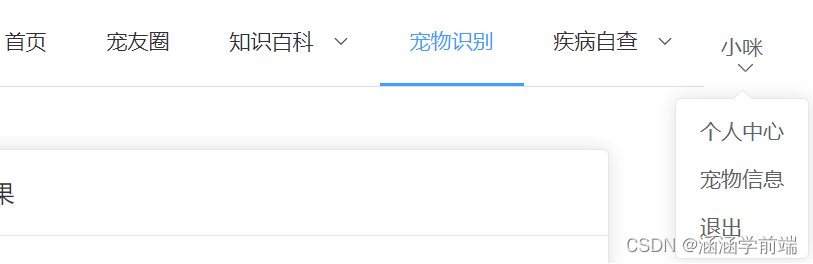
(8) Hover the mouse over the user name on the far right side of the upper navigation bar, and you can choose to modify personal information, manage pet information, or log out. See Figure 3-15.
3.3 How to use the administrator module
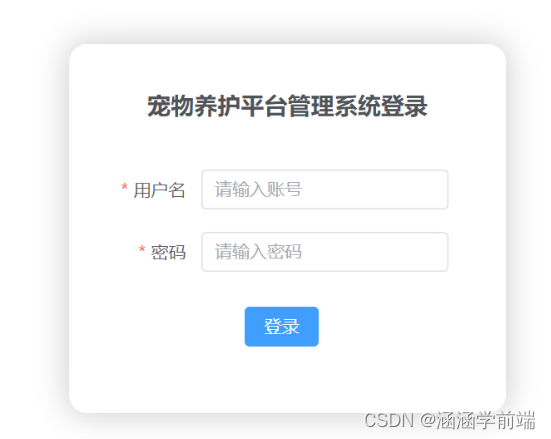
(1) The administrator needs to log in before entering the management platform. The administrator login is shown in Figure 3-16.
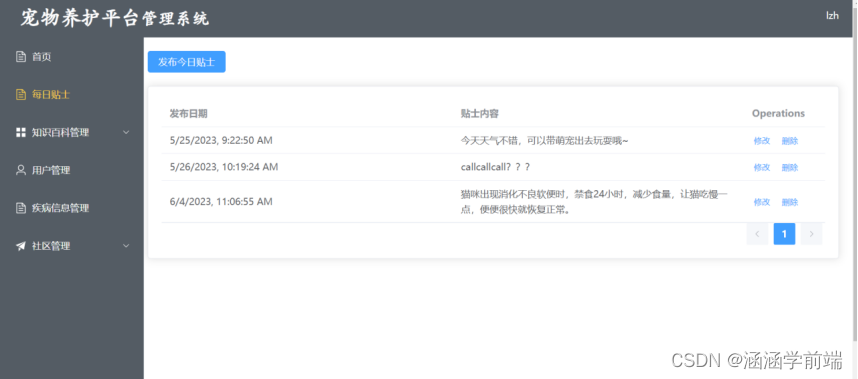
 (2) Administrators can add, delete, modify, and view tips in the daily tips module, see Figure 3-17.
(3) After logging in, the administrator first enters the home page to view data statistics, as shown in Figure 3-18. 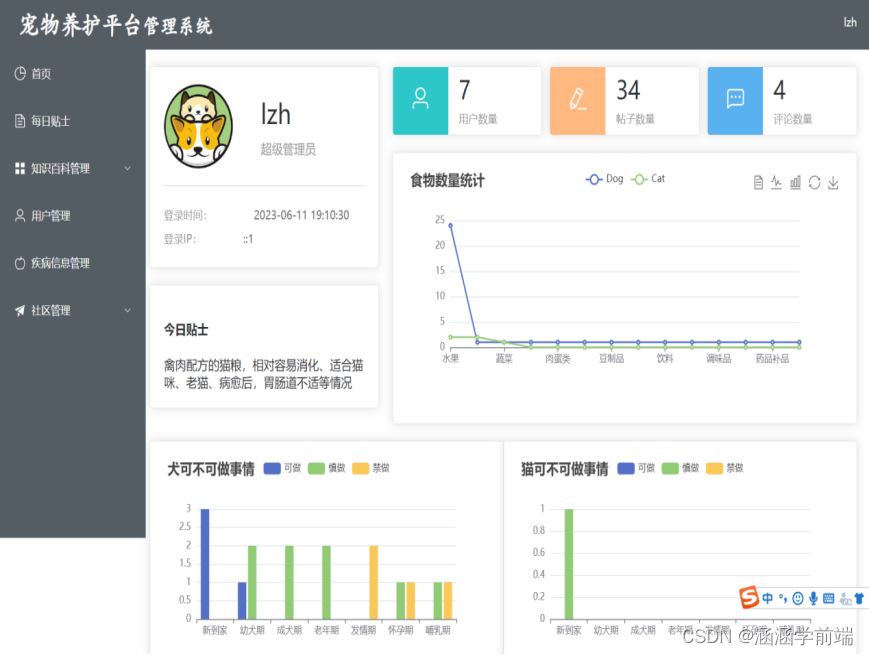
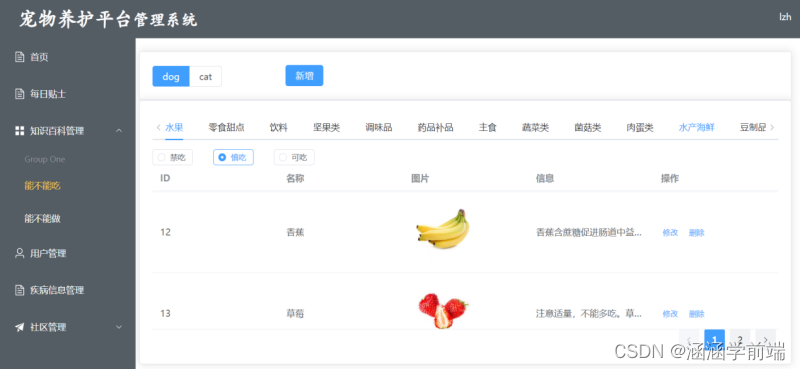
(4) Administrators can add, delete, modify, and view food in the Knowledge Encyclopedia Management-Can I Eat module, see Figure 3-19.
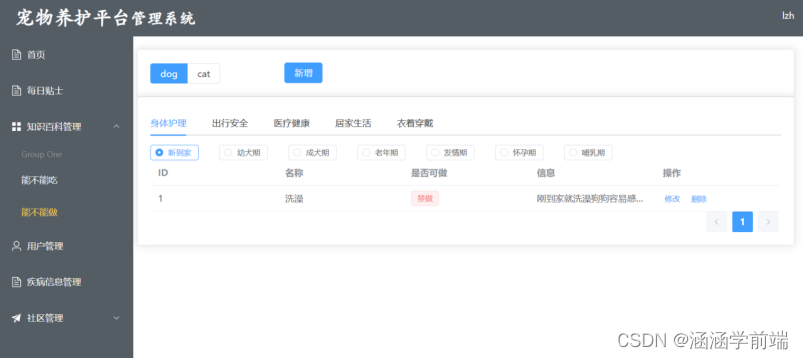
(5) Administrators can add, delete, modify, and view things in the Knowledge Encyclopedia Management-Can it be done module, see Figure 3-20.
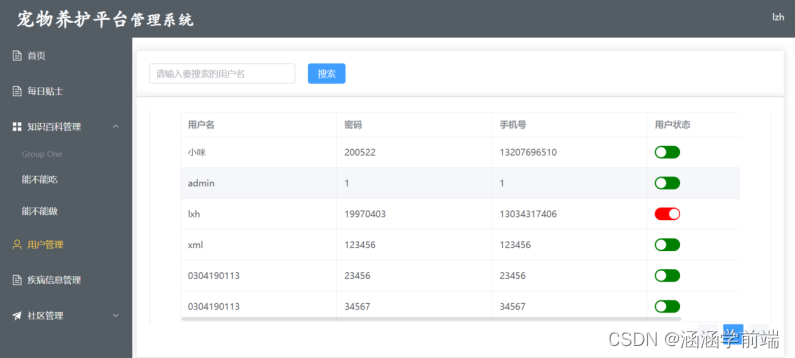
 (6) Administrators can view and modify users’ status in the user management module, see Figure 3-21.
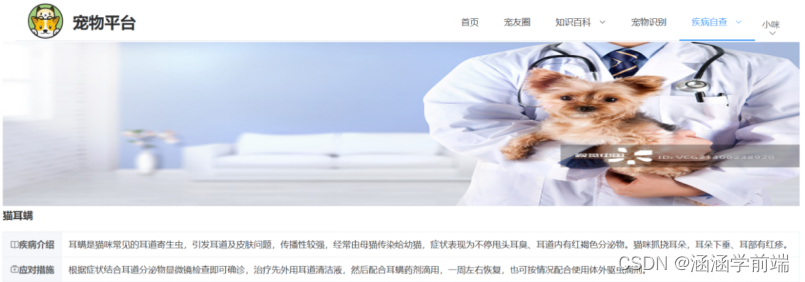
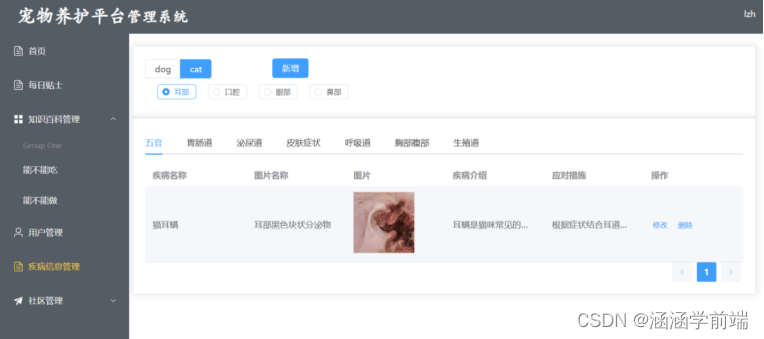
(7) Administrators can add, delete, modify, and view disease information in the disease information management module, see Figure 3-22.
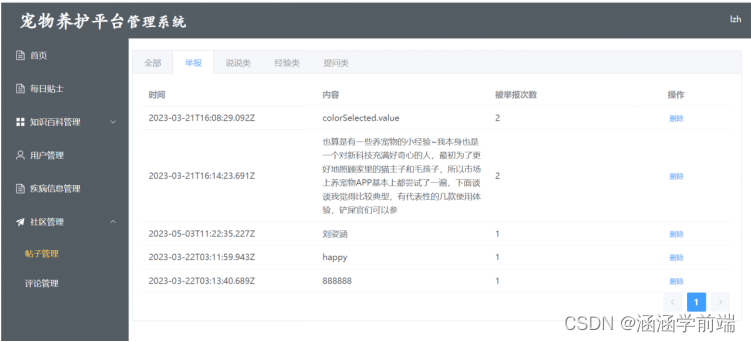
 (8) Administrators can delete and view post information in the community management-post management module, see Figure 3-23.
(9) Administrators can delete and view comment information in the community management-comment management module, see Figure 3-24.

4. End
This article ends here. Your valuable comments are welcome! !