Whenever there is a project in progress, the test needs to be unit tested. It is quite troublesome to manually switch the production and test environments every time, switch various push, statistics and third-party accounts. At the same time, it also needs to temporarily store the code and switch deep branches. Too cumbersome. At this time, if the project configuration is automatically packaged, these problems can be solved. Let's take a look at the Jenkins configuration process.
1. Download Jenkins
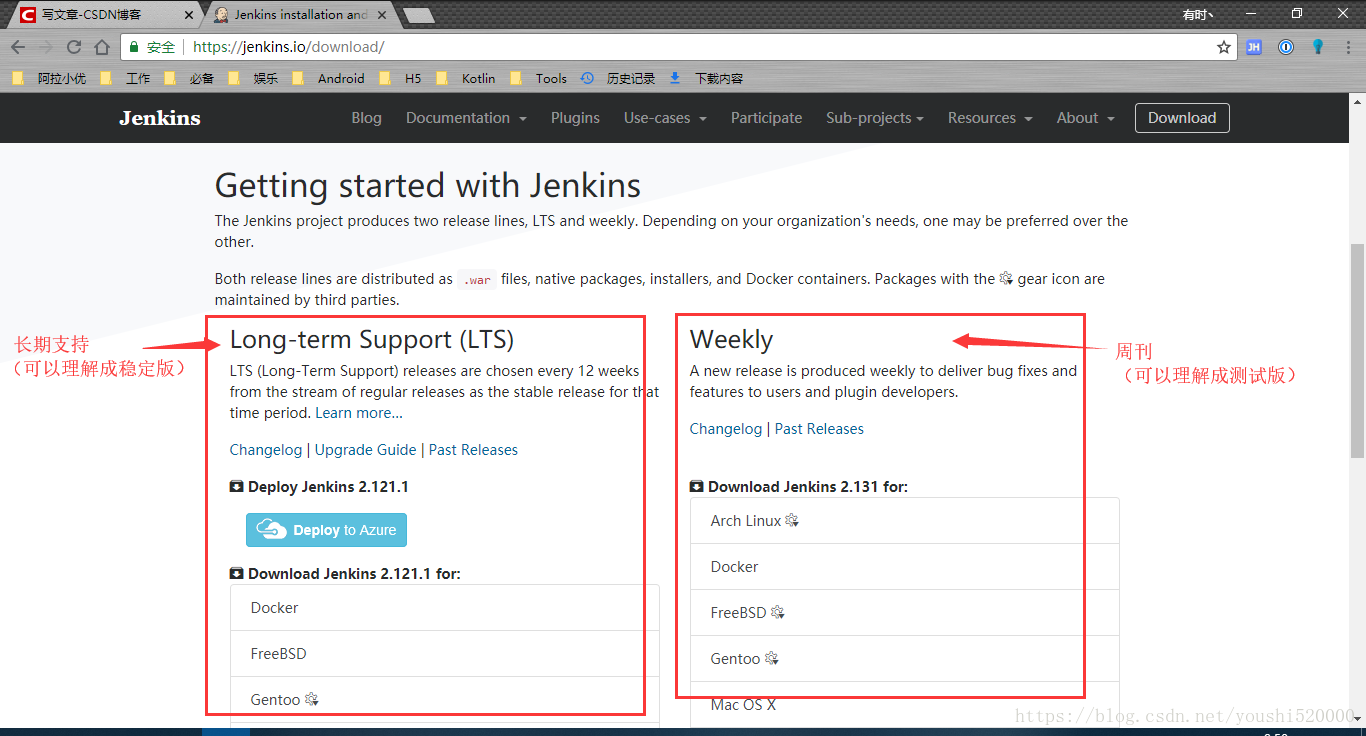
Jenkins official website download address: https://jenkins.io/download/ , select the version of your computer that corresponds to your operating system
2.Install Jenkins
Just install it directly after downloading, and then take the next step. After installing your default browser, a window link will automatically pop up: http://localhost:8080
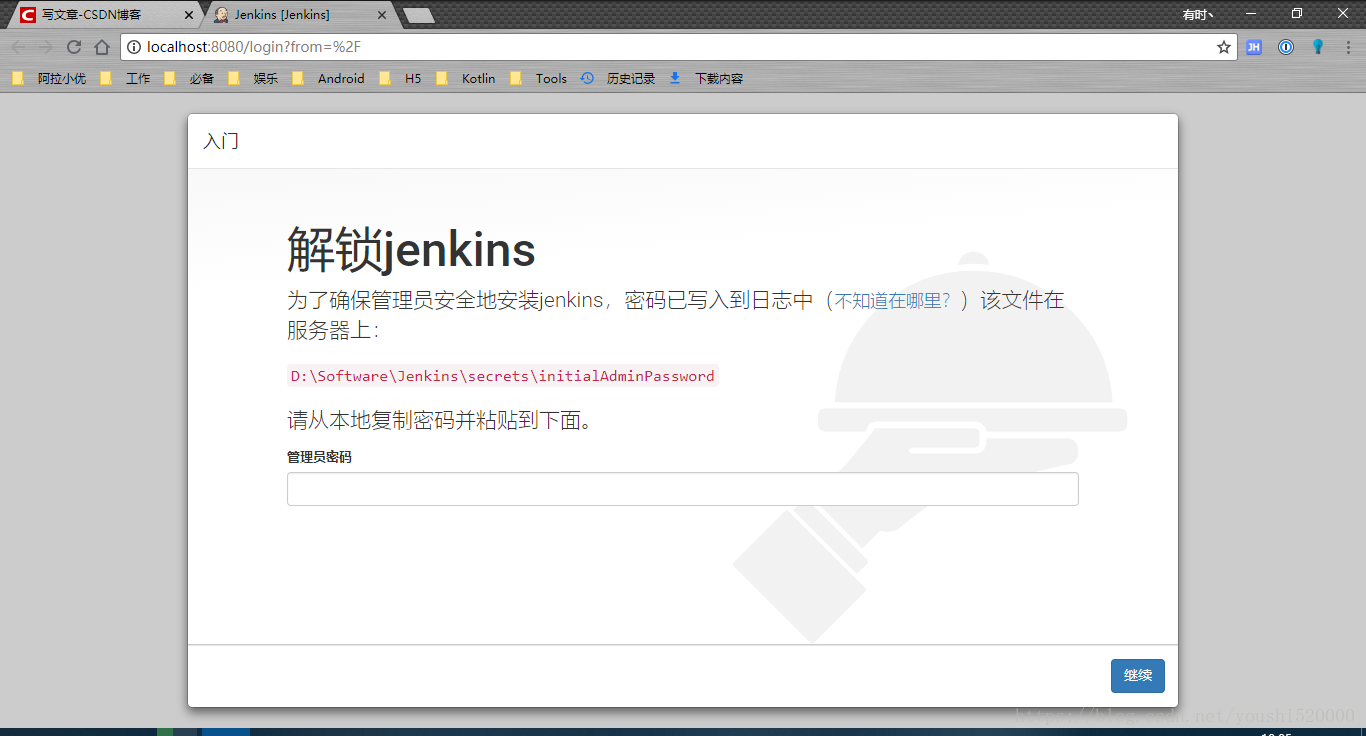
As shown in the picture, the path is given, so there is no need to say more. Find the corresponding file and copy and paste the password inside. continue.
Install the plugin. We only use 2 plug-ins, just choose to install them. Find Gradle and Git, check them and install them. The relevant dependent plug-ins will be installed automatically.
I won’t take screenshots in the following steps, as they are not necessary.
You will then be asked to create an administrator account, and just choose to continue using admin.
Continue, let you configure the path, just skip it.
Ready to use.
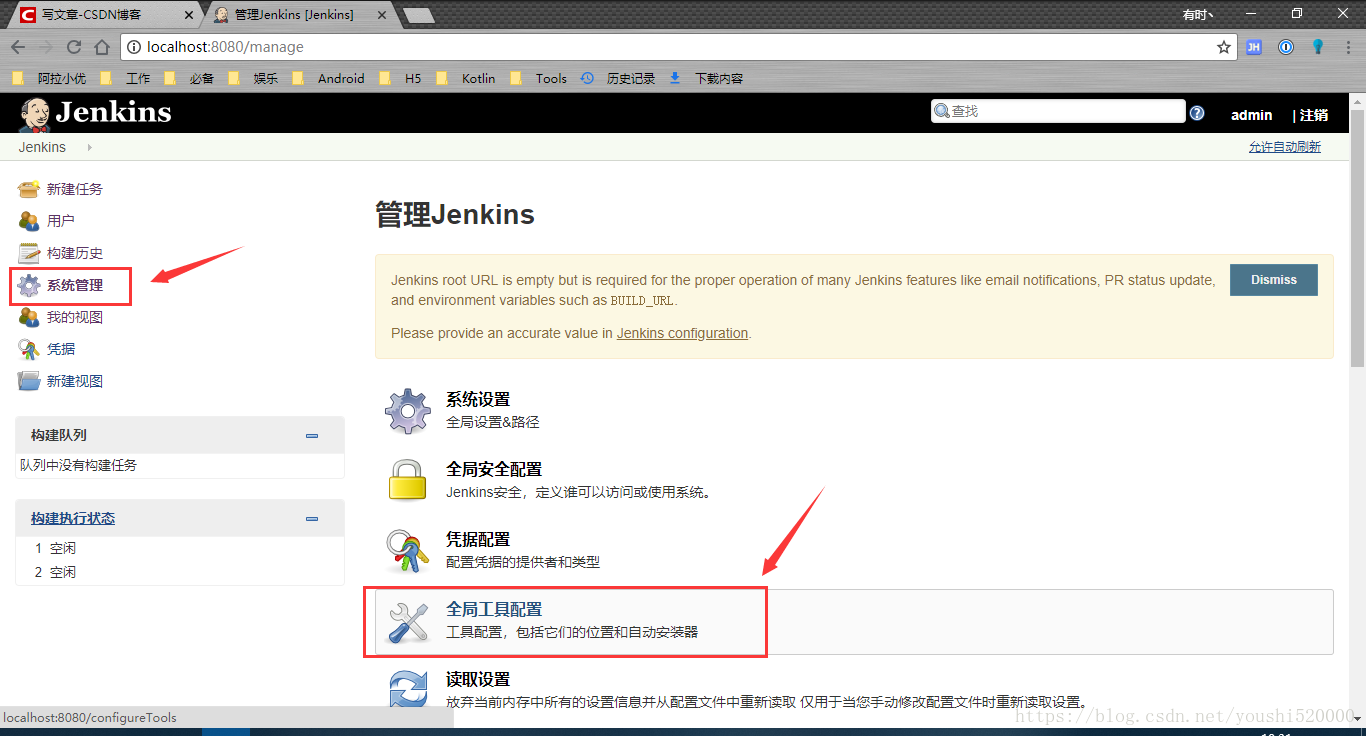
Note: If you do not install the required Gradle and Git plug-ins in the above place where plug-ins are installed, you can also enter the Jenkins environment page and select [System Management] - [Manage Plug-ins] - [Optional Plug-ins], and then find/search for the corresponding Plug-in installation.
Special note: Here is a local configuration try. On the server, you must create an account, configure the path, and install other required plug-ins balabala.
3. Configure Jenkins
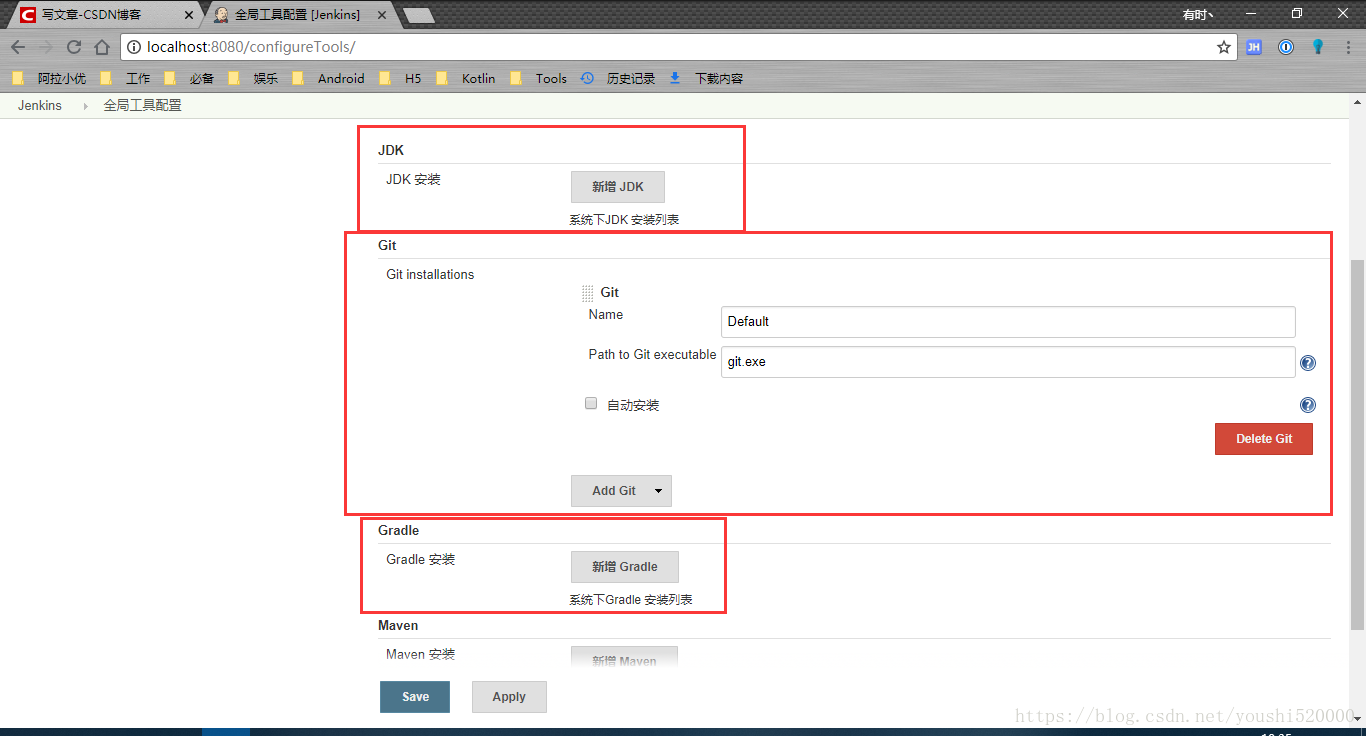
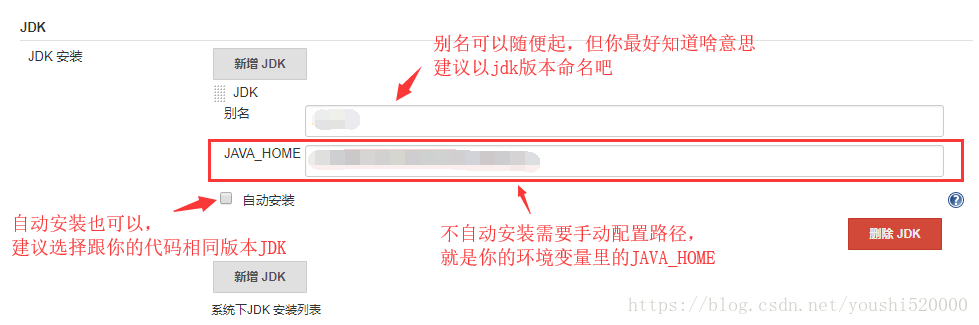
My JDK path was not standardized when it was originally installed. It was coded to prevent misleading.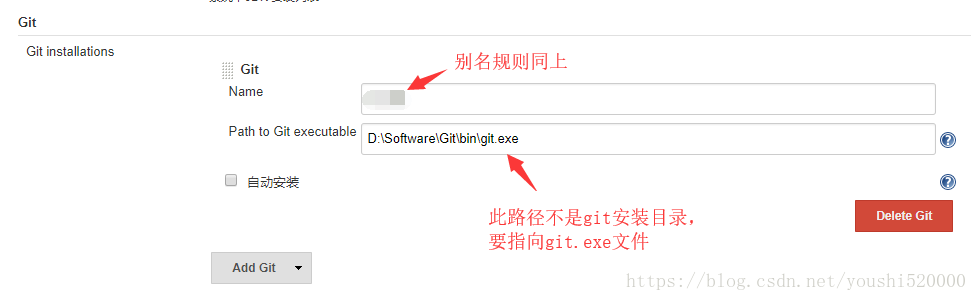
It seems that Git cannot be installed automatically, and it seems that the default version can be used without modification. If you are interested, you can try it.
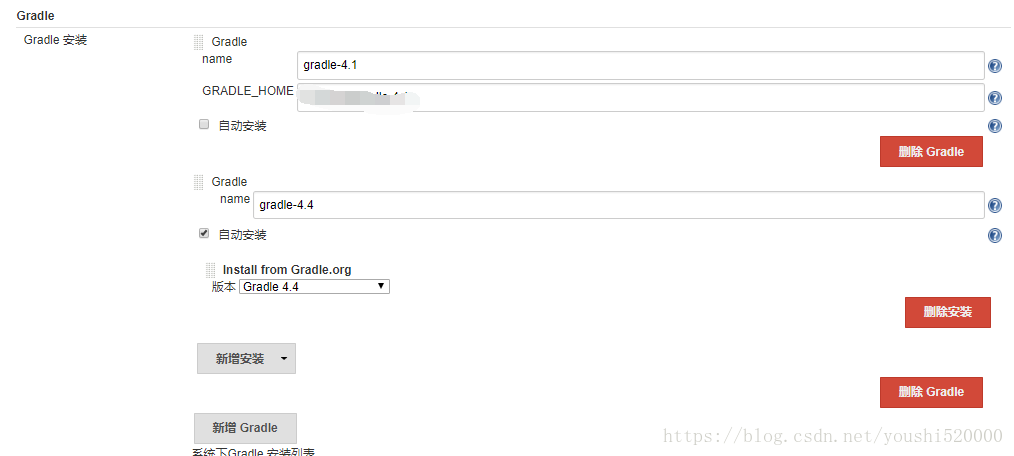
Gradle configuration is the same as above, there is nothing much to say.划重点 -- Android SDK需要另行配置,见下图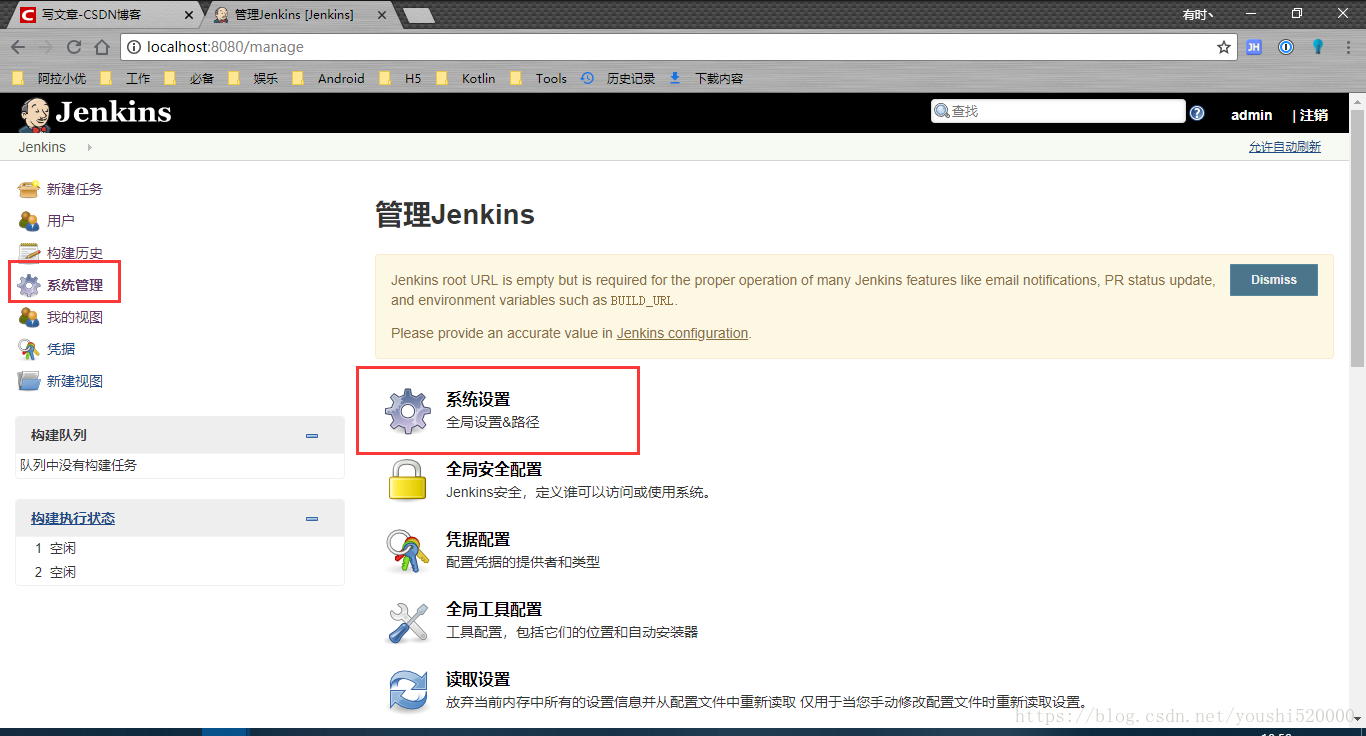
[System Management] - [System Settings] - [Global Properties] - [Environment Variables], find the corresponding figure, add the environment variable, the key is "ANDROID_HOME", and the value points to the SDK directory.
Above, the configuration is completed.

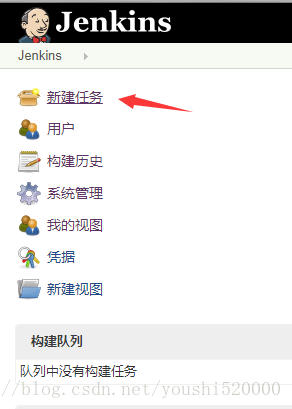
4. Create a new task and configure it
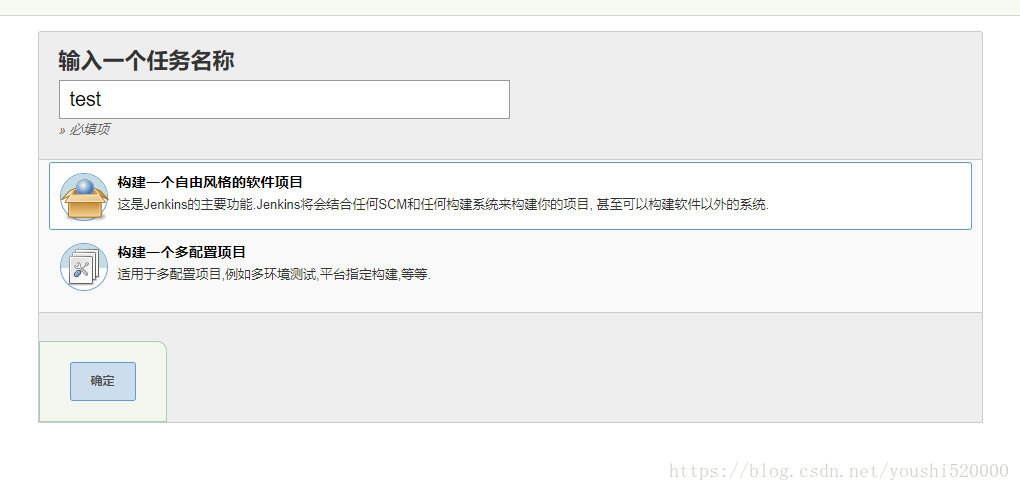
Select Freestyle and OK.
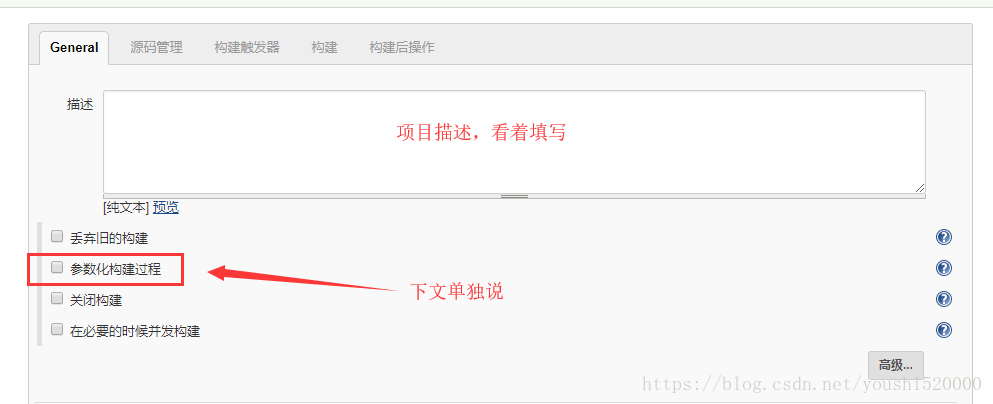
In the basic information, click Advanced in the lower right corner and there will be "Use a custom workspace". If you check it, you can specify the directory. If you don't check it, it will default to the "workspace" folder in the Jenkins installation directory.
Select Git for source code management, and fill in the URL of your project. If there is no certification, an error will be reported. Click "Add" circled in the picture, and the following picture will pop up:
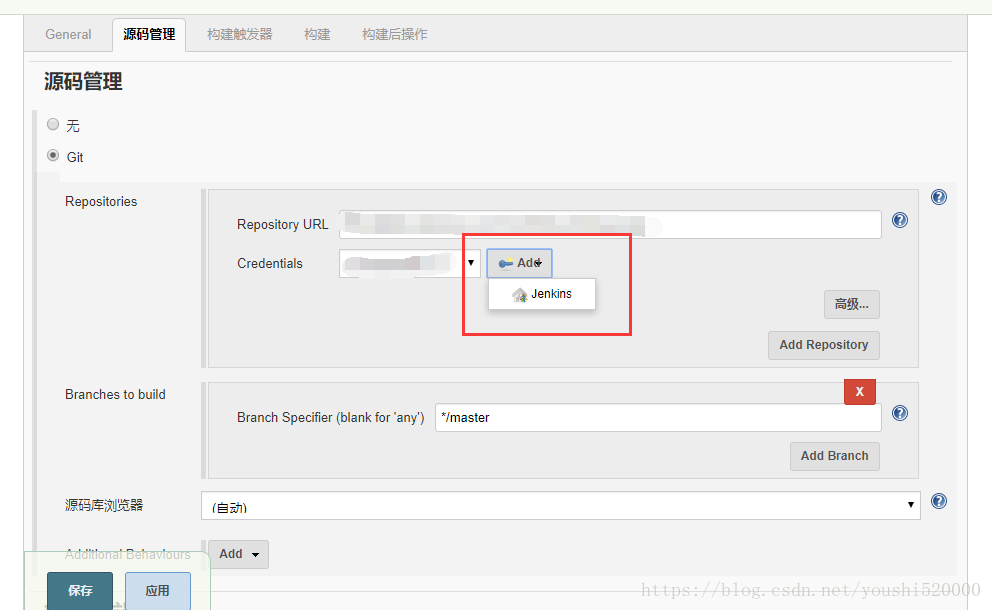
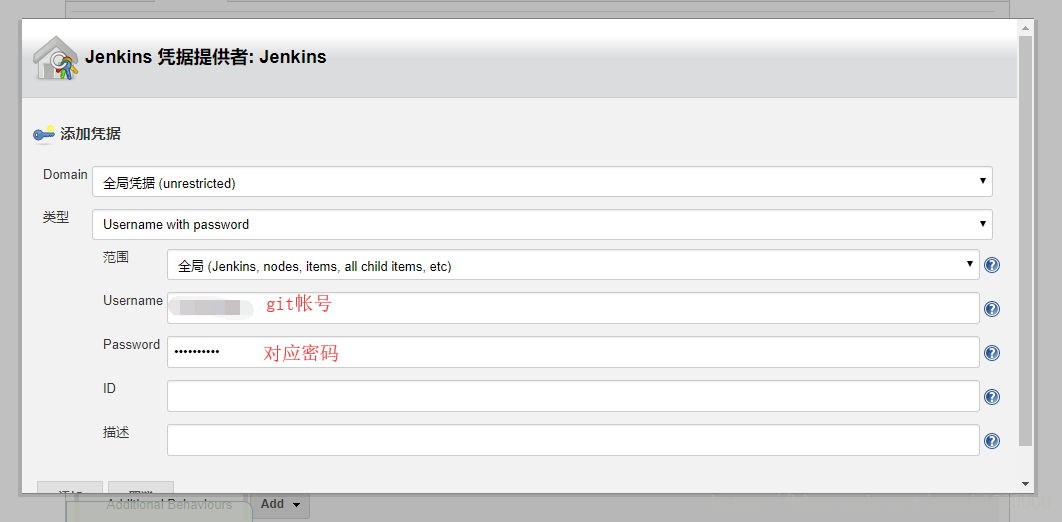
After adding the certificate, pull down and select the corresponding certificate. If it is correct, no error will be reported, and the checkout branch will be displayed below. The default master branch, you can specify a branch according to the situation.
Leave the build trigger alone.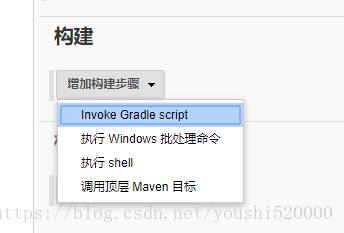
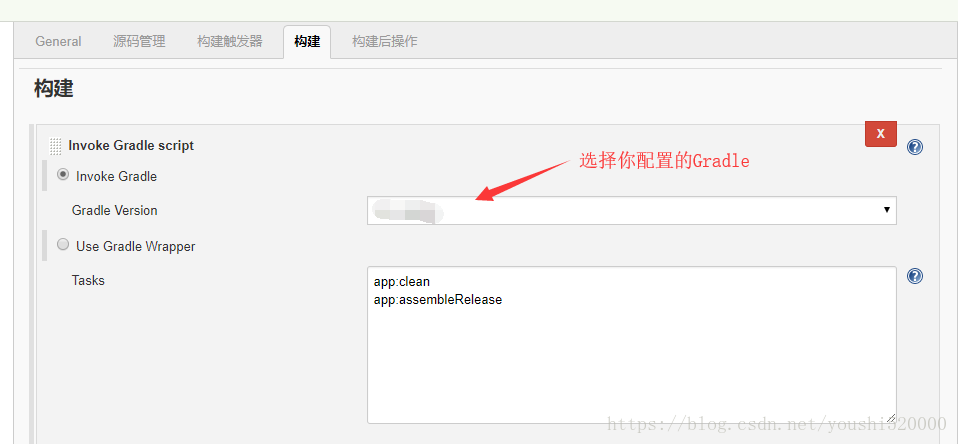
Tasks are statements for build execution, usually "app:clean app:assembleRelease", clean first and then build.
After construction, the operation depends on the requirements, and automatic uploading of apk to Dandelion/fir, email notification, etc. can be achieved.
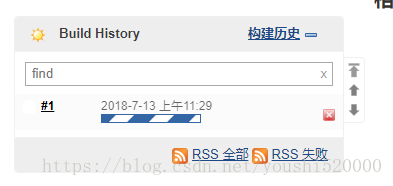
5.Build
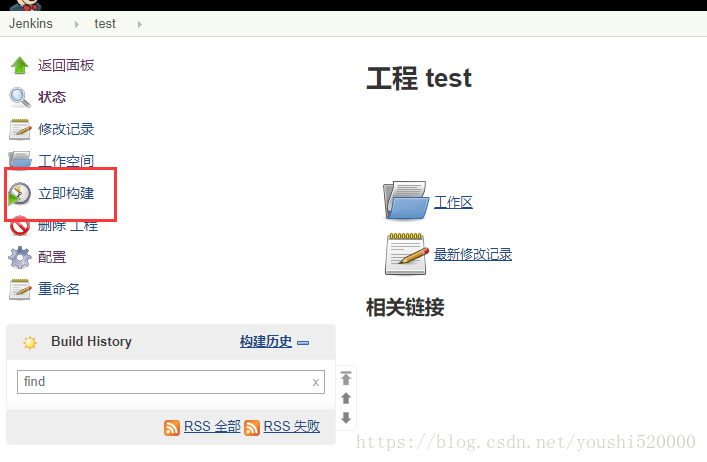
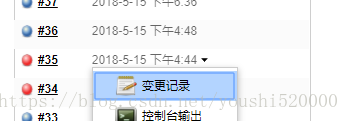
After clicking Build Now, the progress bar shown below will appear.
Blue is normal and the build is successful. Red indicates that the build failed. There is a downward arrow on the right side of the mouse movement. Click to expand the options and click on the console output to view errors.
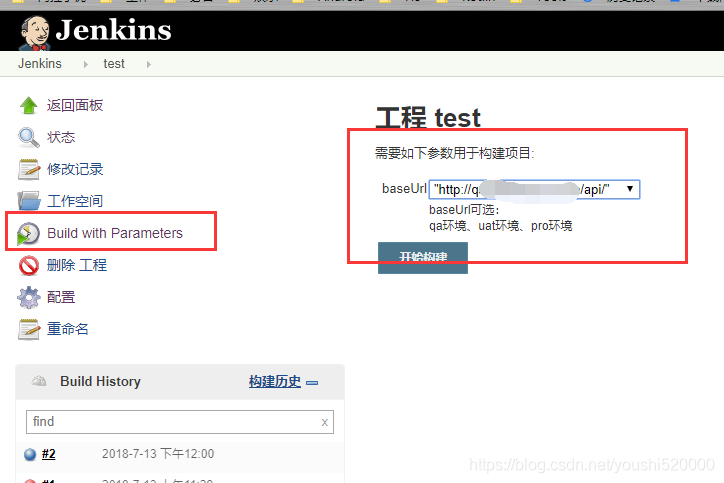
6. Parametric construction
Optional parameters are available when building, so that packages with different parameters can be produced. For example, different baseUrl.
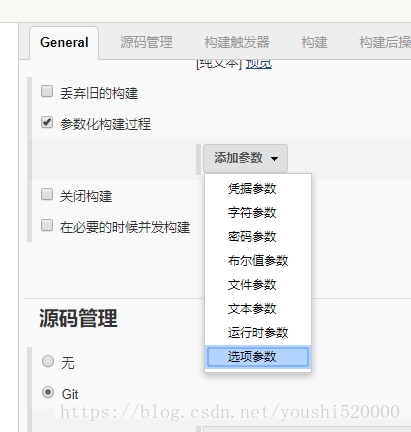
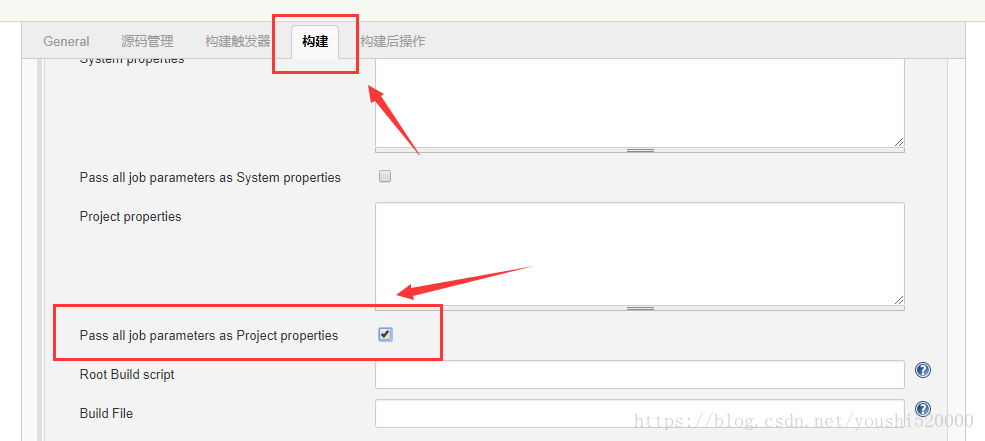
[Add parameters] - [Option parameters], or you want to use some parameters.
The parameterized build is configured, and the parameters need to be mapped to the code during build, as shown below:
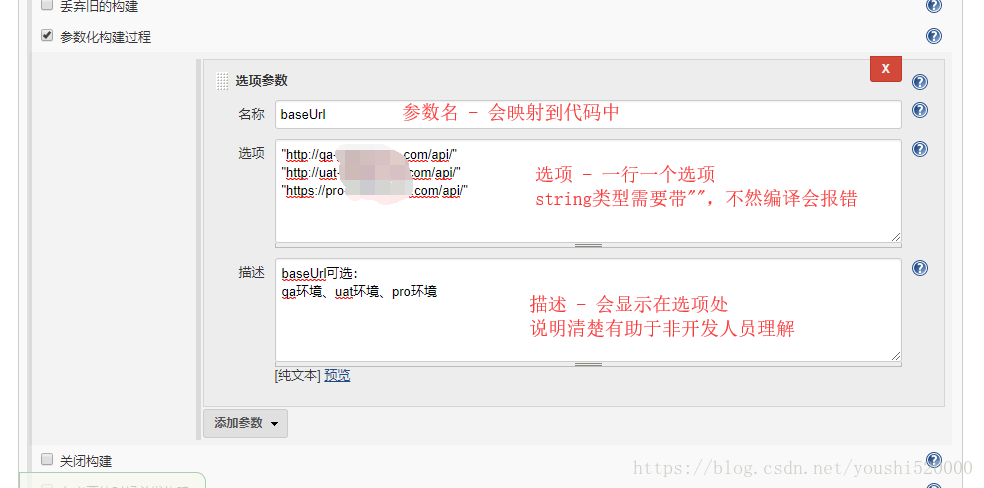
Above, the parameterized build configuration on Jenkins is completed. We also need to receive this parameter in our code.
The parameters will be mapped to gradle.propertiesthe corresponding parameter names in the file. We first define a parameter in the file and assign a default value:
baseUrl = "http://qa-xxxxxx.com/api/"Then build.gradleget that parameter in and add to BuildConfig.java:
......
android {
	......
    defaultConfig {
	    ......
        buildConfigField "String", "baseUrl", baseUrl
    }
	......
}
......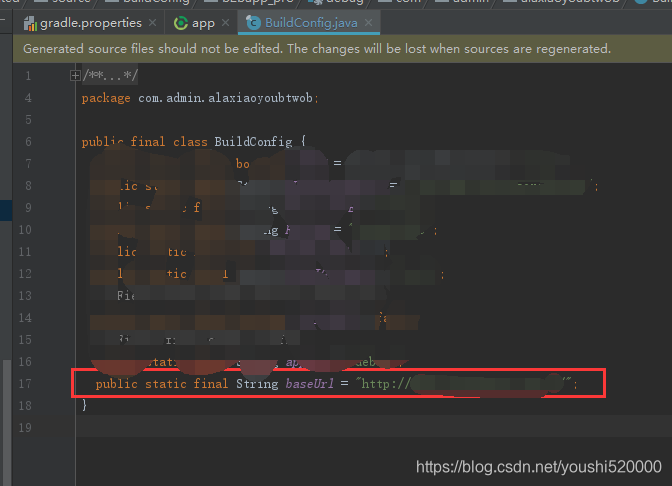
This parameter can be obtained directly in the code: BuildConfig.baseUrl
after the above configuration, the project will change:
Pitfalls encountered
一。AAPT error
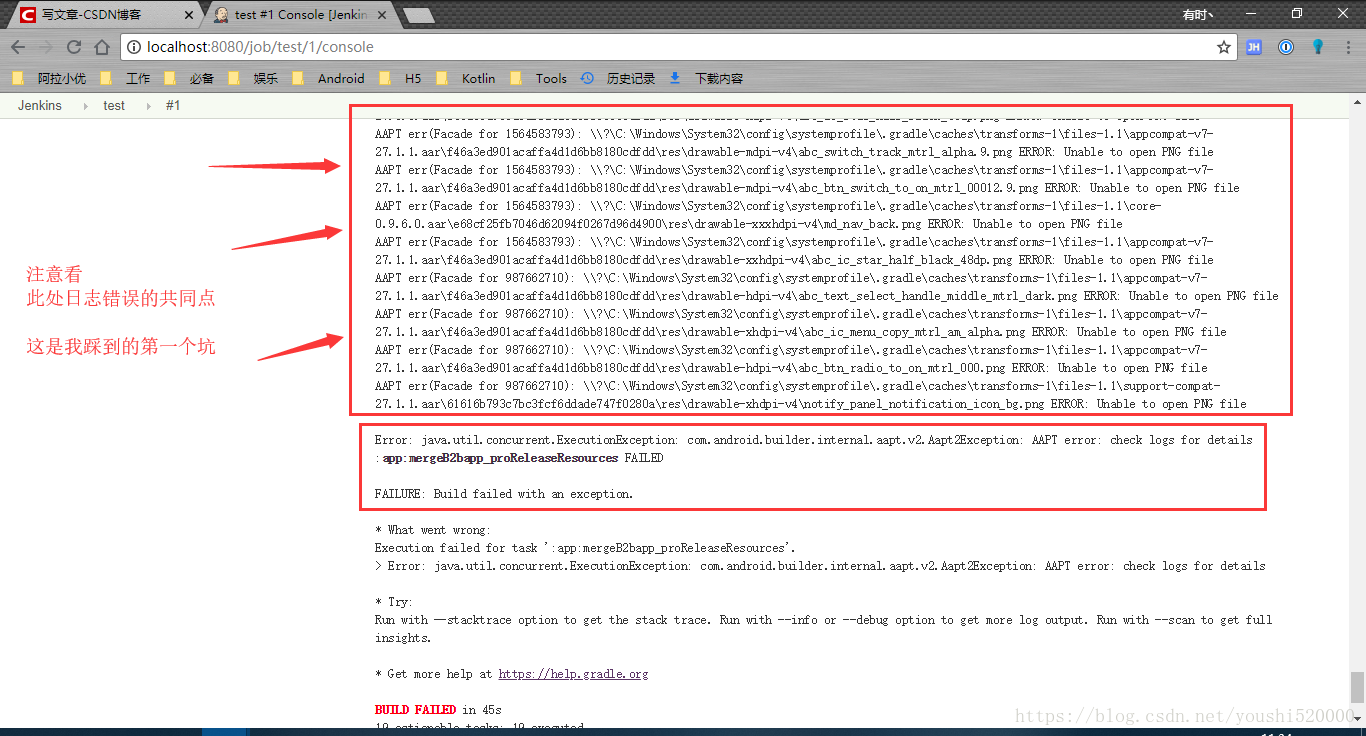
Error message: java.util.concurrent.ExecutionException: com.android.builder.internal.aapt.v2.Aapt2Exception: AAPT error: check logs for details
Baidu has three solutions. One is to add the code android in gradle.properties .enableAapt2=false, the second is to unify the compileSdkVersion, buildToolsVersion, minSdkVersion, targetSdkVersion, etc. of each module, and the third is even more irrelevant.
Here I want to say that your code must have been run locally, and the compilation and packaging were normal. It was only after running Jenkins that this error was reported. These three solutions are untenable! Theoretically it shouldn't be a problem in the code! !
Finally, I found a statement in a non-existent search engine that the Gradle path is too long, causing compilation error balabala...
In fact, if you look carefully at the error log, you will find that the series of errors are all very long paths (the common denominator), so this statement is relatively Reliable.
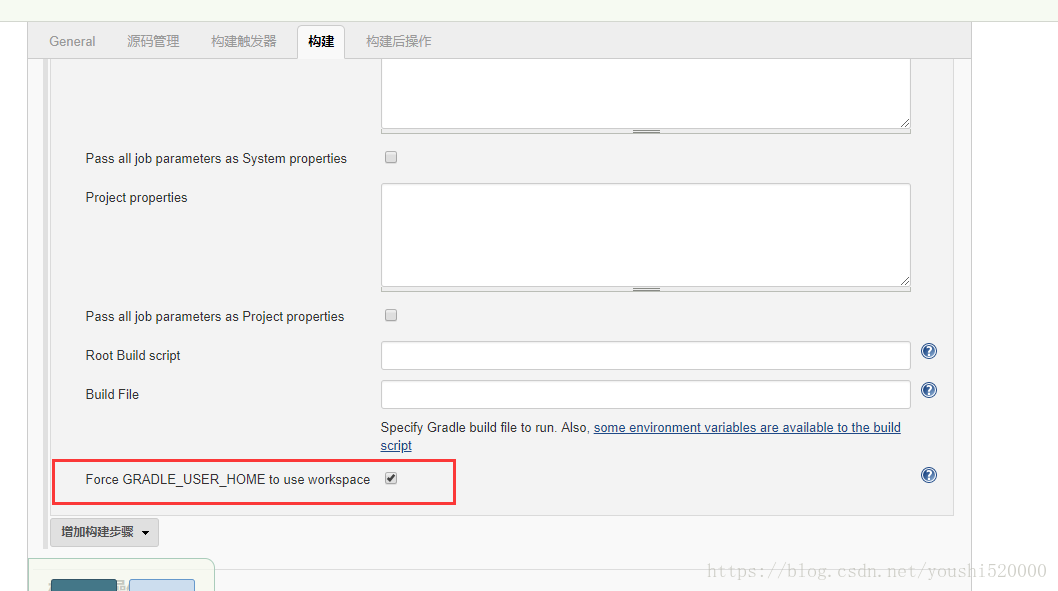
In the build section of the project settings, click Advanced in the lower right corner, find this option and check it.
Build again, BUILD SUCCESSFUL.
two. aidl is missing
The problem occurred when I deployed to the server. First, it prompted that build-tools was missing, and then the corresponding version of sdk was missing, and I uploaded the server sdk directory one by one. Then this error was reported. But it's all normal locally, and there's no problem with the SDK. There's no reason why it won't work on the server.
Here I want to condemn my operation and maintenance colleague. He firmly told me that the SDK on the server was copied and uploaded from another Android colleague (windows), but later he found out that he downgraded it himself (linux). I asked the Android colleague and the reply was "I don't know" and "check it out on Baidu". :)
It took me a long time to locate this problem. The server is a Linux environment, the local environment is a Windows environment, and the sdk is divided into versions. Files under different versions of sdk are inconsistent, causing errors.
The above is the process of Jenkins configuration and the problems encountered during the configuration process. The automated configuration is complete.