[Use the tools minicom and python to debug uart1 and uart2 on the jetson-orin-nx of NVIDIA nvidia-preliminary debugging-get familiar with it]
1 Overview
Recently, I started to learn NVIDIA's industrial control board. As a novice, there are still many differences to understand, but part of the Linux system it uses is a bit like playing with a Raspberry Pi. The 40-pin of the Raspberry Pi is very similar to the 40-pin of the NVIDIA Jetson. After learning and debugging the serial port for a period of time, I can finally communicate easily.
At the beginning, I didn't know much about anything. I started to feel a little bit from a novice, and now I use an industrial computer to debug the simple communication of the serial port. There is no problem. It can be regarded as some progress.
2. Experimental environment
For the first time, please use the software and hardware information provided here.
Hardware information: Jetson Orin nx
software version: 5.10.104-tegra #1 SMP PREEMPT Sun Mar 19 07:55:28 PDT 2023 aarch64 aarch64 aarch64 GNU/Linux

Other hardware: usb serial converter or TTL conversion module
3. Acquire knowledge first
Debugging the uart function requires some basic understanding of jetson, and it takes a period of time to have a basic understanding of the information.
(1) It is necessary to understand the hardware, know where the hardware IO is and how to connect it.
(2) Install the corresponding library or software, and use the apt-get command
(3) Give permission, configure the permission, so that it can run
(4) Search for relevant information, generally go to the official website of Nvidia to find out.
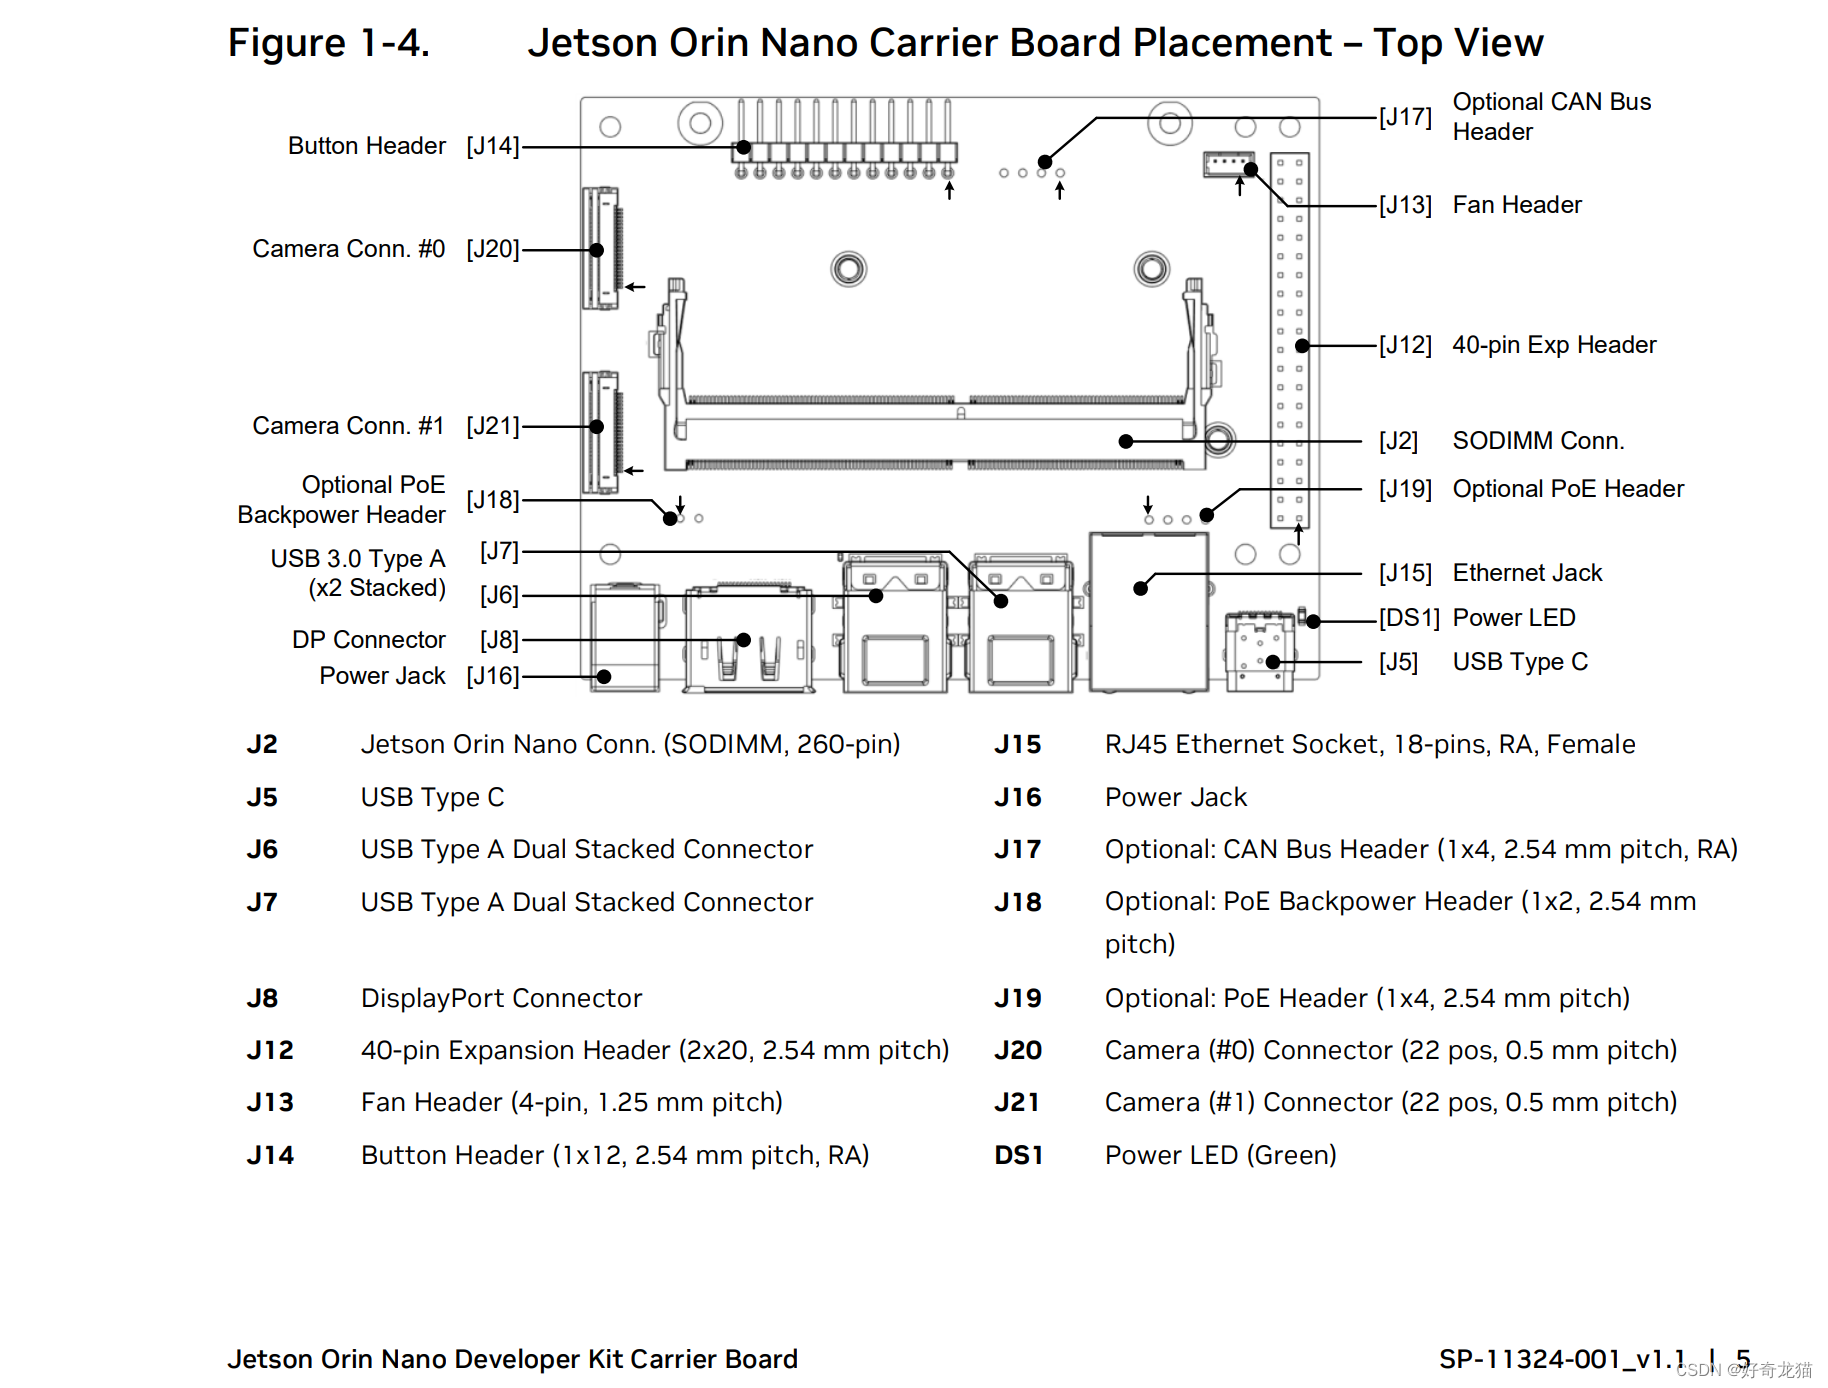
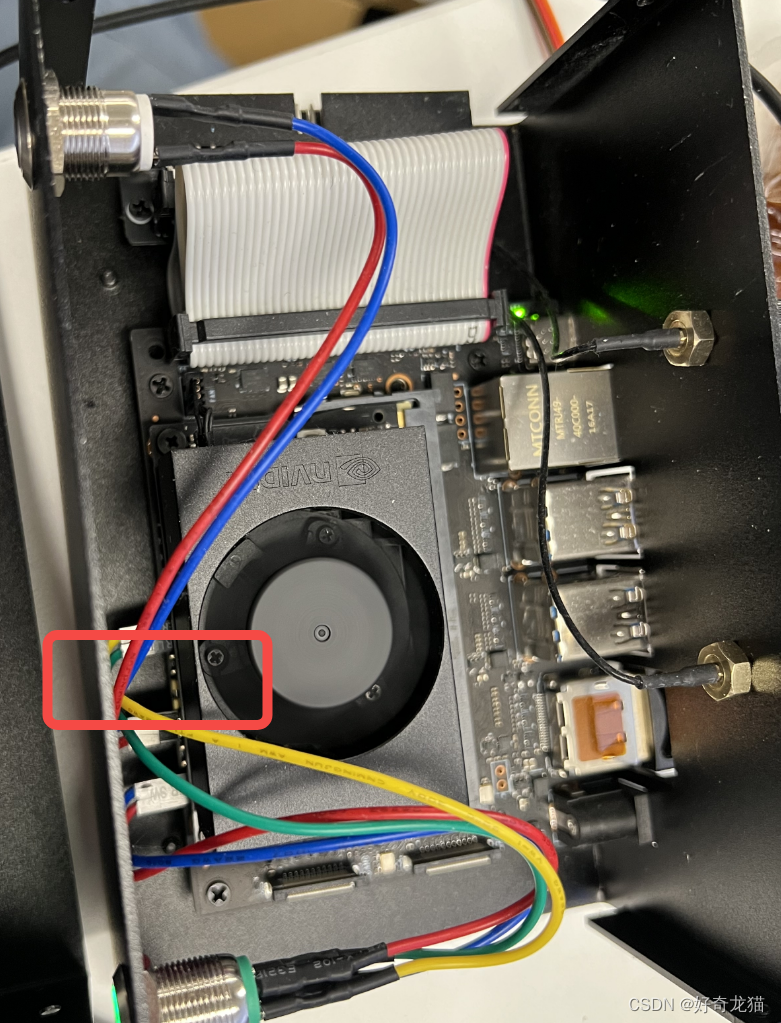
The following is the hardware diagram of the core board peripherals
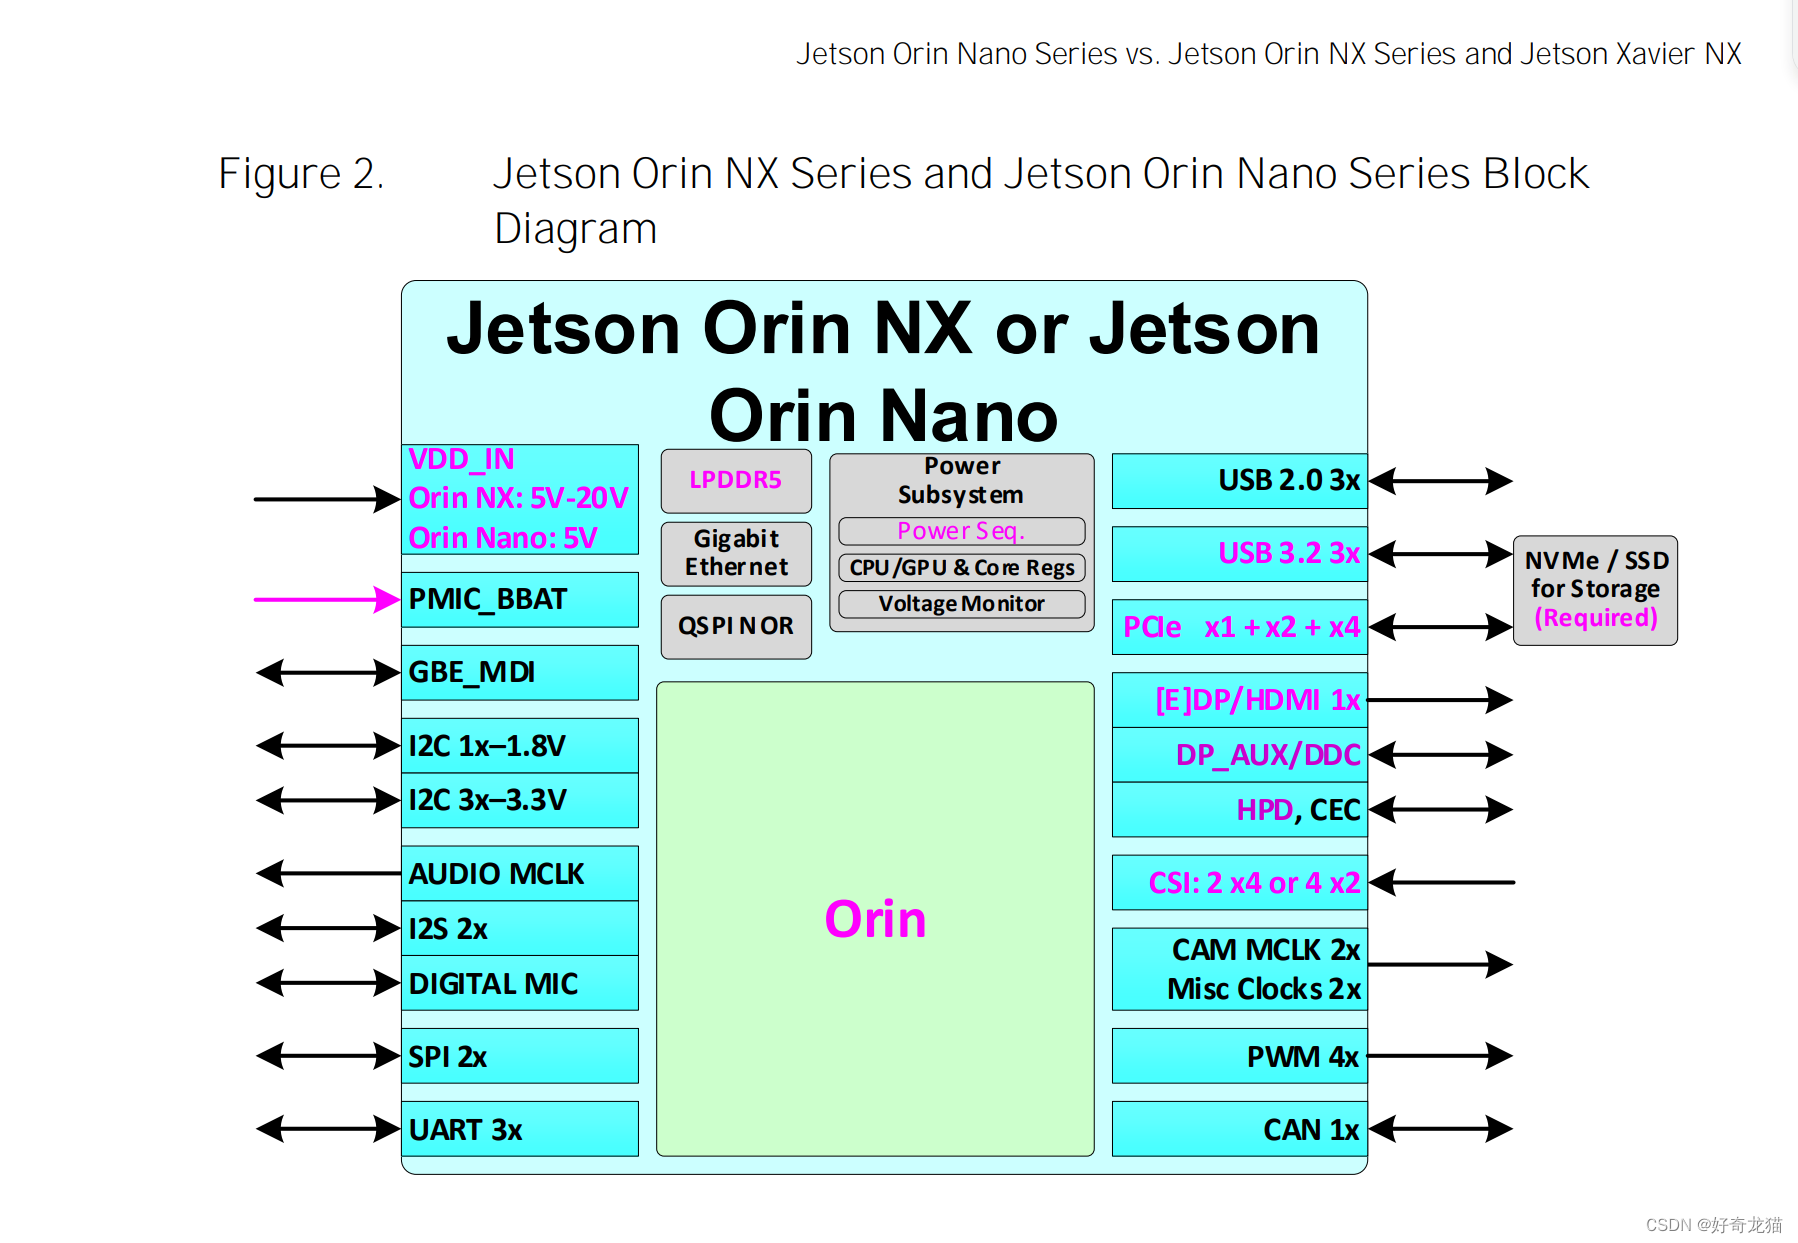
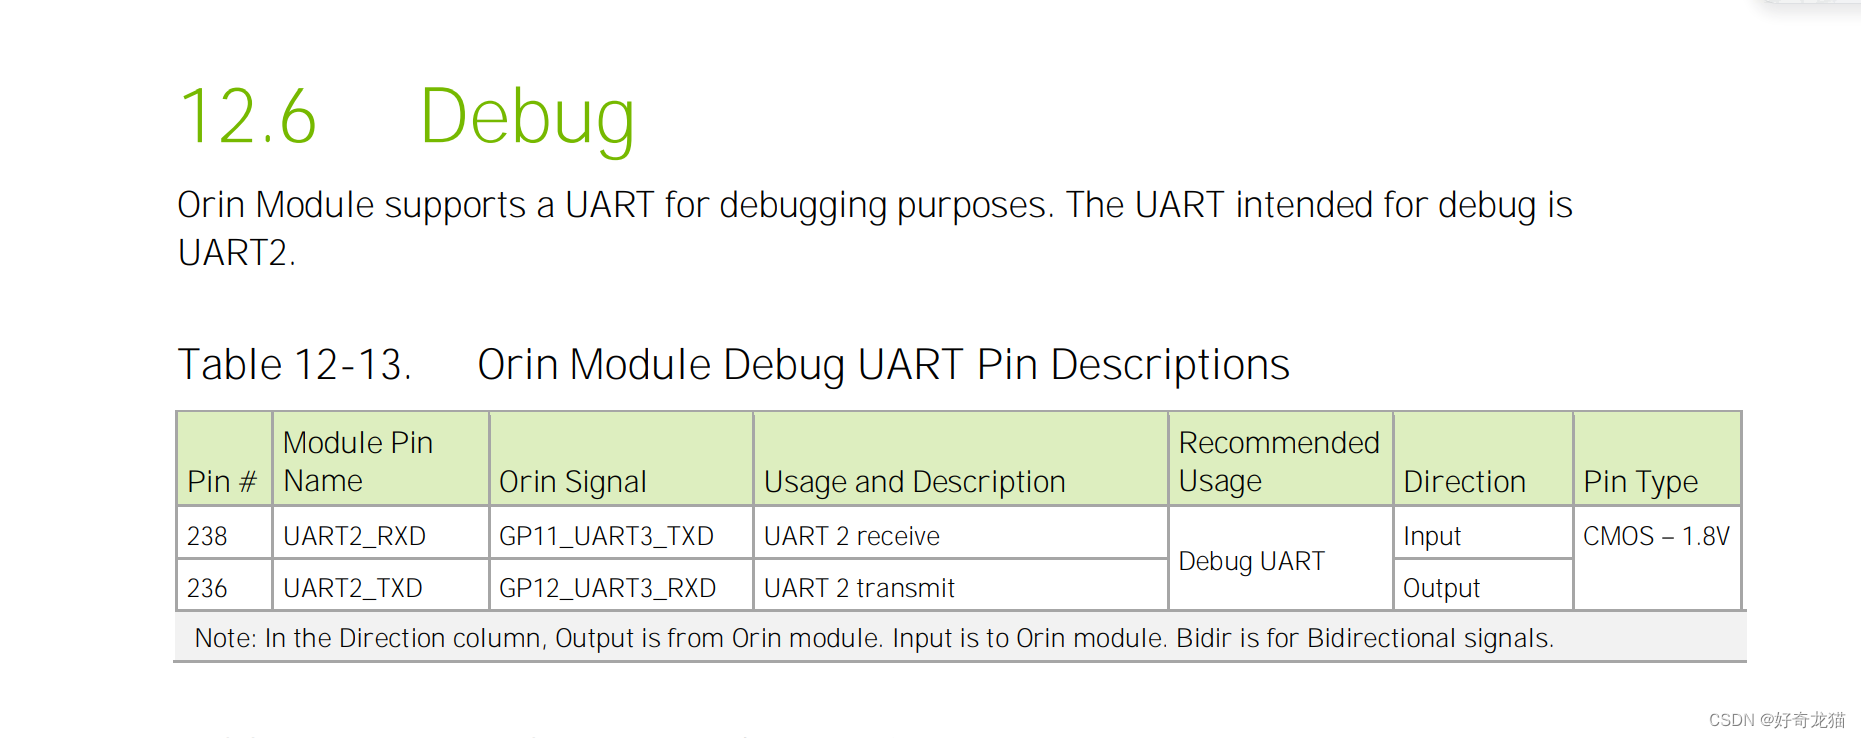
(5) uart2 is a debugging pin, which can be used with different configurations and automatic connection.
Product Design:Jetson Orin NX Series and Jetson Orin Nano Series(Product Design Guide)
4. Reference materials
I also refer to the following links for my own study, which needs to be listed.
(1) Link to Nvidia's official website. If you want to know information, you generally have to go to the official website to check relevant information.
Reference link: https://developer.nvidia.com/embedded/downloads
(2) Refer to the blog post for writing the program code of the python script. I write the code according to this article, and at the same time understand the meaning of each python code.
Reference link: https://blog.csdn.net/weixin_44350337/article/details/111623475
(3) In the link below, the blogger mainly provides a hardware reference diagram to tell you which one is which, and let us know the hardware device from the schematic diagram.
Reference link: https://blog.csdn.net/liuyang_xyz/article/details/126500097
For this reason, I searched for the original website and took a look. This one belongs to orin nx, so I chose the corresponding one.
Website link: https://jetsonhacks.com/nvidia-jetson-orin-nano-gpio-header-pinout/
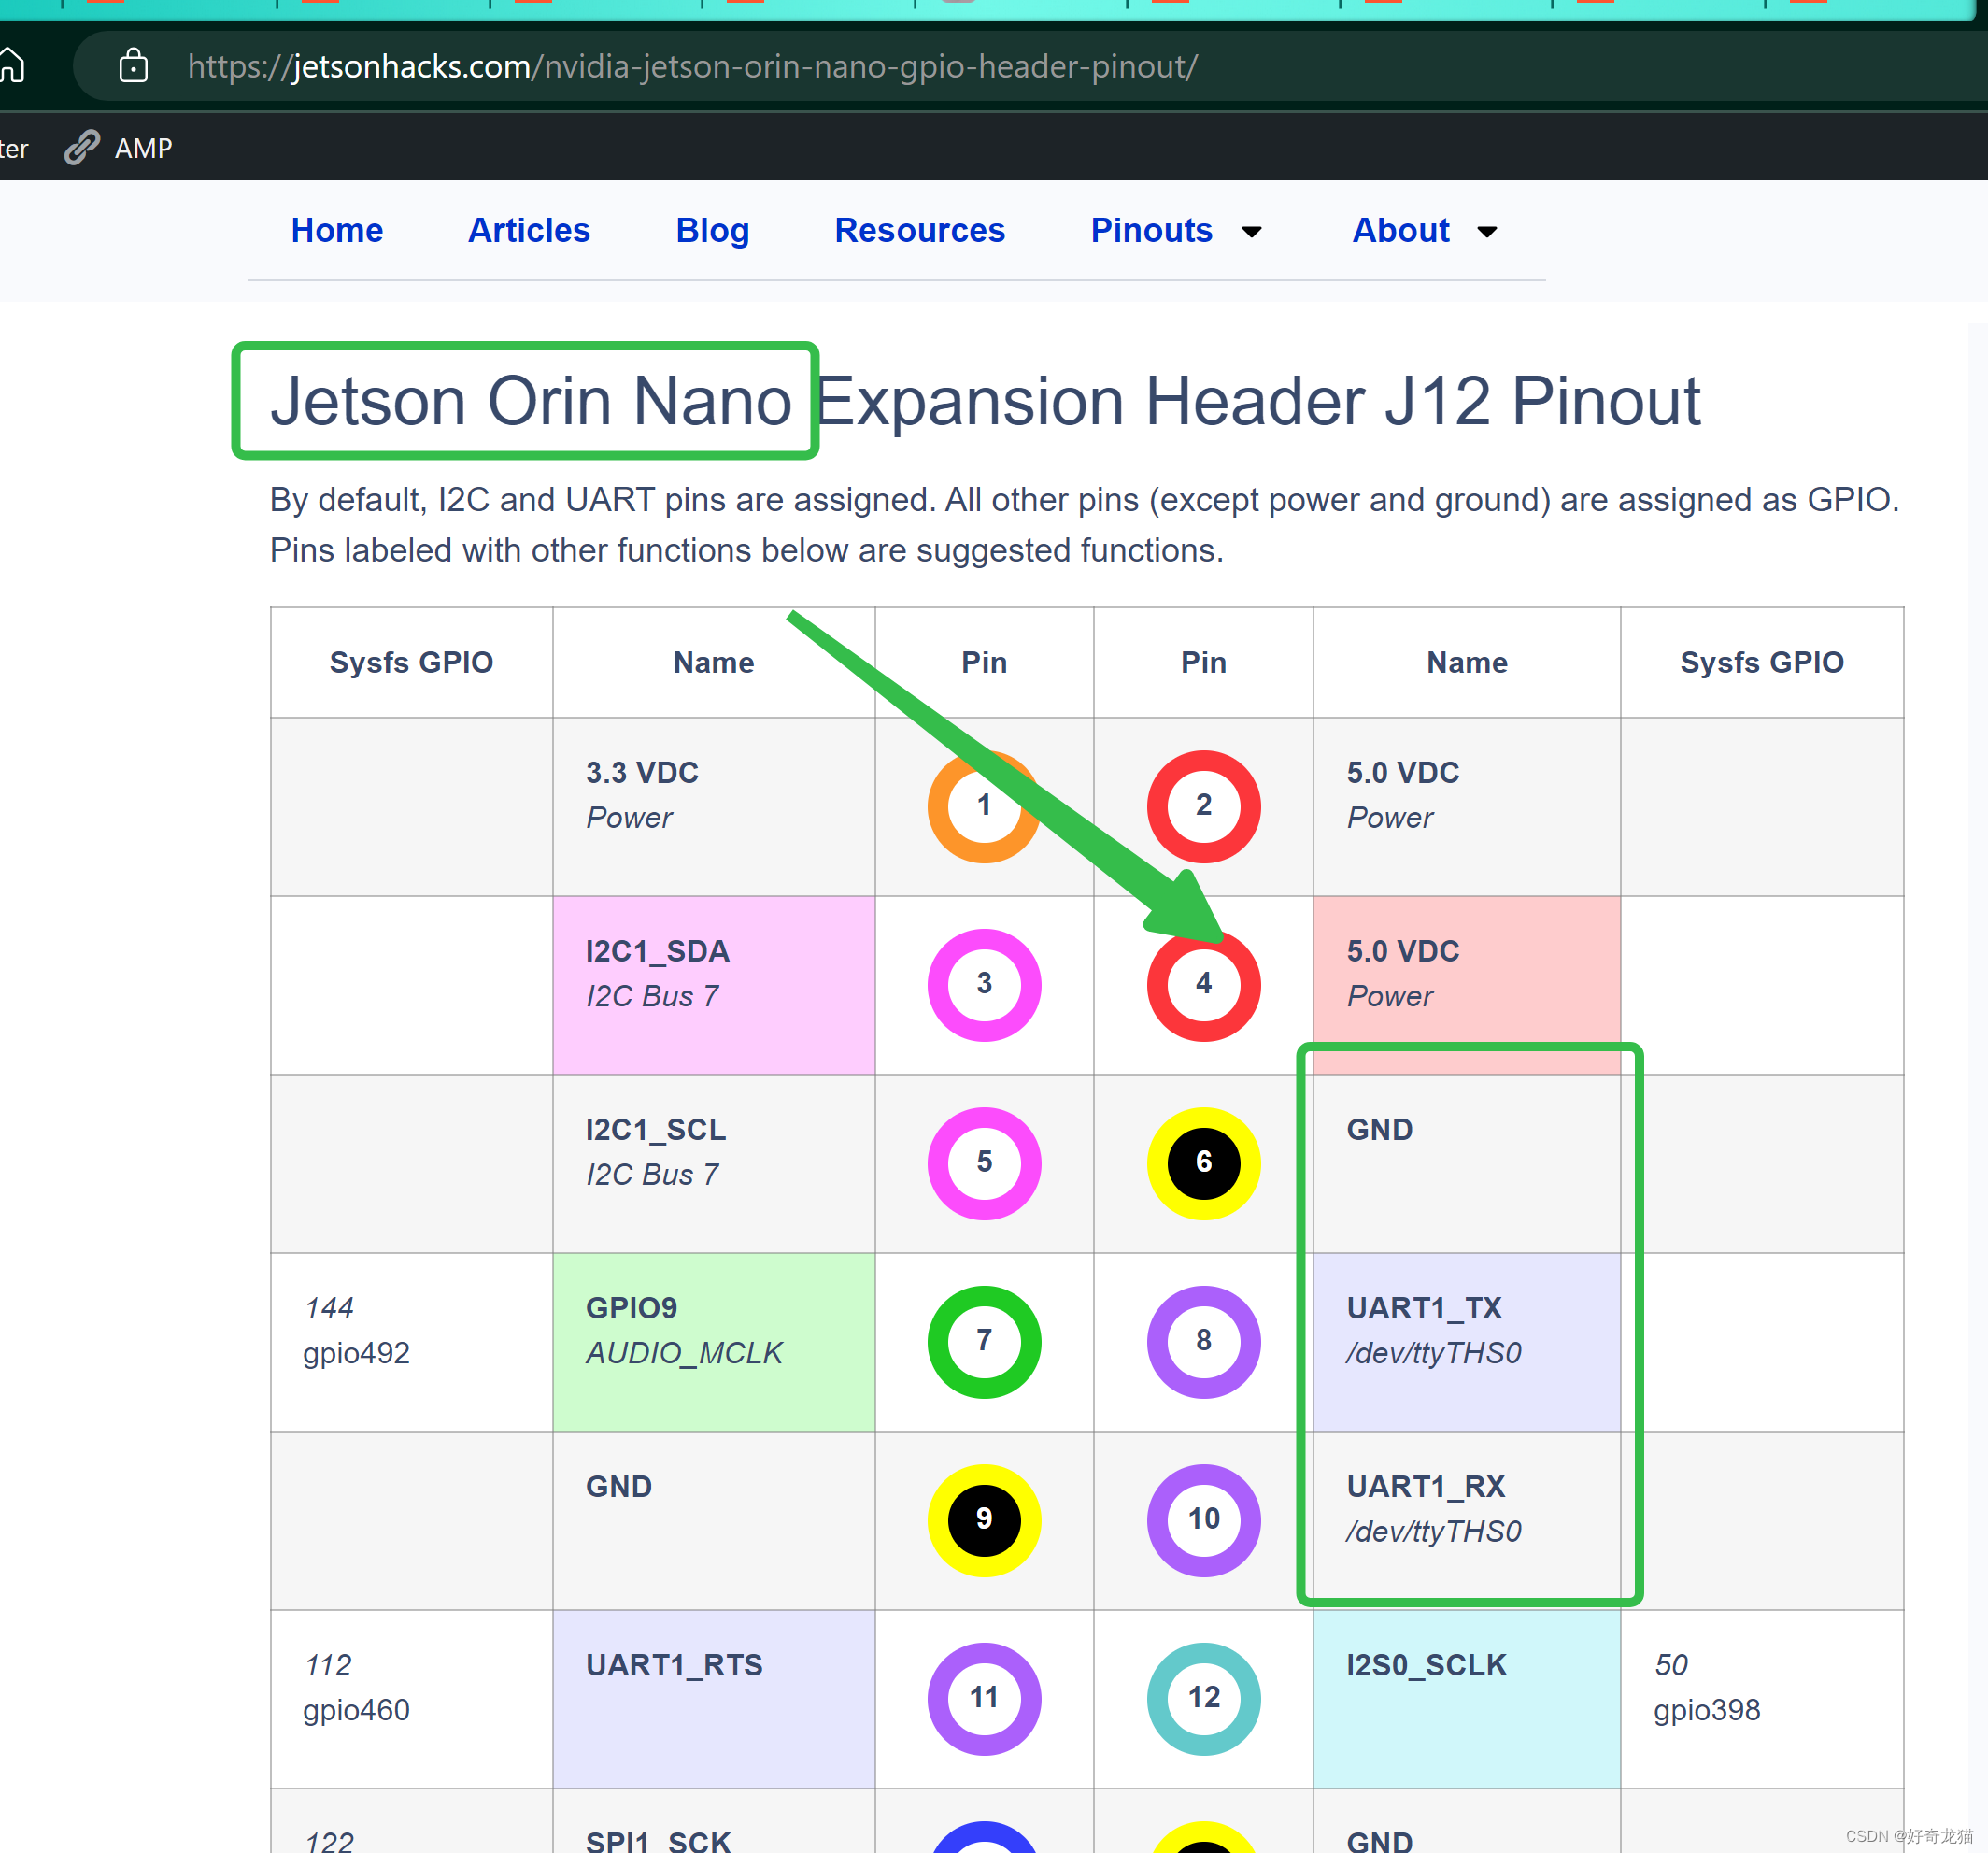
To do this, find the top view image file, as follows, you can go to the NVIDIA documentation in item 1 to search.
File Name: Search for: Jetson Orin Nano Developer Kit Carrier Board
(4) The link below is mainly to solve the library problem. If you use python, you need to install the library.
Reference link: https://blog.csdn.net/qq_25662827/article/details/119381935
sudo pip3 install pyserial
sudo pip install pyserial
5-1. Operation steps - the way of python script (uart1)
1. Hardware connection - pin connection
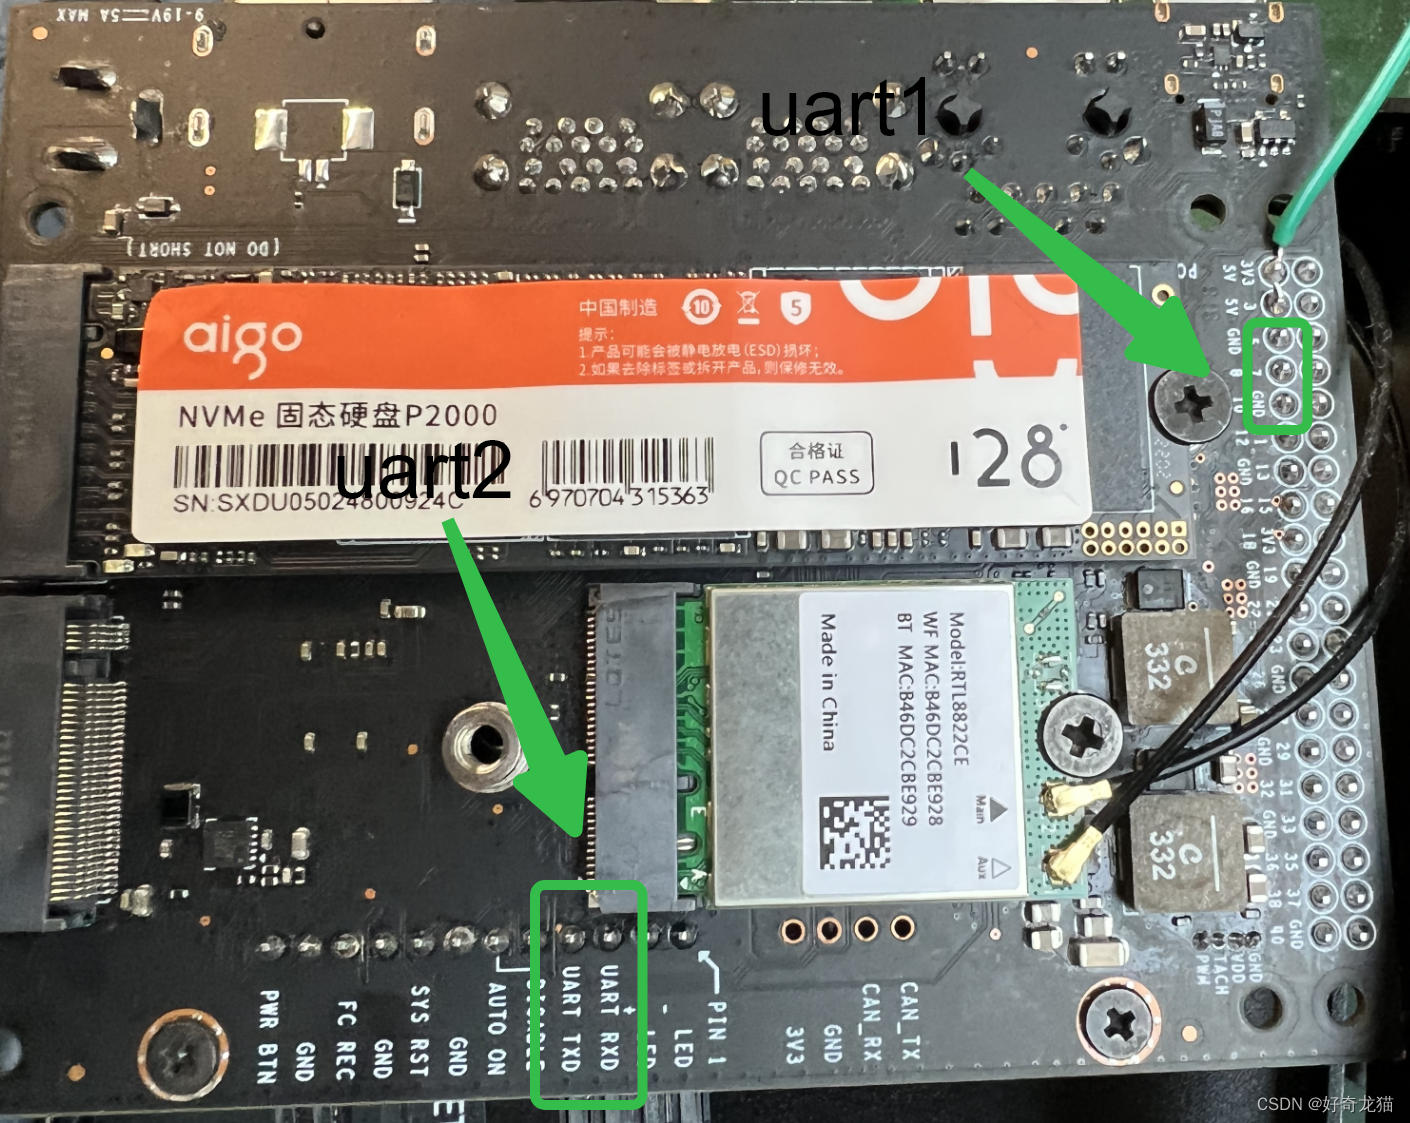
Need to find the hardware pins, through the previous search information, we know that uart1 is on the 40-pin, and uart2 is the debugging port.
As follows, it is the physical picture of my own board, that is, J14 and J12, with silk screen on it
//uart1 - j12
6号引脚-GND
8号引脚-uart1_TX
10号引脚-uart1_RX

//uart2-debug - j14
UART TXD
UART RXD
GND
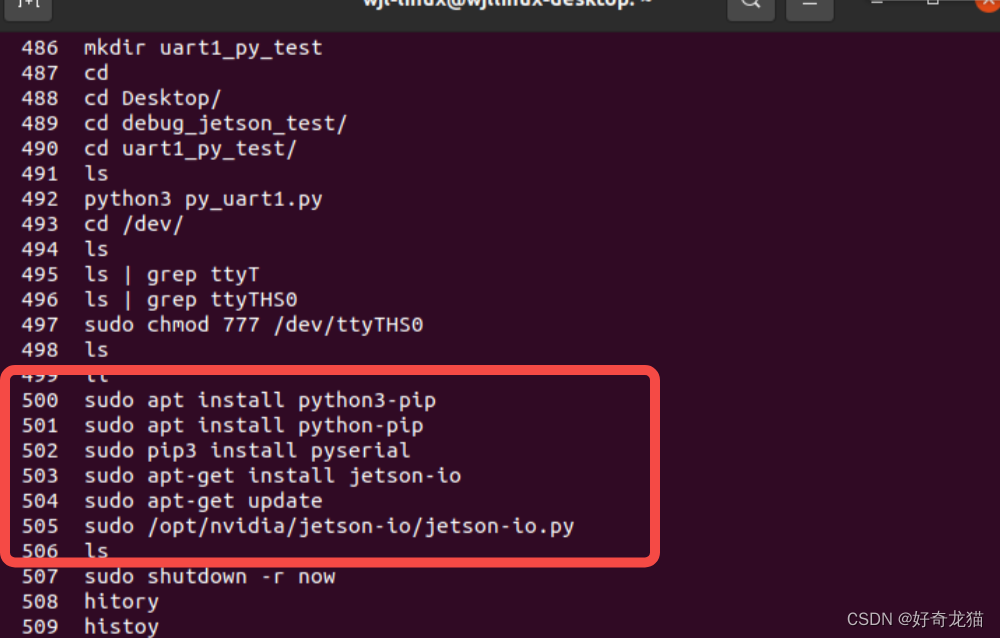
2. Install the corresponding library
At present, it seems that the library corresponding to python needs to be installed. The following are the necessary execution steps
sudo apt-get install python3-pip
sudo apt-get install python-pip
sudo pip3 install pyserial
Other attempts, the following non-essential options, during the trial, try to enter other commands
sudo apt-get install jetson-io
sudo apt-get update
sudo /opt/nvidia/jetson-io/jetson-io.py
3. Code writing
Here I create a new file on the desktop, and then create a new file. You need to find a suitable location and create a file.
//使用vim创建文件
sudo vim py_uart1.py
Then there is the code part, the input code is as follows (python)
import serial as ser
import time
a = "12345"
b = 678
c = " I'm is xxxx.."
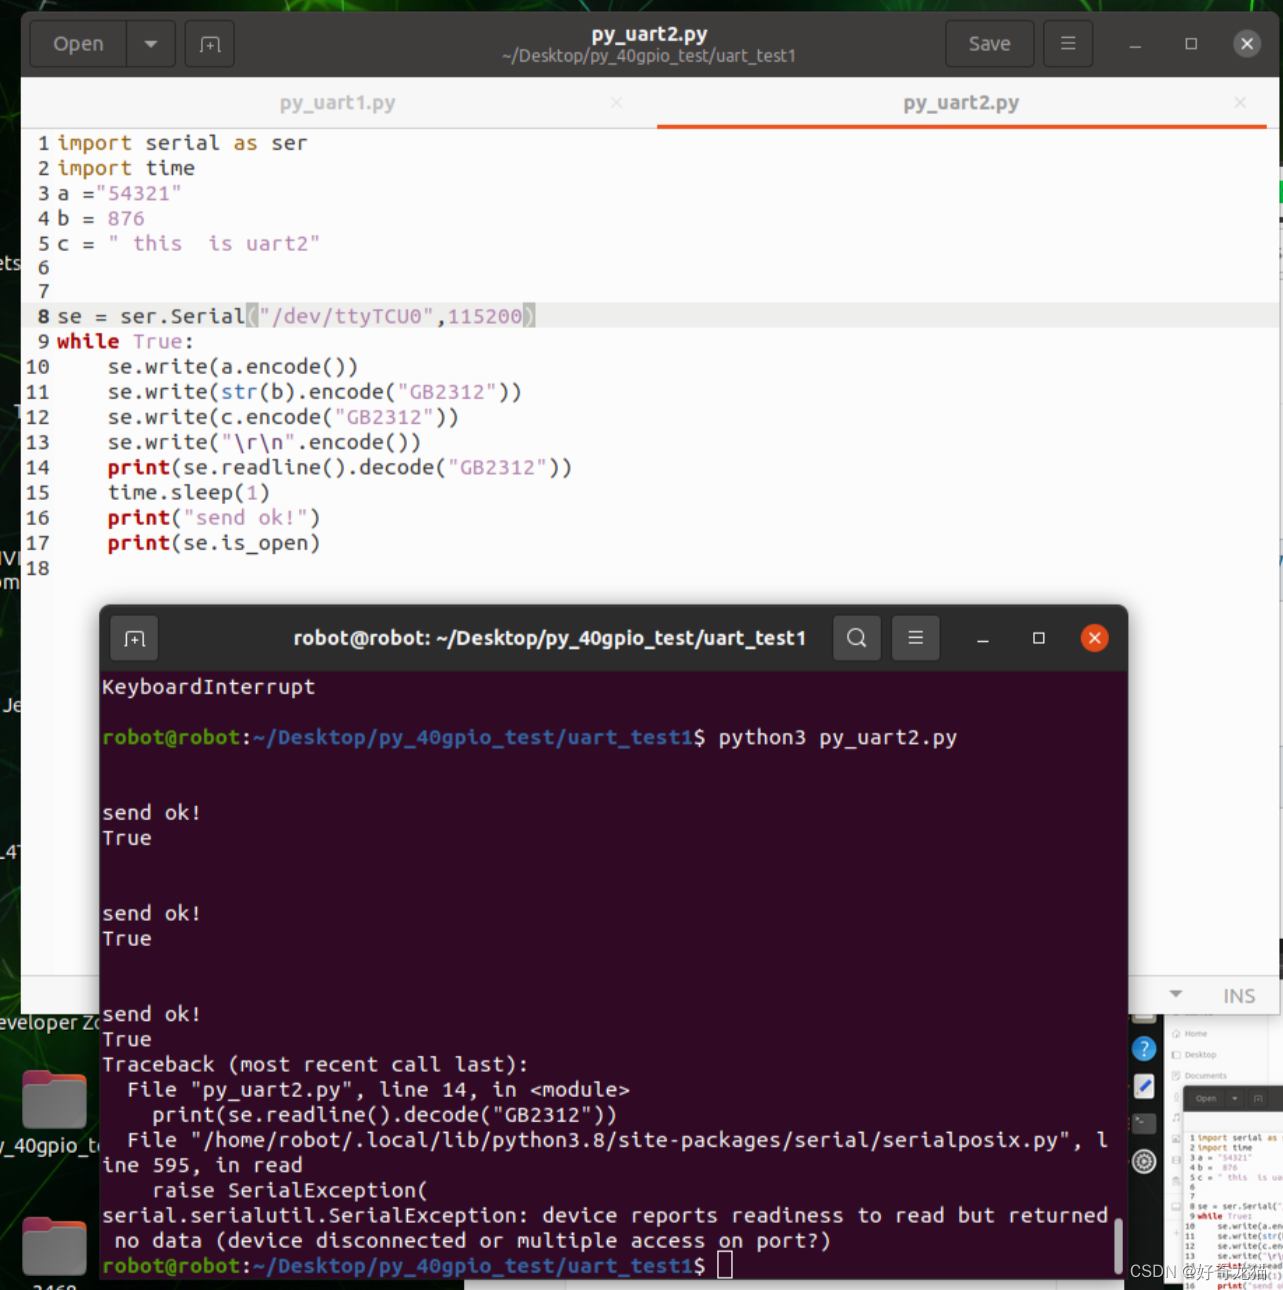
se = ser.Serial("/dev/ttyTHS0",9600)
while True:
se.write(a.encode())
se.write(str(b).encode("GB2312"))
se.write(c.encode("GB2312"))
se.write("\r\n".encode())
print(se.readline().decode("GB2312"))
time.sleep(1)
print("send ok!")
print(se.is_open)
4. Give permission to the file device
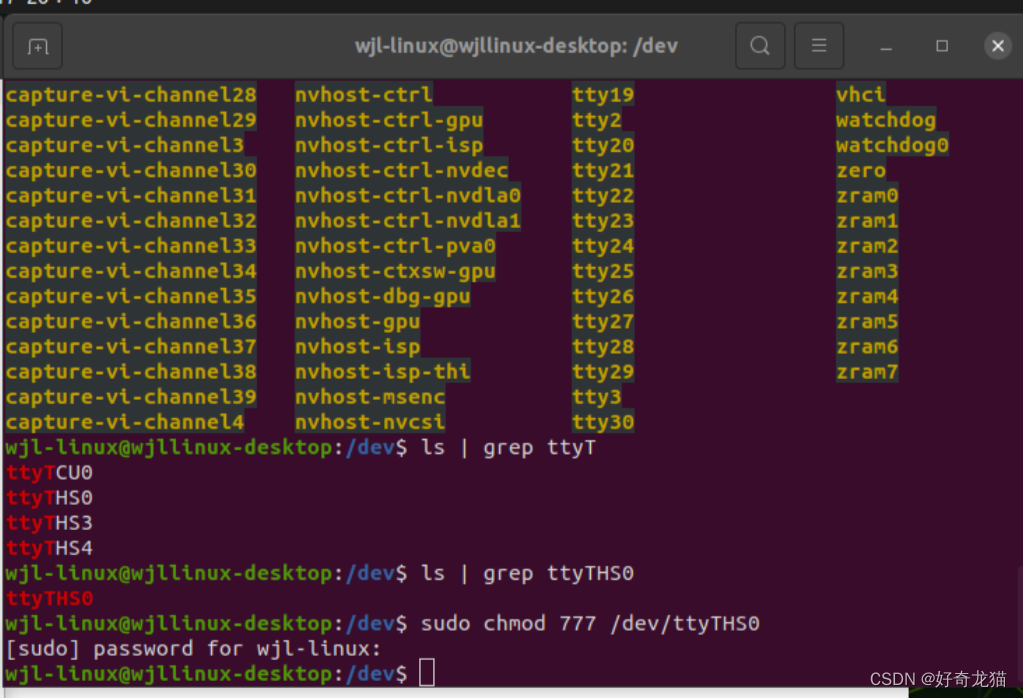
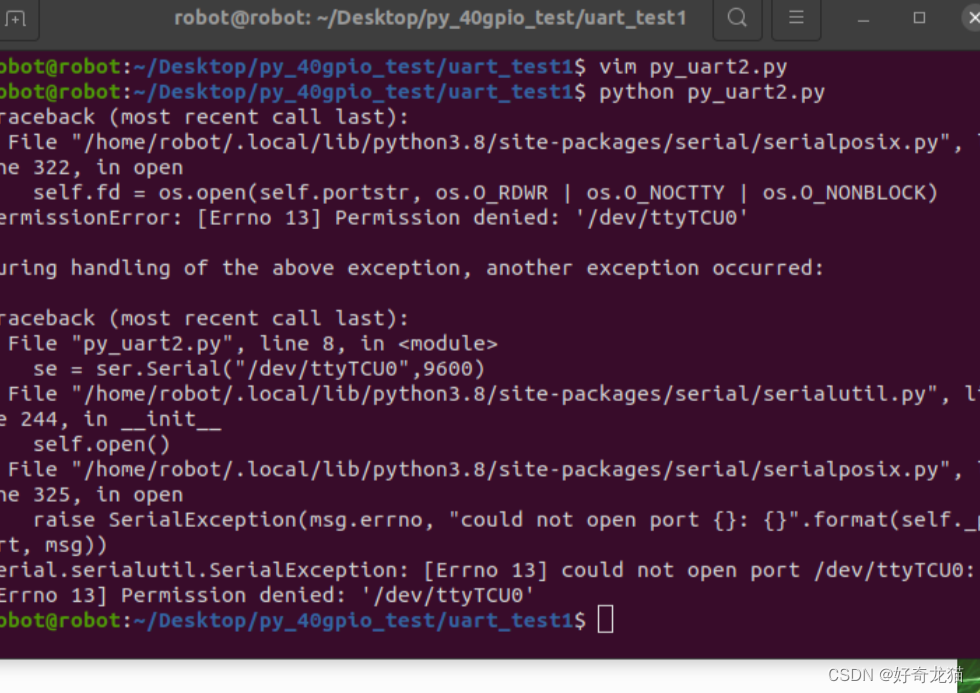
You need to give permission to run with 777 on /dev/ttyTHS0.
sudo chmod 777 /dev/ttyTHS0
5. Run the test
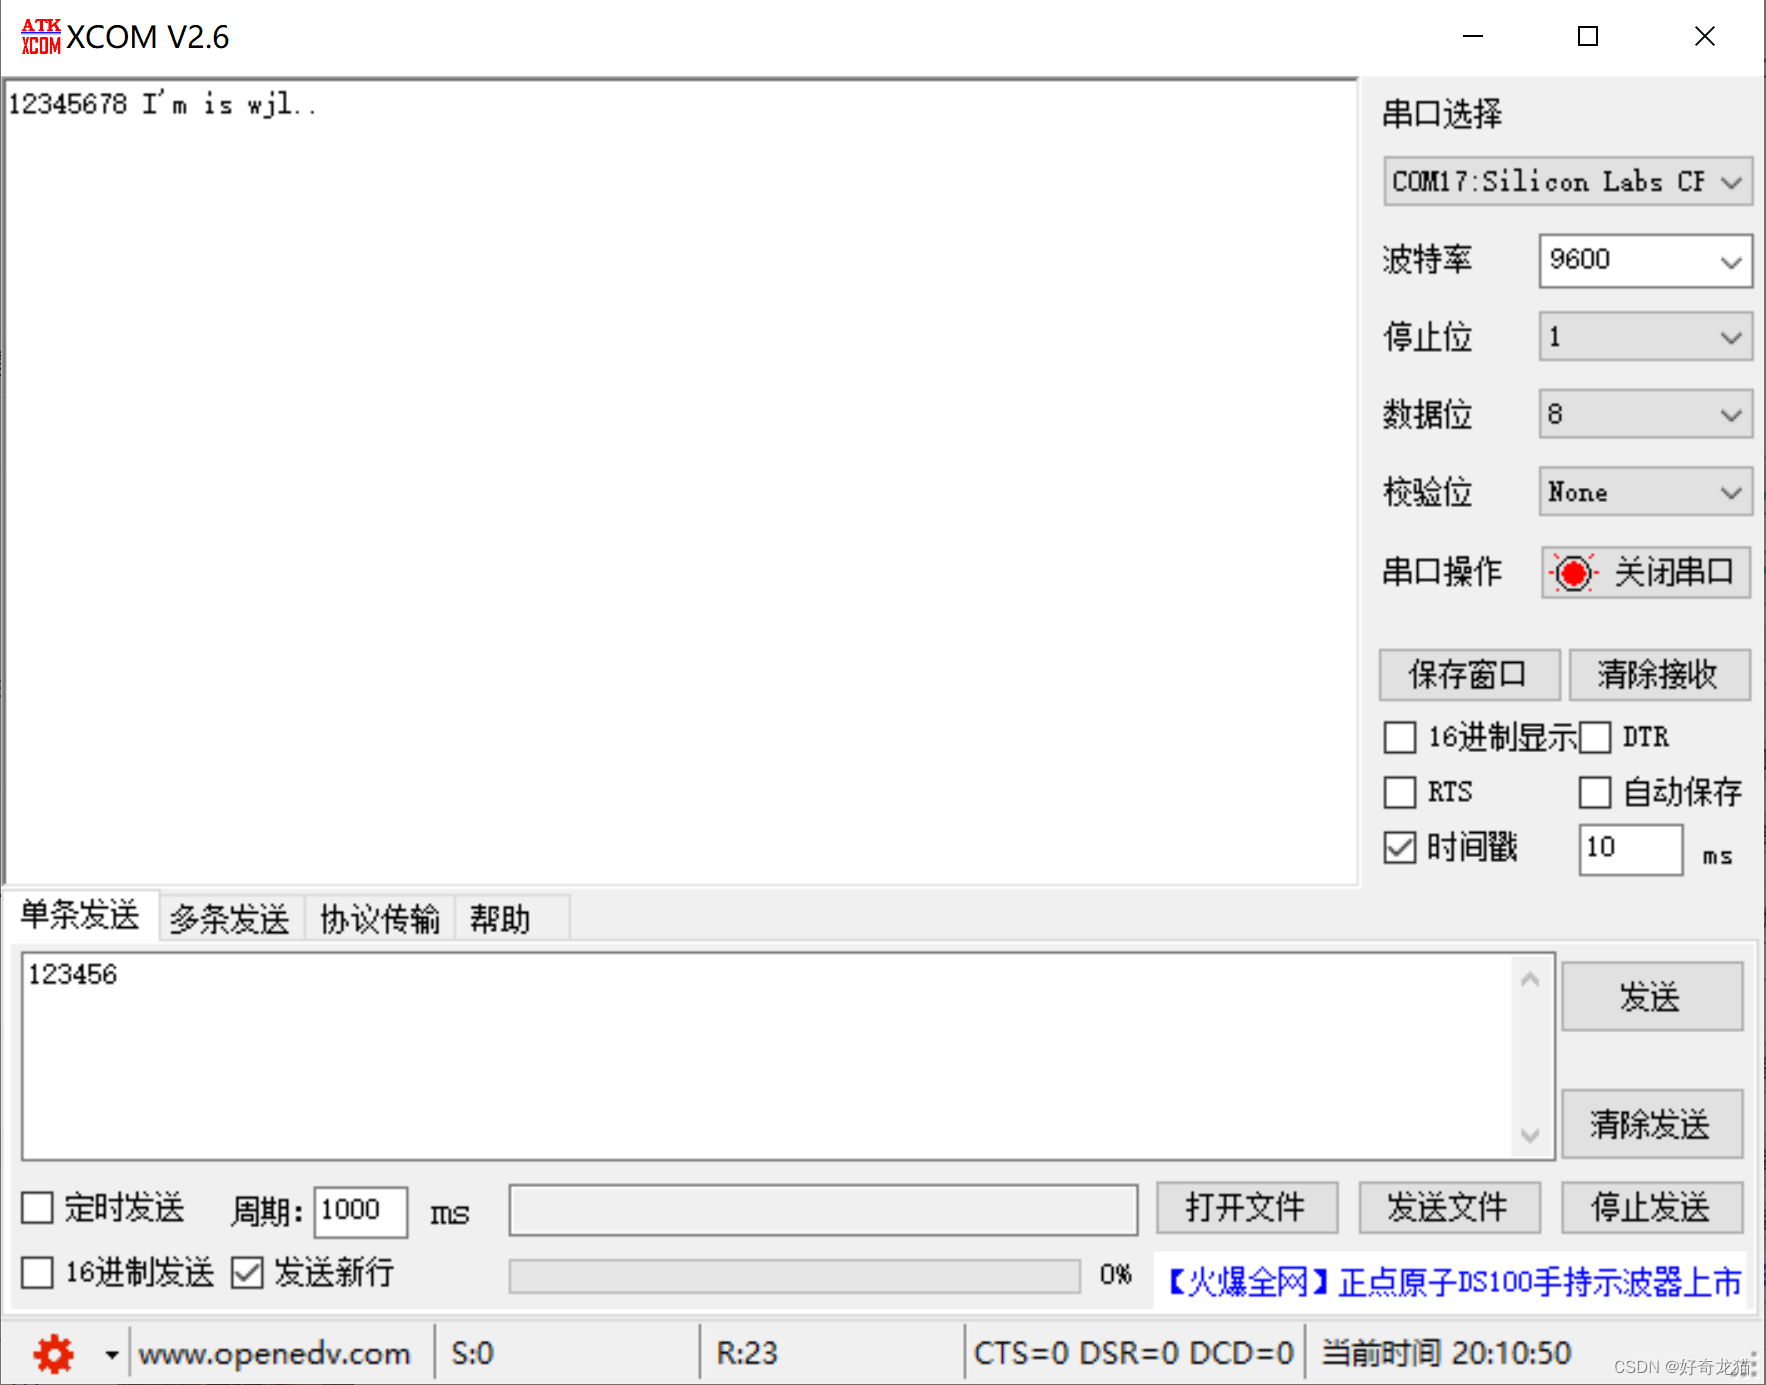
Finally, run the test as follows. I put the py file and the command line together for easy viewing.
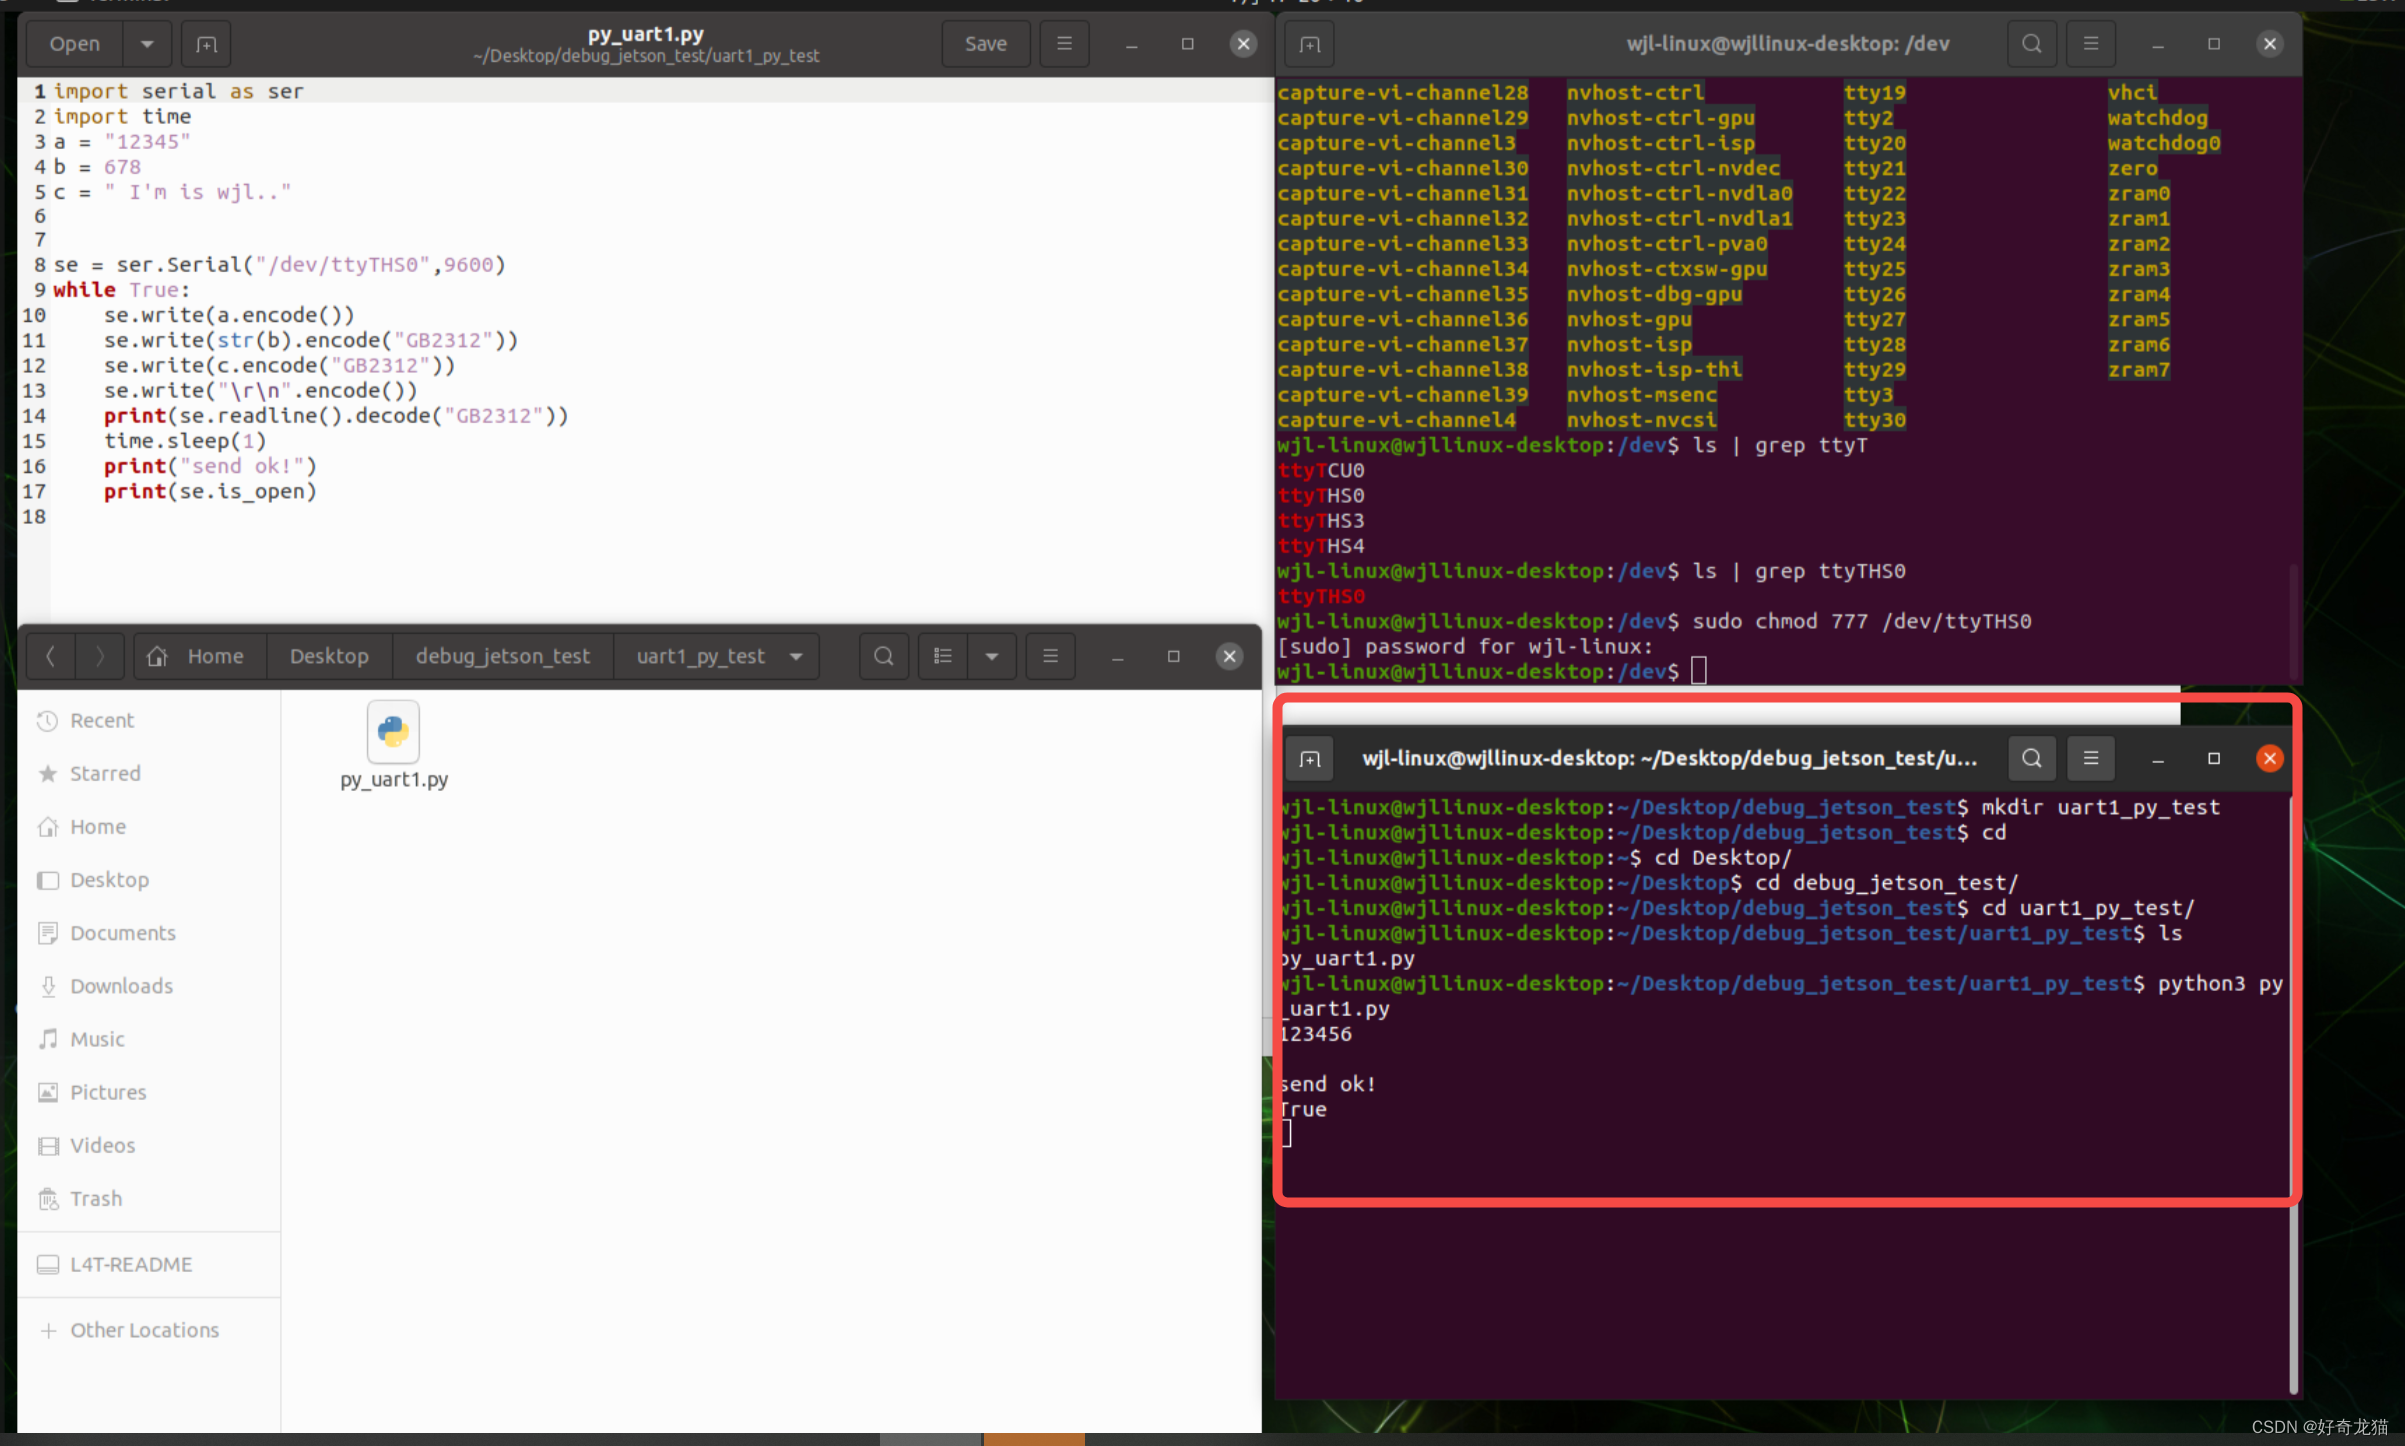
The other end is received by my computer PC.
5-2. Operation steps - minicom tool debugging method (uart1)
1. Install the corresponding software
There is not only one way to debug. Using python is actually convenient for subsequent debugging, writing scripts, etc. Later, I learned that using minicom does not need such trouble, just download it directly, and then use it. The following steps are like this.
sudo apt-get install mincom
sudo minicom -D /dev/ttyTHS0
There are quite a lot of related teaching on the Internet, I will directly give the reference link here:
Reference link: https://blog.csdn.net/Naisu_kun/article/details/117704009
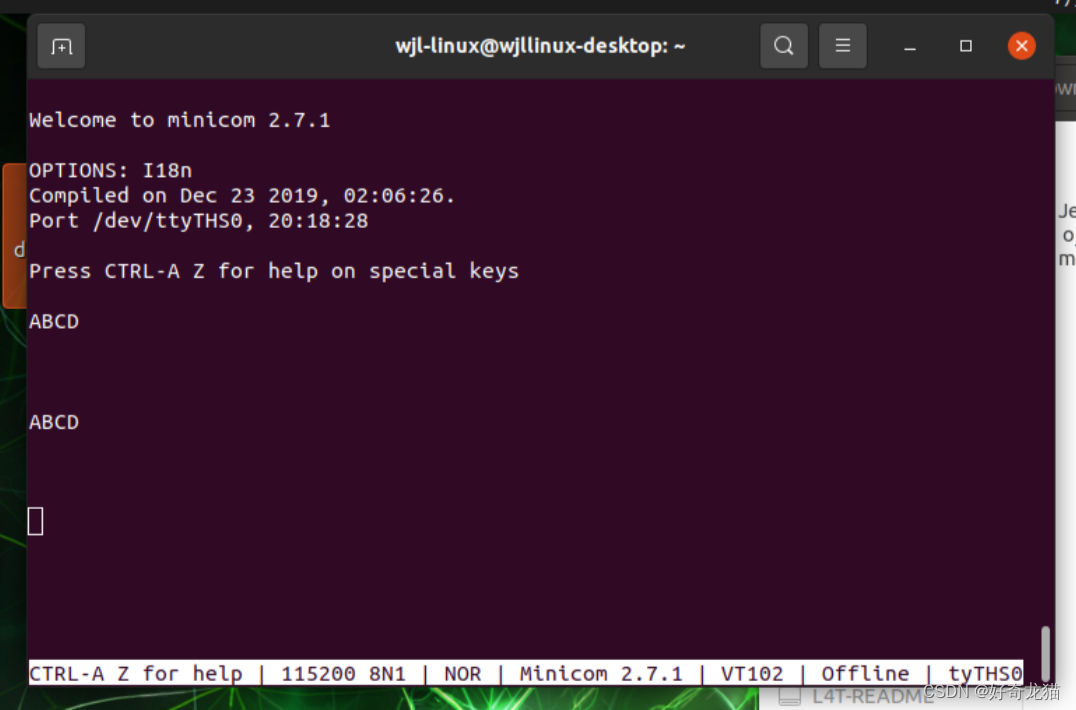
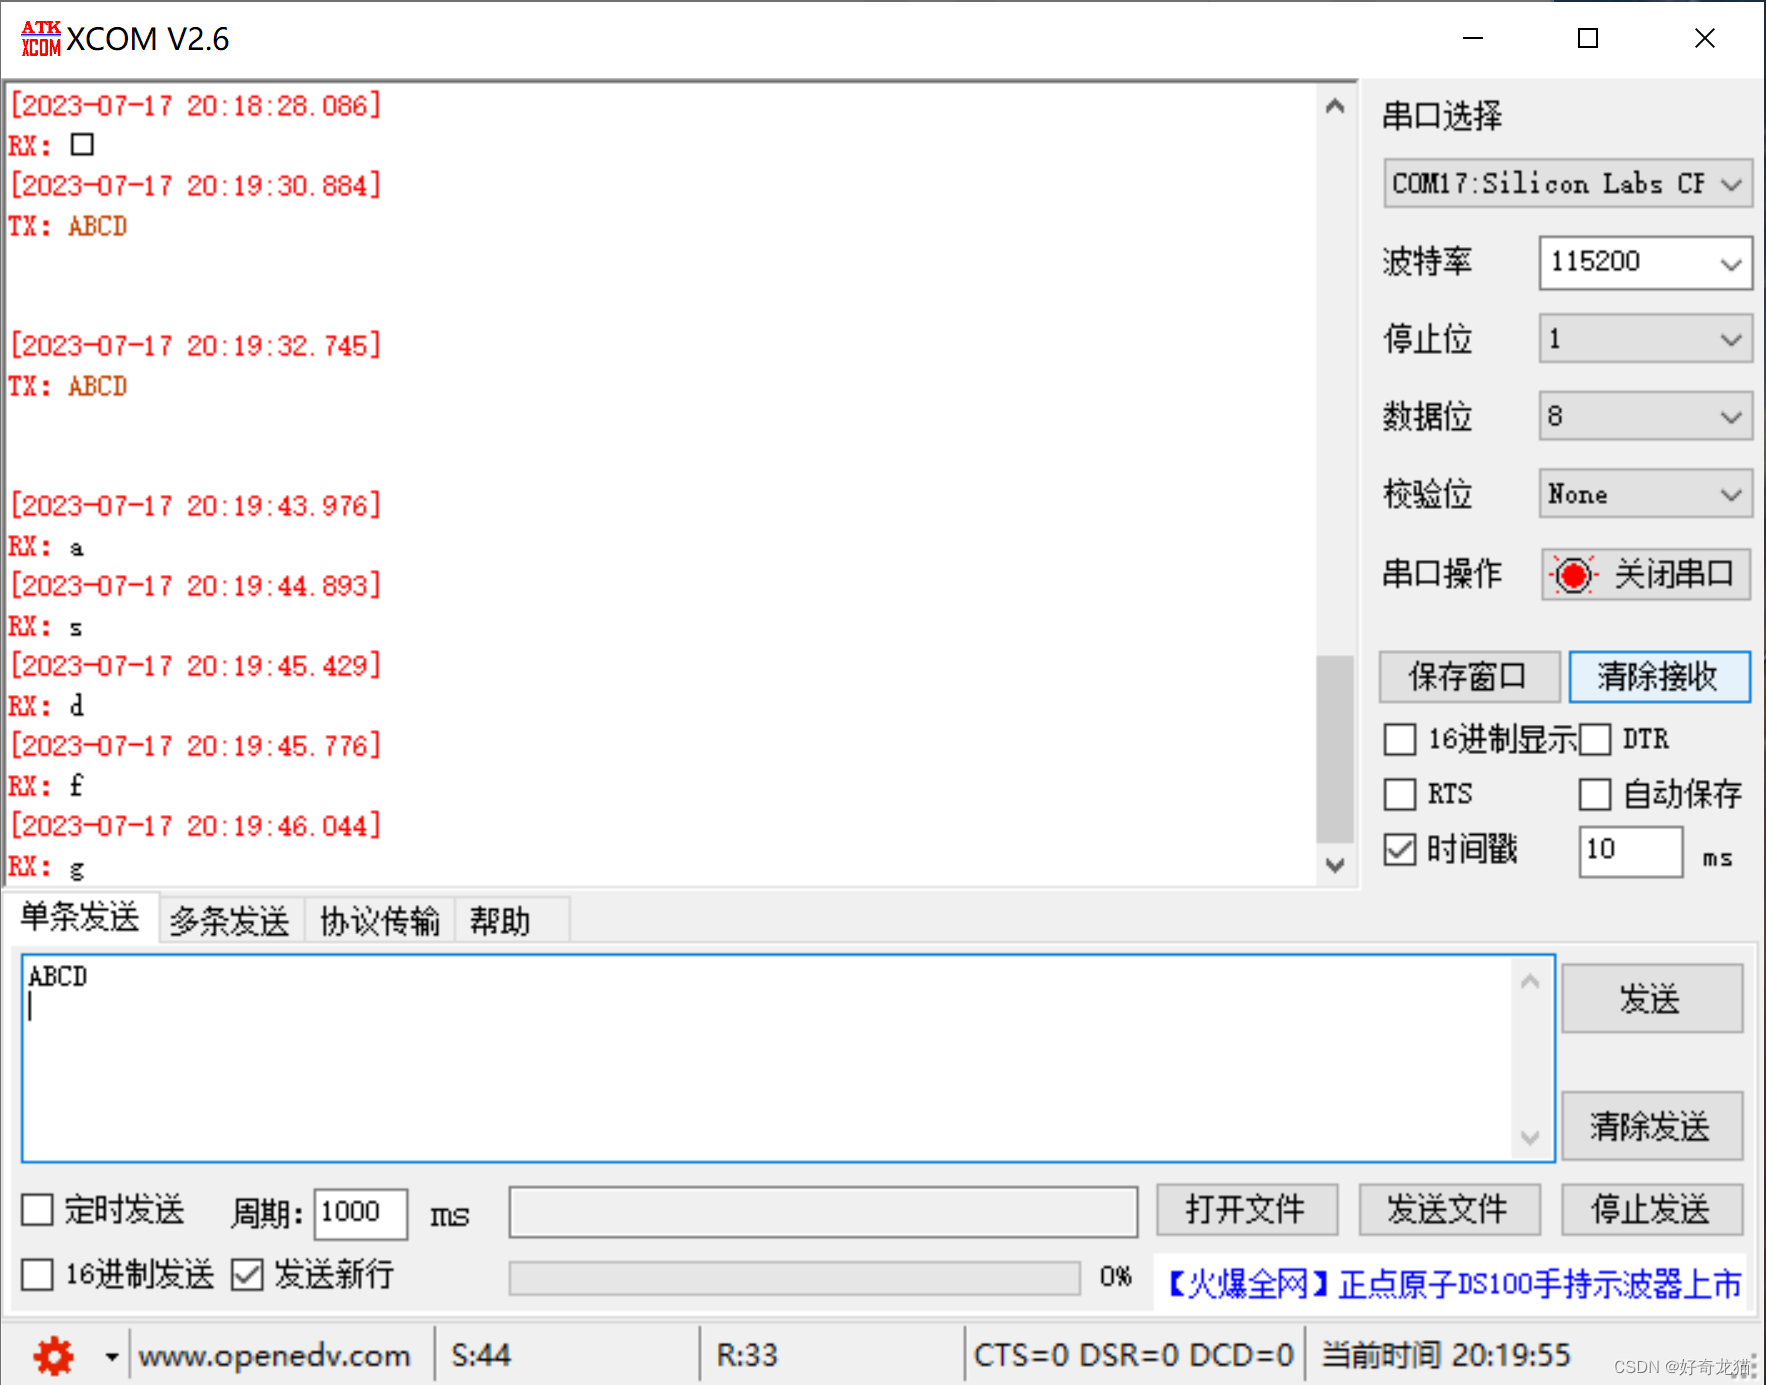
2. Run and debug
The Linu terminal is as follows
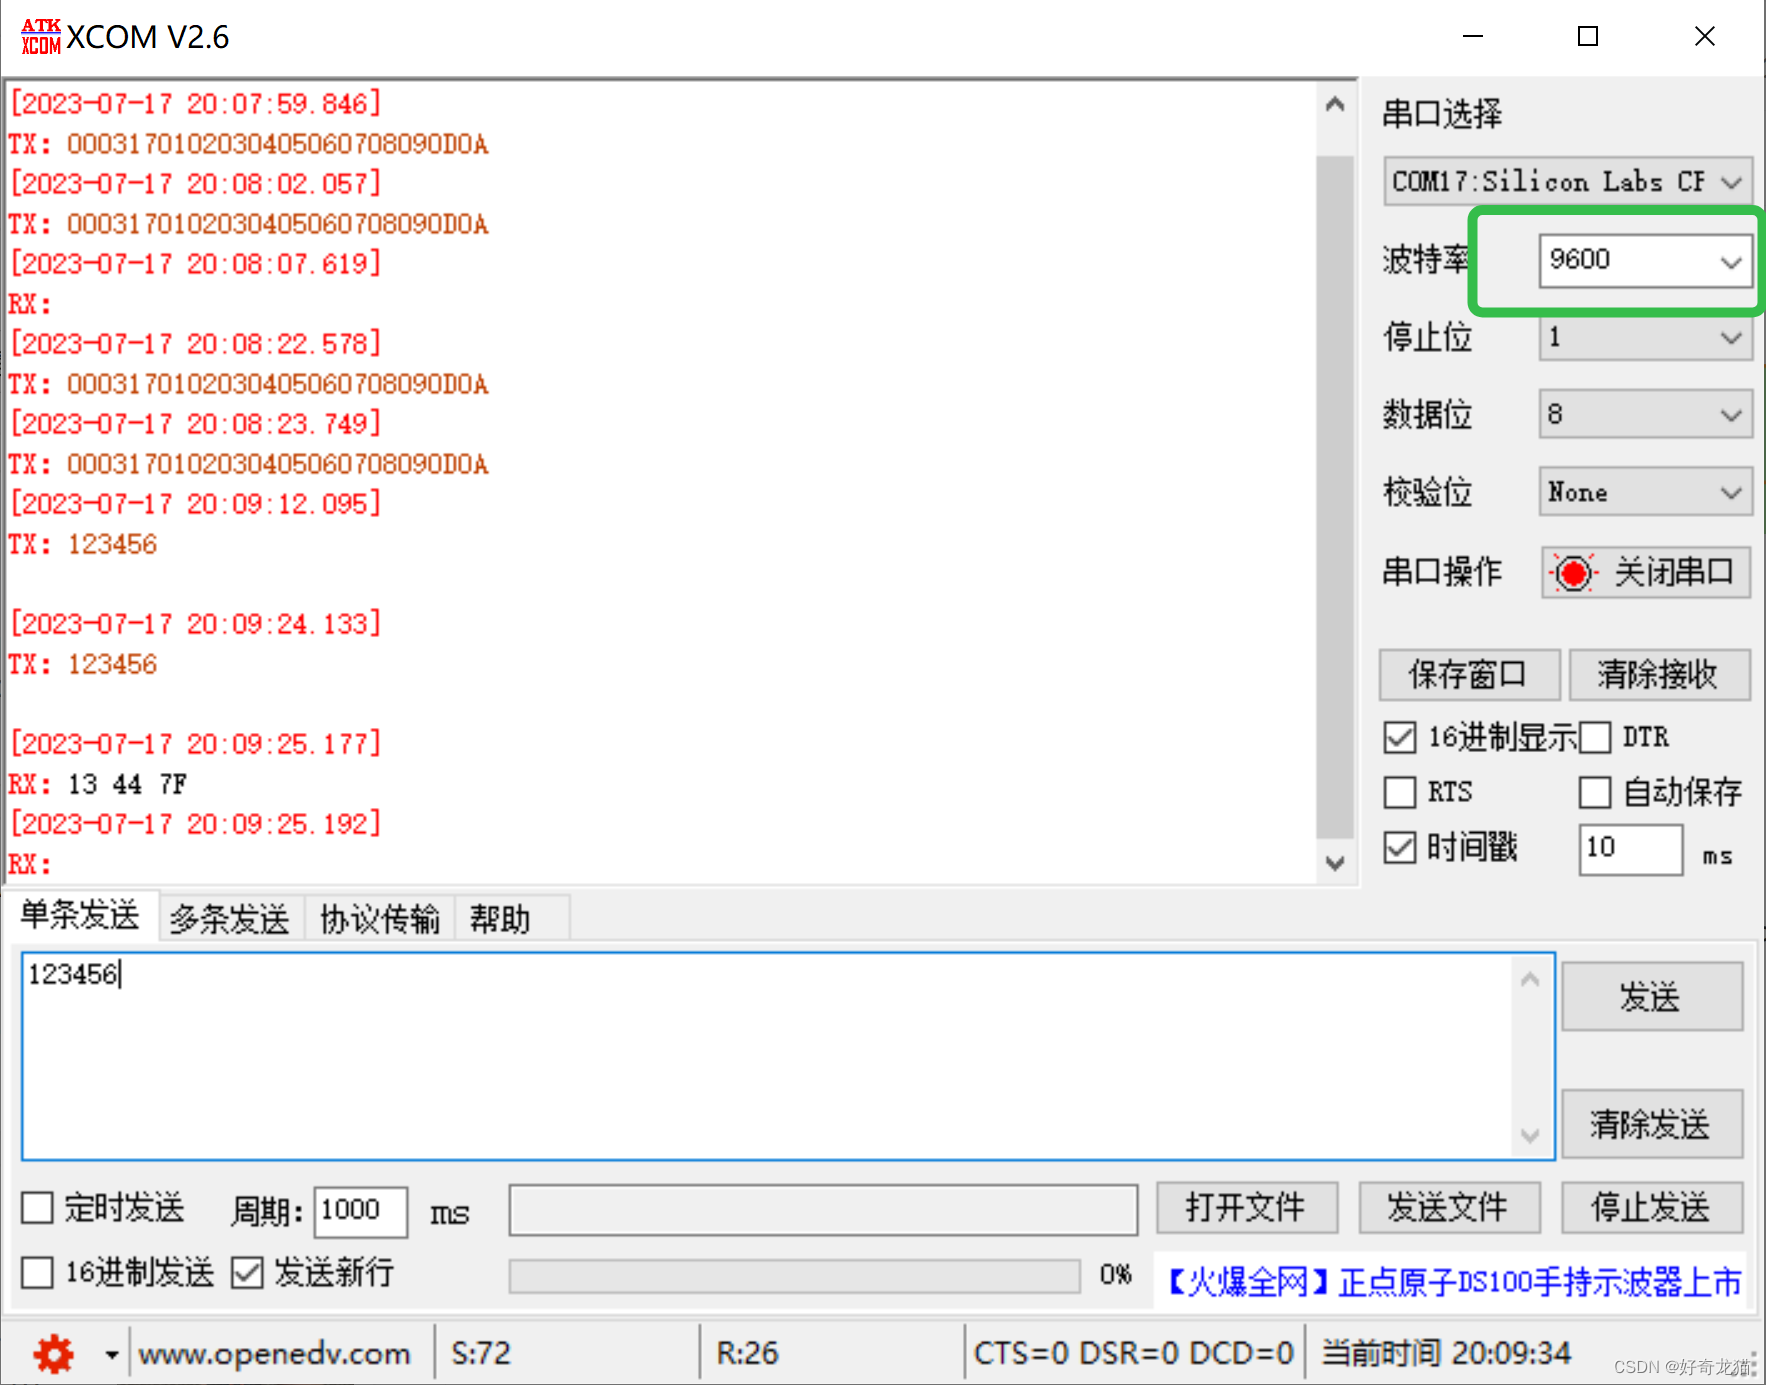
PC computer receiving end
5-3. Operation steps - debug uart2 (debug port) (uart2)
1. Hardware connection - pin connection
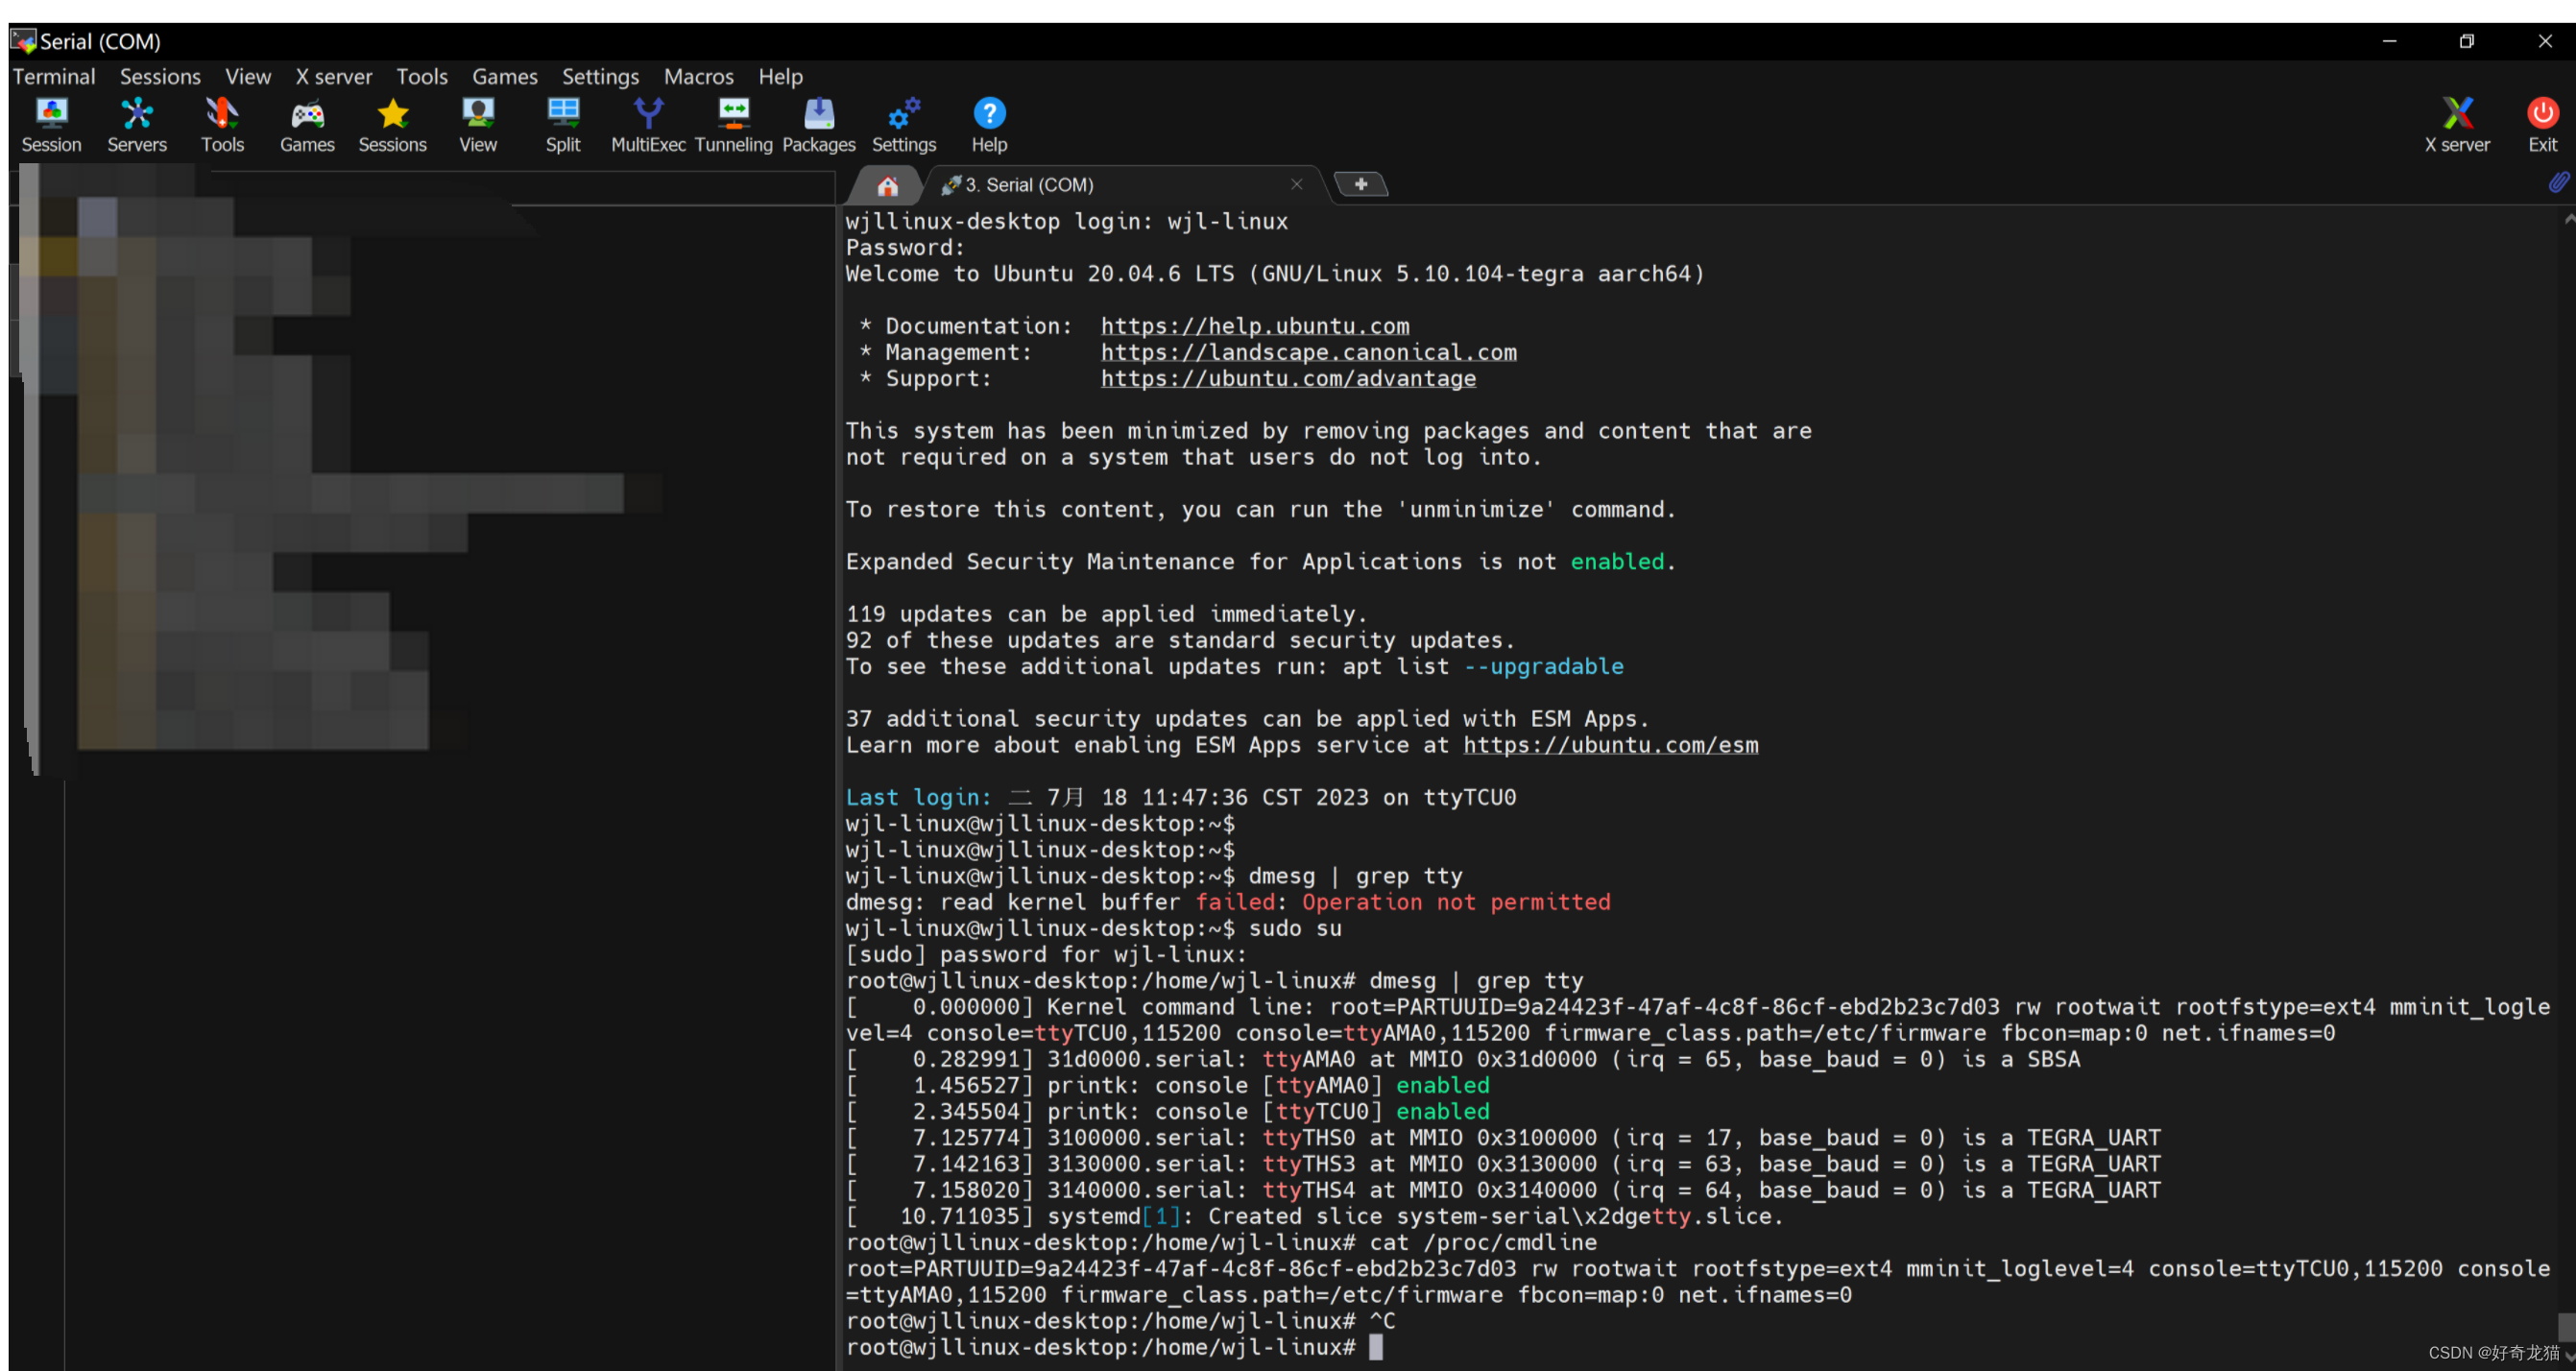
The pin has been confirmed before, but I still want to explain that uart2 is a debug port. I didn’t know it when I tried it before, and then I used a python script to control it. The baud rate in the script is 9600. I found that it was not working. Later, I found that 115200 is OK. Yes, so the debug port does not need to be configured and can be used directly. The main thing is to pay attention to the hardware connection.
The serial port hardware connection uses a TTL to USB module (ps: before debugging the lora module, reuse <.>)

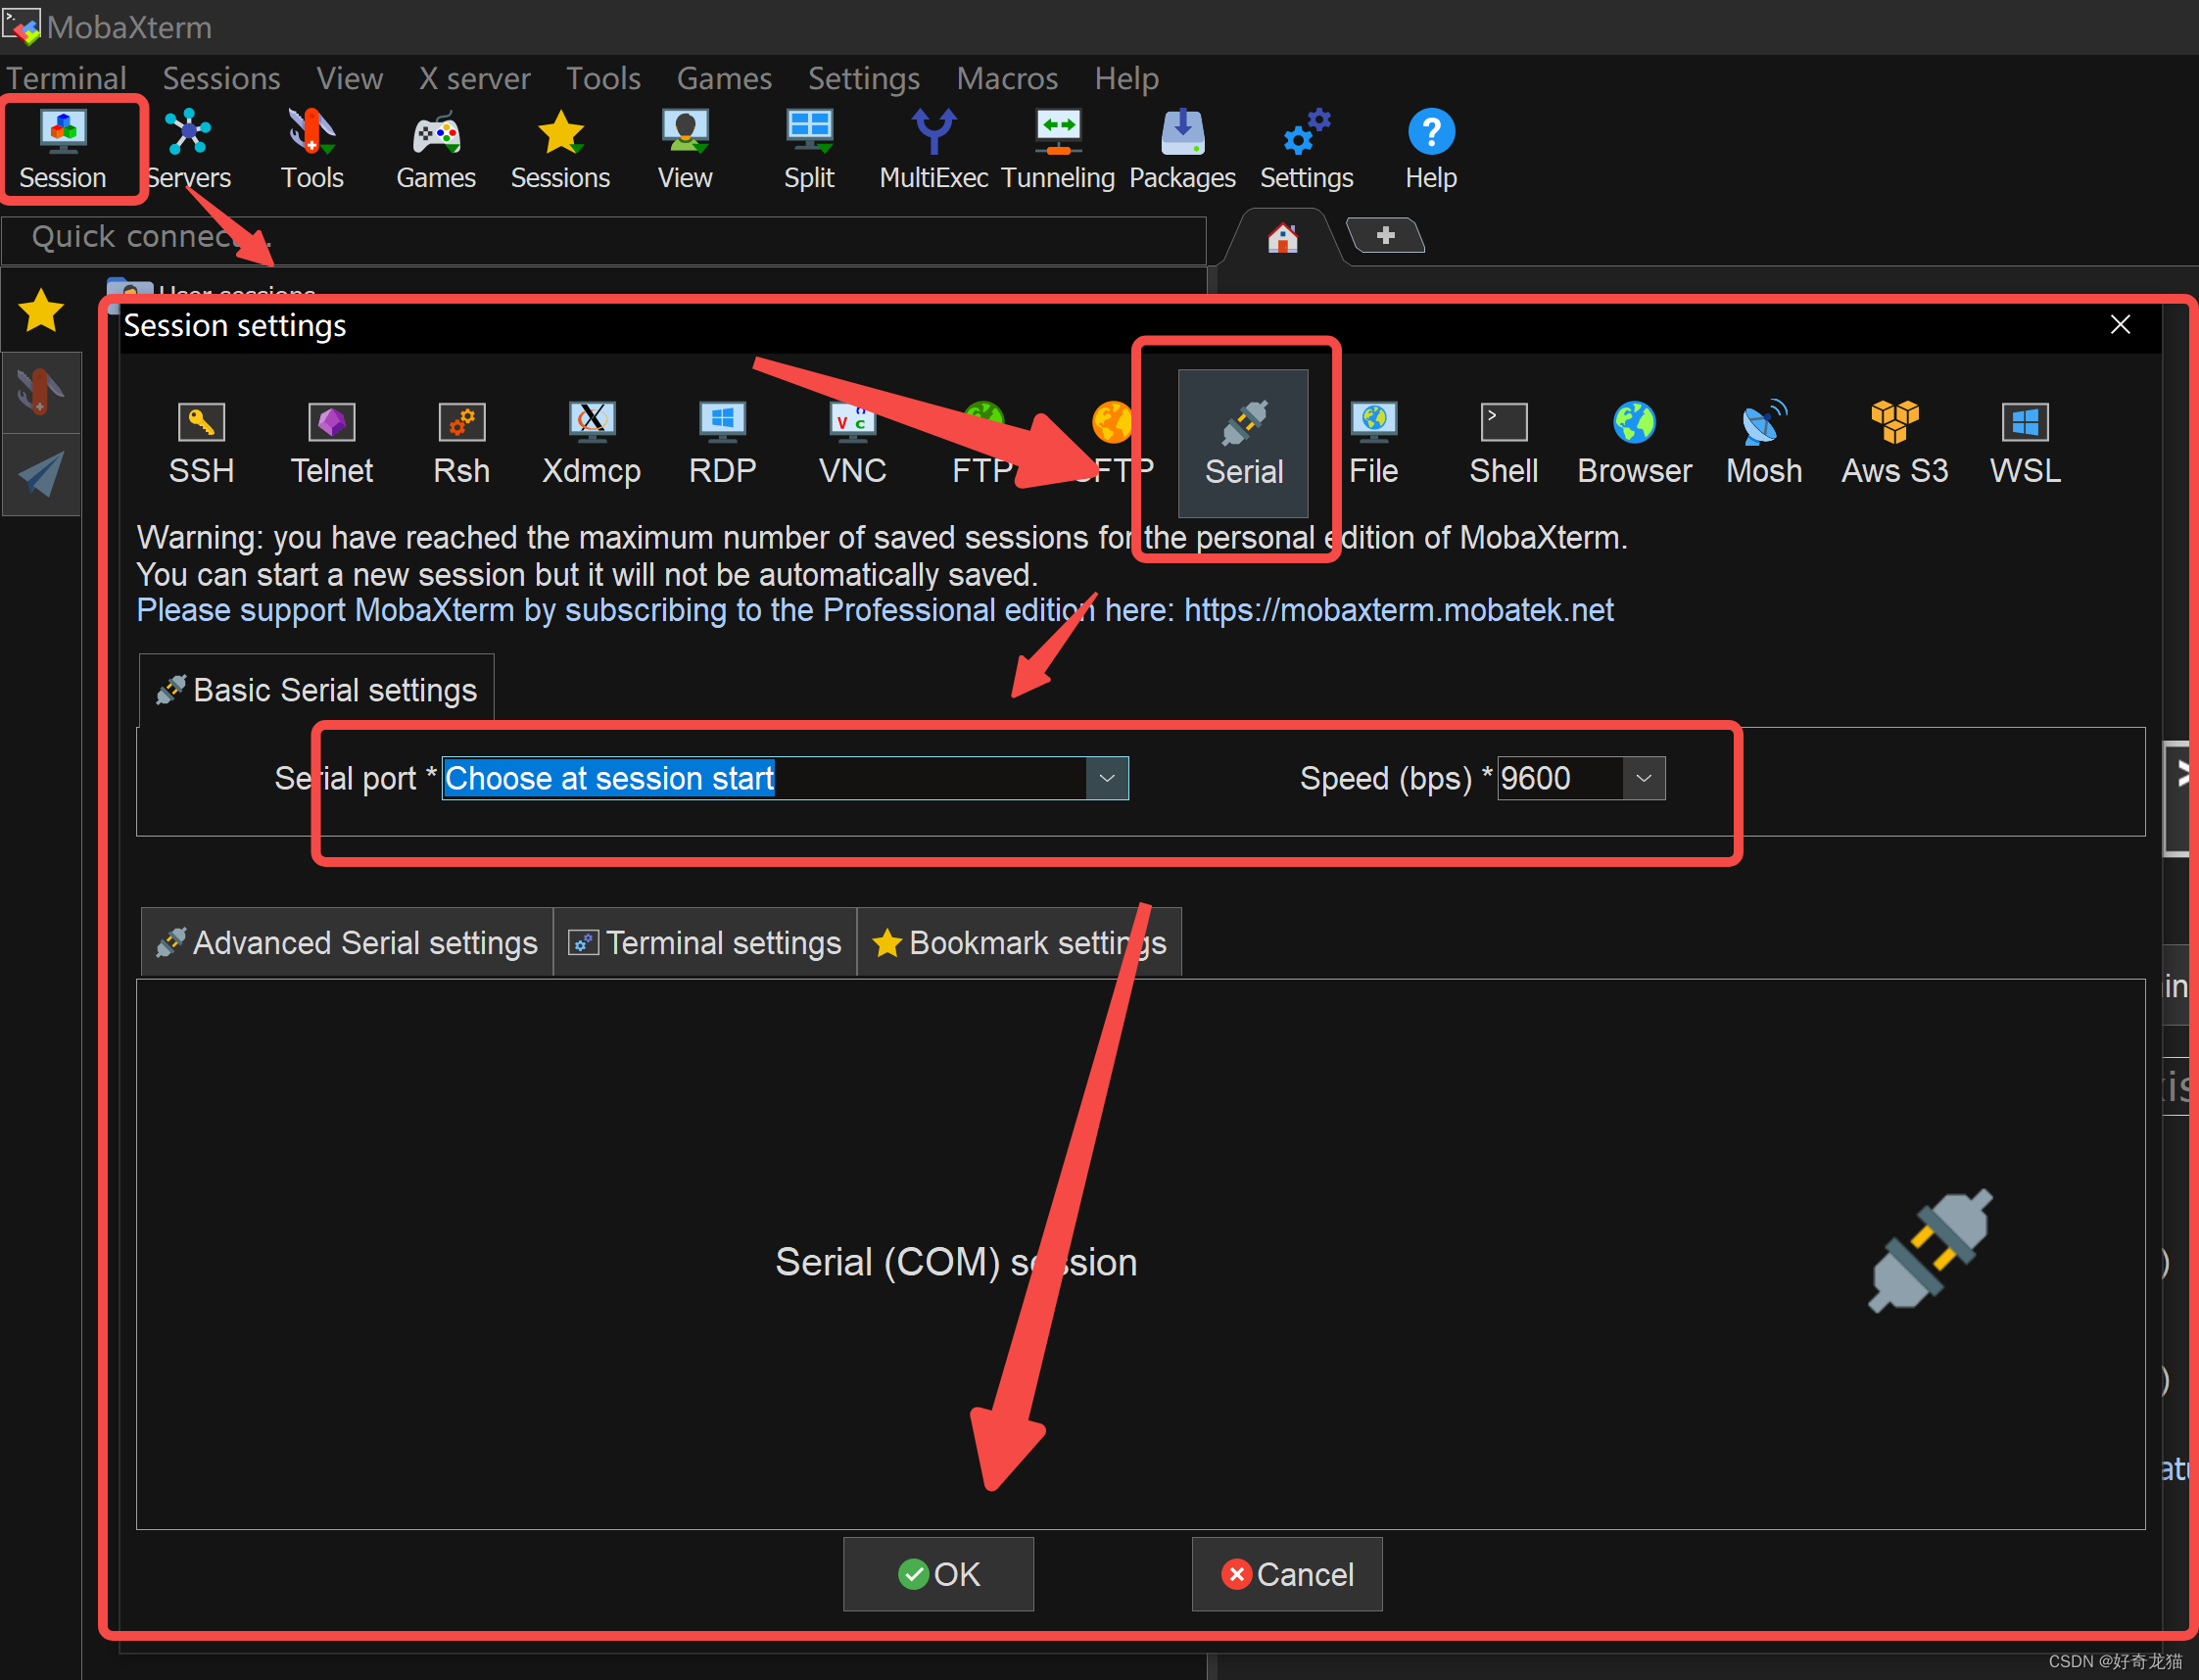
2. Download the software MobaXterm
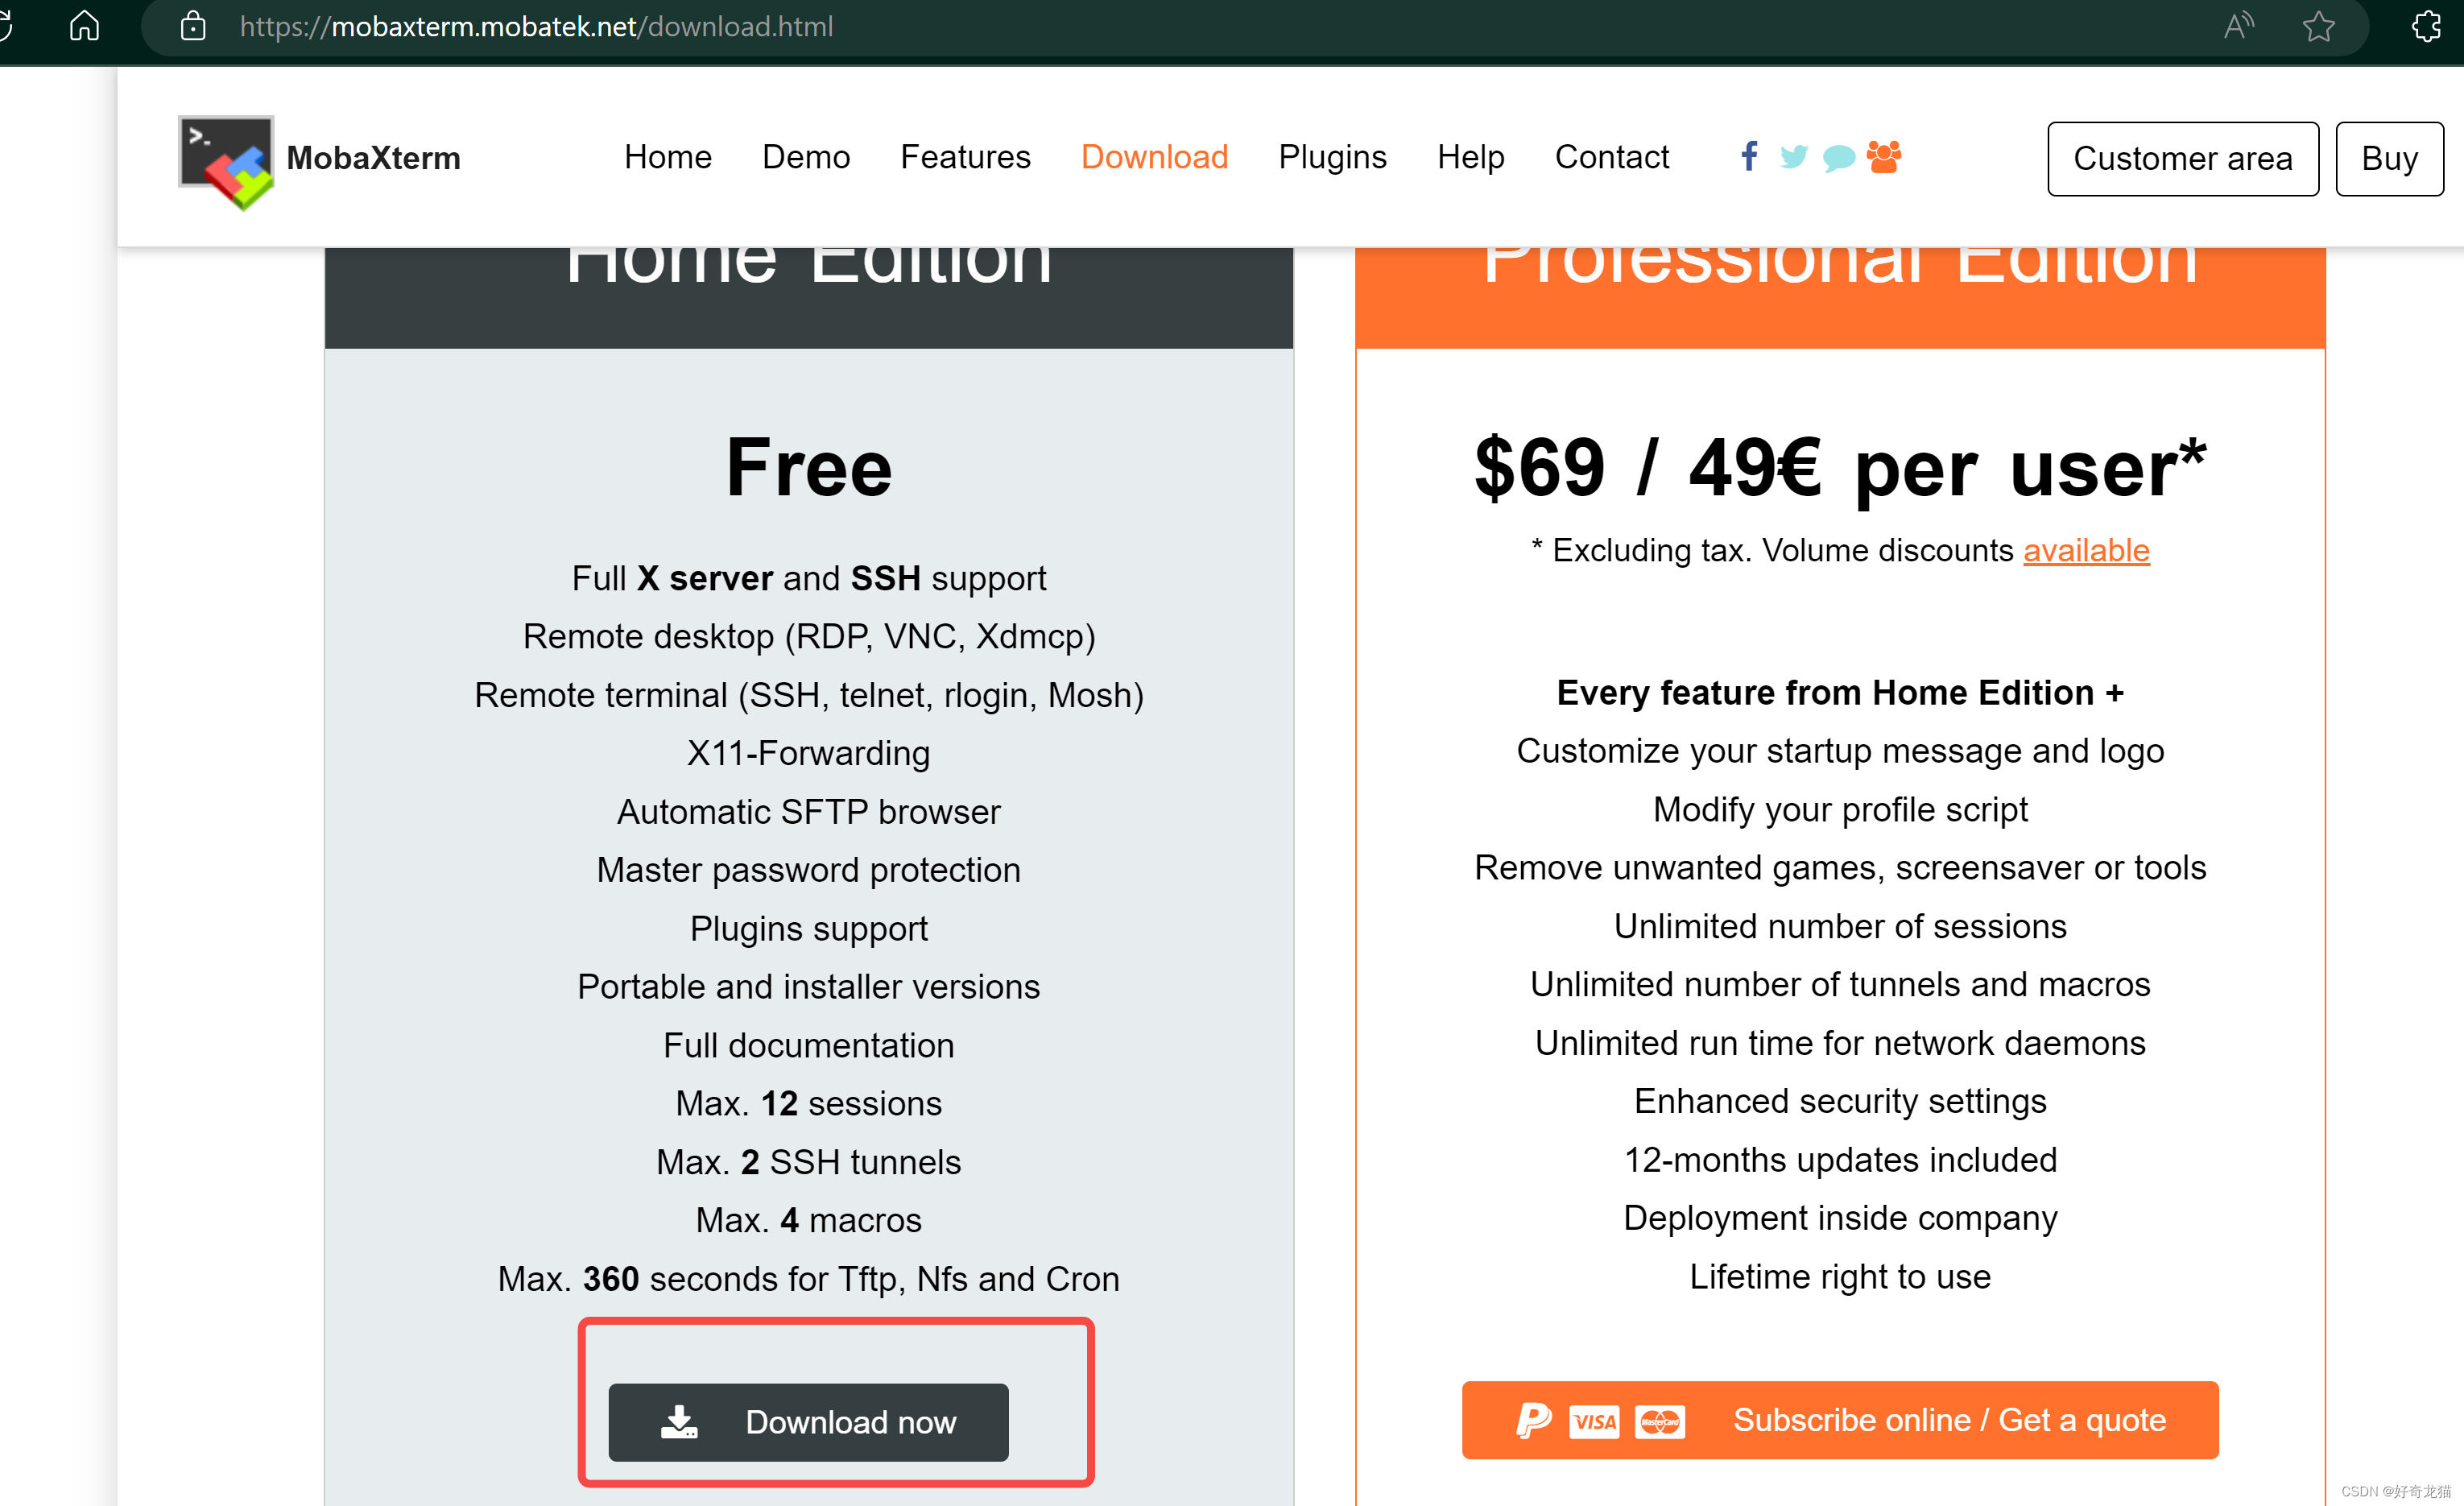
It is not very convenient to use serial port software. The recommended tool is MobaXterm, and if there is a free one, please download it yourself.
Link: https://mobaxterm.mobatek.net/download.html
Use as follows
3. Debugging
After the hardware is connected, information will be printed when the computer is restarted.
Then enter username and password
6. Details
(1) No module named 'serial' problem
Related links: https://blog.csdn.net/jiangchao3392/article/details/75107330
This problem is generally notinstall librarycaused by
(2)pip3: command not found
Before running pip3, you need to install pip3 first. If the order is reversed, it will report.
(3) py file report, unable to run
I typed the code by hand myself, so I reported a lot of grammatical errors, and the reason for the wrong code.
(4) There will be garbled characters in the received data
Generally, you need to check the hardware connection and GND, and the baud rate. In addition, when using minicom, the default baud rate is 115200
(5) uart2 is for debugging, and the default
is 115200. Knowing that it is a debugging port, use the python file control as follows
7. Summary
It is full of details, but from the first point of difference, until now, I have understood a lot, and there is always something to gain.