It has been a while since Unity released InputSystem. Many people may have heard of this new input system, and some people have downloaded it and used it. It turns out that this new input system is not as easy to use as the boss’s, so they gave up using it. up. To be honest, when I first started using this new input system, I also found it very cumbersome to operate and not easy to use at all. But after I watched the video on Youtube explaining this, I found that it was not that it was not easy to use, but that it was not very good at using it.
Although I haven’t used InputSystem for a long time now, let me talk about the advantages of InputSystem. When we develop software with fewer input methods, it is indeed more convenient to use the boss’s InputManager, but once there are more input methods, for example, a handle is required. , joystick, keyboard, mouse, touch screen, etc. When a software needs to have many input methods at the same time, it is very convenient to use InputSystem, because it does not need to modify the input judgment code, just hang in the relevant logic. . And in fact, the new version of InputSystem can also realize the function of the boss, and it is not necessary to use the new version. The following is a case I made myself.
First of all, we first download InputSystem, here from Window——PackManager
If you can't find it, please adjust the underline to Unity Registry.
After importing, there will be a pop-up window, just select the enabled one above, this is to let you change to a new input system, the boss's will not be available. If you want to adjust it back, change it to Both or Old in Editor-ProjectSetting-Player-OtherSetting-ActiveInputHandel.
After the import is complete, we will start our main topic. First click a folder, select Create, create an InputAction and open it.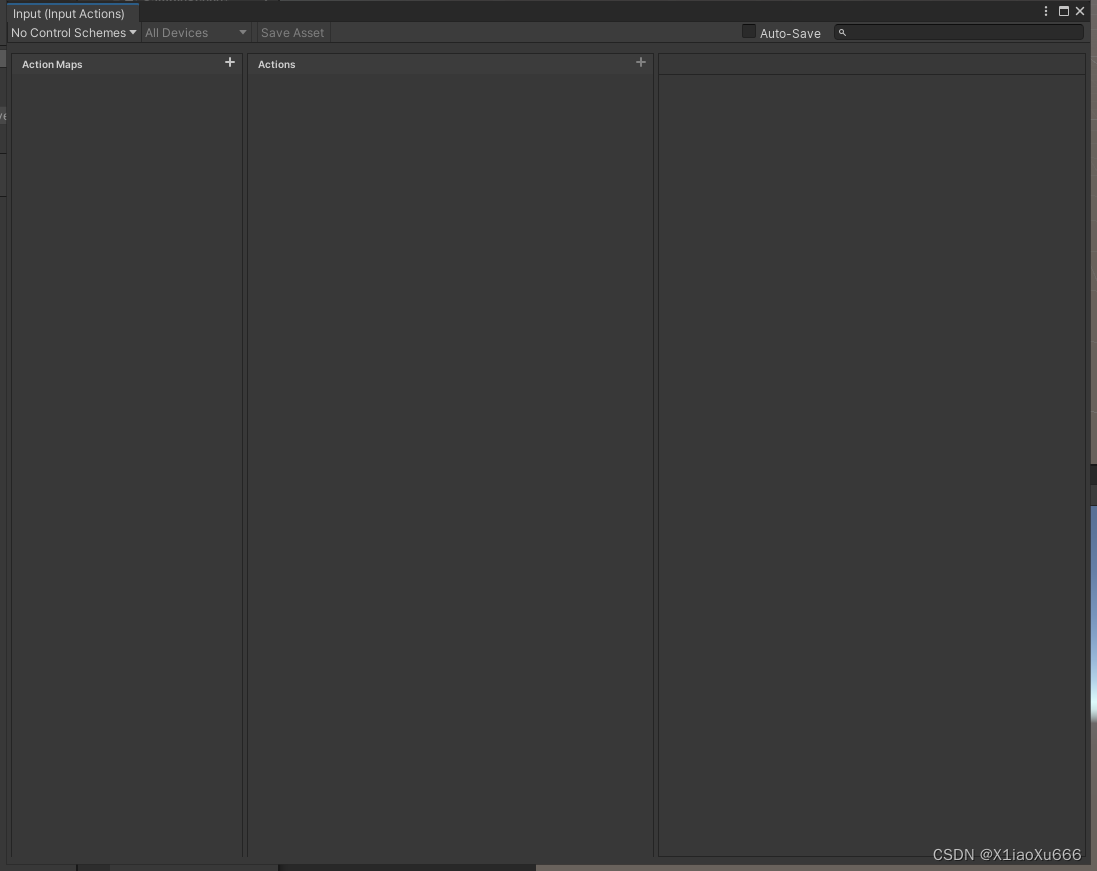
Here will come out such an interface.
ActionMap is like a literal action map, where many things can be created to facilitate player classification. For example, PlayerInput is player input, and UI is UI input.
Action is the specific action input. Let's first create a PlayerInput - Jump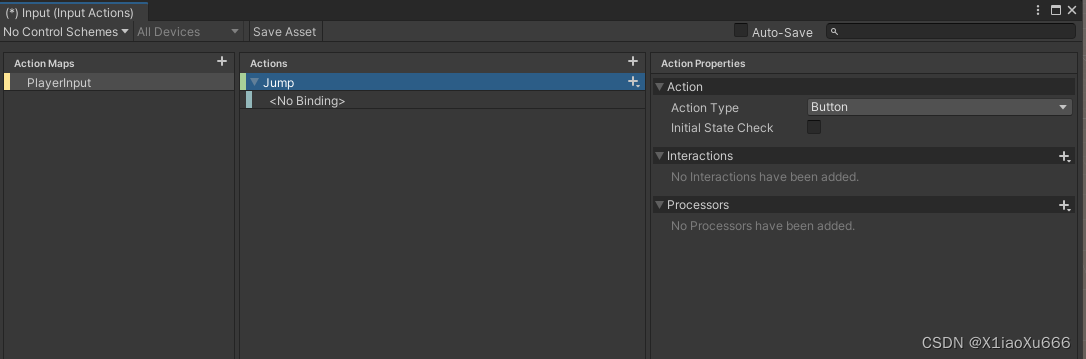
As we all know, the long jump should be a button. Generally, pressing the long jump button returns a Boolean value, so we choose Button in ActionType.
Let me talk about the other types of Value in ActionType. The return value is a very wide value. This can be set by yourself. When you choose Value, there will be many attributes below, and I will talk about it later. PassThrough is actually similar to Value, but it will return an initial value after you don’t enter it. I haven’t studied this thoroughly. I use Value most of the time.
After selecting the Button, click <No Binding> below, and click Path here. There are many kinds of input above
If you don't know which one you need, click the Listen next to it, and then click the button you need, and the binding option for that button will appear. If not, the situation you set up is not suitable for this input. Here we jump to bind a keyboard space, set up here, click SaveAsset on the upper right to save it. (It is best not to choose AutoSave)
There are two ways to use InputAction here. I will only talk about the one that I think is better, and it is also a way that is more suitable for programmers. Click InputAction after we save it. (For those who use other methods, pay attention, the reason why pressing a button will print many times is because checking the input of a button is divided into three detection points, Start, Performed and Cancel, so it will print multiple times)
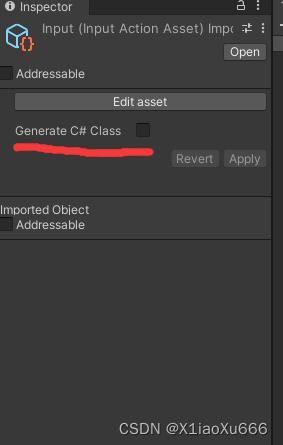
There will be such an option here, after checking it, the C# script will be automatically generated, which is why you do not choose AutoSave above, otherwise it will be a headache if you save it while modifying it.
After generating this script, you can instantiate it in the script. Points to note here:
The declared script should be new() instead of GetComComponent, and it should be enabled after declaration, example:
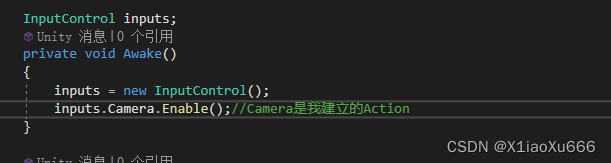
I wrote a camera movement here. I think this is more representative of the input. The movement and rotation of the camera are not a button, but return a three-dimensional vector Vector3 and a two-dimensional vector Vector2. So I chose Value, and I chose Vector3 and Vector2 below. like this: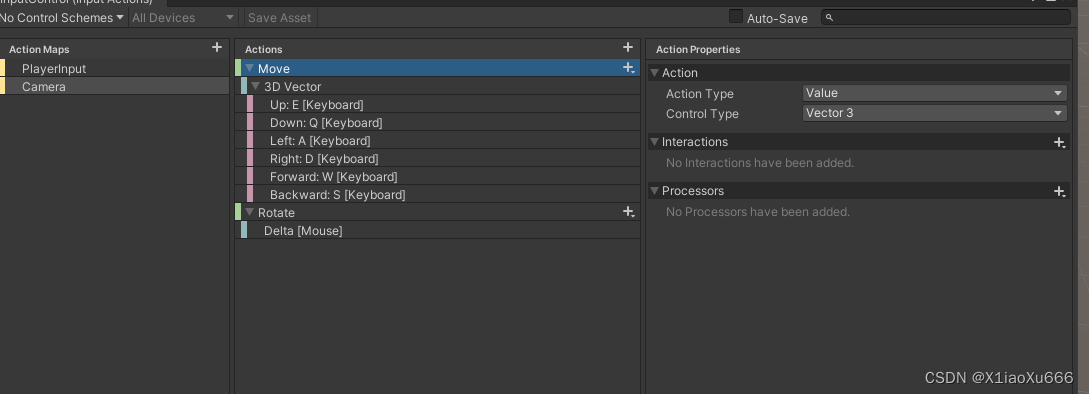
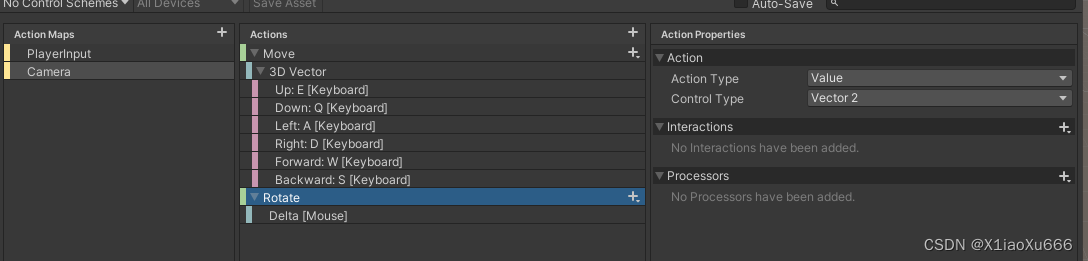 The rotation here is to control the X and Y axis offset of the mouse. I tried the options inside, and Delta should correspond to Input.GetAxis. The code for camera movement is as follows:
    private void Update()
    {
        #region 新输入系统移动
        Vector2 v2 = inputs.Camera.Rotate.ReadValue<Vector2>();//Rotate绑定返回的Vector2向量
        Vector3 v3 = inputs.Camera.Move.ReadValue<Vector3>();//Move绑定返回的Vector3向量
        if (Mouse.current.rightButton.ReadValue() == 1)//这里相当于老板输入法Input.GetMouseButton(1),按住鼠标右键,新版输入法感觉语法上更详细了
        {
            //以下就是关于移动相机功能代码没什么要讲的
            Cursor.lockState = CursorLockMode.Locked;
            transform.Translate((Keyboard.current.leftShiftKey.ReadValue() == 1/* 这里是一样类似于老板的Input.GetKey("left shift")*/ ? fastSpeed : speed) * v3 * Time.deltaTime, Space.Self);
            transform.RotateAround(transform.position, Vector3.up, v2.x * 0.1f);
            transform.RotateAround(transform.position, transform.right, -v2.y * 0.1f);
        }
        else
            Cursor.lockState = CursorLockMode.None;
        #endregion

    }
In fact, the new version of the input system is not as difficult to use as imagined. After using it proficiently, you will find its power in complex projects.