Unity-Comparative summary of transparent object rendering methods
- Summarize
- Compared
-
- 1. ZTest On can ensure correct rendering between transparent objects and opaque objects
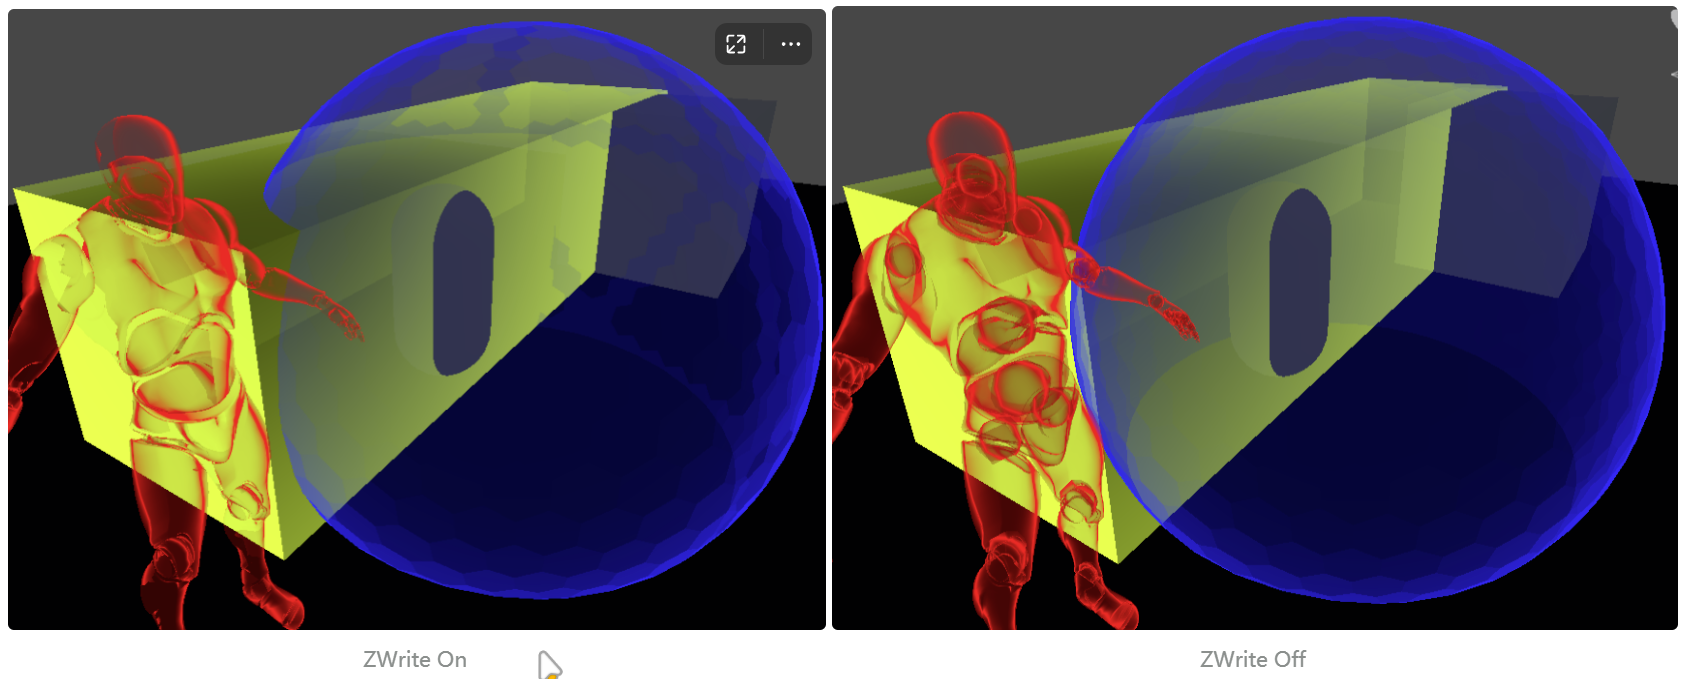
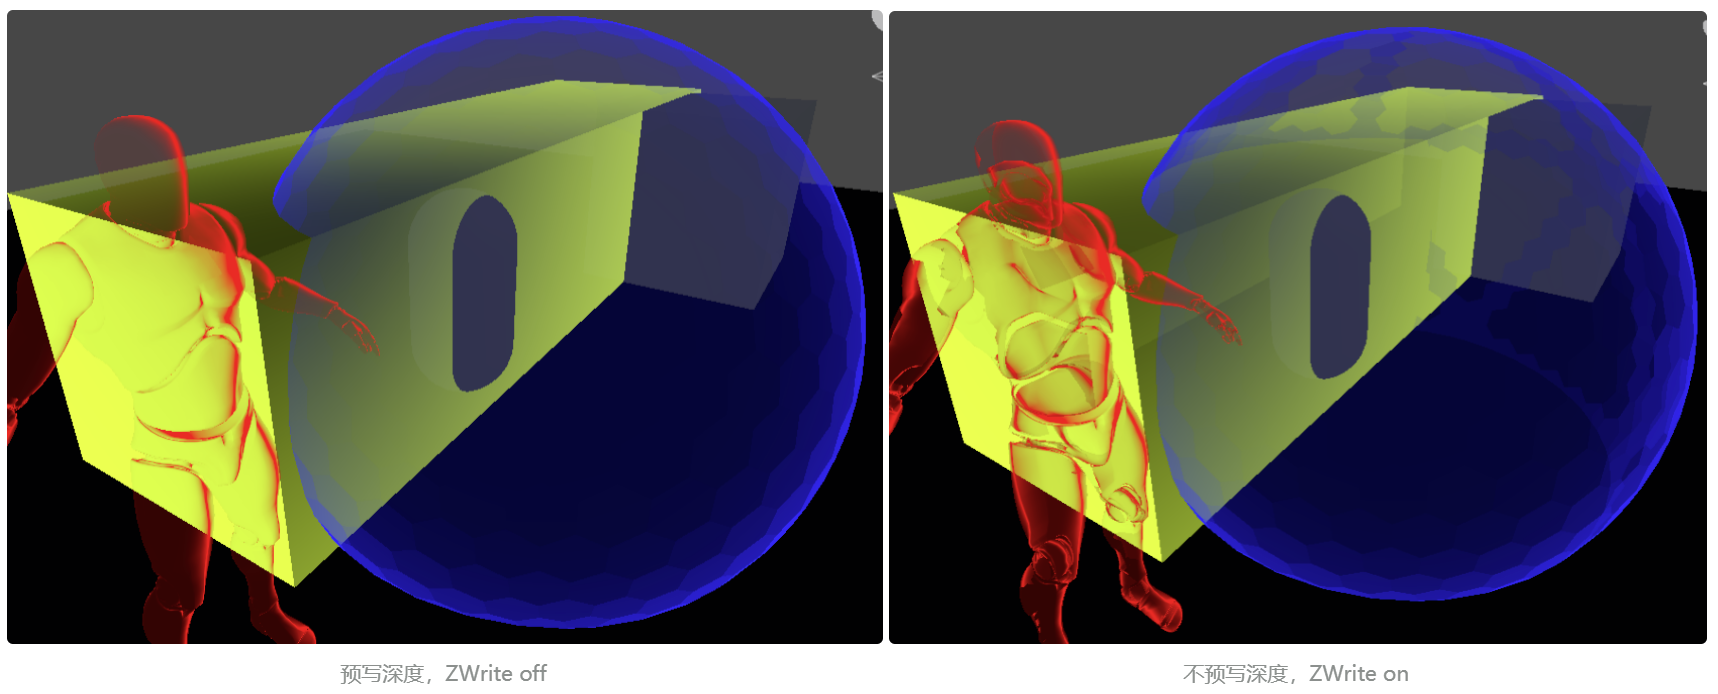
- 2. ZWrite On can ensure correct interspersed rendering between different transparent objects
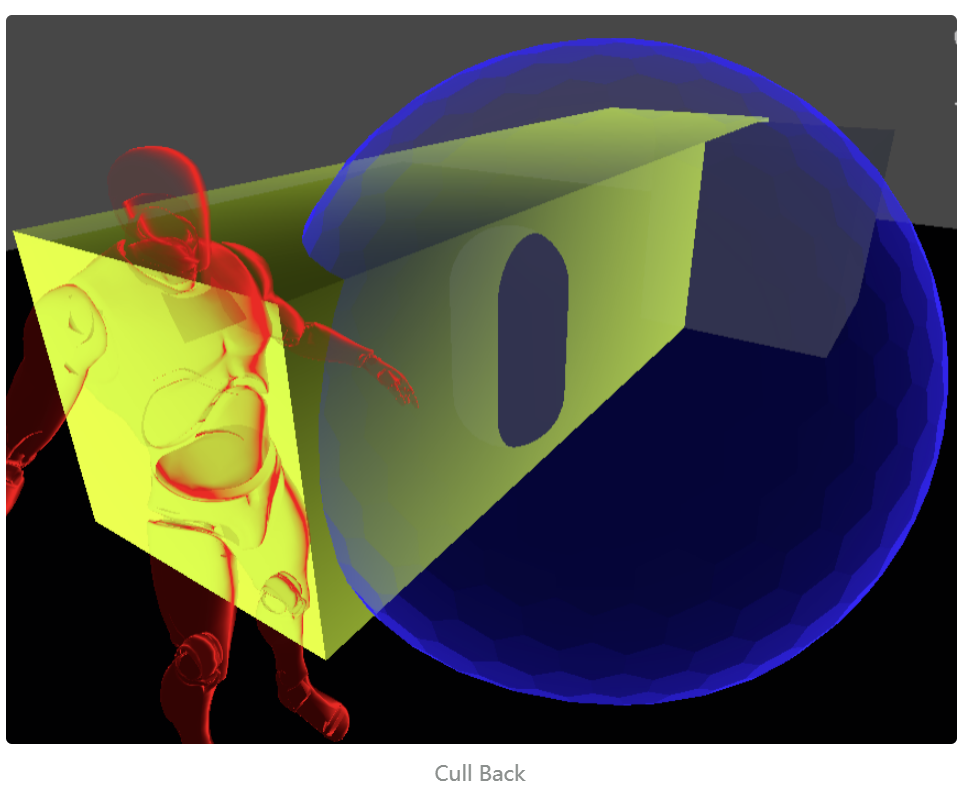
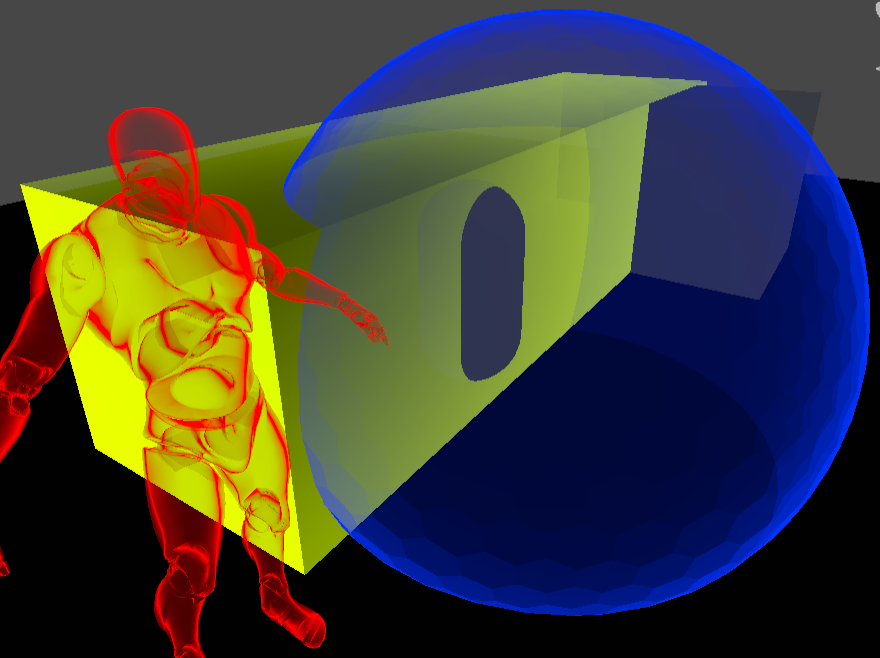
- 3. Cull Back can avoid the abnormal rendering of some backs (transparent objects themselves appear abnormally interspersed)
- 4. Pre-write the depth to solve the problem of abnormal interpenetration of transparent objects themselves
- 5. Double-pass rendering solves the problem of backside rendering
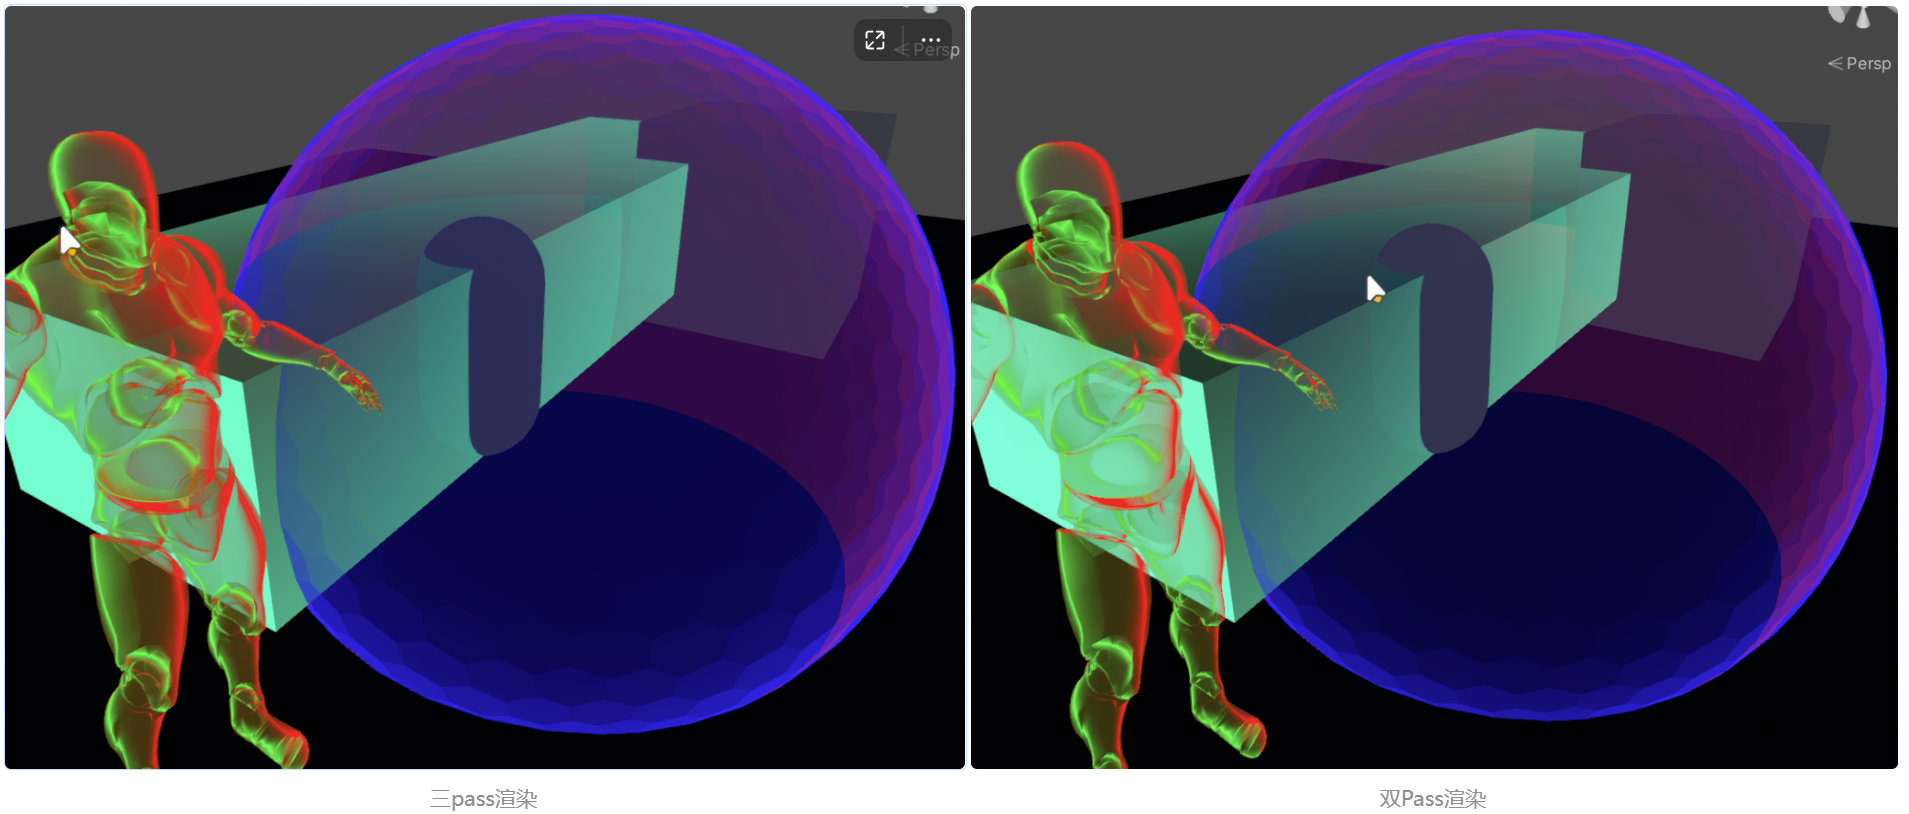
- 6. Three-pass rendering solves the defects of double-pass rendering @MoYaun
The transparency effect has always been one of the difficult problems in rendering. Since the transparent object will not block the object behind the object, the depth map (Z-Buffer) technology cannot be used. Therefore, the rendering pipeline generally performs special processing on transparent objects.
● Put the transparent object after the opaque object for rendering
● The rendering order of the transparent object will cause problems with color superposition, (for example, red first and then blue, and blue first and red) the mixed colors of the two methods are different ● Due
to Z-buffer cannot be used, so rendering of transparent objects is prone to interspersed
Z-Test, use the depth in the Z-buffer to compare the current pixel depth, if the depth meets the conditions, the pixel will be rendered
Z-buffer, a cache shared by all shaders. If the Z-test passes, then the pixel can be written or not written according to the settings in the pass Z-buffer, and of course it can always be written (even if the Z-Test fails)
Cull, forward culling, backward culling, or not.
When rendering transparent objects, they are sorted by depth from back to front (same queue size). Therefore, we don't have to worry too much about the mutual occlusion of multiple transparent objects, because the back-to-front rendering method will not discard or render any transparent objects incorrectly.
Especially in Unity, when the queue value is >2500, it will be recognized as a semi-transparent queue, and sorted from the back to the front according to the depth.
Summarize
Let me talk about the conclusion first.
Direct mixing does have a sequence interspersed within the model, but it is not obvious if the model is simple. We can even use other techniques to reduce this difference, such as based on the distance between the camera and the pixel, the closer the distance, the higher the transparency. This solves most interspersed issues.
For complex models, multiple pass rendering is necessary (multi-Material rendering performance is relatively poor).
● If there is no need to consider the interpenetration of different transparent objects, then ZWrite Off (ZTest On, Cull Off) can achieve good results.
● If you don't need to consider the back of the transparent object, then Cull Back (ZTest On, ZWrite On) can get good results.
● If more complete rendering is required, then a double pass is required to ensure correct rendering of transparent objects.
● If you need relatively complete rendering and don't care about the overhead, then using three-pass rendering can make transparent objects get more correct rendering.
Compared
Variable factors:
● ZTest On, Off,
● ZWrite On, Off
● Cull back, Front, Off
1. ZTest On can ensure correct rendering between transparent objects and opaque objects
After ZTest is Off, translucent objects will directly cover all opaque objects. . Invisible translucent objects that were originally covered by opaque objects are displayed incorrectly.

ZWrite On,Cull Off
2. ZWrite On can ensure correct interspersed rendering between different transparent objects
Observing the ZWrite Off rendering results, it is found that the yellow square is rendered to the back of the sphere (in fact, part of it should be interspersed inside).
Although ZWrite On renders strangely, the yellow square is correctly rendered inside the sphere.
ZTest On,Cull Off
3. Cull Back can avoid the abnormal rendering of some backs (transparent objects themselves appear abnormally interspersed)
Although it avoids the problem of its own interpenetration, it does not restore the opaque effect on the back. Reality is missing.
ZTest On,ZWrite On
4. Pre-write the depth to solve the problem of abnormal interpenetration of transparent objects themselves
It is true that the forehead will not be inserted by itself, but the back is rejected due to the depth test. (The rendering result is a bit different from backface culling, and backface culling will have a little bit of artifacts).
ZTest On,ZWrite On,Cull Off
5. Double-pass rendering solves the problem of backside rendering
Render the back (Cull Front) first, then render the front (Cull Back) to ensure that the front and back rendering order, and both sides are rendered.
Problem: Since the back side is rendered first and the depth is written, if there is a forward side with a large depth, it will be culled. As a result, complex objects themselves exhibit imperfections.
No pre-write depth, ZWrite On, ZTest On, Cull Front\Back
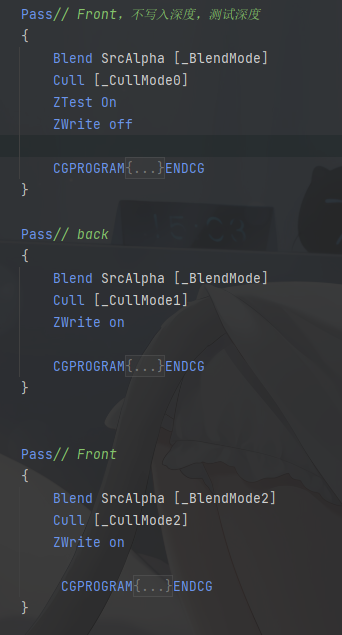
6. Three-pass rendering solves the defects of double-pass rendering @MoYaun
First render an extra Pass, remove the back, ZTest On, ZWrite Off can theoretically be solved - let the missing part be filled.
There is no actual reference basis for this rendering method, it is just my personal trick for double-pass rendering defects-I thought that this method can be used to make up for it, so I did so.
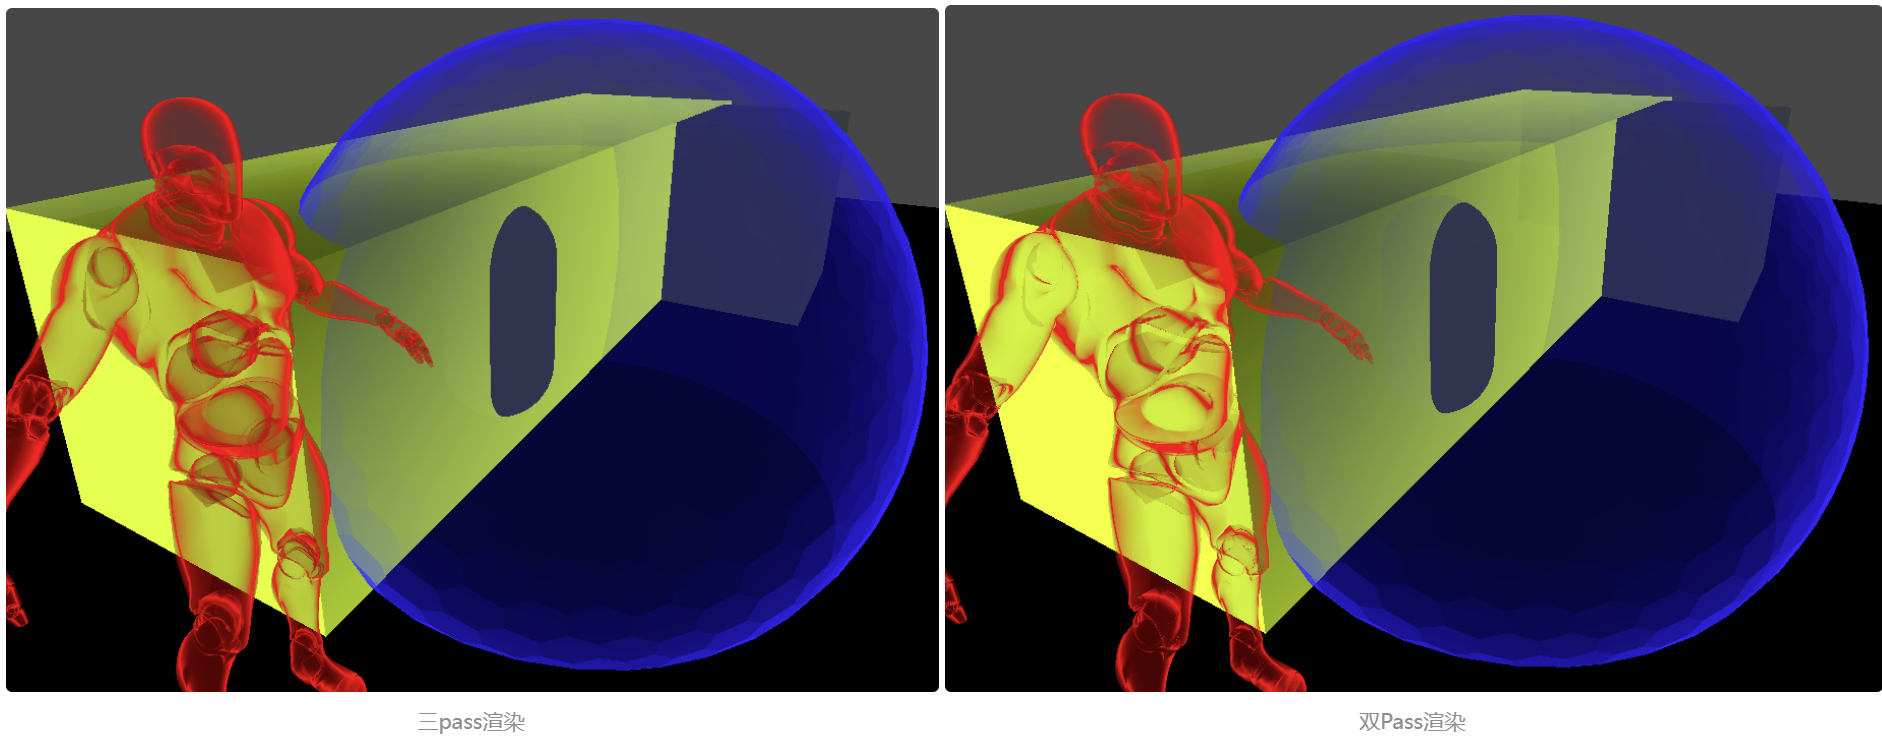
But because the color of the front is rendered twice, the colors are superimposed, so there will be a difference in the rendering of different colors on the front and back, and the color of the front rendering will be brighter. (But the effect is not big, it still looks correct)