If you haven't installed stm32cubeide, you can go to the st official website to download it (you have to log in to download it), or you can download the one I provided , which comes with a Chinese tutorial.
Written in the front: If you are new to stm32cubeide, it is recommended to read this article together, so that you can get to know stm32cubeide more quickly.
1. Open stm32cubeide, select the working directory to enter the main interface, and click Create Project.

2. Search and select the chip model you want, here I choose stm32f103c8t6.

3. After selecting, click Next.


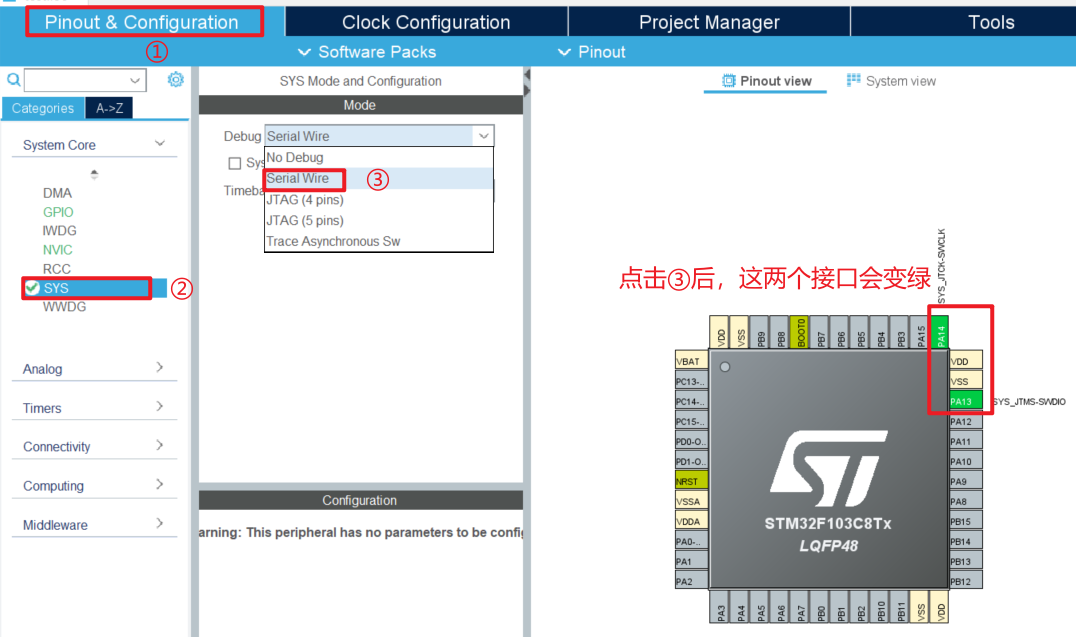
4. After the project is created, other peripherals cannot be configured directly. First, the simulation interface, crystal oscillator source and clock tree must be configured. Because I use the stm32f103c8t6 minimum development board , the download simulation interface that comes with it has four pins, and the corresponding simulation mode is Serial Wire .
Simulation interface:
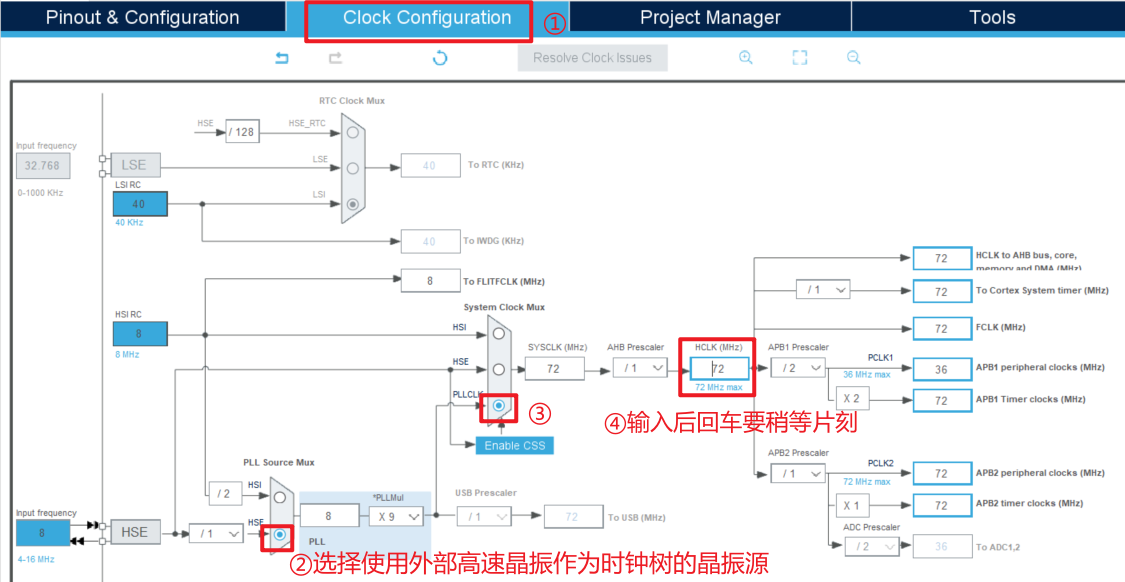
Set crystal oscillator source :

Set up the clock tree:
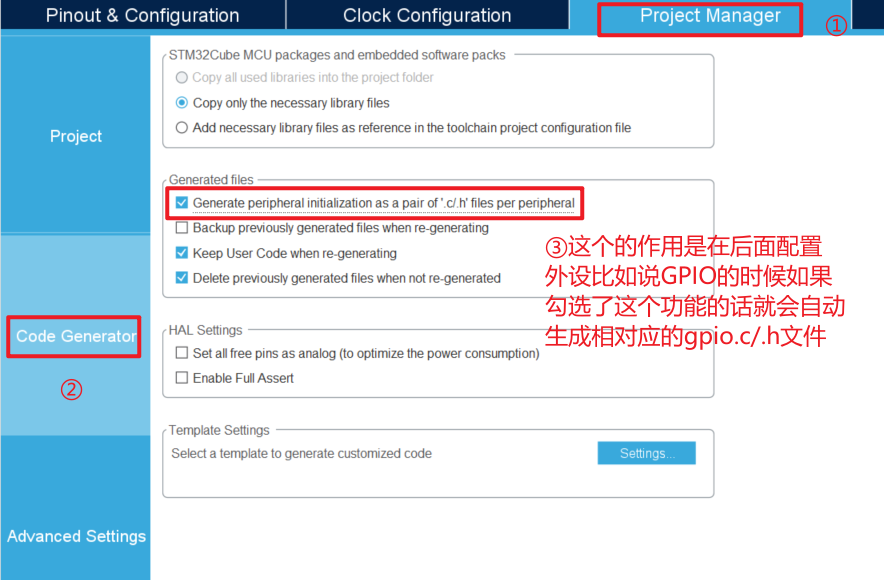
5. Then set up a more important place.
6. After the settings are complete, click Generate Code.

7. Set the simulation function.

8. Set to prevent Chinese garbled characters.

9. Set the serial port to output floating-point numbers according to personal needs (optional).

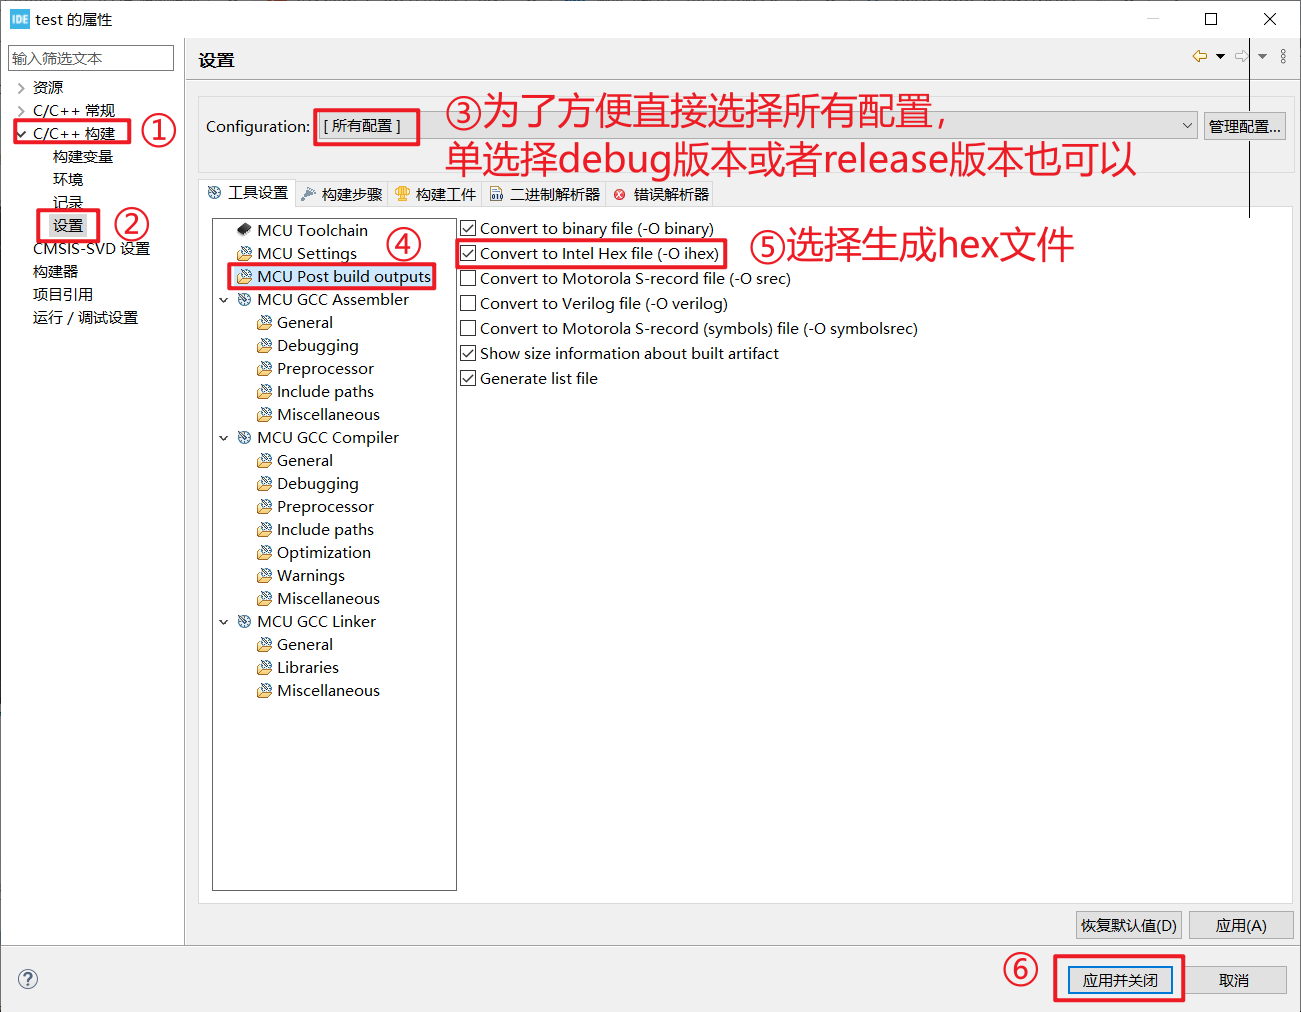
10. Choose to generate a hex file according to personal needs (optional).
Such a usable blank project is created, and you can continue to add peripherals according to the project later.