1. Deployment
1.1. OpenVINO Toolkit:
- CNN-based deep learning inference on edge devices
- Supports heterogeneous execution across Inter® CPU, Inter® Integrated Graphics, Inter® FPGA, Inter® Movidius™ Neural Compute Stick, Inter® Neural Compute Stick 2, and Inter® Vision Accelerator designs with Inter® Movidius™ VPU
- Accelerate inference time with an easy-to-use library of computer vision functions and pre-optimized kernels
- Includes optimized calls to computer vision standards including OpenCV*, OpenCL™ and OpenVX*
1.2. The most important components of OpenVINO:
- Deep Learning Deployment Toolkit (DLDT)
深度学习模型优化器------ A cross-platform command-line tool for importing models and preparing them for optimal execution by the inference engine. Model
Optimizer imports, converts and optimizes models, supported models are
popular frameworks such as Caffe*, TensorFlow*, MXNet*, Kaldi* and ONNX*.深度学习推理引擎------ Unified API for high-performance inference on multiple hardware types, including Intel® CPU, Intel® Integrated Graphics, Intel® Movidius™ Neural Compute Stick, Intel® Neural Compute Stick 2 and Intel®-powered Intel® Vision Accelerator Design Movidius™ VPU
1.3 Intel Processor
-
Supported hardware:
第6至第10代Intel®Core™处理器and Intel® Xeon® Processor
Intel Pentium® Processor N4200/5, N3350/5 or N3450/5 with Intel® HD Graphics -
Supported Operating Systems:
Windows®10(64位)
Ubuntu* 18.04.3 LTS (64-bit)
CentOS* 7.4 (64-bit)
Yocto Project* version Poky Jethro 2.0.3 (64-bit)
macOS* (64-bit) -
Supported Intel® Distributions of OpenVINO™ toolkit components:
Deep Learning Deployment Toolkit
OpenCV
OpenVX*
Deep Learning Workbench
1.4 OpenVINO installation
1.4.1 Download
Official download address: https://software.seek.intel.com/openvino-toolkit?os=windows
Register first, and you will receive an activation code by email.
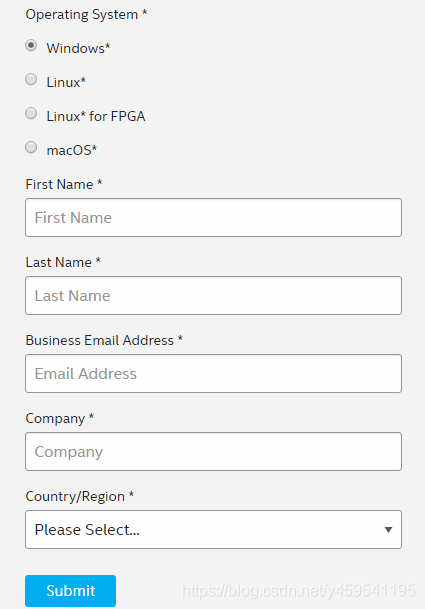
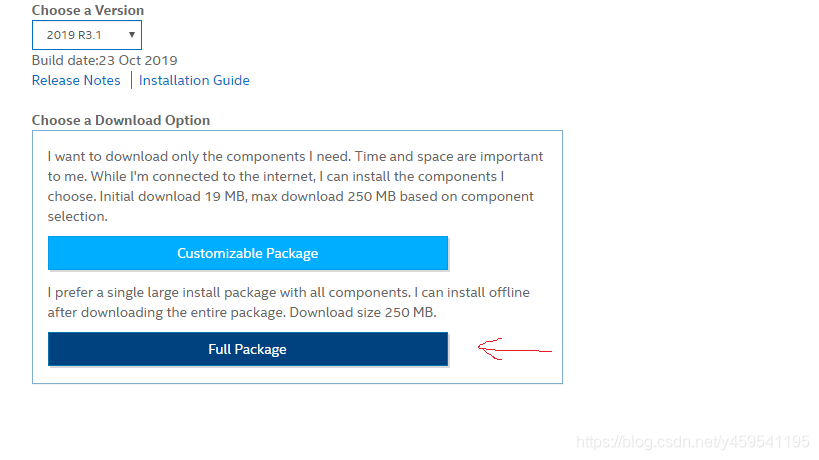
Select the complete package to download
1.4.2 Install openvino
The file size is 255M.

Double-click to install, select the path, click Extract
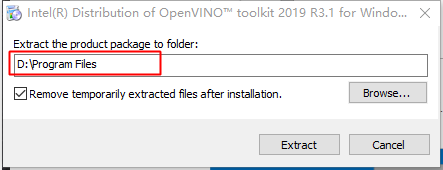
and select again 默认的安装路径,
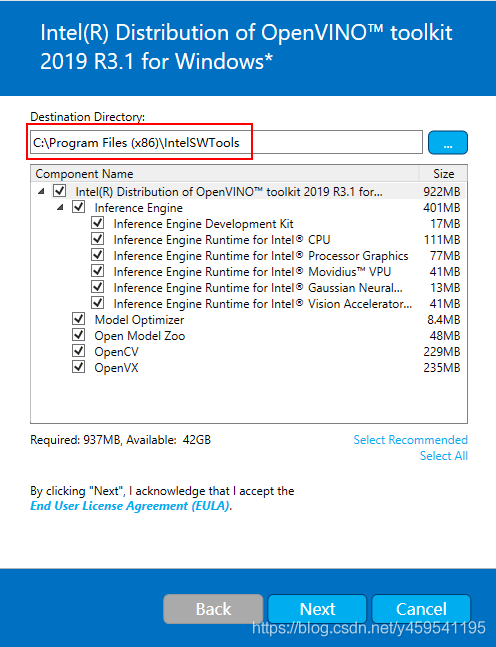
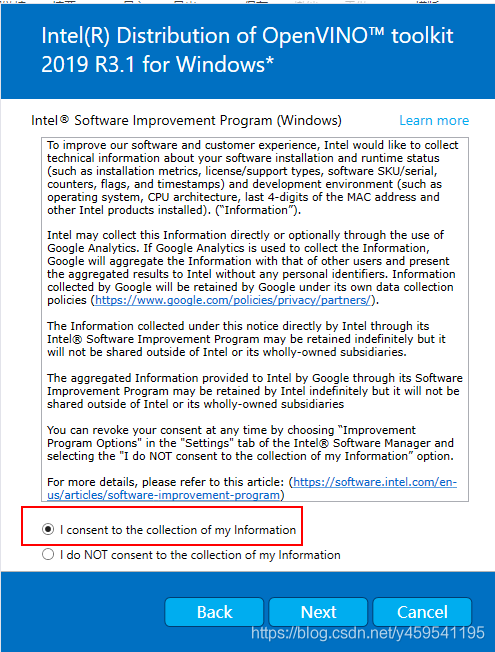

Keep clicking next and exit when done.
1.4.3 Install dependencies
- Visual Studio version >= 2015
- CMake version >= 3.4
- Python version >= 3.6 (used here)
2. Model acceleration test
2.1 Model Optimizer
-
First configure the model optimizer
Win + R key combination to open the command line window, switch to your own Model Optimizer installation directory, here I am:
cd C:\Program Files (x86)\IntelSWTools\openvino\deployment_tools\model_optimizer\install_prerequisitesIn the run directory:
install_prerequisites.batenter
install_prerequisites.bat

2.2 Verify installation
-
Switch directory to find
demo:cd C:\Program Files (x86)\IntelSWTools\openvino\deployment_tools\demo\图像分类Validate input:demo_squeezenet_download_convert_run.batRunning result:

推理Verify input:demo_security_barrier_camera.batThe result is as follows:

2.3 YOLOv3 model reasoning acceleration
2.3.1 yolov3 model darknet to tf model
Download and switch to the directory:
https://github.com/mystic123/tensorflow-yolo-v3.git

cd tensorflow-yolo-v3
Then you can use your own trained labels and models, here we use coco.names和yolov3.weightstwo files
to generate conversions:
python convert_weights_pb.py --class_names coco.names --data_format NHWC --weights_file yolov3.weights


Will get a pb file
or name the pb file, specify the size
#  --output_graph 指定输出pb文件的名称
python convert_weights_pb.py --class_names coco.names --data_format NHWC --weights_file yolov3.weights  --output_graph yolov3.pb

 #  --size 指定图像的大小(默认为416)
python3 convert_weights_pb.py --class_names coco.names --data_format NHWC --weights_file yolov3_608.weights --size 608
2.3.2 Convert YOLOv3 TensorFlow model to IR
Switch to the tf directory to modify your own category
cd C:\Program Files (x86)\IntelSWTools\openvino_2019.3.379\deployment_tools\model_optimizer\extensions\front\tf

Copy the frozen_darknet_yolov3_model.pb file to the model_optimizer directory, and enter the following command to generate xml and bin files:
cd C:\Program Files (x86)\IntelSWTools\openvino_2019.3.379\deployment_tools\model_optimizer

python mo_tf.py  --input_model ./frozen_darknet_yolov3_model.pb  --tensorflow_use_custom_operations_config ./extensions/front/tf/yolo_v3.json  --batch 1


2.3.3 Testing
win + R to open the window
and enter the following command settings 临时环境变量:
C:\Program Files (x86)\IntelSWTools\openvino_2019.3.379\bin\setupvars.bat
Continue to operate in the current window, cd to the following directory:
C:\Program Files (x86)\IntelSWTools\openvino_2019.3.379\deployment_tools\open_model_zoo\demos\python_demos\object_detection_demo_yolov3_async
Copy the required 5 files to this directory and

run the command:
python object_detection_demo_yolov3_async.py -i ./test.mp4 -m ./frozen_darknet_yolov3_model.xml -l ./cpu_extension_avx2.dll --labels coco.names

If you want to use the camera, replace -i ./test.mp4 with -i cam; if there is a GPU device -d GPUfor testing
, the effect is as follows:


over~
Reference:
https://docs.openvinotoolkit.org/latest/index.html
https://docs.openvinotoolkit.org/latest/_docs_install_guides_installing_openvino_windows.html
https://docs.openvinotoolkit.org/latest/openvino_docs_MO_DG_prepare_model_convert_model_tf_specific_Convert_YOLO_From_Tensorflow.html
https://blog.csdn.net/weixin_41247701/article/details/99642139
https://docs.openvinotoolkit.org/2019_R3.1/_models_intel_index.html