OpenCV相关操作
一、OpenCV部分操作
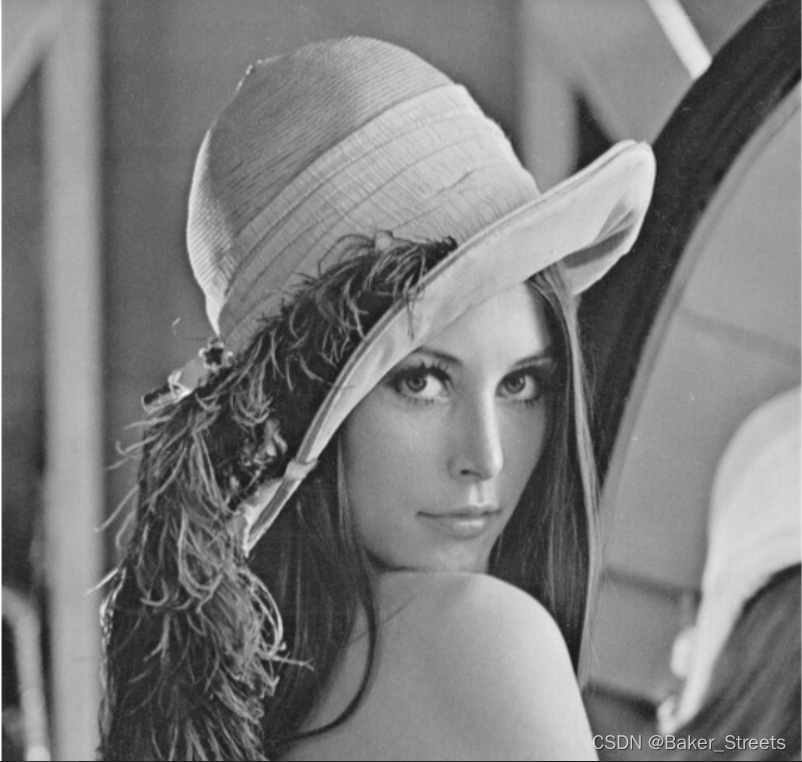
1. 图片转灰度
- 不使用
OpenCV:
from PIL import Image
I = Image.open('Lena.jpg')
I.show()
L = I.convert('L')
L.show()
- 使用
OpenCV:
import cv2 as cv

# 路径为英文
image = cv.imread('Lena.jpg')

# 将图片转为灰度图
gray_image  = cv.cvtColor(image,code=cv.COLOR_BGR2GRAY)

# 显示图片
cv.imshow('image',gray_image)
# 等待键盘输入,单位是毫秒,0表示无限等待
cv.waitKey(0)
# 因为最终调用的是C++对象,所以使用完要释放内存
cv.destroyAllWindows()

2. 转HSV
import cv2 as cv
image = cv.imread('Lena.jpg')
hsv = cv.cvtColor(image, cv.COLOR_BGR2HSV)
# 显示图片
cv.imshow('hsv',hsv)
# 等待键盘输入
cv.waitKey(0)

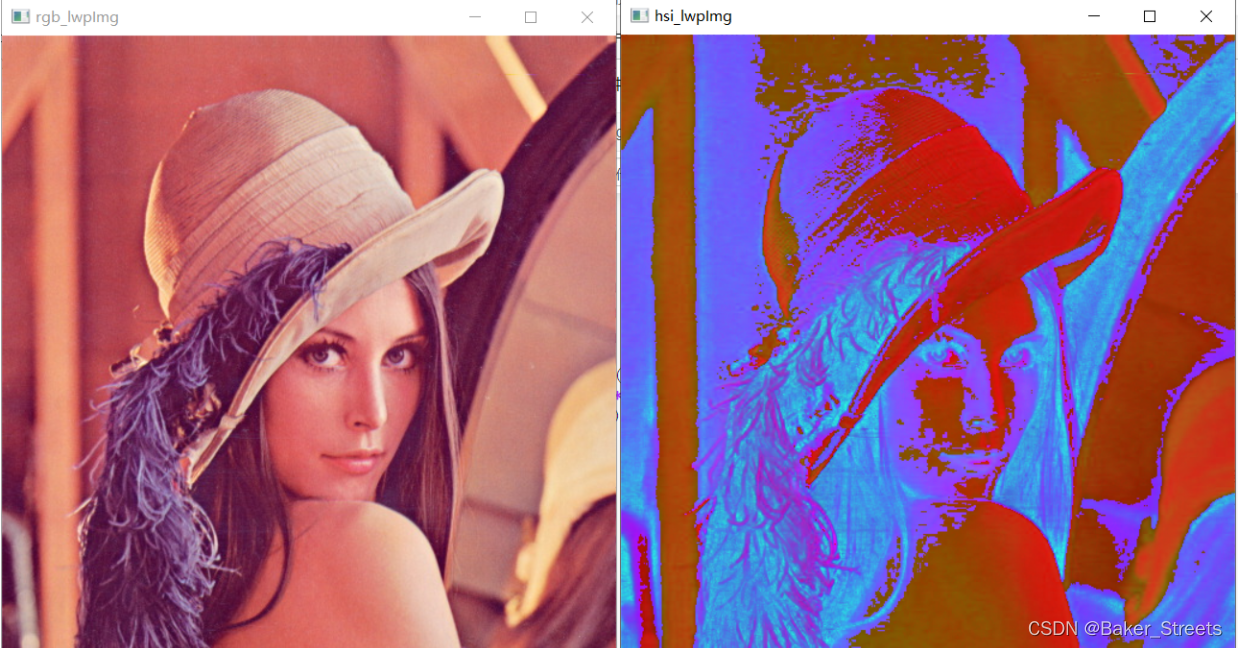
3. 转HSI
import cv2
import numpy as np

def rgbtohsi(rgb_lwpImg):
  rows = int(rgb_lwpImg.shape[0])
  cols = int(rgb_lwpImg.shape[1])
  b, g, r = cv2.split(rgb_lwpImg)
  # 归一化到[0,1]
  b = b / 255.0
  g = g / 255.0
  r = r / 255.0
  hsi_lwpImg = rgb_lwpImg.copy()
  H, S, I = cv2.split(hsi_lwpImg)
  for i in range(rows):
    for j in range(cols):
      num = 0.5 * ((r[i, j]-g[i, j])+(r[i, j]-b[i, j]))
      den = np.sqrt((r[i, j]-g[i, j])**2+(r[i, j]-b[i, j])*(g[i, j]-b[i, j]))
      theta = float(np.arccos(num/den))

      if den == 0:
          H = 0
      elif b[i, j] <= g[i, j]:
        H = theta
      else:
        H = 2*3.14169265 - theta

      min_RGB = min(min(b[i, j], g[i, j]), r[i, j])
      sum = b[i, j]+g[i, j]+r[i, j]
      if sum == 0:
        S = 0
      else:
        S = 1 - 3*min_RGB/sum

      H = H/(2*3.14159265)
      I = sum/3.0
      # 输出HSI图像,扩充到255以方便显示,一般H分量在[0,2pi]之间,S和I在[0,1]之间
      hsi_lwpImg[i, j, 0] = H*255
      hsi_lwpImg[i, j, 1] = S*255
      hsi_lwpImg[i, j, 2] = I*255
  return hsi_lwpImg
if __name__ == '__main__':
  rgb_lwpImg = cv2.imread("Lena.jpg")
  hsi_lwpImg = rgbtohsi(rgb_lwpImg)

  cv2.imshow('rgb_lwpImg', rgb_lwpImg)
  cv2.imshow('hsi_lwpImg', hsi_lwpImg)

  key = cv2.waitKey(0) & 0xFF
  if key == ord('q'):
    cv2.destroyAllWindows()
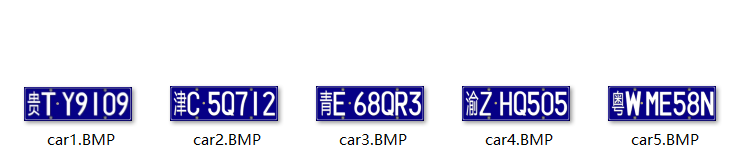
二、分割车牌数字为单个字符图片
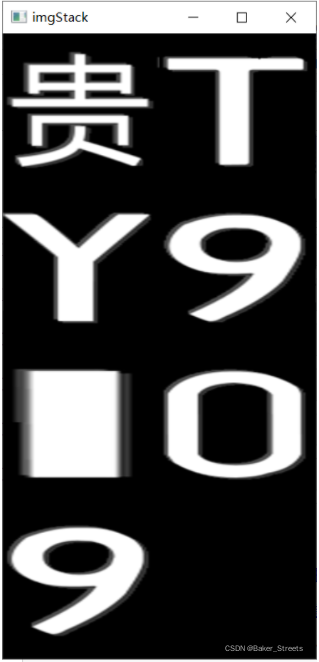
原图片:
代码:
import cv2
import numpy as np
import os
def stackImages(scale, imgArray):
"""
将多张图像压入同一个窗口显示
:param scale:float类型,输出图像显示百分比,控制缩放比例,0.5=图像分辨率缩小一半
:param imgArray:元组嵌套列表,需要排列的图像矩阵
:return:输出图像
"""
rows = len(imgArray)
cols = len(imgArray[0])
rowsAvailable = isinstance(imgArray[0], list)
# 用空图片补齐
for i in range(rows):
tmp = cols - len(imgArray[i])
for j in range(tmp):
img = np.zeros((imgArray[0][0].shape[0], imgArray[0][0].shape[1]), dtype='uint8')
imgArray[i].append(img)
# 判断维数
if rows>=2:
width = imgArray[0][0].shape[1]
height = imgArray[0][0].shape[0]
else:
width = imgArray[0].shape[1]
height = imgArray[0].shape[0]
if rowsAvailable:
for x in range(0, rows):
for y in range(0, cols):
if imgArray[x][y].shape[:2] == imgArray[0][0].shape[:2]:
imgArray[x][y] = cv2.resize(imgArray[x][y], (0, 0), None, scale, scale)
else:
imgArray[x][y] = cv2.resize(imgArray[x][y], (imgArray[0][0].shape[1], imgArray[0][0].shape[0]),
None, scale, scale)
if len(imgArray[x][y].shape) == 2:
imgArray[x][y] = cv2.cvtColor(imgArray[x][y], cv2.COLOR_GRAY2BGR)
imageBlank = np.zeros((height, width, 3), np.uint8)
hor = [imageBlank] * rows
hor_con = [imageBlank] * rows
for x in range(0, rows):
hor[x] = np.hstack(imgArray[x])
ver = np.vstack(hor)
else:
for x in range(0, rows):
if imgArray[x].shape[:2] == imgArray[0].shape[:2]:
imgArray[x] = cv2.resize(imgArray[x], (0, 0), None, scale, scale)
else:
imgArray[x] = cv2.resize(imgArray[x], (imgArray[0].shape[1], imgArray[0].shape[0]), None, scale, scale)
if len(imgArray[x].shape) == 2: imgArray[x] = cv2.cvtColor(imgArray[x], cv2.COLOR_GRAY2BGR)
hor = np.hstack(imgArray)
ver = hor
return ver
# 分割结果输出路径
output_dir = "./output/"
# 车牌路径
file_path="./car/"
# 读取所有车牌
cars = os.listdir(file_path)
cars.sort()
# 循环操作每一张车牌
for car in cars:
# 读取图片
print("正在处理"+file_path+car)
src = cv2.imread(file_path+car)
img = src.copy()
# 预处理去除螺丝点
cv2.circle(img, (145, 20), 10, (255, 0, 0), thickness=-1)
cv2.circle(img, (430, 20), 10, (255, 0, 0), thickness=-1)
cv2.circle(img, (145, 170), 10, (255, 0, 0), thickness=-1)
cv2.circle(img, (430, 170), 10, (255, 0, 0), thickness=-1)
cv2.circle(img, (180, 90), 10, (255, 0, 0), thickness=-1)
# 转灰度
gray = cv2.cvtColor(img, cv2.COLOR_BGR2GRAY)
# 二值化
adaptive_thresh = cv2.adaptiveThreshold(gray, 255, cv2.ADAPTIVE_THRESH_MEAN_C, cv2.THRESH_BINARY_INV, 333, 1)
# 闭运算
kernel = np.ones((5, 5), int)
morphologyEx = cv2.morphologyEx(adaptive_thresh, cv2.MORPH_CLOSE, kernel)
# 找边界
contours, hierarchy = cv2.findContours(morphologyEx, cv2.RETR_LIST, cv2.CHAIN_APPROX_SIMPLE)
# 画边界
img_1 = img.copy()
cv2.drawContours(img_1, contours, -1, (0, 0, 0), -1)
imgStack = stackImages(0.7, ([src, img, gray], [adaptive_thresh, morphologyEx, img_1]))
cv2.imshow("imgStack", imgStack)
cv2.waitKey(0)
# 转灰度为了方便切割
gray_1 = cv2.cvtColor(img_1, cv2.COLOR_BGR2GRAY)
# 每一列的白色数量
white = []
# 每一列的黑色数量
black = []
# 区域高度取决于图片高
height = gray_1.shape[0]
# 区域宽度取决于图片宽
width = gray_1.shape[1]
# 最大白色数量
white_max = 0
# 最大黑色数量
black_max = 0
# 计算每一列的黑白色像素总和
for i in range(width):
s = 0 # 这一列白色总数
t = 0 # 这一列黑色总数
for j in range(height):
if gray_1[j][i] == 255:
s += 1
if gray_1[j][i] == 0:
t += 1
white_max = max(white_max, s)
black_max = max(black_max, t)
white.append(s)
black.append(t)
# 找到右边界
def find_end(start):
end = start + 1
for m in range(start + 1, width - 1):
# 基本全黑的列视为边界
if black[m] >= black_max * 0.95: # 0.95这个参数请多调整,对应下面的0.05
end = m
break
return end
# 临时变量
n = 1
# 起始位置
start = 1
# 结束位置
end = 2
# 分割结果数量
num=0
# 分割结果
res = []
# 保存分割结果路径,以图片名命名
output_path= output_dir + car.split('.')[0]
if not os.path.exists(output_path):
os.makedirs(output_path)
# 从左边网右边遍历
while n < width - 2:
n += 1
# 找到白色即为确定起始地址
# 不可以直接 white[n] > white_max
if white[n] > 0.05 * white_max:
start = n
# 找到结束坐标
end = find_end(start)
# 下一个的起始地址
n = end
# 确保找到的是符合要求的,过小不是车牌号
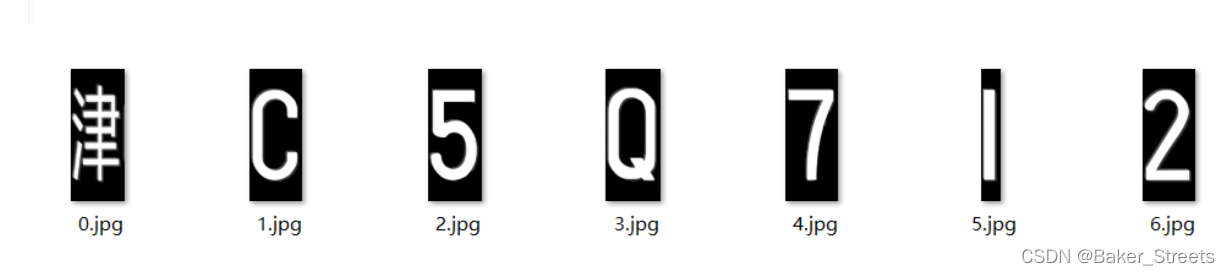
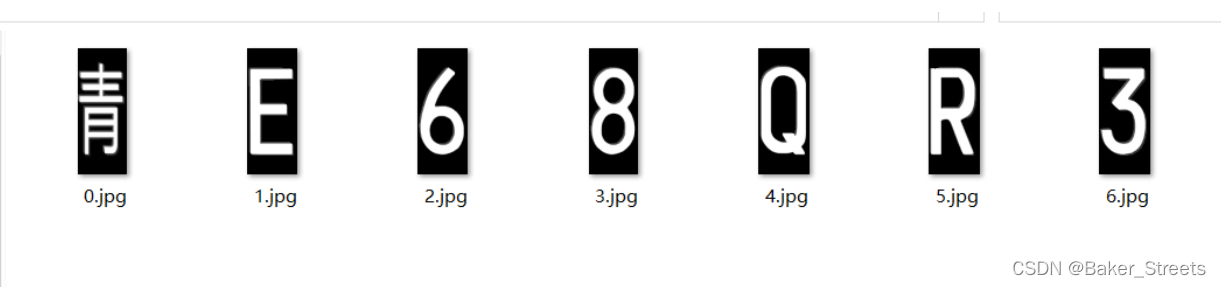
if end - start > 10:
# 分割
char = gray_1[1:height, start - 5:end + 5]
# 保存分割结果到文件
cv2.imwrite(output_path+'/' + str(num) + '.jpg',char)
num+=1
# 重新绘制大小
char = cv2.resize(char, (300, 300), interpolation=cv2.INTER_CUBIC)
# 添加到结果集合
res.append(char)
# cv2.imshow("imgStack", char)
# cv2.waitKey(0)
# 构造结果元祖方便结果展示
res2 = (res[:2], res[2:4], res[4:6], res[6:])
# 显示结果
imgStack = stackImages(0.5, res2)
cv2.imshow("imgStack", imgStack)
cv2.waitKey(0)
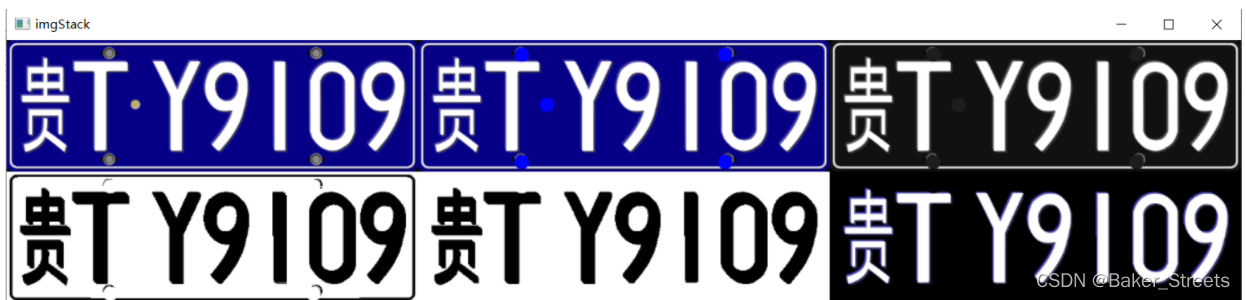
结果:


三、总结
OpenCV处理图像十分方便
参考
基于python的图像格式转换(将RGB图像转换为灰度图像)