integración de freemarker
Agregar dependencia al archivo pom.xml
<!-- 引入freemarker模板依赖 -->
<dependency>
	<groupId>org.springframework.boot</groupId>
	<artifactId>spring-boot-starter-freemarker</artifactId>
</dependency>
La estructura del proyecto y la configuración de application.yml son las siguientes

application.yml
spring:
  # freemarker静态资源配置
  freemarker:
#    设定ftl文件路径
    template-loader-path: classpath:/templates
#   关闭缓存,及时刷新,上线生产环境需要改为true
    cache:  false
    charset: UTF-8
    check-template-location: true
    content-type: text/html
    expose-request-attributes: true
    expose-session-attributes: true
    request-context-attribute: request
    suffix: .ftl
FreemarkerController.java
package com.xiangty.controller;

import org.springframework.beans.factory.annotation.Autowired;
import org.springframework.stereotype.Controller;
import org.springframework.ui.ModelMap;
import org.springframework.web.bind.annotation.RequestMapping;

import com.xiangty.pojo.Resource;

@Controller
@RequestMapping(value = "ftl")
public class FreemarkerController {

	@Autowired
	private Resource resource;

	@RequestMapping("/index")
	public String index(ModelMap map) {
		map.addAttribute("resource", resource);
		return "freemarker/index";
	}

	@RequestMapping("/center")
	public String center() {
		return "freemarker/center/center";
	}

}
templates / freemarker / index.ftl
<!DOCTYPE html>
<html>
<head lang="en">
<meta charset="UTF-8" />
<title>FreeMarker模板引擎</title>
</head>
<body>
FreeMarker模板引擎
<h1>${resource.name}</h1>
<h1>${resource.website}</h1>
<h1>${resource.language}</h1>
</body>
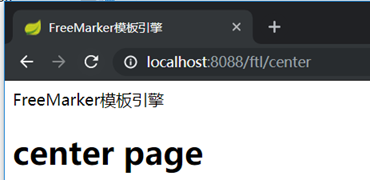
</html>templates / freemarker / center / center.ftl
<!DOCTYPE html>
<html>
<head lang="en">
    <meta charset="UTF-8" />
    <title>FreeMarker模板引擎</title>
</head>
<body>
FreeMarker模板引擎
<h1>center page</h1>
</body>
</html>
Inicie el proyecto y pruebe de la siguiente manera:

integración de la hoja de tomillo
La estructura del proyecto es la siguiente

Introducir dependencias
<!-- 引入 thymeleaf 模板依赖 -->
<dependency>
	<groupId>org.springframework.boot</groupId>
	<artifactId>spring-boot-starter-thymeleaf</artifactId>
</dependency>
colocación application.yml
spring:
# thymeleaf静态资源配置
  thymeleaf:
    #关闭缓存,及时刷新
    cache: false
    prefix: classpath:/templates/
    suffix: .html
    mode: HTML5
    encoding: UTF-8
    servlet:
      content-type: text/html
templates / thymeleaf / index.html
<!DOCTYPE html>
<html>
<head lang="en">
    <meta charset="UTF-8" />
    <title>Thymeleaf模板引擎</title>
</head>
<body>
Thymeleaf模板引擎
<h1 th:text="${name}">hello world~~~~~~~</h1>
</body>
</html>
ThymeleafContorller.java
package com.xiangty.controller;

import org.springframework.stereotype.Controller;
import org.springframework.ui.ModelMap;
import org.springframework.web.bind.annotation.RequestMapping;


@Controller
@RequestMapping(value = "th")
public class ThymeleafController {

	@RequestMapping("/index")
	public String index(ModelMap map) {
		map.addAttribute("name", "thymeleaf测试Name");
		return "thymeleaf/index";
	}

	@RequestMapping("/center")
	public String center() {
		return "thymeleaf/center/center";
	}

}
Los resultados de la prueba son los siguientes:

Lo anterior es el uso básico de freemarker y thymeleaf, el código de muestra se puede ver en los artículos del directorio del blog de tecnologías comunes de desarrollo de Spring Boot .