Ubuntu17.10 installation process is a lucky coincidence pile pit, record it in the post.
Refer to the following process and a number of links, thanks thanks! !
Process is as follows:
1 install the driver
Video drivers, refused to hand, a bunch of pit. Graphics herein as GTX1080.
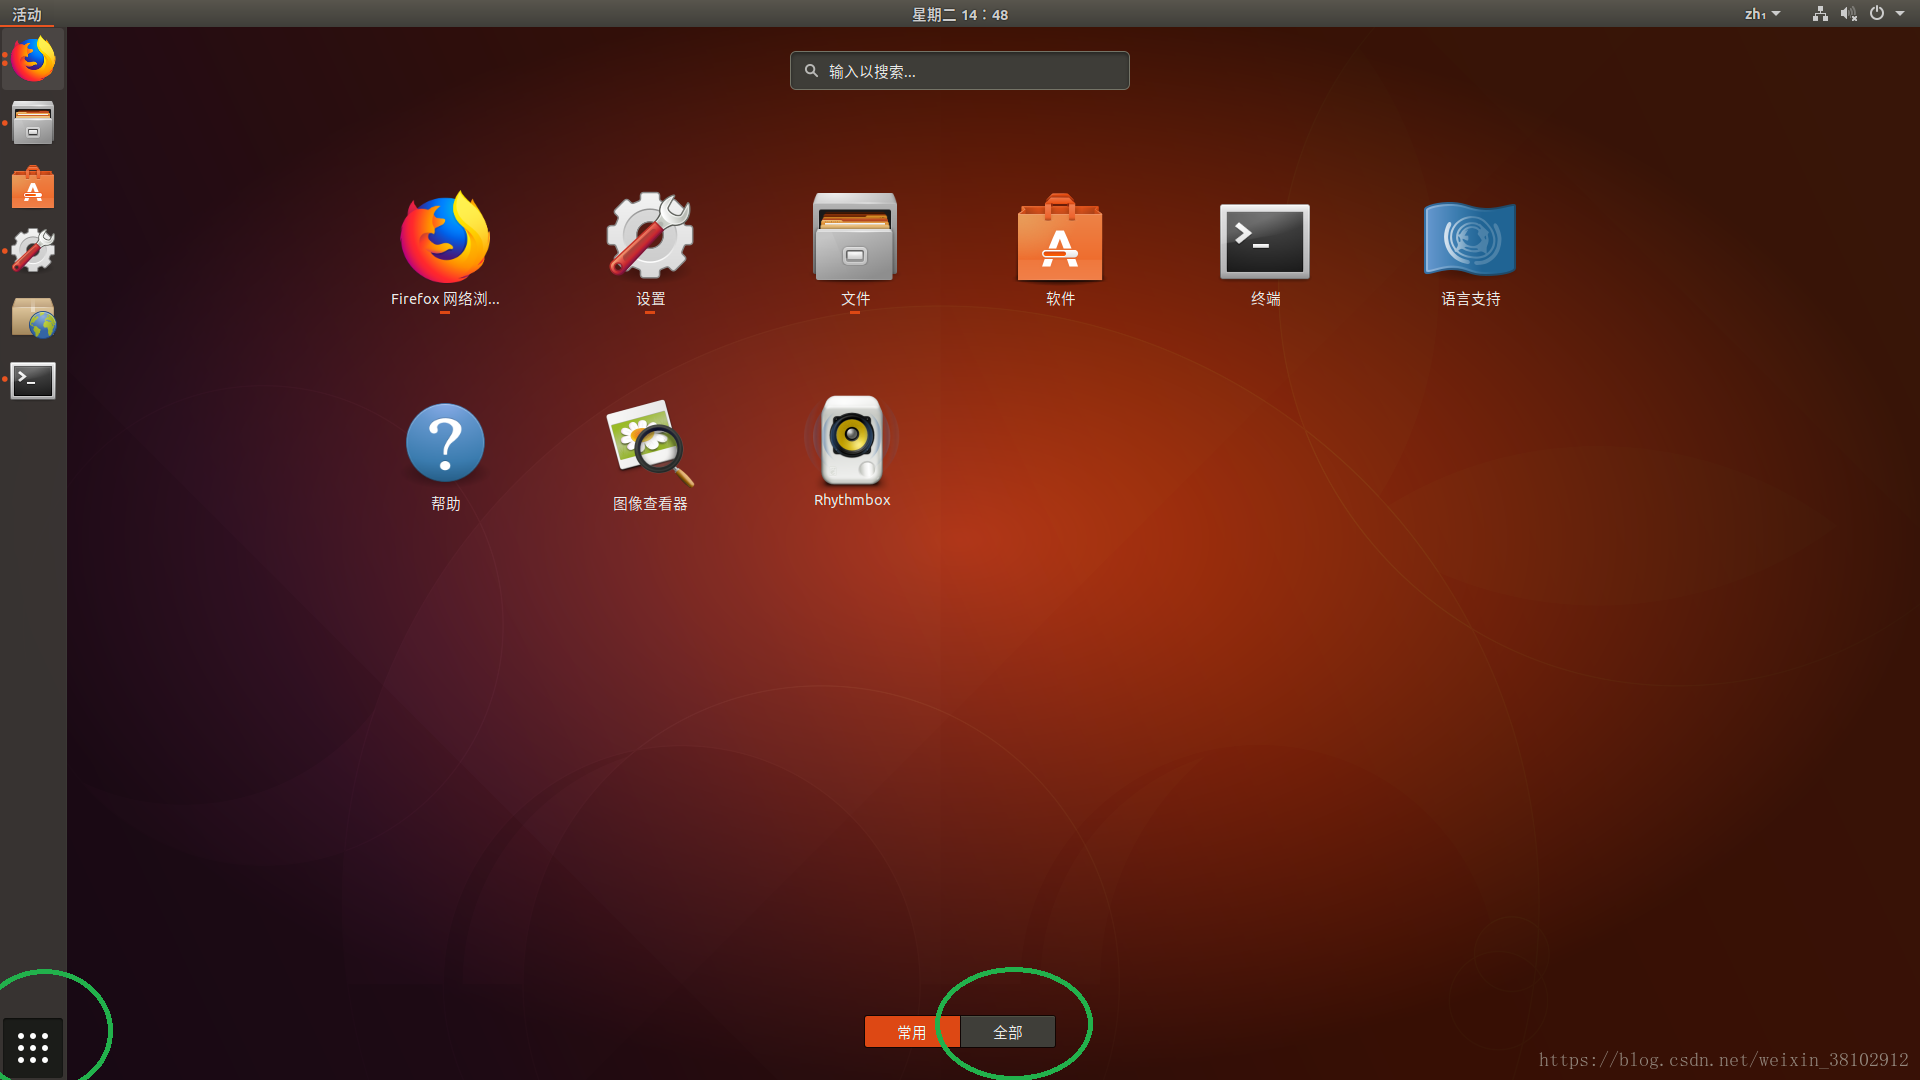
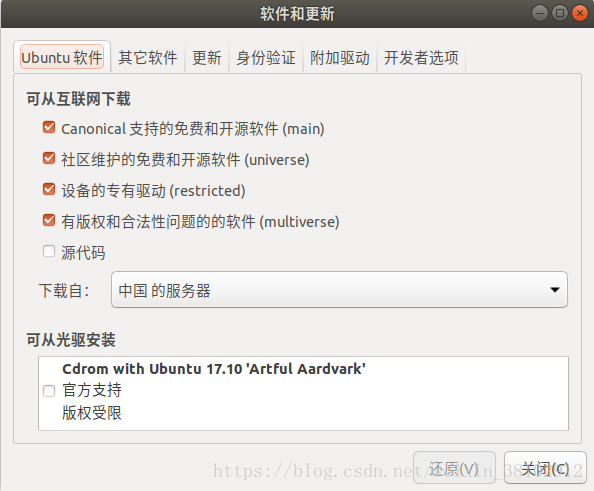
Software and Update (All) -> Additional drivers -> nvidia corporation GP104
Installation Results
384 version of the driver
2 Install CUDA
Prior to the installation of some 2.0 Description:
1)
Cuda8.0 does not support 17 versions! ! ! So there can only be installed Cuda9.0 (online installation tutorial 8.0 of fact, which are all about the installation of 9.0), this article is installed uda version is already 9.2
2) the direct use of Linux download is very slow, it is recommended to use windows to find a good place to download a good, home files in the folder u disk to linux
3) refer to the official installation guide link (before installing
https://docs.nvidia.com/cuda/cuda-installation-guide-linux/index.html)
with particular attention to Pre-installation Action section.
2.1 Preparation before installation:
Corresponds to the official documentation, linux version information, NVIDIA GPU information, refer to:
This section of the main problems encountered gcc version too dependent on the installation process and the package is not installed problem, the solution is as follows:
1) mounted gcc-5
sudo add-apt-repository ppa:ubuntu-toolchain-r/test
sudo apt-get update
sudo apt-get install gcc-5 gcc-5-multilib g++-5 g++-5-multilib
At this point
gcc --version found or version 7.2, update the system defaults to gcc gcc-5
sudo update-alternatives --install /usr/bin/gcc gcc /usr/bin/gcc-5 40
sudo update-alternatives --install /usr/bin/gcc gcc /usr/bin/gcc-7 50
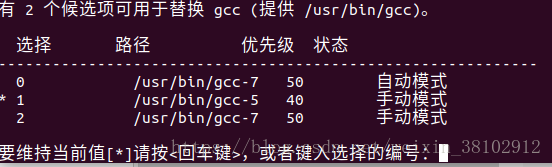
sudo update-alternatives --config gcc
Wherein the last number is the priority, the higher priority the higher the number, the difference between 40 and 50
(https://www.linuxidc.com/Linux/2017-03/142299.htm)
The results are as follows:
同样设置g++:
sudo update-alternatives --install /usr/bin/g++ g++ /usr/bin/g++-5 50
sudo update-alternatives --install /usr/bin/g++ g++ /usr/bin/g++-4.9 40
sudo update-alternatives --config g++
此时用
gcc --version查看为5.0版本
2) 按装依赖的包
sudo apt-get install g++ freeglut3-dev build-essential libx11-dev libxmu-dev libxi-dev libglu1-mesa libglu1-mesa-dev
3 安装CUDNN
3.1 获取cuda安装 文件
这个cuda有两个安装方式:一个是runfile,另一个是deb。
选择第一个runfile下载。
选择第一个runfile下载。
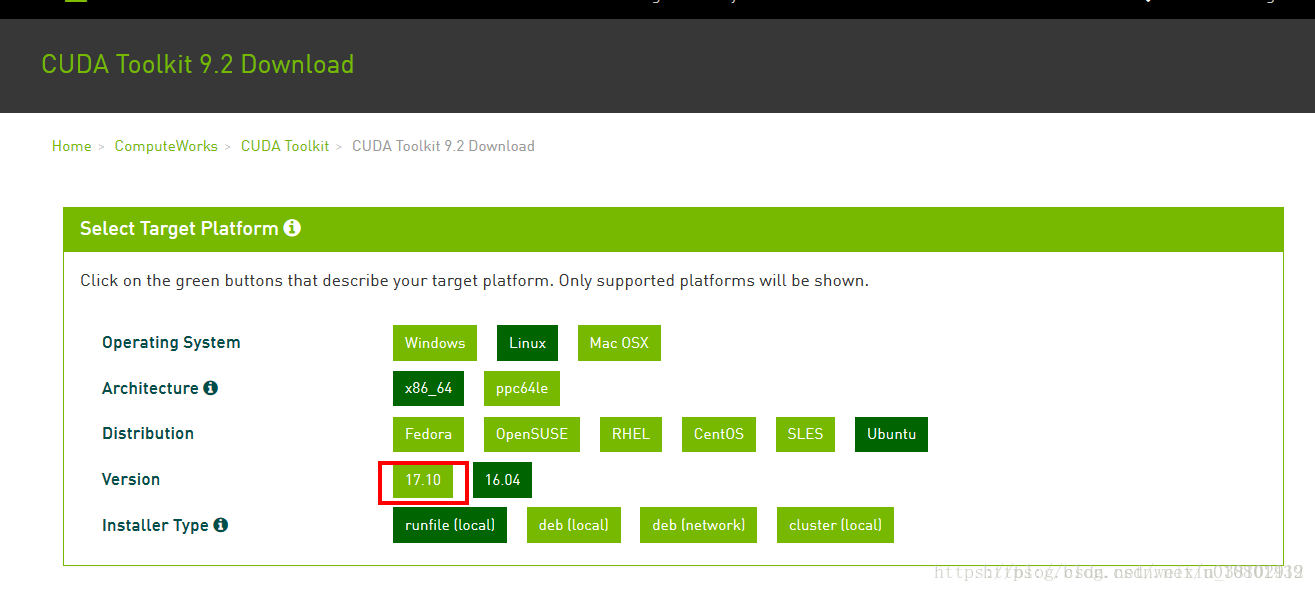
选17.10!!!!!否则下不到合适的安装文件,注意下载下来应该为9.0+版本
本文下载的文件为
本文版本:
cuda_9.2.88_396.26_linux.run
3.2 安装
chmod +x cuda_9.2.88_396.26_linux.run
sudo sh cuda_9.2.88_396.26_linux.run
#上句不成功时尝试如下
sudo sh cuda_9.2.88_396.26_linux.run -override
安装过程,
选项install nvidia accelerated Graphics Driver (驱动需要选
n (NO), 原因已经安好驱动(第一步),系统自带驱动坑略多,其余默认。
3.3. 更改配置件
sudo gedit ~/.bashrc
添加
export PATH=/usr/local/c
uda-
9.2/bin:$PATH
export LD_LIBRARY_PATH=/usr/loca
l/cuda-
9.2
/lib64:$LD_LIBRARY_PATH
保存
重启ubuntu
3.4 检验cuda是否安装成功
|
1
|
cuda-
install
-samples-9.0.sh <
dir
> 安装测试程序,<
dir
>是安装目录,自己新建一个即可
|
安装好后,<dir>下有个NVIDIA_CUDA-9.0_Samples文件夹,cd到这个文件夹里面,执行$sudo make,编译完后,在bin目录或bin目录的子目录的子目录里有编译好的deviceQuery可执行文件,执行这个文件,可以看到下面的输出就说明安装成功了:
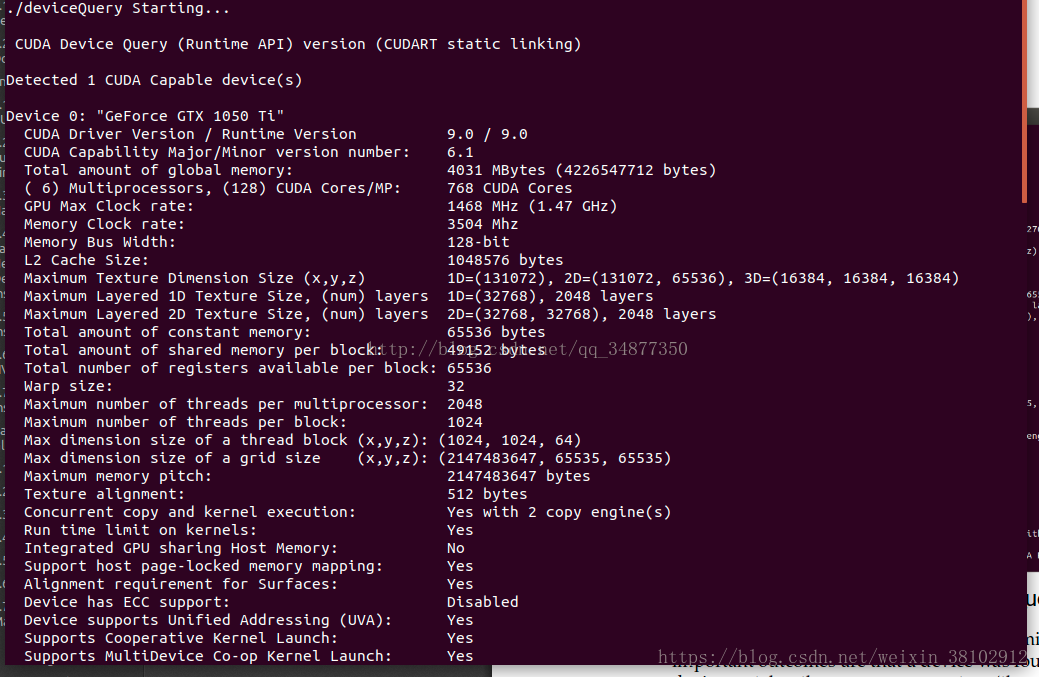
如果执行失败,则是显卡驱动没有装好。
最后再来测试一下CUDA,运行:
|
1
|
sudo
nvidia-smi
|
可以看到gpu的各种信息。
4 安装cudnn
4.1 下载
1) 版本问题:
CUDA8.0对应的cuDNN版本是5.1,CUDA9.0对应的cuDNN7.0。同时,cuDNN可以同时安装在CUDA8.0和9.0中,而cuDNN7.0只能对CUDA9.0及以上适用。
cuda, cudnn, tensorflow之间版本的对应关系
)
2) 下载
官方链接:
(下载前需要登录网站,因此需要进行注册)
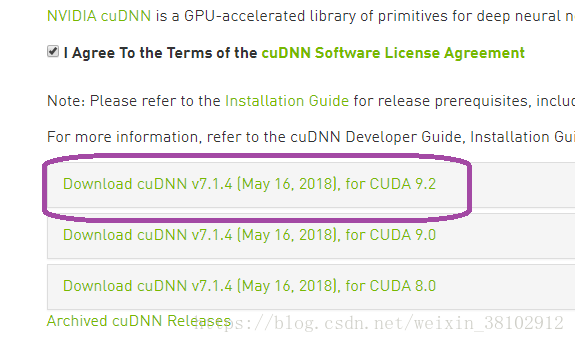
本文中版本:
cudnn-9.2-linux-x64-v7.1.tgz
3) 解压及安装
# 版本信息 cudnn-9.2-linux-x64-v7.1.tgz
mkdir cuda
mv cudnn-9.2-linux-x64-v7.1.tgz cuda/
cd cuda/
gunzip cudnn-9.2-linux-x64-v7.1.tgz
tar xvf cudnn-9.2-linux-x64-v7.1.tar
cd cuda/
cd ..
sudo cp cuda/include/cudnn.h /usr/local/cuda/include
sudo cp cuda/lib64/libcudnn* /usr/local/cuda/lib64/ -d
sudo chmod a+r /usr/local/cuda/include/cudnn.h
sudo chmod a+r /usr/local/cuda/lib64/libcudnn*
5 安装annaconda
#
python 3.6版本:
wget https://repo.continuum.io/archive/Anaconda3-5.0.1-Linux-x86_64.sh
# python 2.7版本:
https://repo.continuum.io/archive/Anaconda2-5.0.1-Linux-x86_64.sh
#手动下载,链接
chmod +x Anaconda3-5.0.1-Linux-x86_64.sh
./Anaconda3-5.0.1-Linux-x86_64.sh
提示加入环境变量 输入yes
source ~/.bashrc
6
annaconda 安装teansorflow
#通过清华的pip源,用这种方式安装tensorflow-gpu版本速度很快
conda config --add channels https://mirrors.tuna.tsinghua.edu.cn/anaconda/pkgs/free/
conda config --set show_channel_urls yes
conda install --channel https://conda.anaconda.org/jjh_cio_testing tensorflow-gpu
7 最终测试
我们在ipython中试一下新安装好的Tensorflow:
|
