Flutter achieve integration Baidu map show map
Foreword
After the last combat, someone told me to get a map of Baidu integrated combat. I have in mind, and spent a day when, finally somehow combat this, there are some online resources, but I still feel a little bad, just look at his article is to draw up, and today I elaborate written.
Preparation Tool
This course is using Android Studio for development. In this current before you are ready Flutter development environment, I will not be explained here
Write it manually combat
The first step to open the bottom of android
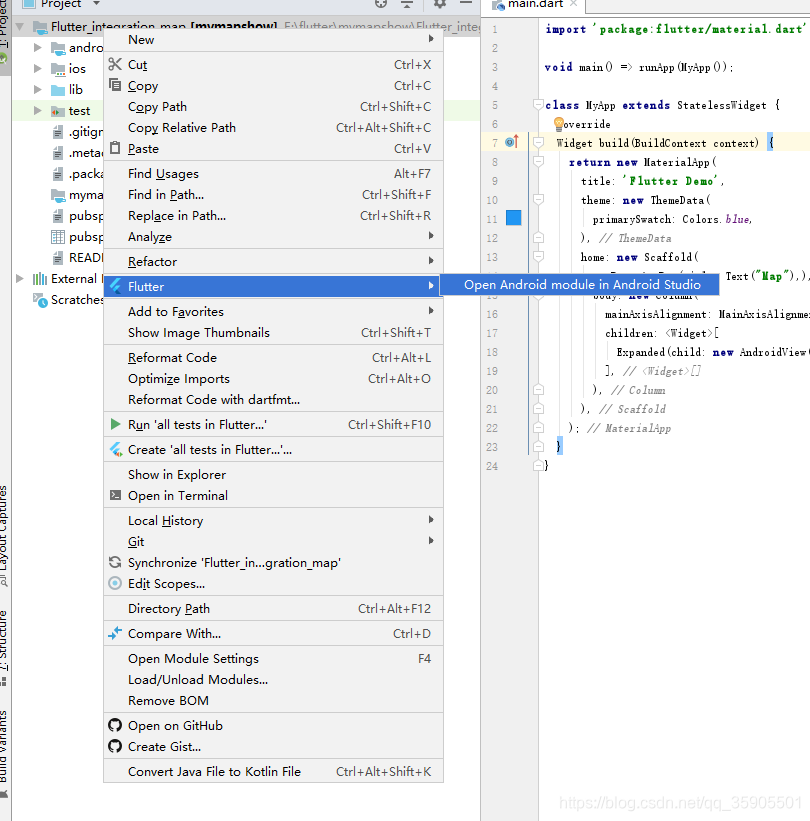
After the above three steps, you enter the bottom of the development of Android, the next step is to integrate Baidu map api
Please come to the Android Map SDK go to access information about configuration, time to do the following picture shows, it shows the success of the integration
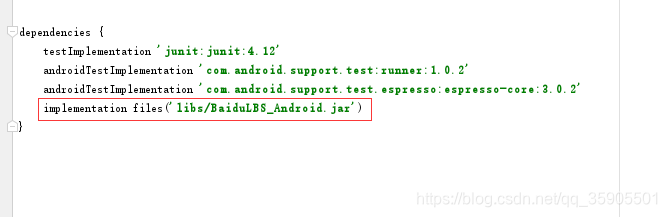
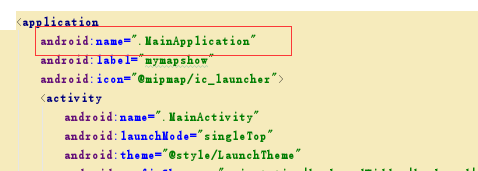
The next set permissions to add the next AndroidManifest.xml file permissions, Baidu key
	<manifest xmlns:android="http://schemas.android.com/apk/res/android"
    xmlns:tools="http://schemas.android.com/tools"
    package="com.example.mymapshow">

 	//添加权限
    <uses-permission android:name="android.permission.ACCESS_NETWORK_STATE"/>
    //获取设备网络状态,禁用后无法获取网络状态
    <uses-permission android:name="android.permission.INTERNET"/>
    //网络权限,当禁用后,无法进行检索等相关业务
    <uses-permission android:name="android.permission.READ_PHONE_STATE" />
    //读取设备硬件信息,统计数据
    <uses-permission android:name="com.android.launcher.permission.READ_SETTINGS" />
    //读取系统信息,包含系统版本等信息,用作统计
    <uses-permission android:name="android.permission.ACCESS_WIFI_STATE" />
    //获取设备的网络状态,鉴权所需网络代理
    <uses-permission android:name="android.permission.WRITE_EXTERNAL_STORAGE"/>
    //允许sd卡写权限,需写入地图数据,禁用后无法显示地图
    <uses-permission android:name="android.permission.WRITE_SETTINGS"
        tools:ignore="ProtectedPermissions" />
    //获取统计数据
    <uses-permission android:name="android.permission.CAMERA" />


    <application
        android:name=".MainApplication"
        android:label="mymapshow"
        android:icon="@mipmap/ic_launcher">
        <activity
            android:name=".MainActivity"
            android:launchMode="singleTop"
            android:theme="@style/LaunchTheme"
            android:configChanges="orientation|keyboardHidden|keyboard|screenSize|locale|layoutDirection|fontScale|screenLayout|density|uiMode"
            android:hardwareAccelerated="true"
            android:windowSoftInputMode="adjustResize">
            <!-- This keeps the window background of the activity showing
                 until Flutter renders its first frame. It can be removed if
                 there is no splash screen (such as the default splash screen
                 defined in @style/LaunchTheme). -->
            <meta-data
                android:name="io.flutter.app.android.SplashScreenUntilFirstFrame"
                android:value="true" />
            <intent-filter>
                <action android:name="android.intent.action.MAIN"/>
                <category android:name="android.intent.category.LAUNCHER"/>
            </intent-filter>
        </activity>

        <!-- 百度地图key -->
        <meta-data
            android:name="com.baidu.lbsapi.API_KEY"
            android:value="vYt9Olso8BcBn1gKoBnQre3vjZQ4vX68" />

    </application>
</manifest>
Then write the underlying code
First, we show a major structure of the code
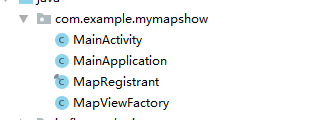
MainApplication initialization Baidu Map SDK
package com.example.mymapshow;

import com.baidu.mapapi.CoordType;
import com.baidu.mapapi.SDKInitializer;

import io.flutter.app.FlutterApplication;

public class MainApplication extends FlutterApplication {
    @Override
    public void onCreate() {
        super.onCreate();
        // 初始化百度地图 SDK
        SDKInitializer.initialize(this);
        SDKInitializer.setCoordType(CoordType.BD09LL);
    }
}
MapViewFactory integrated PlatformViewFactory, create a View and pass it on to Flutter
package com.example.mymapshow;

import android.content.Context;
import android.view.View;

import com.baidu.mapapi.map.MapView;

import io.flutter.plugin.common.MessageCodec;
import io.flutter.plugin.platform.PlatformView;
import io.flutter.plugin.platform.PlatformViewFactory;

public class MapViewFactory extends PlatformViewFactory {
    private MapView mapView;

    public MapViewFactory(MessageCodec<Object> createArgsCodec, MapView mapView) {
        super(createArgsCodec);
        this.mapView = mapView;
    }

    @Override
    public PlatformView create(final Context context, int i, Object o) {
        return new PlatformView() {
            @Override
            public View getView() {
                return mapView;
            }

            @Override
            public void dispose() {

            }
        };
    }
}
MapRegistrant registration and instantiation Baidu map api
package com.example.mymapshow;

import com.baidu.mapapi.map.MapView;

import io.flutter.plugin.common.PluginRegistry;
import io.flutter.plugin.common.StandardMessageCodec;

public final class MapRegistrant {
    public static void registerWith(PluginRegistry registry, MapView mapView) {
        final String key = MapRegistrant.class.getCanonicalName();

        if (registry.hasPlugin(key)) return;

        PluginRegistry.Registrar registrar = registry.registrarFor(key);                //注册
        //返回百度地图api
        registrar.platformViewRegistry().registerViewFactory("MyMap", new MapViewFactory(new StandardMessageCodec(), mapView));
    }
}
In MainActivity instantiate the class map and registration ViewRegistrant more to add.
package com.example.mymapshow;

import android.os.Bundle;

import com.baidu.mapapi.map.MapView;

import io.flutter.app.FlutterActivity;
import io.flutter.plugins.GeneratedPluginRegistrant;

public class MainActivity extends FlutterActivity {
  @Override
  protected void onCreate(Bundle savedInstanceState) {
    super.onCreate(savedInstanceState);
    // GeneratedPluginRegistrant.registerWith(this);
    MapView mapView = new MapView(this);
    MapRegistrant.registerWith(this, mapView);
  }
}
Do this step will be returning to a place modify AndroidManifest.xml
Then you write Flutter time to call the bottom of the code here is mainly AndroidView
import 'package:flutter/material.dart';

void main() => runApp(MyApp());

class MyApp extends StatelessWidget {
  @override
  Widget build(BuildContext context) {
    return new MaterialApp(
      title: 'Flutter Demo',
      theme: new ThemeData(
        primarySwatch: Colors.blue,
      ),
      home: new Scaffold(
        appBar: AppBar(title: Text("集成百度地图"),),
        body: new Column(
          mainAxisAlignment: MainAxisAlignment.center,
          children: <Widget>[
            Expanded(child: new AndroidView(viewType: 'MyMap'))
          ],
        ),
      ),
    );
  }
}
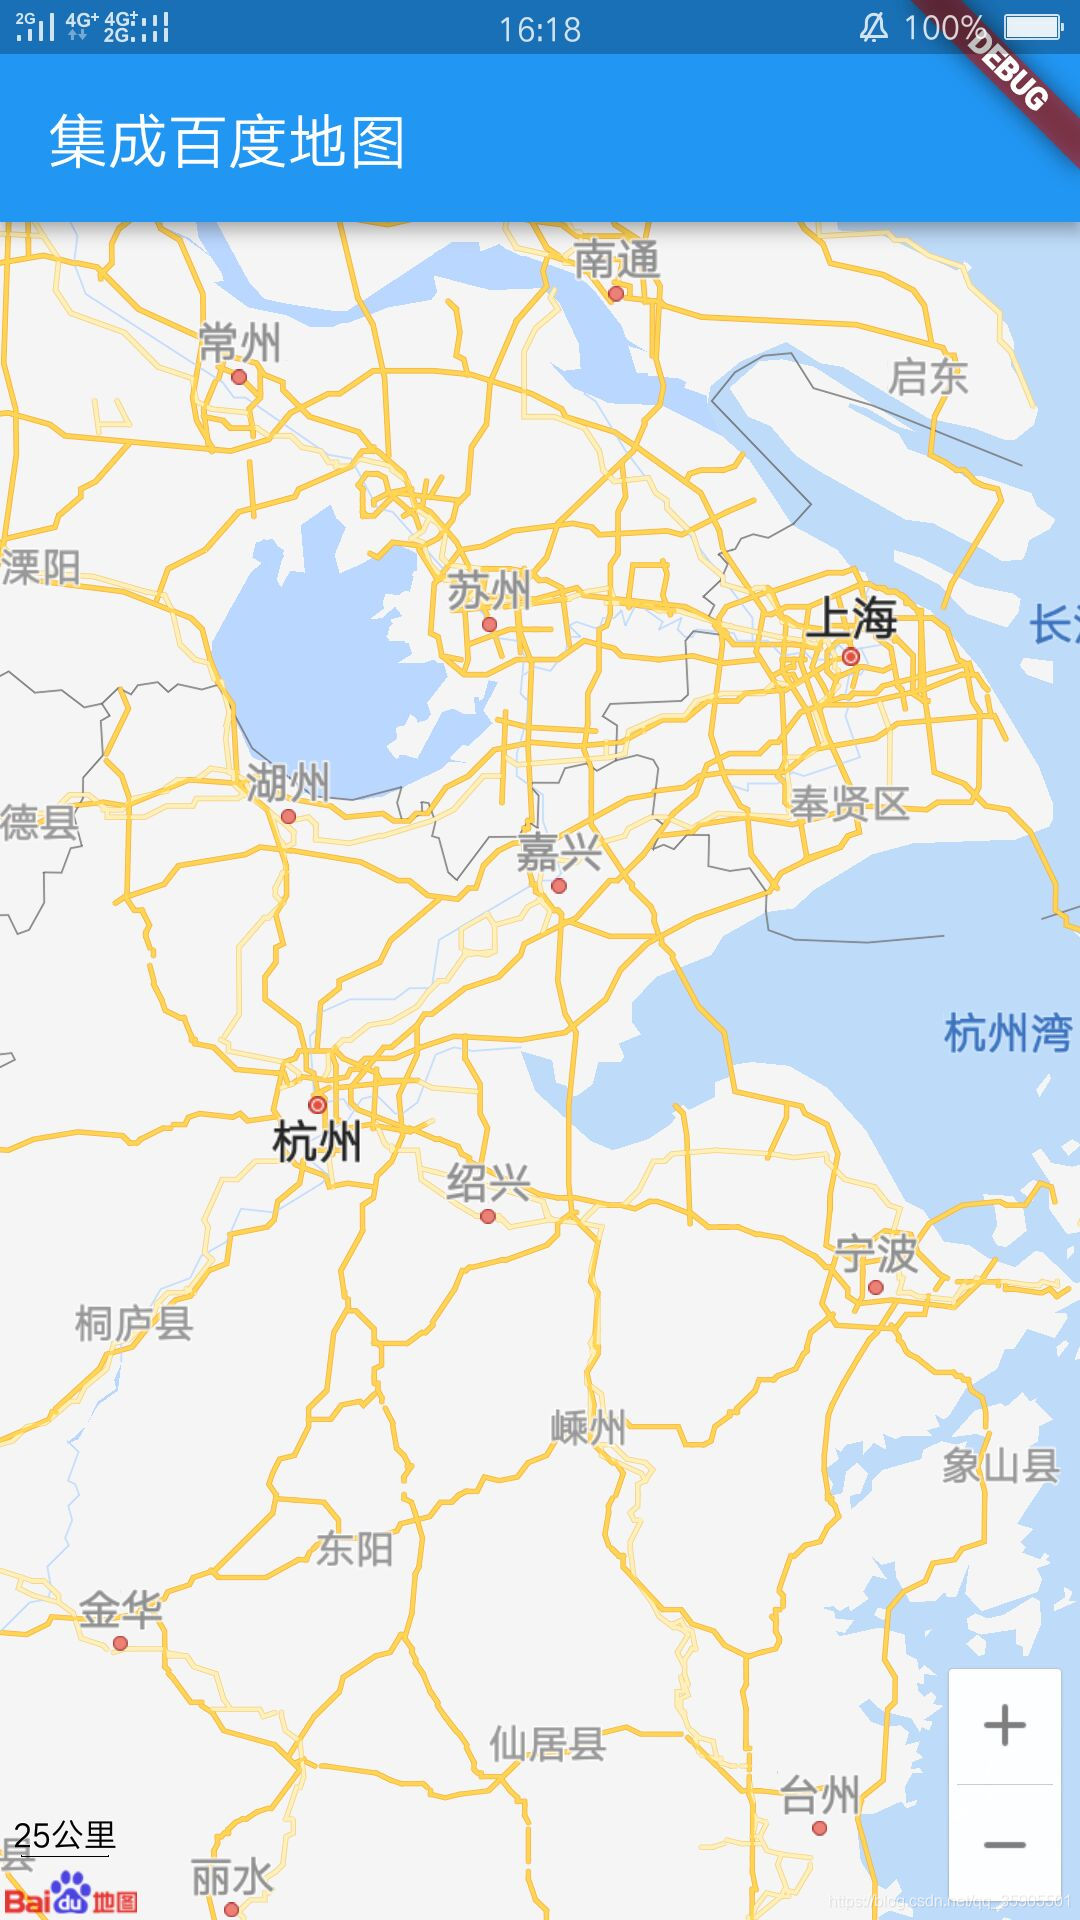
Display of results
The complete code has been reached my GitHub to facilitate the download to watch my github address to write is not easy, give praise and a small series of a star
