Foreword
In recent years with the discovery of gravitational waves, black holes shoot photos, evidence of the presence of water on Mars discovery breakthrough scientific, literary and film works, such as "three-body", "wandering the Earth", "Interstellar" and spread universal, space those things had distant closer and closer, people are concerned about the unknown civilization and curiosity about space has reached unprecedented heights. Standing on a higher footing as the history of our species one, we manage the planet for our lives as it should be, our solar system where there is a certain understanding of the 8 planets orbit their quality, the amount of storage resources and even have some knowledge of the terrain.
The system uses the HT for Web Hightopo products constructed of lightweight 3D visualization scene.
Solar System This system is mainly used for two scenarios:
1. As a carrier of scientific research, new discoveries, and to do 3D rendering of space data visualization for constructing the solar system science to the general public, knowledge of all the planetary organizational structure, etc., can be placed in the museum big screen, big screen school, can also be used for the Internet products, aerospace as a portal page websites, showing page.
2. As a cockpit NASA, aerospace-related research institutions, in 3D visualization interface in the relative positions of the planets, stars state, astral weather, the terrain has an intuitive stars quickly understand and explore more successful moment in space , after the data transmission speed and technology is a breakthrough in quality, even through the system to do real-time monitoring of the state of the planet appear on the operating point of the astronauts, the job situation, and so on-line monitoring. Artificial satellite orbit configuration, monitoring data area, the satellite system of the present system can be used, described coverage and presenting observations.
Preview Address: https://www.hightopo.com/demo/solar-system/
Interface Introduction and preview effects
Theme: solar detection system
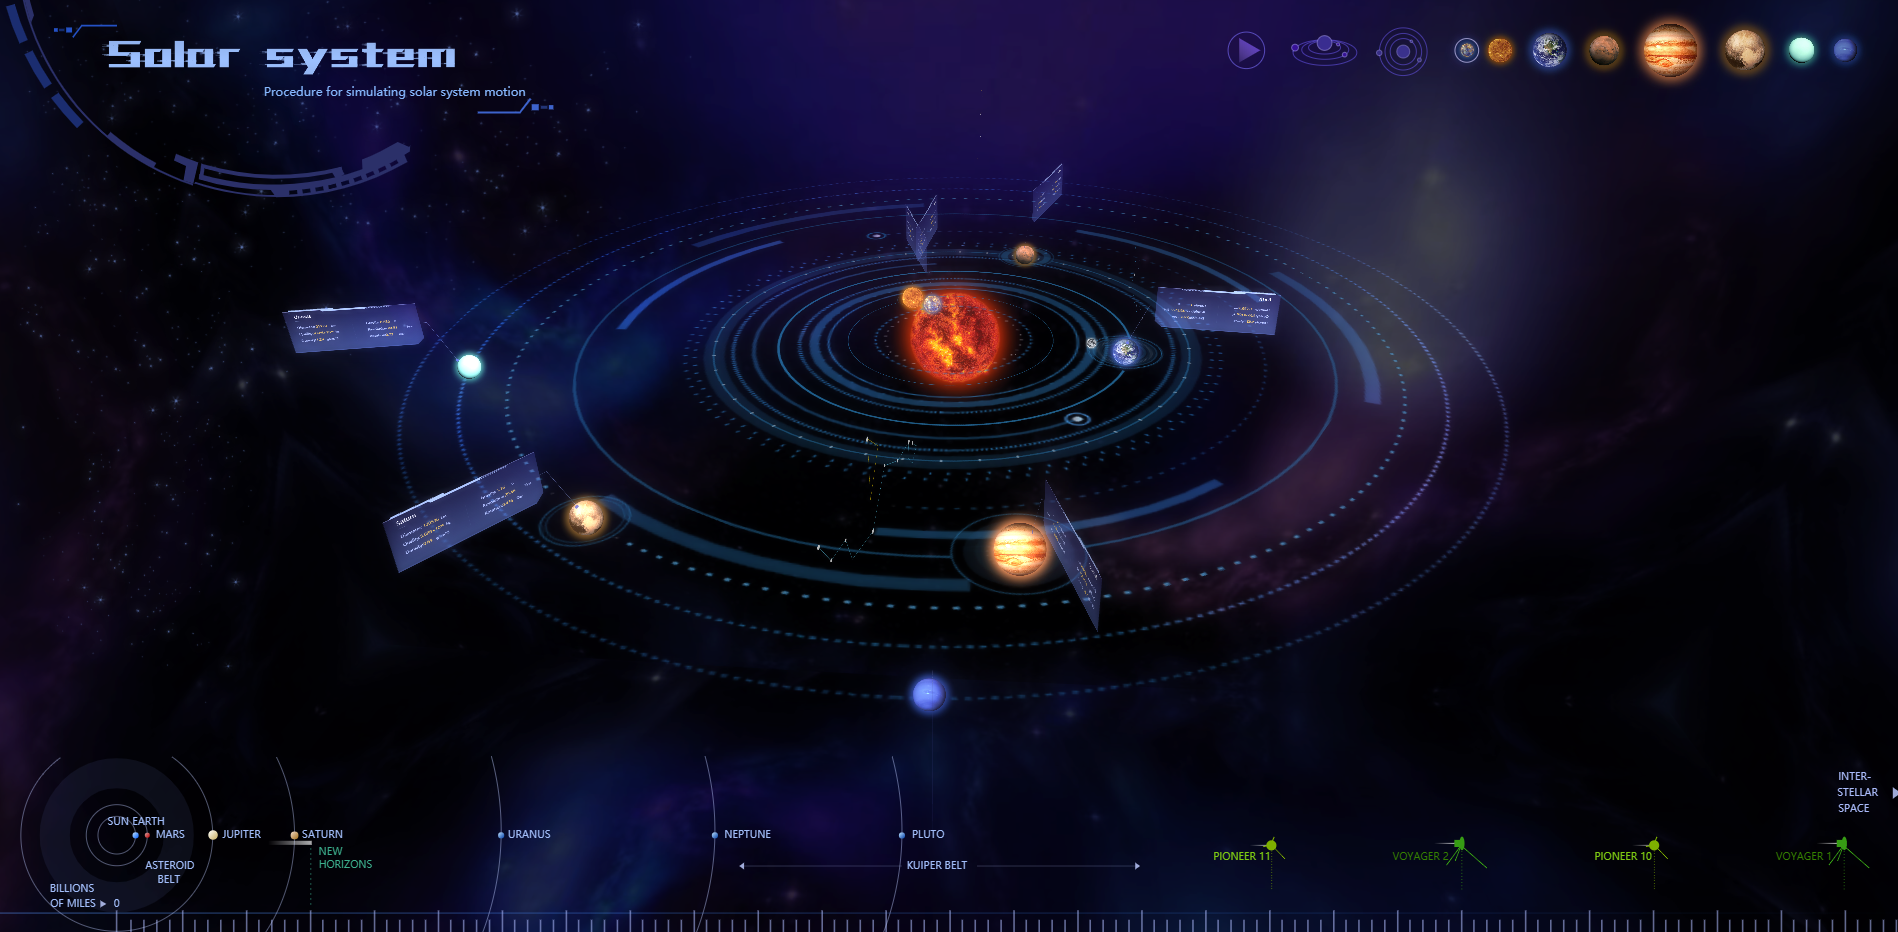
This system is presenting 8 planets orbiting the sun information track, the relative position, star quality, resource content.
Button in the upper right corner planet triggers a perspective switch, switch to the corresponding planetary observation point

this.g3d.flyTo(data, {
    animation: {
        duration: 1000,
        easing: function (t) {
            return (2-t) * t;
        }
    },
    distance: 2000
});
效果:
该主题提供两种视角,鸟瞰和斜视,其它视角可以通过鼠标自行旋转
两种视角的切换由右上角第二、三个圆形按钮触发。
调用 moveCamera 方法重新设置相机位置:
/**
 * 切换镜头
 * @param {Number} num - 主题编号
 */
triggerThemeCamera(num) {
    //...
    this.g3d.moveCamera(
        [ 6742.5, 4625.6, -836.7],
        [0, 0, 0],
        {
            duration: 500,
            easing: function (t) {
                return (2-t) * t;
            }
        }
    );
}
效果:
信息框默认采用跟随星体一起旋转,这可以达到俯视视角不出现信息框,看起来更清爽。
如果需要查看星体详情,可以通过点击右上角播放按钮,该按钮会触发所有信息框朝向屏幕方向。
通过改变消息面板 style.autorotate 来实现:
setBillboardToCamera(flag) {
    const list = this.dm3d.getDatas();
    list.each( item => {
        if (item instanceof ht.Node) {
            if (/_board$/.test(item.getTag())) {
                if (flag) {
                    item.s('shape3d.autorotate', true);
                }
                else {
                    item.s('shape3d.autorotate', false);
                }
            }
        }
    });
}
效果:
主题二:戴森球星体 3D 拓扑结构
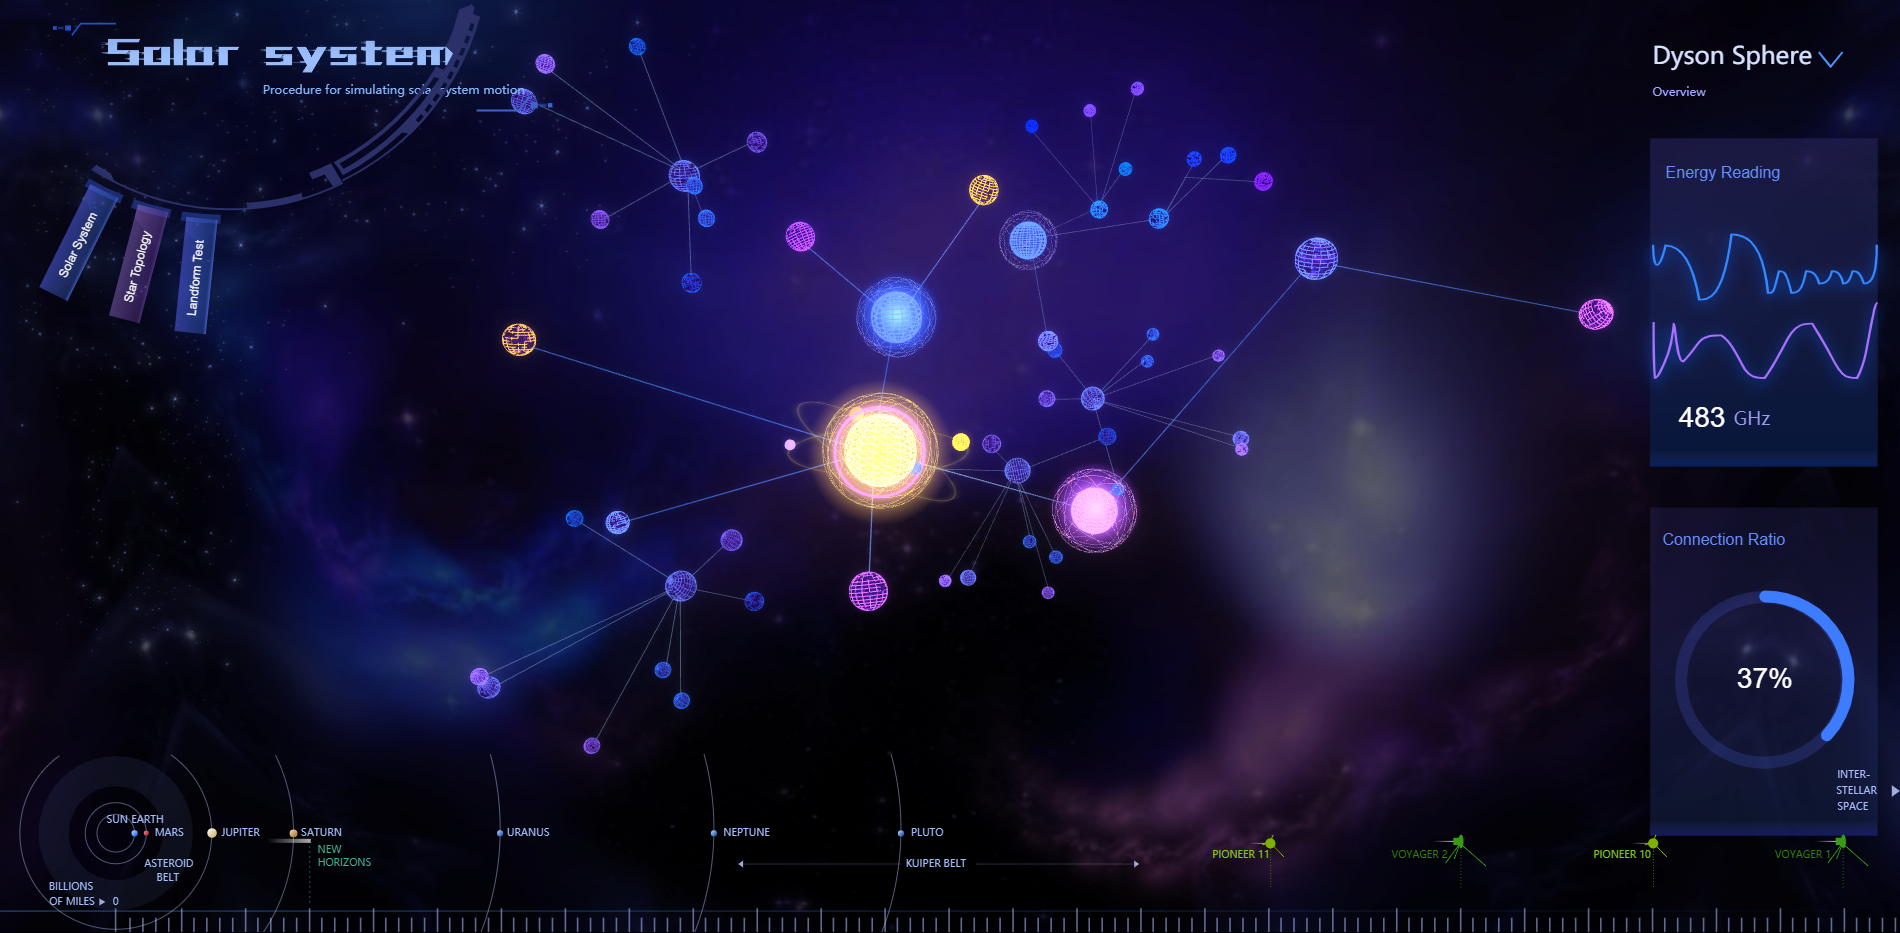
本系统主要展示用户所点选的行星与其它星际物质的相互作用,也可用于展示行星周围卫星的分布情况,以及展示星体间引力、辐射范围等的拓扑结构。
鼠标悬停在一个星体上会触发选中状态,右侧会监控该星体的相关数据。
通过监听 mousemove 后调用 resetPinkOutside 方法,将粉色边框重新设置到悬停的 node 位置:
/**
 * 重新设置边框
 * @param node
 */
resetPinkOutside(node) {
    const pinkOutside = this.dm3d.getDataByTag('billboard4');
    pinkOutside.setPosition3d(node.getPosition3d()[0],node.getPosition3d()[1],node.getPosition3d()[2]);
}
效果:
主题三:星体气象、地形检测系统
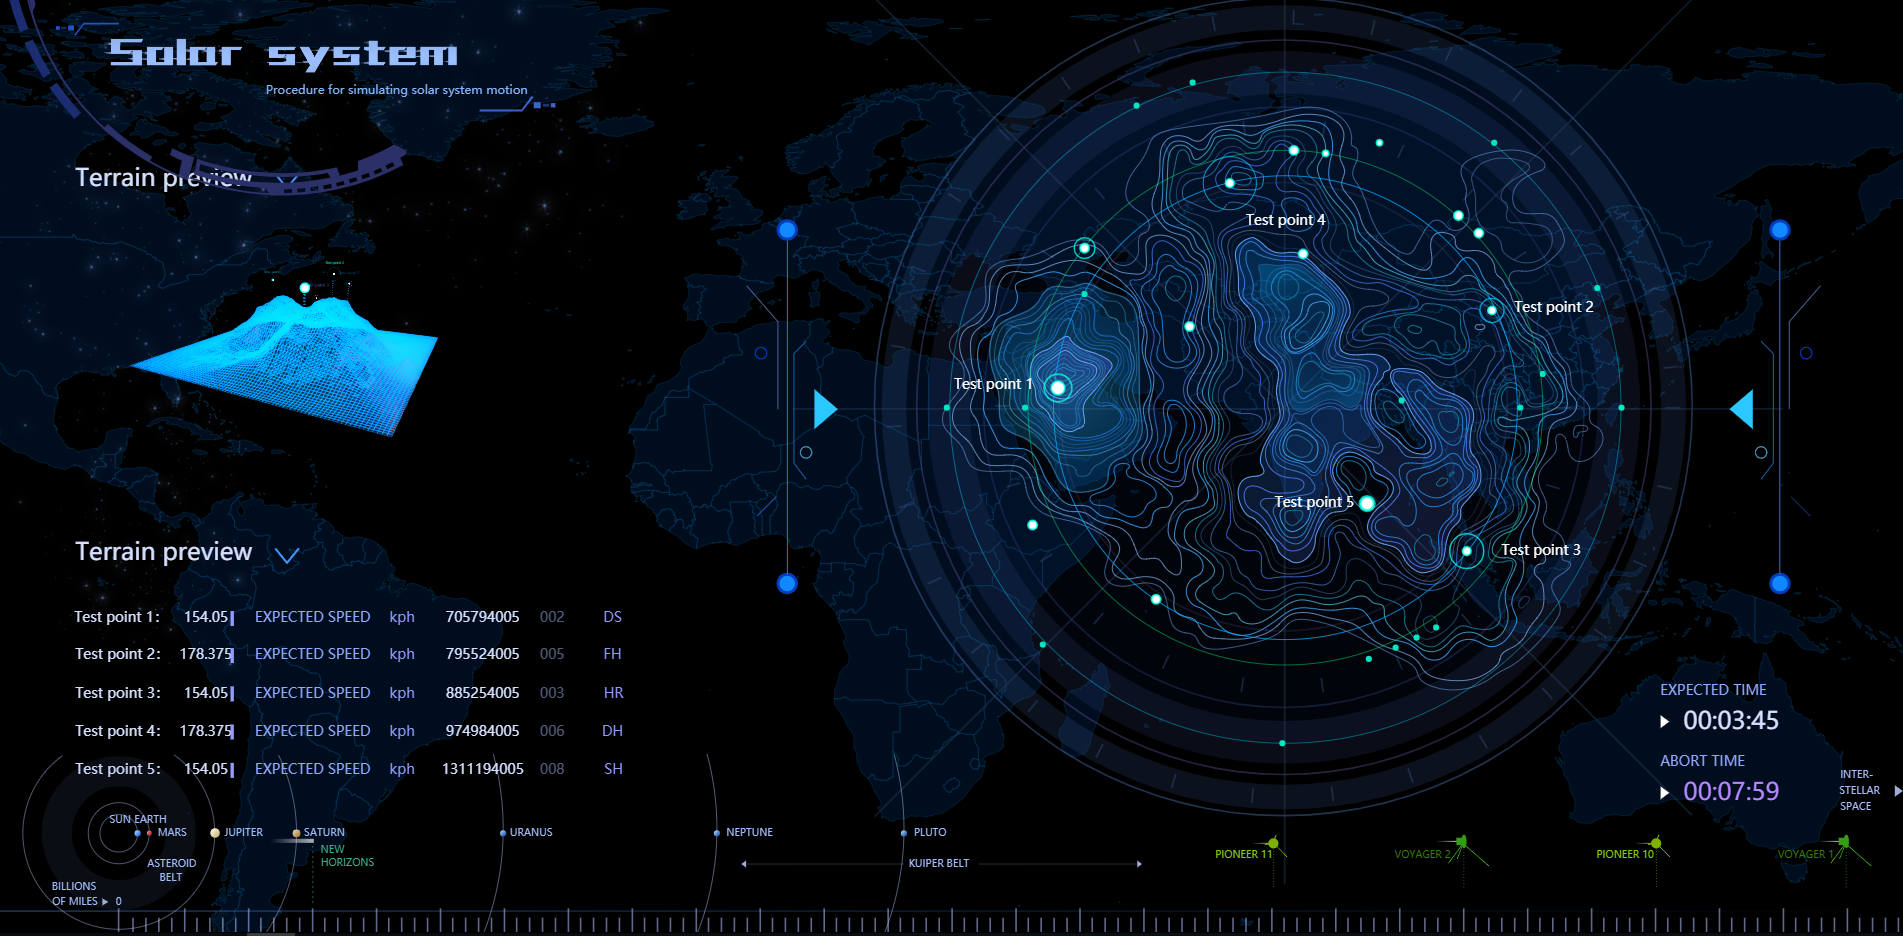
该主题主要用于呈现在场景二中点选的星体上具体的检测点位,点位周边的等高线在左侧自动生成一个 3D 的地形和闪烁的点位示意,并与右侧的检测点位一一对应。
该功能可用于地形的呈现,也可以用于星体大气层的气象状态展示。
左下角实时监控点位的地质热量、气象流动数据。
点选右侧对应检测点,会触发右侧点的缩放动画,同时左侧对应的 3D 点位也会同步变化,其它的点则调用 setAnimation(null)
setTwinkleToPoints(flag) {
    //...
    if (flag) {
        if (point1_3D && point1) {
            if (this.animationFlags.twinklePointNum === 1) {
                point1_3D.setAnimation({
                    change: {},
                    start: ["change"]
                });
                point1.setAnimation({
                    width: {},
                    height: {},
                    start: ["width", "height"]
                });
            } else {
                SolarSystem.disableTwinkle(point1_3D, point1);
            }
        } else {
            SolarSystem.disableTwinkle(point1_3D, point1);
            //...
        }
    }
}
效果:
关联:三个主题(系统)的联动
三个系统是互相关联的,相互切换的方式有三种。
1.点选左上角的切换按钮:
左上角部分均为导航栏的响应范围,鼠标悬停时会改变动画控制器 animationFlags 的对应值,触发导航栏落下来,悬停和点选按钮会通过 setImage 方法设置不同的背景
this.g2d.getView().addEventListener('mousemove', event => {
    const node = this.g2d.getDataAt(event);
    let tag = '';
    if (node) {
        tag = node.getTag();
    }
    if('navigator' === tag){
        if(!this.animationFlags.navigatorRotate && this.animationFlags.navAnimationDone){
            this.animationFlags.navAnimationDone = false;
            this.animationControl(0, true);
        }
        this.resetButtonStyle();
    }
    else if (/^navButton/.test(tag)) {
        this.animationFlags.navButtonOnHover = true; // 防止动画过快导致无法点选按钮
        this.resetButtonStyle();
        if (!node.a('buttonOnClick')) {
            node.setImage('buttonOnHover');
        }
    }
    else {
        this.resetButtonStyle();
        this.animationFlags.navButtonOnHover = false;
        if(this.animationFlags.navigatorRotate && this.animationFlags.navAnimationDone){
            setTimeout(() => {
                if(!this.animationFlags.navButtonOnHover){
                    this.animationFlags.navButtonOnHover = true;
                    this.animationFlags.navAnimationDone = false;
                    this.animationControl(0, false);
                }
            }, 500);
        }
    }
}, false);
效果:
2.点击最下方的标尺栏,分别对应 3 个模块:

3.点选主题一中的行星跳转到的主题二的拓扑结构,点选主题二的星体跳转主题三的地形,主题三无法向前关联,只能通过前两种方式进行跳转:

总结:
该系统使用轻量高效的 ht 库,矢量平面信息与 3D 对象进行关联,并采用 3D 拓扑可视化呈现,相对位置清晰直观,3D 地形与等高线图对应,海拔高度和相互遮挡关系都可以准确把握。
该系统满足了最基本的太空场景和数据呈现的框架,更为详尽的数据呈现和业务功能有待相关的工作人员根据具体的业务场景提出更详尽的需求。