table of Contents
Source Learning Series WebMvc automatic configuration principle notes
@
web auto-configuration is a very important aspect in SpringBoot project implementation code in a spring-boot-autoconfigure works in:
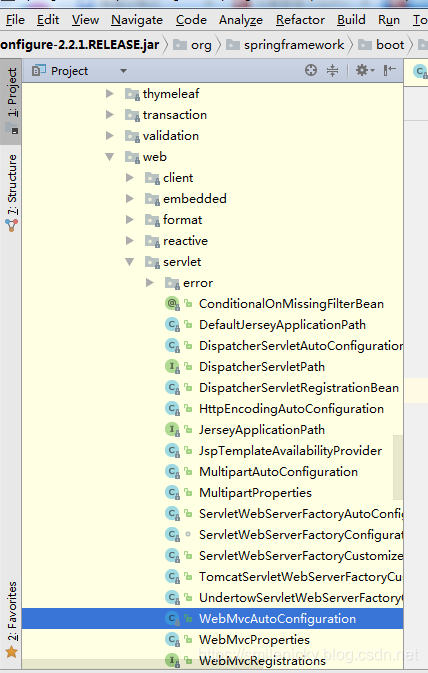
According to statement of official documents, SpringBoot official statement, Springboot of SpringMVC automatic configuration, which offers the following automatic configuration:

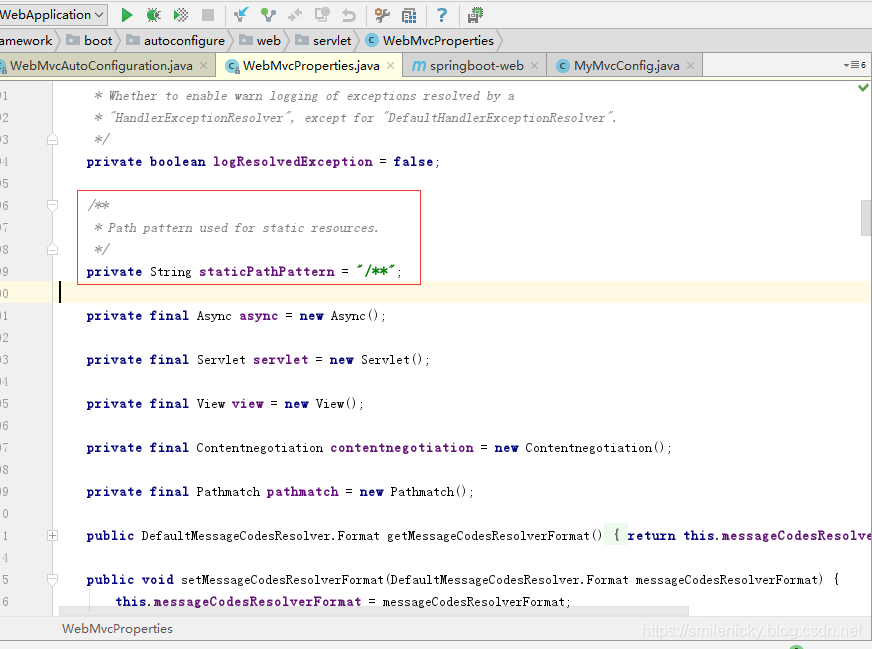
WebMvcAutoConfiguration.java this class is very important, this is a very critical configuration class SpringBoot Springmvc autoconfiguration
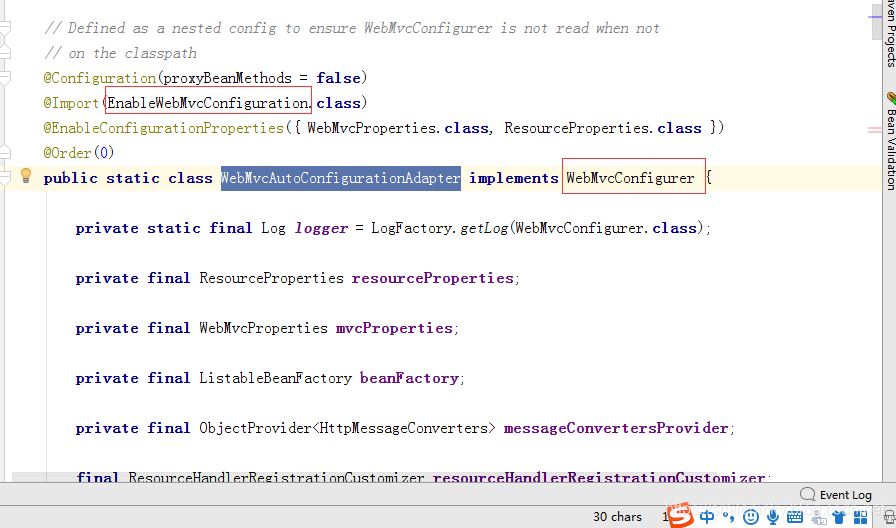
@Configuration(proxyBeanMethods = false)//指定WebMvcAutoConfiguration不代理方法
@ConditionalOnWebApplication(type = Type.SERVLET)//在web环境(selvlet)才会起效
@ConditionalOnClass({ Servlet.class, DispatcherServlet.class, WebMvcConfigurer.class })//系统有有Servlet,DispatcherServlet(Spring核心的分发器),WebMvcConfigurer的情况,这个自动配置类才起效
@ConditionalOnMissingBean(WebMvcConfigurationSupport.class)//系统没有WebMvcConfigurationSupport这个类的情况,自动配置起效
@AutoConfigureOrder(Ordered.HIGHEST_PRECEDENCE + 10)
@AutoConfigureAfter({ DispatcherServletAutoConfiguration.class, TaskExecutionAutoConfiguration.class,
        ValidationAutoConfiguration.class })
public class WebMvcAutoConfiguration {
....
}
Turn the source can be seen WebMvcAutoConfiguration automatic configuration there is a class type WebMvcConfigurer configuration class, the interface implements WebMvcConfigurer version 2.2.1, 1 + version extends WebMvcConfigurerAdapter
@Configuration(proxyBeanMethods = false)//定义为配置类
    @Import(EnableWebMvcConfiguration.class)//spring底层注解,将EnableWebMvcConfiguration加到容器
    @EnableConfigurationProperties({ WebMvcProperties.class, ResourceProperties.class })//使WebMvcProperties、ResourceProperties配置类生效
    @Order(0)
    public static class WebMvcAutoConfigurationAdapter implements WebMvcConfigurer {
    ....
}
ok, now what WebMvcAutoConfigurationAdapter in key overloaded methods:
1、ContentNegotiatingViewResolver

如图,是视图解析器的自动配置,这个类起效的情况是系统没有ContentNegotiatingViewResolver类的情况,就调用改方法自动创建ContentNegotiatingViewResolver类
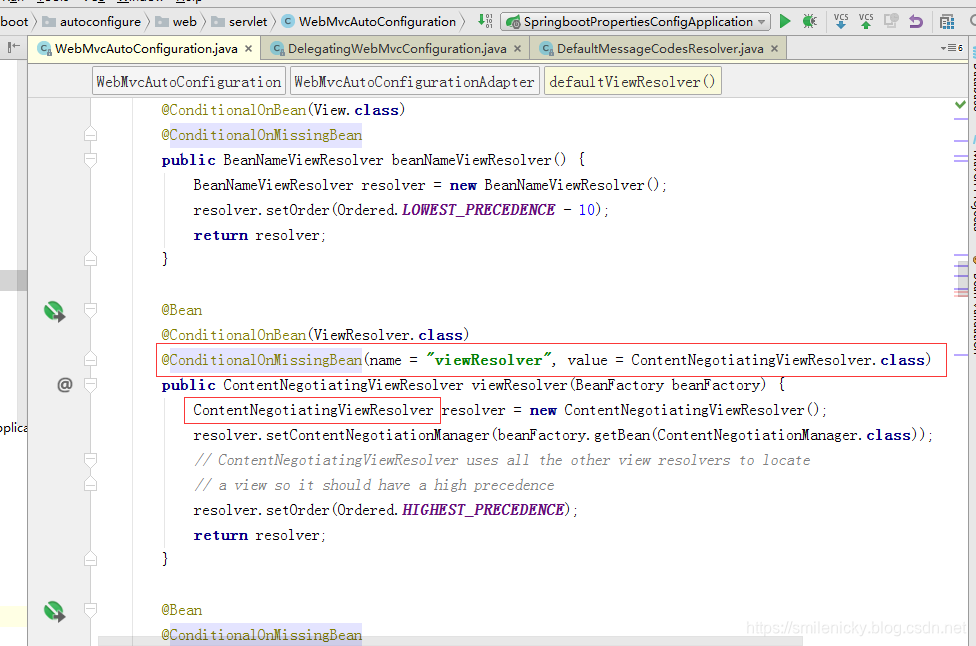
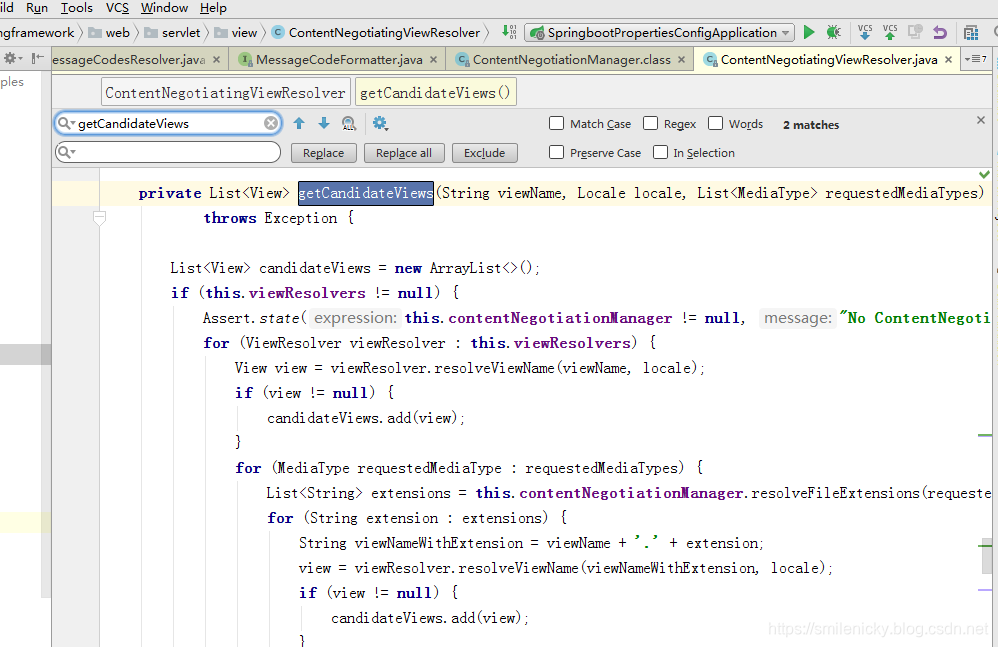
关键的是ContentNegotiatingViewResolver类,翻下ContentNegotiatingViewResolver类,找到如下重要的初始化方法
@Override
    protected void initServletContext(ServletContext servletContext) {
    //调用Spring的BeanFactoryUtils扫描容器里的所有视图解析器ViewResolver类
        Collection<ViewResolver> matchingBeans =
                BeanFactoryUtils.beansOfTypeIncludingAncestors(obtainApplicationContext(), ViewResolver.class).values();
        if (this.viewResolvers == null) {
            this.viewResolvers = new ArrayList<>(matchingBeans.size());
            //遍历候选的viewResolvers,封装到this.viewResolvers列表
            for (ViewResolver viewResolver : matchingBeans) {
                if (this != viewResolver) {
                    this.viewResolvers.add(viewResolver);
                }
            }
        }
        else {
            for (int i = 0; i < this.viewResolvers.size(); i++) {
                ViewResolver vr = this.viewResolvers.get(i);
                if (matchingBeans.contains(vr)) {
                    continue;
                }
                String name = vr.getClass().getName() + i;
                obtainApplicationContext().getAutowireCapableBeanFactory().initializeBean(vr, name);
            }

        }
        AnnotationAwareOrderComparator.sort(this.viewResolvers);
        this.cnmFactoryBean.setServletContext(servletContext);
    }
所以ContentNegotiatingViewResolver类的作用就是组合所有的视图解析器,自动配置了ViewResolver(视图解析器作用,根据方法返回值得到视图对象view)
往下翻代码,可以看到resolveViewName方法,里面代码是从this.viewResolvers获取候选的视图解析器,遍历容器里所有视图,然后通过如图所标记的获取候选视图的方法,获取候选的视图列表,再通过getBestView获取最合适的视图
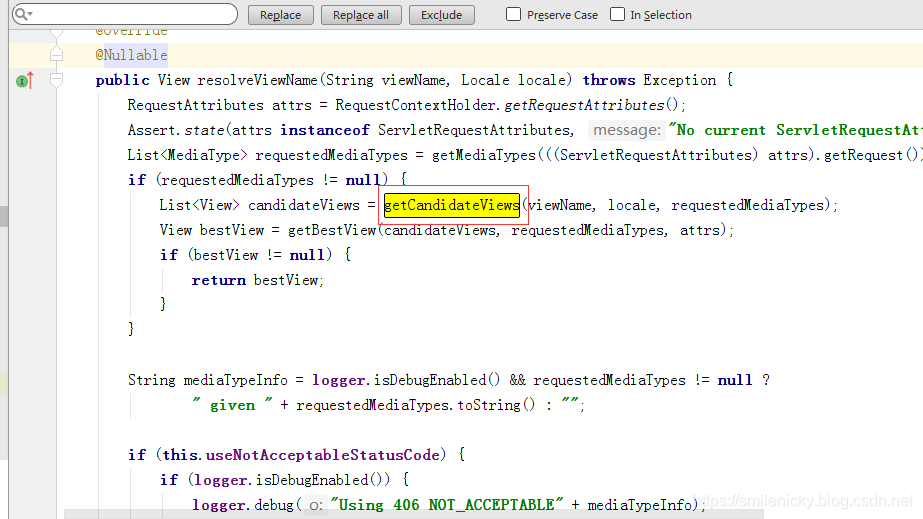
遍历所有的视图解析器对象,从视图解析器里获取候选的视图,封装成list保存
ok,跟了源码就是只要将视图解析器丢到Spring容器里,就可以加载到
写个简单的视图解析类

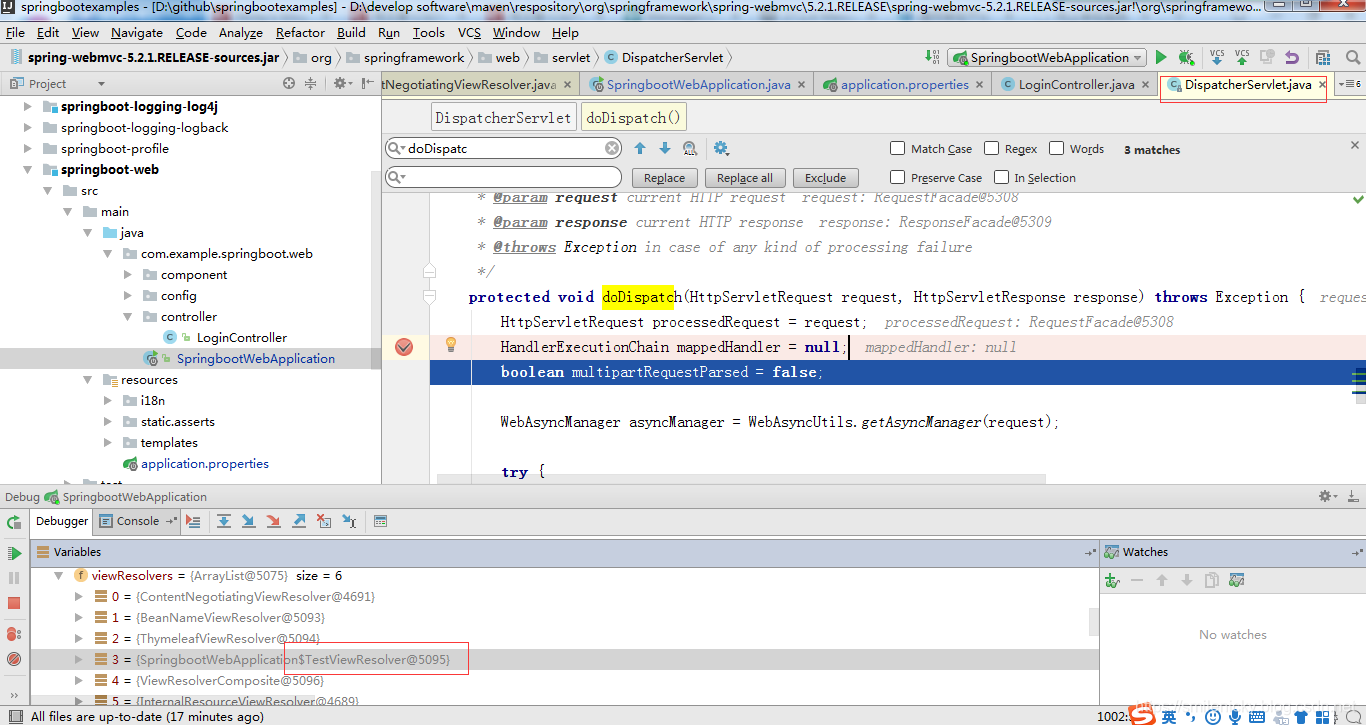
DispatcherServlet是Spring核心分发器,找到doDispatch方法,debug,可以看到加的视图解析器加载到了
2、静态资源
也就是官方说的,如下图所示:

翻译过来就是支持静态资源包括webjars的自动配置,webjars,就是以maven等等方式打成jar包的静态资源,可以去webjars官网看看文档:
使用的话,直接去webjars官网负责对应的配置,加到项目里就可以
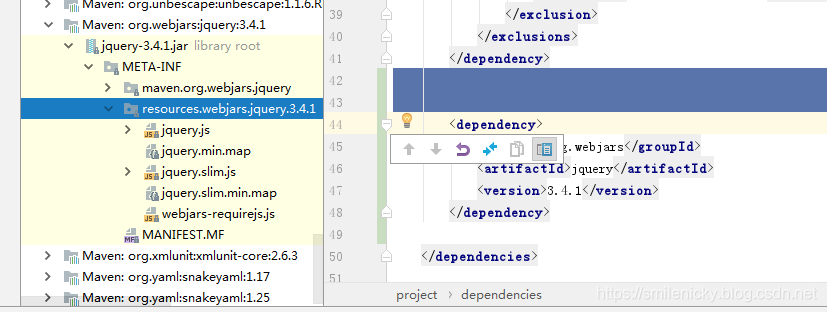
路径都是在META-INF/webjars/**
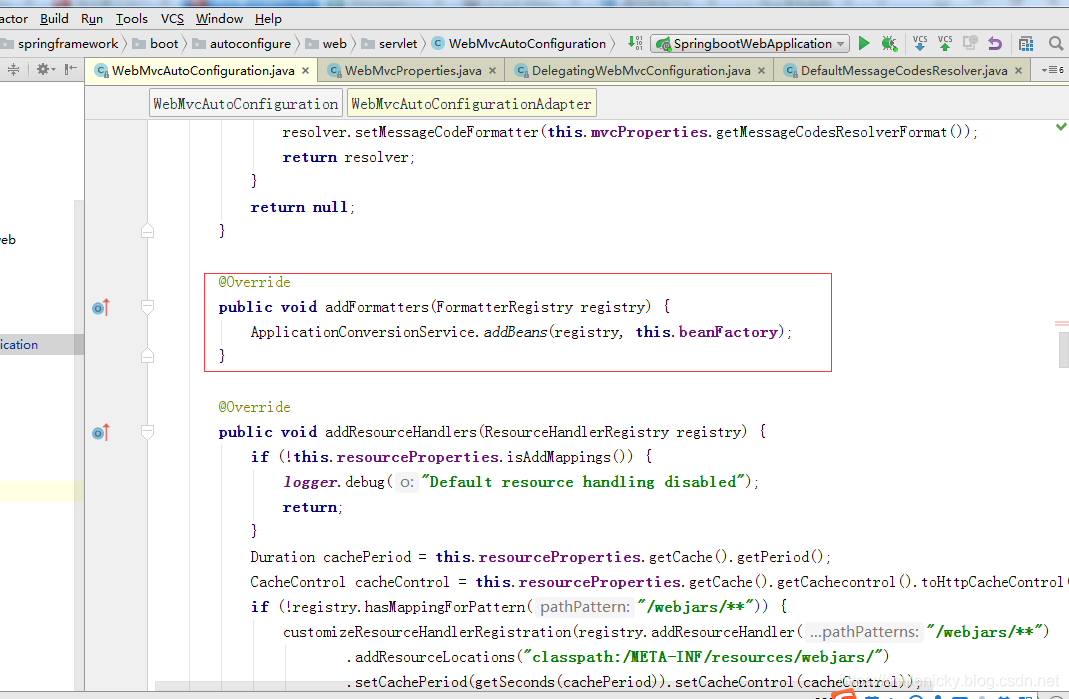
WebMvcAutoConfiguration.addResourceHandlers,这个是比较重要的资源配置方法
@Override
public void addResourceHandlers(ResourceHandlerRegistry registry) {
if (!this.resourceProperties.isAddMappings()) {
logger.debug("Default resource handling disabled");
return;
}
Duration cachePeriod = this.resourceProperties.getCache().getPeriod();
//CacheControl是Spring框架提供的http缓存
CacheControl cacheControl = this.resourceProperties.getCache().getCachecontrol().toHttpCacheControl();
//读取到webjars资源,将classpath:/META-INF/resources/webjars/的webjars资源都扫描出来
if (!registry.hasMappingForPattern("/webjars/**")) {
customizeResourceHandlerRegistration(registry.addResourceHandler("/webjars/**")
.addResourceLocations("classpath:/META-INF/resources/webjars/")
.setCachePeriod(getSeconds(cachePeriod)).setCacheControl(cacheControl));
}
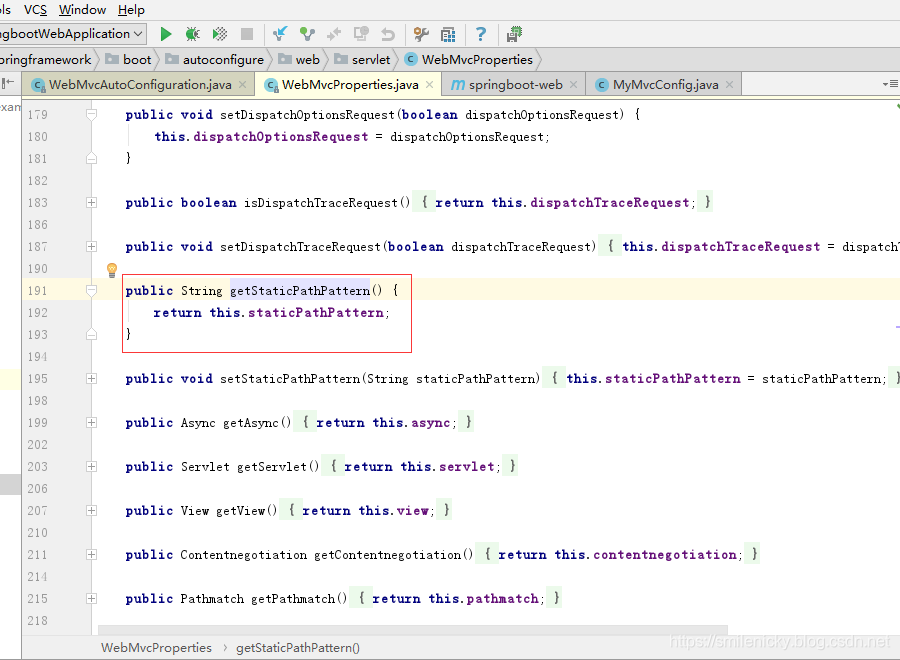
String staticPathPattern = this.mvcProperties.getStaticPathPattern();
if (!registry.hasMappingForPattern(staticPathPattern)) {
customizeResourceHandlerRegistration(registry.addResourceHandler(staticPathPattern)
.addResourceLocations(getResourceLocations(this.resourceProperties.getStaticLocations()))
.setCachePeriod(getSeconds(cachePeriod)).setCacheControl(cacheControl));
}
}
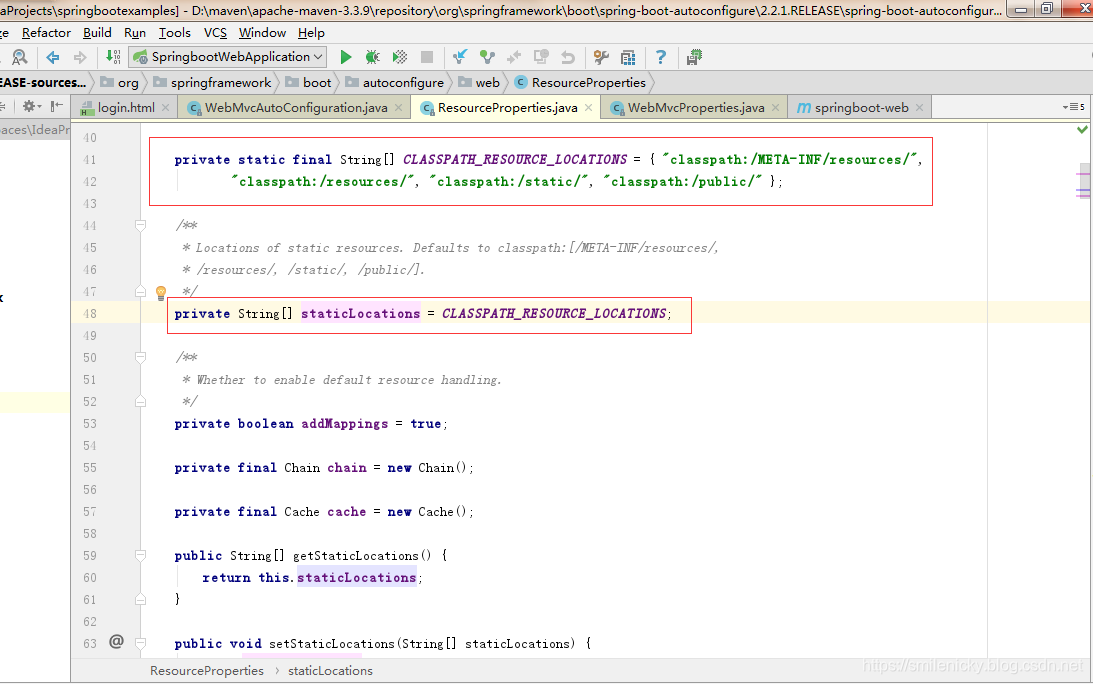
ok,通过源码可以知道,Springboot支持webjars和其它等等静态资源,其它的静态资源要放在如下目录里,Springboot就能自动加载到
- classpath:/META-INF/resources/
- classpath:/resources/
- classpath:/static/
- classpath:/public/
- classpath:/
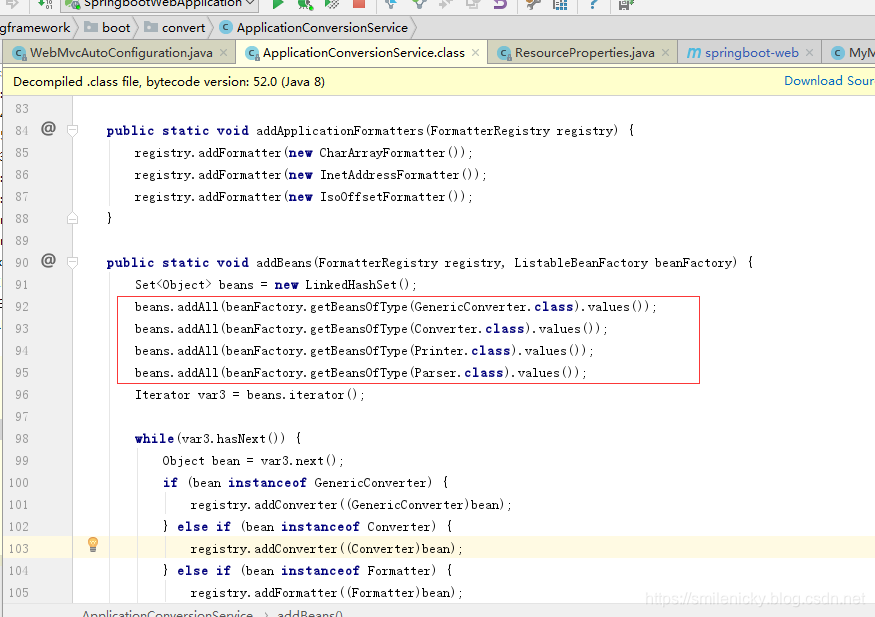
3、自动注册 Converter, GenericConverter, and Formatter beans.

翻译过来就是自动注册了 Converter, GenericConverter, and Formatter beans.
- Converter:转换器 ,作用就是能自动进行类型转换
eg: public String hello(User user),这是一个方法,然后前端视图传来的参数通过转换器能够根据属性进行映射,然后进行属性类型转换 - Formatter :格式化器,eg:比如对前端传来的日期2019/11/25,进行格式化处理
源码在这里,WebMvcAutoConfiguration.addFormatters方法是添加格式化器的方法
同理,也是从Spring容器里将这几种类拿过来
当然,还有其它的,比如WebMvcAutoConfiguration.localeResolver方法是实现i18n国际化语言支持的自动配置
@Bean
        @ConditionalOnMissingBean//没有自定义localeResolver的情况
        @ConditionalOnProperty(prefix = "spring.mvc", name = "locale")//application.properties有配置了spring.mvc.locale
        public LocaleResolver localeResolver() {
            if (this.mvcProperties.getLocaleResolver() == WebMvcProperties.LocaleResolver.FIXED) {
                return new FixedLocaleResolver(this.mvcProperties.getLocale());
            }
            //默认使用AcceptHeaderLocaleResolver
            AcceptHeaderLocaleResolver localeResolver = new AcceptHeaderLocaleResolver();
            localeResolver.setDefaultLocale(this.mvcProperties.getLocale());
            return localeResolver;
}具体的源码参考我之前博客:SpringBoot系列之i18n国际化多语言支持教程,博客里面有涉及源码的
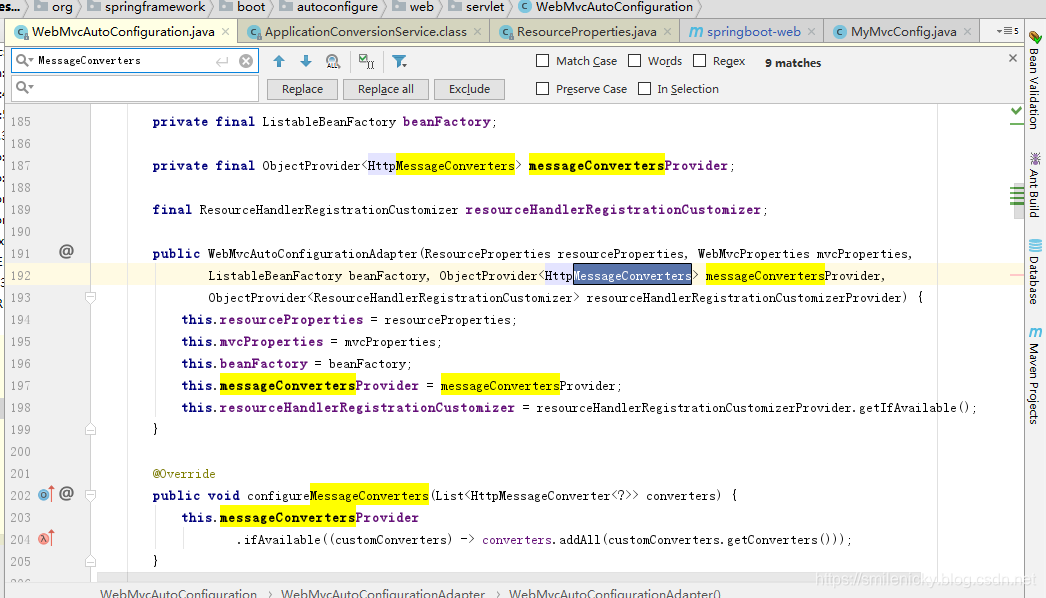
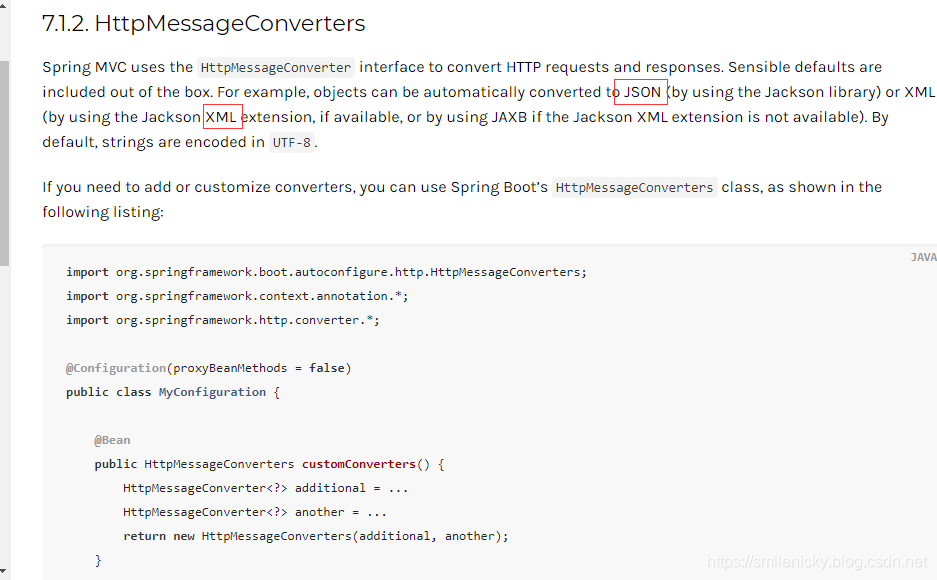
4、支持HttpMessageConverters
HttpMessageConverters :消息转换器,Springmvc中用来转换http请求和响应的
源码里是通过configureMessageConverters方法实现,很显然也是从容器里获取的
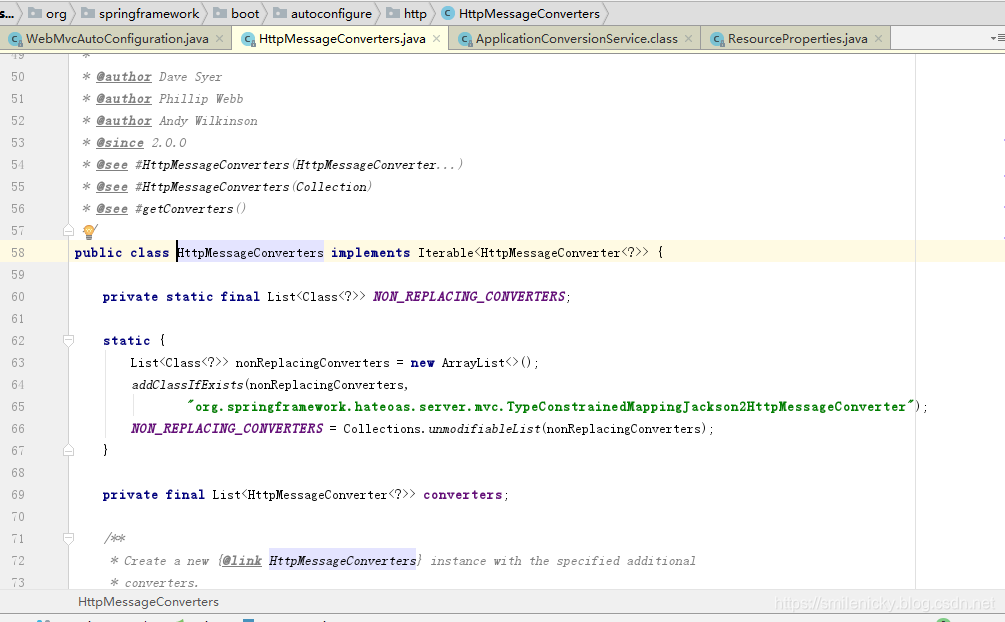
官方文档里也进行了比较详细描述,Springboot已经为我们自动配置了json的、xml的自动转换器,当然你也可以自己添加
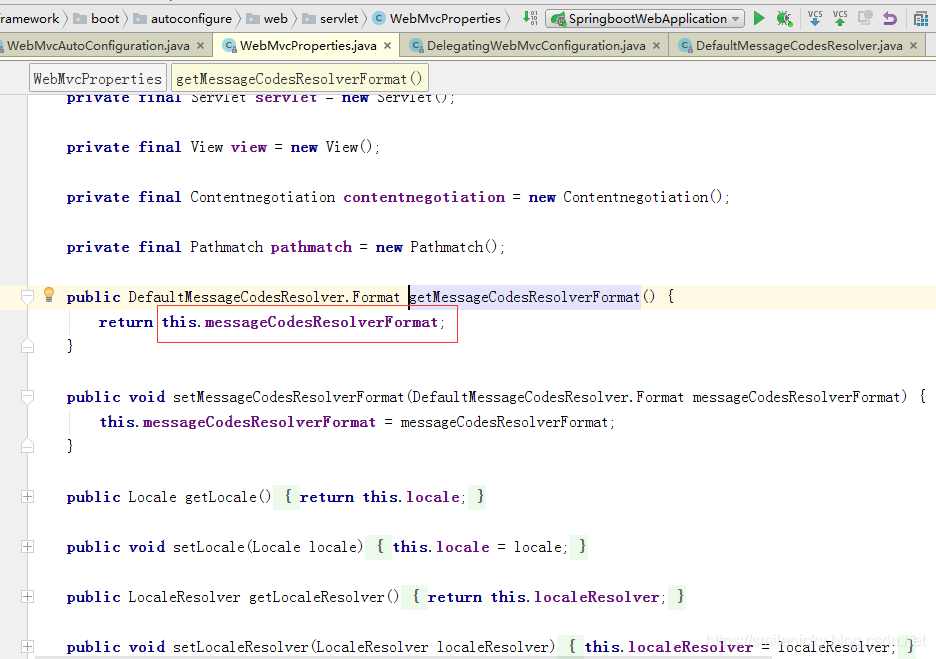
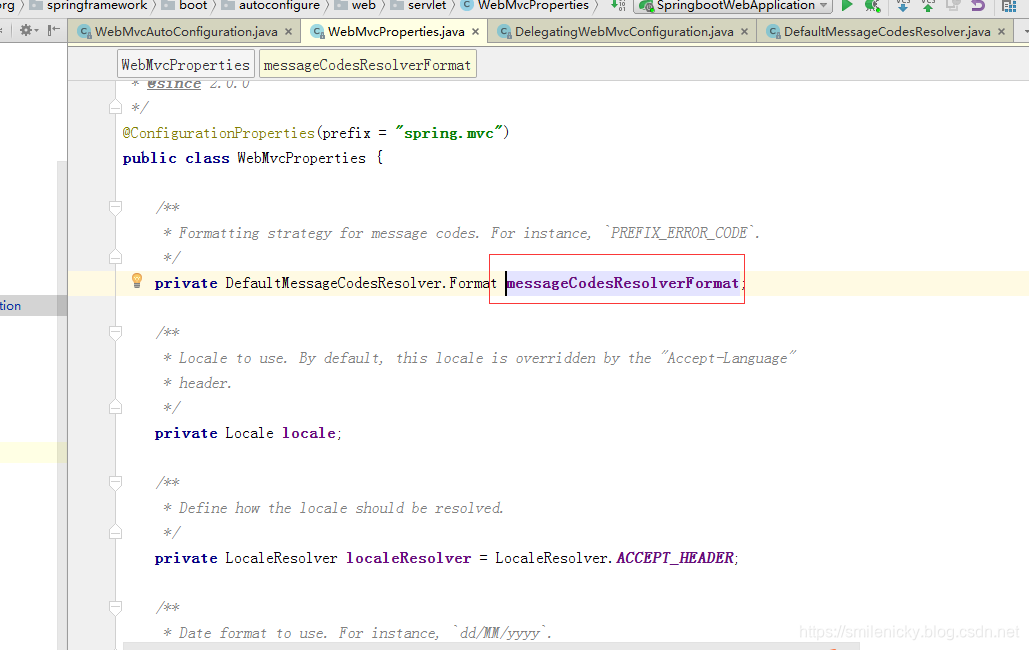
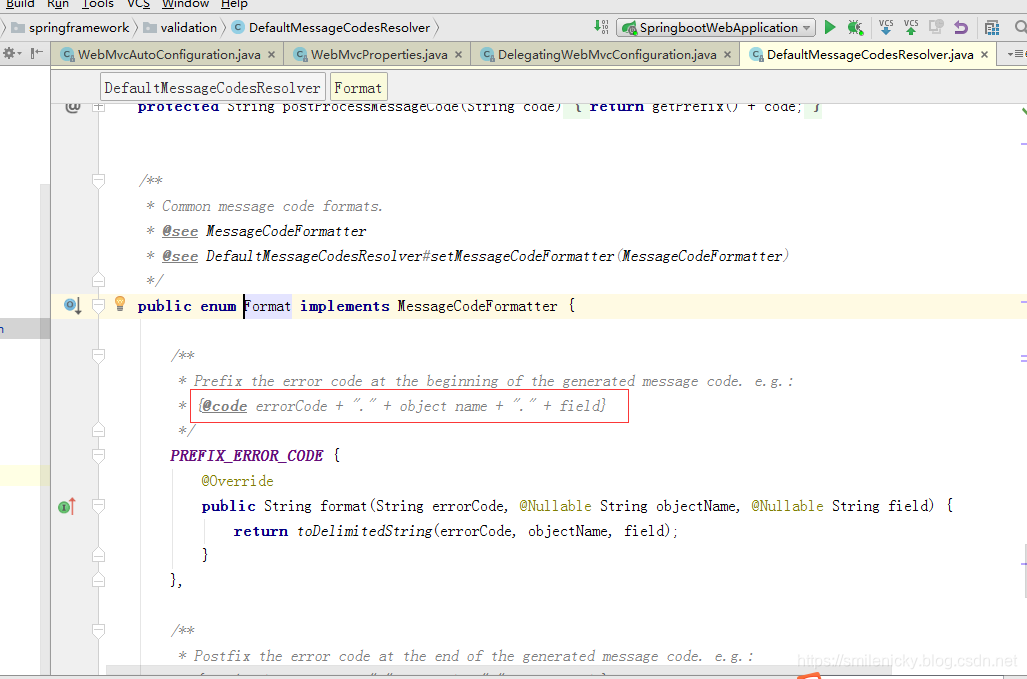
5、支持MessageCodesResolver

MessageCodesResolver:是消息解析器,WebMvcAutoConfiguration.getMessageCodesResolver是实现Exception异常信息格式的
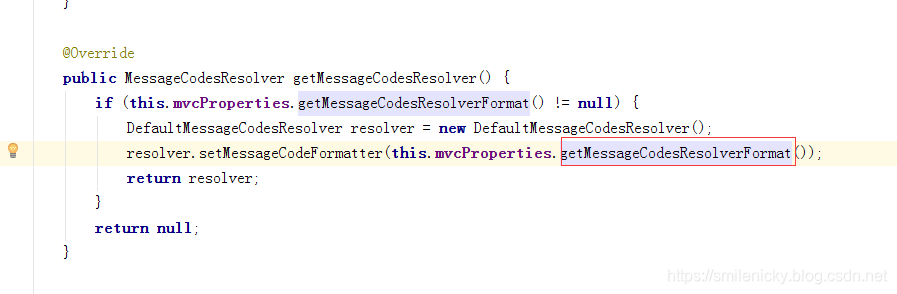
WebMvcProperties配置文件定义的一个异常枚举值
格式为如图所示,定了了错误代码是生成规则:
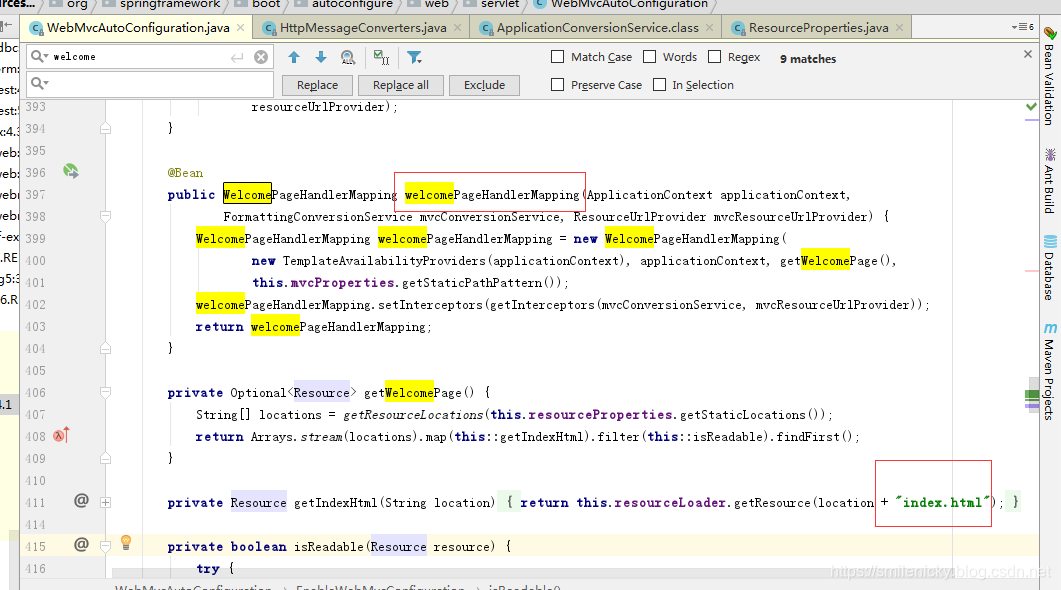
6、首页支持

Springboot默认的首页是index.html,也就是你在classpath路径丢个index.html文件,就被Springboot默认为首页,或者说欢迎页
如图示代码,就是遍历静态资源文件,然后获取index.html作为欢迎页面
7、网站logo设置

Springboot1.+版本,是有默认的logo图标的,2.2.1版本,经过全局搜索,没有发现给自定义的图标,使用的话,是直接丢在classpath路径,文件命名为favicon.ico,不过在2.2.1代码并没有找到相应的配置代码,1.+版本是有的,不过文档还是有描述了
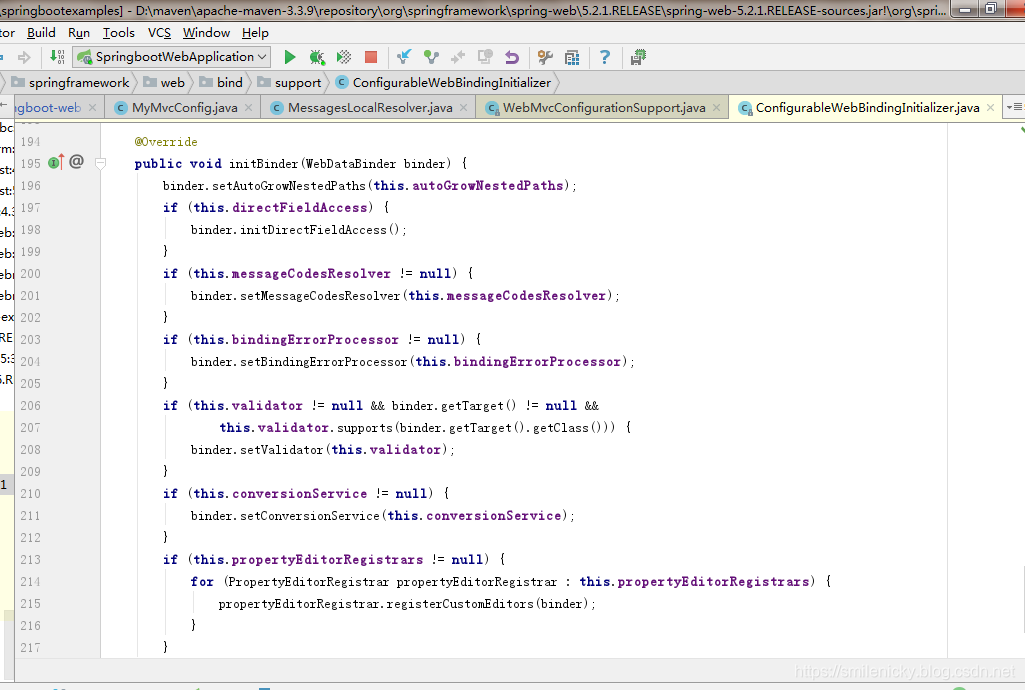
8、ConfigurableWebBindingInitializer 初始绑定器

With at source, is also available from the Spring container, and then noticed that without this ConfigurableWebBindingInitializer, getConfigurableWebBindingInitializer code calls the base class's

source code, here is create a getConfigurableWebBindingInitializer
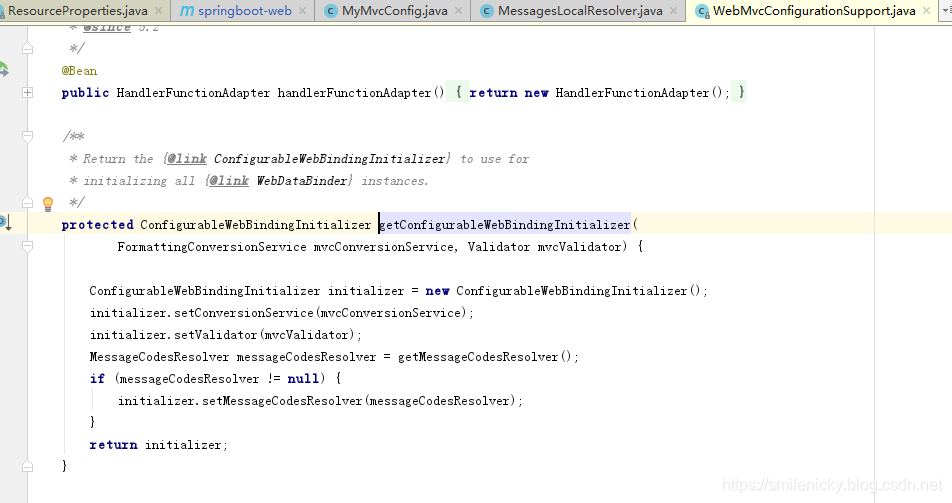
ConfigurableWebBindingInitializer Springboot is automatically configured for the system, of course, we can also define their own a ConfigurableWebBindingInitializer, then loaded into a container to
Initialization method binding, ok, now at the source of this blog is simple
Note:
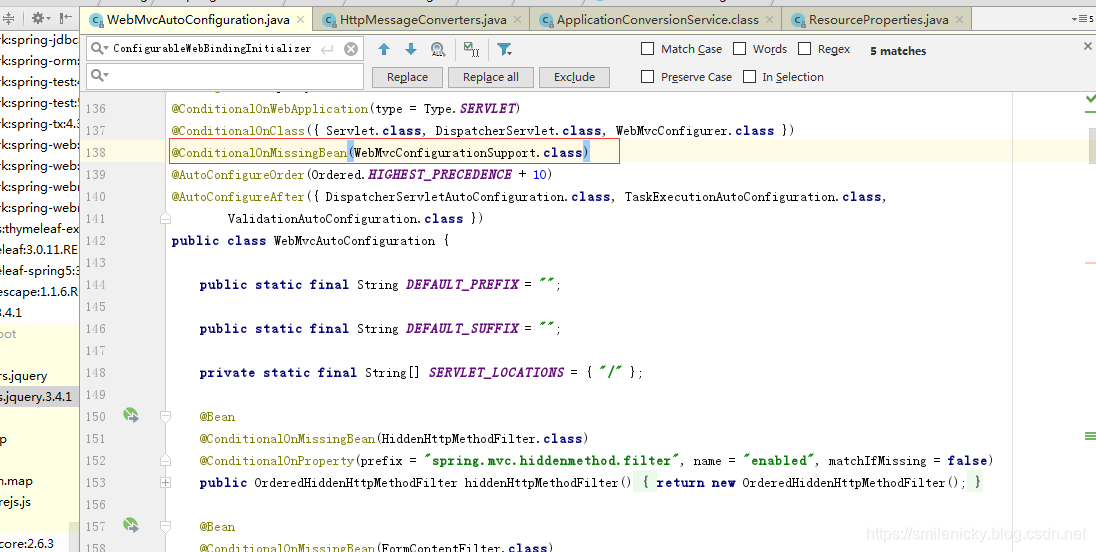
the ok, Springboot official documentation there is such a description, as shown in Fig

mean, when using webmvcConfigurer configuration, do not use @EnableWebMvc notes, why not use it? Because of the use @EnableWebMvc, is to achieve full control SpringMVC automatic configuration, automatic configuration means that the other will fail, all their allocation
Why is the principle? May look simple with source code, as shown, SpringMVC automatic configuration class, there is this very critical comments, the comment is not meant @WebMvcConfigurationSupport annotation system automatically configures before onset time
Why then added @EnableWebMvc can be automatically configured to take full control? Tap @EnableWebMvc source
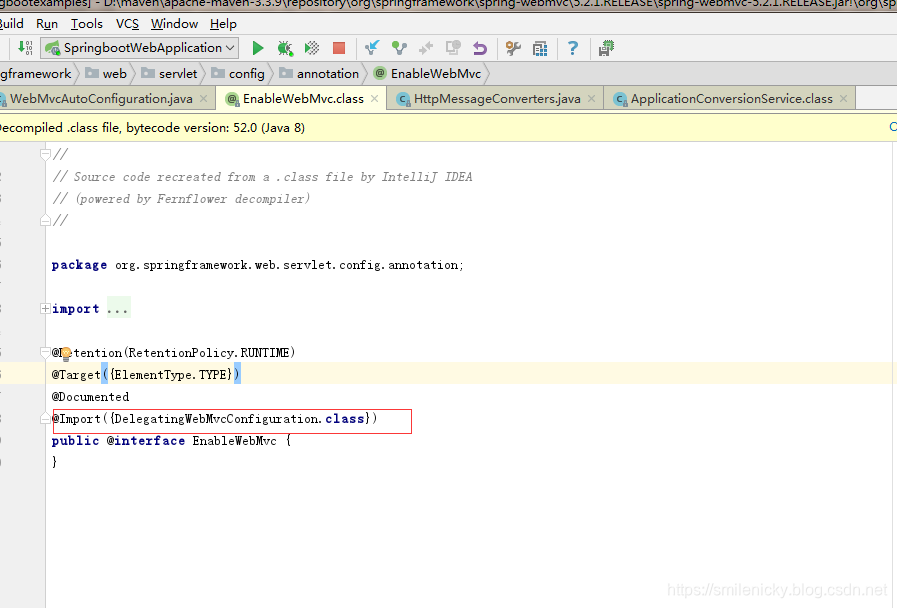
Obviously, DelegatingWebMvcConfiguration class extends WebMvcConfigurationSupport class, so this is why @EnableWebMvc annotations can take full control of realization of the principle of automatic configuration